• Skip to primary navigation
  • Skip to main content
  • Skip to primary sidebar
  • About Us
  • Affiliate Disclosure
  • Contact us
  • Cookie Privacy Policy
  • Privacy Policy
  • Sample Page
  • Terms of Use

Kitchen Guide

  • Appliance Reviews
  • Bakeware
  • Buying Guides
  • Product Comparisons
  • Recipes
  • Essentials
  • Cleaning

Cleaning

Can you use a carpet cleaner on concrete floor

September 11, 2024 by bigfishtavernlagunaadmin Leave a Comment

Concrete floors are known for their durability and low-maintenance requirements, making them a popular choice in garages, basements, and industrial spaces. However, over time, even concrete can accumulate dirt, grime, and unsightly stains. One question that often arises is, “Can you use a carpet cleaner on a concrete floor?” While carpet cleaners are typically designed for softer, fabric-based surfaces, they can also be used effectively on concrete when applied correctly.

In this comprehensive guide, we’ll explore how a carpet cleaner can be used to clean concrete floors, what precautions to take, and some alternative methods you can consider for maintaining the cleanliness of your concrete flooring.

Can you use a carpet cleaner on concrete floor

Can You Really Use a Carpet Cleaner on Concrete Floors?

Using a carpet cleaner on a concrete floor is generally safe, but it’s important to take precautions since different types of concrete surfaces may need special care.

The safety of using a carpet cleaner on concrete also depends on the type of cleaner and the solution used.

Types of Concrete Floors

Sealed vs. Unsealed Concrete

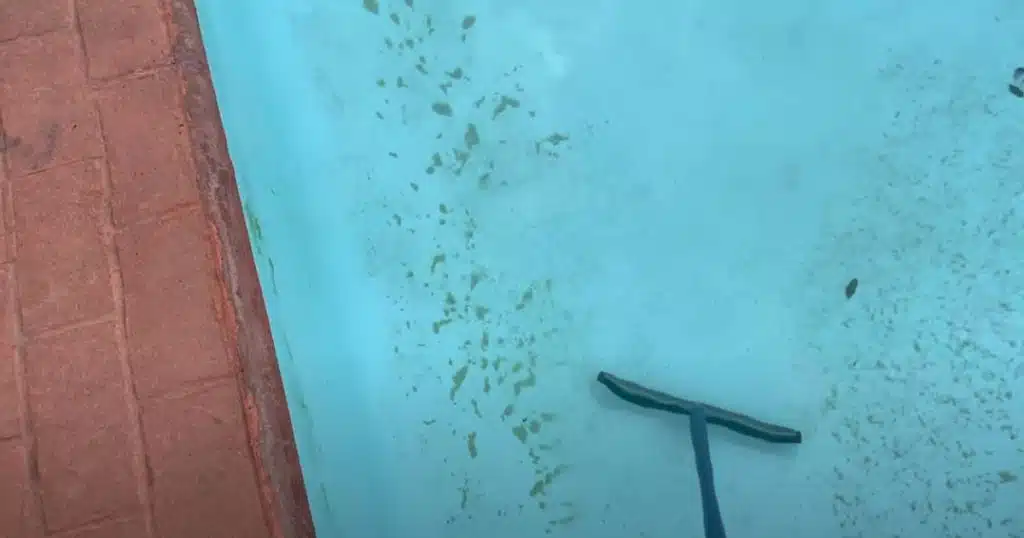
Concrete floors come in two main types: sealed and unsealed. Sealed concrete has a protective coating that shields it from stains and water damage, while unsealed concrete is porous, making it more prone to absorbing moisture and dirt.

Stained or Polished Concrete Floors

Many concrete floors are stained or polished to give them a decorative look. These finishes can change the cleaning requirements and susceptibility to damage, especially when using powerful cleaning machines.

Advantages of Using a Carpet Cleaner on Concrete Floors

Though carpet cleaners are typically meant for fabrics, they offer several unique advantages when applied to concrete floors:

  • Versatility: You can use a single machine to clean multiple surfaces in your home or business, from carpets to concrete, saving you the cost of buying separate machines.
  • Deep Cleaning: The combination of water, detergent, and agitation allows the machine to penetrate deeply into the porous surface of concrete, ensuring that dirt, grime, and stains are effectively lifted.
  • Cost-Efficiency: If you already own a carpet cleaner, there’s no need to rent or purchase a specialized hard-floor cleaner, making it a more cost-effective solution.

Potential Drawbacks

While carpet cleaners can work on concrete, there are a few limitations to be aware of:

  • Not Ideal for Polished Concrete: If you have polished or sealed concrete floors, a carpet cleaner with stiff brushes may cause scratches. For polished concrete, opt for gentler cleaning methods such as mopping or using a steam cleaner.
  • Struggle with Tough Stains: While carpet cleaners are effective for regular cleaning, tougher stains, especially oil or chemical spills, might require more heavy-duty equipment such as a pressure washer.
  • Water Absorption: Since concrete is porous, it absorbs water quickly. Excess moisture left behind after cleaning can lead to mildew or efflorescence (a white, powdery residue on the surface), particularly in areas with poor ventilation.

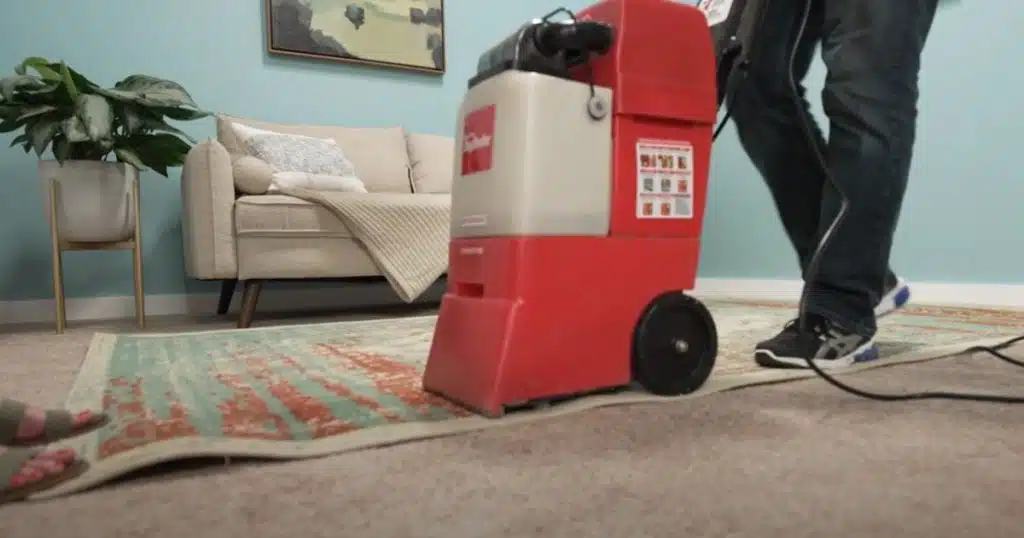
Best Practices for Cleaning Concrete Floors with a Carpet Cleaner

If you decide to use a carpet cleaner on concrete, following these best practices will help you achieve the best results.These steps will ensure you clean effectively while minimizing any potential damage.

Preparing the Concrete Surface

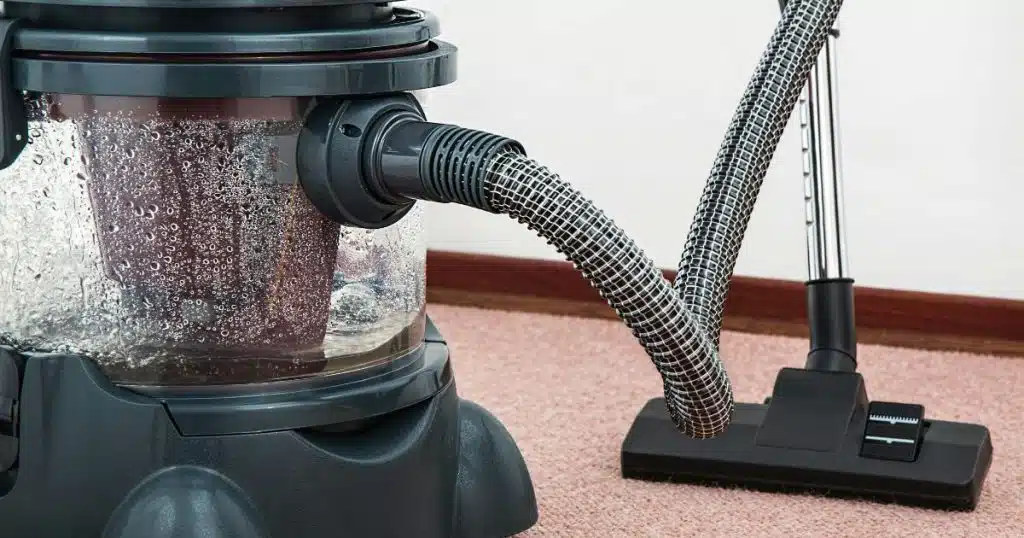
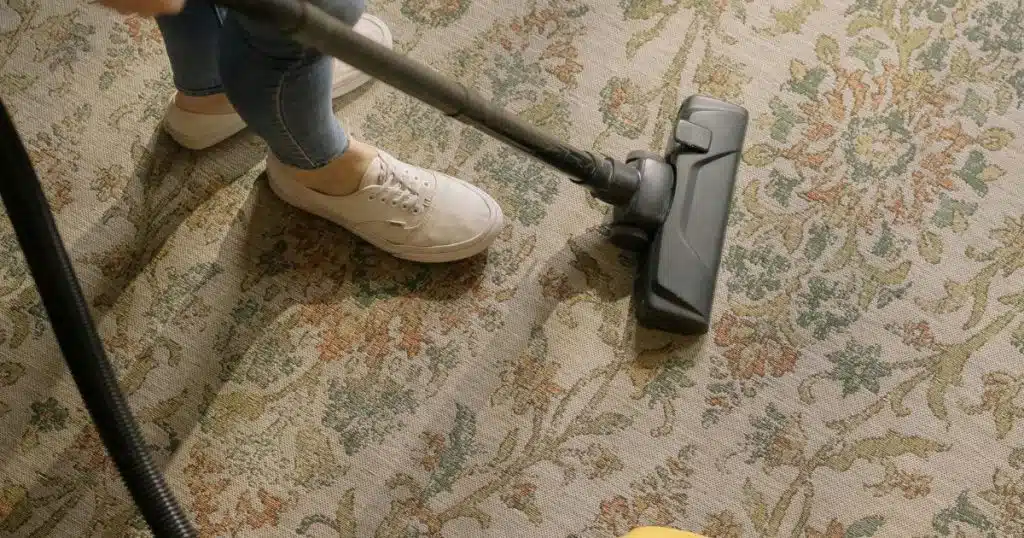
Before using the carpet cleaner, ensure that the concrete floor is clear of any loose debris.
Vacuum or sweep the area thoroughly to remove dirt, dust, and small particles.
This will prevent the carpet cleaner from pushing debris deeper into the concrete’s surface.

Choosing the Right Carpet Cleaner Solution

Not all cleaning solutions are suitable for concrete floors.
When using a carpet cleaner, opt for a cleaning solution designed for hard surfaces or concrete.
Avoid harsh chemicals, as these can damage the concrete or leave behind residue that’s difficult to remove.

Alternative Cleaning Methods for Concrete Floors

While carpet cleaners can be a convenient option, there are several alternative methods to clean concrete floors that might be more suited to specific types of stains or environments:

Pressure Washing

One of the most effective ways to clean concrete, especially outdoors, is through pressure washing. The high-pressure water stream effectively blasts away dirt, oil, and grime, making it ideal for driveways, patios, and garage floors. However, this method is generally too intense for indoor spaces like basements.
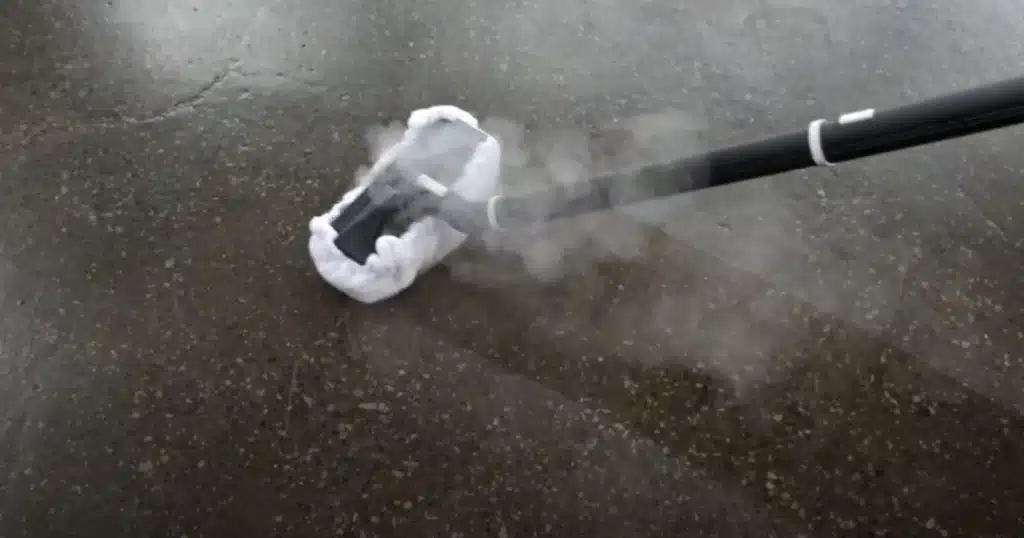
Steam Cleaning

Steam cleaning can be another excellent alternative, especially for sealed concrete floors. It uses high heat to sanitize and clean without chemicals. This method is both environmentally friendly and highly effective at disinfecting concrete surfaces.

Can you use a carpet cleaner on concrete floor

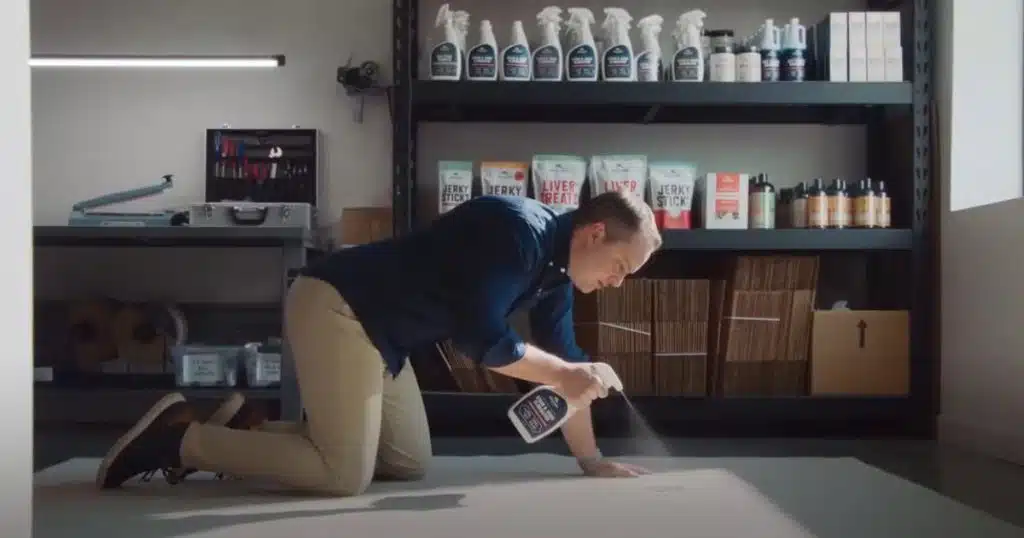
Specialized Concrete Cleaners

For especially tough stains or industrial areas, specialized concrete cleaning solutions can be applied directly to the floor and scrubbed in with a stiff brush. These cleaners are engineered to tackle the toughest dirt, grease, and stains.These cleaners are built to handle the most stubborn dirt, grease, and stains.

Mop and Bucket

For routine maintenance and light cleaning, a simple mop and bucket with warm water and mild detergent is usually sufficient for sealed concrete floors. Regular mopping prevents the build-up of dirt and grime, keeping your concrete floors looking fresh.

Final Thoughts: Should You Use a Carpet Cleaner on Concrete Floors?

Using a carpet cleaner on concrete floors is possible, but it’s not always the best option.
The machine can offer a quick solution for light cleaning, but it may not provide the deep clean that some concrete floors need.
Be mindful of the risks, such as leaving excess water behind, and consider alternatives like pressure washing for more intensive cleaning needs.

In the end, if you choose to use a carpet cleaner, following proper procedures will help you achieve a clean and safe concrete surface.

Frequently Asked Questions

Can You Damage Concrete Floors with a Carpet Cleaner?

Yes, using a carpet cleaner on concrete floors can potentially cause damage if the cleaner is not suitable or if used improperly. It’s important to ensure the cleaner is designed for concrete surfaces and follow the manufacturer’s instructions to avoid any damage.

What type of carpet cleaner is most effective for cleaning concrete?

For cleaning concrete floors, a cleaner specifically formulated for concrete is ideal. These cleaners often have powerful degreasers and are designed to lift stains and dirt effectively without damaging the surface.

How Often Should Concrete Floors Be Cleaned?

The frequency of cleaning concrete floors depends on foot traffic and whether there are spills or stains. Generally, high-traffic areas may need weekly cleaning, while less frequently used areas can be cleaned monthly or as needed.

Can Carpet Cleaners Remove Stains from Concrete?

Carpet cleaners can assist in removing some stains from concrete, but their effectiveness varies based on the type and age of the stain. For stubborn stains, using a concrete cleaner with specific stain-fighting properties might be more effective.

Is Professional Cleaning Necessary for Concrete Floors?

Professional cleaning is not always necessary but can be beneficial for deep cleaning or if dealing with heavy stains and grime. Professionals employ specialized equipment and cleaning solutions to effectively restore the appearance of concrete floors.

Filed Under: Cleaning

Can You Steam Mop LVP Floors? Here’s Why You Shouldn’t

September 9, 2024 by bigfishtavernlagunaadmin Leave a Comment

Luxury Vinyl Plank (LVP) flooring has become increasingly popular in homes due to its durability, affordability, and stylish designs that can mimic the appearance of hardwood or stone. With LVP floors being water-resistant and easy to maintain, many homeowners wonder: Can you steam mop LVP floors?

In this article, we’ll address this frequently asked question and provide a detailed guide on how to clean and maintain your LVP floors effectively, including whether or not you should use a steam mop on this type of flooring.

Can You Steam Mop Lvp Floors

What is Luxury Vinyl Plank (LVP) Flooring?

Before diving into whether steam mopping is appropriate for LVP flooring, it’s essential to understand what LVP floors are. Luxury Vinyl Plank is a vinyl flooring option crafted to mimic the appearance of natural materials such as wood or stone and is composed of several layers:

  • Wear Layer: This transparent top layer guards the flooring against scratches, stains, and daily wear. It also provides some water resistance.
  • Vinyl Layer: The second layer contains the printed design, giving the floor its aesthetic appearance.
  • Core Layer: The core is typically made of PVC or another form of vinyl composite and provides strength and stability. Some LVP floors have a waterproof core, which makes them ideal for kitchens, bathrooms, and basements.
  • Backing Layer: The bottom layer provides additional stability and sometimes comes with an attached underlayment for sound absorption and comfort.

LVP flooring is well-known for being water-resistant, easy to install, and relatively low maintenance, making it a popular choice in high-traffic areas of the home. However, when it comes to cleaning, caution should be exercised to avoid damaging the layers, particularly with heat and moisture.

Can You Use a Steam Mop on LVP Floors?

The short answer is no; using a steam mop on LVP floors is not recommended. While LVP flooring is water-resistant, it is not designed to withstand high temperatures and excessive moisture from steam. Steam mops can heat water to around 212°F (100°C), and the intense heat and moisture can seep into the seams of the flooring or damage the wear layer, causing the planks to warp or peel over time.

Why is Steam Mopping Not Recommended for LVP Floors?

Here are a few reasons why using a steam mop on LVP floors is not advisable:

Heat Sensitivity

LVP floors are constructed from vinyl, which is sensitive to high temperatures. Excessive heat from a steam mop can soften or warp the vinyl material, causing permanent damage to the flooring. Over time, this can lead to buckling, lifting, or curling at the edges.

Moisture Penetration

Although LVP flooring is water-resistant, it’s not entirely waterproof, especially at the seams where the planks lock together. Steam from a mop can penetrate the seams, leading to moisture buildup underneath the planks. This trapped moisture can cause mold growth, mildew, and warping, particularly in areas like kitchens and bathrooms where humidity levels are already higher.

Damage to the Wear Layer

The top wear layer of LVP floors is designed to protect the flooring from scratches and stains, but it’s not designed to withstand prolonged exposure to moisture and heat. Using a steam mop can cause the wear layer to break down over time, leading to discoloration, blisters, or a dull appearance.

How to Properly Clean LVP Floors Without a Steam Mop

Now that we know steam mopping is not the best option, let’s explore the safest and most effective ways to clean and maintain your LVP floors.

Can You Steam Mop Lvp Floors

Regular Sweeping and Vacuuming

One of the most straightforward ways to keep LVP floors clean is by regularly sweeping or vacuuming them. Dirt, dust, and debris can accumulate on the surface and, if left untreated, may scratch the wear layer. Use a soft-bristle broom or a vacuum designed for hard floors (avoid beater bars) to remove particles from the surface without damaging the vinyl.

Dry Dust Mopping

In between sweeping or vacuuming, use a microfiber dust mop to trap dust and dirt on the surface of the floor. Microfiber is gentle and won’t scratch the wear layer, making it an excellent choice for daily cleaning.

Damp Mopping

For deeper cleaning, damp mopping is safe for LVP floors. Follow these steps to clean your LVP floors properly:

  • Use the Right Mop: A microfiber mop is ideal for cleaning LVP floors as it’s soft and non-abrasive.
  • Choose a Suitable Cleaner: Avoid harsh chemicals like bleach or ammonia-based products that can degrade the wear layer. Instead, choose a pH-neutral cleaner designed for vinyl or hardwood floors. You can also mix a small amount of vinegar with water for a natural cleaning solution, but be careful not to overuse vinegar, as its acidity can dull the finish over time.
  • Damp, Not Wet: When mopping, make sure the mop is only slightly damp, not soaking wet. Excess moisture can penetrate the seams of LVP flooring and lead to damage. Always thoroughly wring out the mop before using it to clean the floor.
  • Rinse and Dry: After mopping, dry the floor by using a clean microfiber cloth to soak up any leftover moisture.

Spot Cleaning

If you notice spills or stains on your LVP flooring, clean them up immediately to prevent them from setting in. For stubborn spots, such as grease or scuff marks, you can use a non-abrasive sponge with a little bit of floor cleaner or water. Make sure to blot the area dry afterward.

Avoid Harsh Tools

When cleaning LVP floors, steer clear of abrasive scrubbers, steel wool, and hard-bristle brushes. These tools can scratch and damage the wear layer, making your floor more susceptible to further damage.

Additional Tips for Maintaining LVP Floors

In addition to regular cleaning, there are a few maintenance tips that can help extend the life of your LVP floors and keep them looking like new:

Use Floor Mats and Rugs

Position floor mats at entrances to capture dirt and debris before it can reach your LVP floors. In high-traffic areas or places where spills are likely, such as in front of the kitchen sink, use rugs to provide extra protection.

Can You Steam Mop Lvp Floors

Protect from Furniture Scratches

Furniture legs can scratch and dent LVP floors if left unprotected. Attach felt pads to the bottoms of chairs, tables, and other frequently moved furniture to help prevent scratches and scuffs on your floors.

Avoid Prolonged Exposure to Water

While LVP floors are water-resistant, they are not entirely waterproof. Avoid letting water or liquids sit on the surface for long periods, as this can cause the vinyl to weaken or curl at the edges. Always wipe up spills immediately and use a dry cloth to absorb excess moisture.

Limit Sun Exposure

Direct sunlight can cause LVP floors to fade over time. Employ window coverings or UV-protective film to minimize sunlight exposure on your floors, particularly in rooms with large windows or skylights.

What Are the Best Alternatives to Steam Mopping?

If you’re looking for an alternative to steam mopping that is safe for LVP floors, consider the following methods:

Microfiber Mops

Microfiber mops are excellent for cleaning LVP floors because they are gentle, effective at trapping dust and dirt, and can be used damp or dry. They also won’t damage the wear layer or introduce excess moisture to the floor.

Spray Mops

Spray mops allow you to control the amount of liquid applied to the floor, ensuring that your LVP flooring stays clean without being exposed to too much moisture. Choose a spray mop that is compatible with a pH-neutral cleaning solution designed for vinyl floors.

Swiffer WetJet

A popular option for cleaning LVP floors is the Swiffer WetJet. It’s safe for most hard floors, including vinyl, and comes with pre-moistened cleaning pads that won’t soak the floor. Be sure to use the Swiffer solution designed for vinyl or hardwood floors to avoid any harsh chemicals.

Conclusion

In summary, while Luxury Vinyl Plank (LVP) floors are durable and water-resistant, they are not designed to handle the high heat and moisture generated by steam mops. Using a steam mop on LVP floors can cause the planks to warp, curl, or even lead to moisture damage over time. Therefore, it is not recommended to steam mop LVP floors.Instead, opt for safer cleaning methods such as regular sweeping, dry dust mopping, and damp mopping with a pH-neutral cleaner. By following these practices, you can ensure your LVP floors remain attractive and retain their quality for years. If you’re looking for a reliable, effective way to clean your LVP floors, stick to microfiber mops, spray mops, or Swiffer WetJet as safe alternatives to steam mopping.

Important Notice: Always refer to your flooring manufacturer’s cleaning recommendations before using any cleaning method on your LVP floors to avoid voiding the warranty.

Filed Under: Cleaning

How to Remove Sand from Pool Without Vacuum

September 8, 2024 by bigfishtavernlagunaadmin Leave a Comment

Every homeowner dreams of a crystal-clear pool. But, dealing with sand buildup can be tough. Luckily, you don’t always need a powerful vacuum to keep your pool clean. This article will show you easy and effective ways to remove sand from your pool without a traditional vacuum.

If you’re facing a sand problem or just want to keep your pool clean, these methods will help. You’ll learn about manual brushing and other filtration solutions. These are the best ways to get rid of unwanted sand and enjoy a clean pool all season.

How to remove sand from pool without vacuum

Introduction to Sand Removal from Pools

Keeping a pool clean is key to enjoying a swim. Sand can build up over time, causing problems. It’s important to remove sand to keep the water clear and the filtration system working right.

Why Sand Needs to be Removed

Sand in a pool can clog the filter, make the water murky, and harm the pool’s lining. It can also make the pool floor uneven, which is a safety risk. So, it’s vital to regularly remove sand to keep the pool safe and healthy.

Benefits of Removing Sand Without a Vacuum

Using a pool vacuum is common for removing sand, but there are other ways too. These methods can save money and be easier to use. By trying out sand cleaner for pool or pool sand filter alternative options, pool owners can keep their pools clean without a vacuum.

Preparatory Steps for Sand Removal

Before you start removing sand from your pool, it’s important to prepare. These steps will make the process smoother and save you time and effort.

First, inspect your pool carefully. Look for areas where sand has built up and how much there is. This will help you choose the best way to remove the sand. Also, check the water level and adjust it if needed for clear water and good circulation.

Next, collect the tools you’ll need. You might need a pool brush, skimmer net, leaf rake, or broom. Make sure they’re in good shape and ready for use. Also, have a bucket or container ready to collect the sand.

Finally, clean the pool and its surroundings. Remove any debris, leaves, or things that could get in the way of sand removal. This ensures the sand you remove stays out of the pool.

By doing these preparatory steps, you’re setting up for a successful pool sand removal process. It makes the whole thing more efficient and effective. Remember, preparing well can save you a lot of time and effort later.

Manual Sand Removal Techniques

Removing sand from your pool without a vacuum can save money and be efficient. You can use a pool brush and skimmer net, or a leaf rake or broom. These methods are great for keeping your pool clean and free of sand.

Using a Pool Brush and Skimmer Net

To remove sand from the pool without vacuum, try using a pool brush and skimmer net. Brushing the pool’s floor and walls loosens the sand. Then, use the skimmer net to scoop it out. This is good for small sand spots.

How to remove sand from pool without vacuum

Employing a Leaf Rake or Broom

For big areas of pool sand removal, a leaf rake or broom works well. Sweep the pool floor slowly to gather sand into piles. Then, scoop it out. This is best for big sand areas in the pool.

Manual Sand Removal Technique

Recommended Use

Advantages

Pool Brush and Skimmer Net

Small, localized sand accumulation

Precise, targeted approach; cost-effective

Leaf Rake or Broom

Widespread sand buildup

Covers larger areas; effective for significant sand removal

Using these sand removal tips, you can keep your pool clean without a vacuum. With some effort and the right tools, you can remove sand from the pool without a vacuum. This way, you’ll have a clean, enjoyable pool all season.

How to remove sand from pool without vacuum

Removing sand from your pool without a vacuum is easy and saves money. With a few simple steps, you can get rid of sand and keep your pool clean. Here’s how to do it.

First, get your tools ready. You’ll need a pool brush, skimmer net, and a leaf rake or broom. These tools help a lot in removing sand. Start by brushing the pool bottom with the brush to loosen the sand.

Then, use the skimmer net to pick up the sand from the water. Move the net over the water to catch as much sand as you can. Keep doing this until most of the sand is gone.

Tool

Purpose

Pool Brush

Loosen and agitate the sand at the bottom of the pool

Skimmer Net

Scoop up the loosened sand from the surface of the water

Leaf Rake or Broom

Sweep and collect any remaining sand on the pool floor

After that, use a leaf rake or broom to sweep any sand left on the floor. This makes it easy to remove the sand into the skimmer. This way, you can get rid of all the sand without a vacuum.

By following these steps, you can easily remove sand from your pool without a vacuum. This method is not only affordable but also keeps your pool clean and working well.

Using a Pool Cover for Sand Removal

Using a pool cover is a great way to get rid of sand without a vacuum. Pool covers are key in fighting against sand buildup. There are many types that work well for this job.

How to remove sand from pool without vacuum

Types of Pool Covers Suitable for Sand Removal

Mesh pool covers are top picks for sand removal. They let water through but catch debris like sand. This design stops sand from sinking, making it easy to clean.

Solid pool covers also work well. They act as a barrier to keep sand out. To remove sand, just lift the cover and scoop out the debris. These covers are great at keeping sand away from the pool.

Automatic pool covers are another smart choice. They roll in and out with a button press, making cleaning easy. These covers catch sand and other particles well. They’re perfect for those who want less manual work.

Choosing any pool cover and using it often helps in pool sand removal. It stops sand from building up, saving you time and effort. This keeps your pool clean and sand-free.

Chemical Methods for Sand Removal

Chemical solutions can be a big help when you’re fighting sand buildup in your pool. There are many chemicals you can use to remove sand without just vacuuming. From pool clarifiers to coagulating agents, these options can make a big difference.

Using a pool clarifier is a good choice. It makes tiny sand particles stick together, making them easier to filter out. Just add the clarifier to your pool water as the instructions say. Then, let it circulate before filtering out the clumped sand.

Coagulating agents are another great option. They make small sand particles clump together. This makes them easier to remove. Like clarifiers, you add these to the water and filter it after it circulates.

[wptb id="1071" not found ]

When using chemicals for pool sand removal, always follow the instructions closely. Make sure your pool’s circulation and filtration work well for the best results. Also, be aware that some chemicals can change your pool’s pH or other levels.

Adding chemicals to your sand cleaner for pool efforts can help with tough sand build up. This keeps your pool clean and working right all season. Always put safety first and talk to pool experts if you’re unsure about removing pool maintenance sand.

Preventing Sand Buildup in Your Pool

Keeping your pool clean is key for a great swim. Sand buildup can make your pool look bad and harm your equipment. Regular maintenance stops sand from gathering and keeps your pool perfect.

Regular Maintenance Tips

Skim the pool’s surface with a net or brush to remove sand and debris. Vacuuming your pool weekly, either by hand or with an automatic vacuum, picks up sand at the bottom. Using a pool cover when the pool is unused traps sand before it settles.

Right water chemistry, like the right pH and chlorine levels, helps stop sand buildup. Wrong water chemistry makes sand stick to the pool, making it hard to clean. Keeping the water balanced reduces sand accumulation.

Regular care, like brushing, vacuuming, and balancing chemicals, keeps your pool looking great. It also stops pool sand removal problems. By following these sand removal tips pool and pool maintenance sand steps, your pool will be sand-free all season.

Safety Precautions During Sand Removal

Removing sand from your pool requires careful attention to safety. Pool sand can be risky if not handled correctly. So, make sure to follow these steps for a safe process.

Start by wearing protective gear like gloves and goggles. This protects your hands and eyes from debris or chemicals. Also, keep the pool area well-ventilated to avoid harmful fumes or dust.

Wear non-slip shoes to prevent slipping on the pool deck. This can help keep you steady and safe.

Be careful when using cleaning tools or equipment. Always follow the instructions from the manufacturer. Using pool chemicals or equipment incorrectly can be dangerous. Always be cautious. Also, keep children and pets away from the pool area during sand removal to prevent accidents.

Summary

Maintaining a clean pool doesn’t always require expensive equipment like a vacuum. By using the manual methods and simple tools outlined in this guide, you can effectively remove sand from your pool and keep your swimming area in pristine condition. Whether it’s using a pool brush, leaf rake, or taking advantage of your pool’s circulation system, these DIY techniques offer practical solutions for any pool owner. Consistently monitoring and cleaning your pool will prevent future build-up of debris, ensuring a safe and enjoyable swimming environment for you and your guests. With regular upkeep and these handy methods, you’ll no longer have to worry about pesky sand disrupting your pool’s cleanliness. So, dive in with confidence, knowing you can easily manage sand removal without a vacuum.

Filed Under: Cleaning

Does Cleaning Carpets Kill Fleas?

September 6, 2024 by bigfishtavernlagunaadmin Leave a Comment

Fleas are more than just a nuisance; they can also present health hazards to both humans and pets. These tiny, blood-sucking pests not only make our furry friends itch and scratch but can also infest our homes. One common misconception is that simply cleaning our carpets will get rid of these pesky creatures. But does cleaning carpets really kill fleas? In this detailed investigation, we will delve into the effectiveness of carpet cleaning methods in eliminating fleas and explore other crucial steps to ensure a flea-free home. So if you have been struggling with a flea infestation or simply want to prevent one, keep reading to find out the truth behind the question, “Does cleaning carpets kill fleas?”

Does cleaning carpet kill fleas

Why Do Fleas Infest Carpets?

Fleas are tiny, blood-sucking parasites that are notorious for infesting homes, particularly carpets. While these pests are often associated with pets like cats and dogs, they can also live in various areas of a house, especially carpets, which provide the perfect environment for them to thrive.

Fleas lay eggs on their hosts, like dogs or cats, but these eggs don’t stay on the animal for long. As pets move around, eggs fall off and land on surfaces such as carpets, bedding, and furniture. Carpets, in particular, provide an ideal environment for fleas due to their warm, humid, and undisturbed nature. Fleas thrive in places where they can hide and grow without being easily noticed.

The flea life cycle consists of four stages: egg, larva, pupa, and adult. Larvae and pupae are most commonly found in carpets. Flea larvae feed on organic debris like skin cells or flea feces, which are often found embedded in carpet fibers. This makes carpets a prime breeding ground, especially in areas where pets spend a lot of time.

Moreover, fleas seek out dark, protected places to grow. Carpets, with their thick pile, offer a cozy hideaway that shields flea larvae and pupae from light and predators, making it easier for them to mature into adults. Once they reach adulthood, they jump onto a host to begin the cycle again.

In short, fleas infest carpets because they provide the perfect environment for the fleas to reproduce and grow, making them a hotbed for flea infestations.

Will Shampooing a Carpet Help Get Rid of Fleas?

Shampooing a carpet can help get rid of fleas, but it is not a standalone solution. Fleas often live in carpets, laying eggs and hiding in fibers.Using a carpet shampoo along with a thorough vacuuming routine can greatly decrease their numbers. However, fleas have a complex life cycle comprising eggs, larvae, pupae, and adult stages. Simply cleaning with carpet shampoo might eliminate adult fleas and larvae, but flea eggs and pupae are more resilient.

Does cleaning carpet kill fleas

For more effective flea control, consider using a flea-killing shampoo specifically designed for pests. These shampoos contain insecticides that can target fleas more directly. Be sure to vacuum thoroughly after shampooing, as this will help remove flea eggs and larvae.

In addition to carpet cleaning, addressing the environment is key. You should wash pet bedding, treat pets with flea preventatives, and consider using flea sprays or powders for added protection.

While shampooing a carpet plays a role in flea removal, combining it with other methods like vacuuming, pest control products, and pet treatments ensures a more thorough and lasting solution.

What is the Fastest Way to Get Rid of Fleas From Carpet?

Managing fleas in your carpet can be an ongoing and frustrating challenge. These small pests not only cause discomfort but can lead to severe infestations if not dealt with quickly. While there are various DIY methods available, the fastest and most effective way to get rid of fleas from your carpet is to hire a professional pest control service.

Pest control professionals have specialized equipment and expertise to tackle flea infestations more efficiently than home remedies. One of the primary advantages of hiring a professional is their access to high-grade, industrial-strength insecticides that are more potent than store-bought products. These chemicals are applied in targeted ways, ensuring that all flea stages, from eggs to adults, are eradicated.

Moreover, professionals use advanced techniques such as steam cleaning and targeted spot treatments that can penetrate deep into carpet fibers where fleas like to hide. This thorough approach ensures that fleas are not only killed on the surface but also in the depths of your carpet, reducing the likelihood of re-infestation.

One major benefit of professional pest control is the knowledge and expertise it provides. Experts can accurately identify the extent of the infestation, determine the best treatment method, and provide guidance on preventing future issues. Their detailed evaluations and treatment plans are tailored to meet the unique needs of your home and carpet.

In addition, professional pest control services often offer follow-up visits and guarantees, ensuring that the treatment has been effective and that any remaining fleas are dealt with promptly. This peace of mind is worth far more than the risks and guesswork associated with DIY solutions.

Is Steam Cleaning Effective in Removing Fleas from Carpets?

Steam cleaning can be effective in removing fleas from carpets. The high temperatures produced by steam cleaners—often reaching around 200°F (93°C)—can kill fleas at all stages of their lifecycle, including eggs, larvae, and adults. Steam cleaning reaches deep into carpet fibers, where fleas commonly hide, providing a thorough treatment. However, for severe infestations, steam cleaning alone may not be sufficient.

Does cleaning carpet kill fleas

Combining steam cleaning with additional pest control methods, like chemical treatments or professional services, can boost effectiveness and help prevent re-infestation. Ongoing maintenance and vigilance are crucial for long-term flea control.

Will Fleas Thrive in a Carpeted Area?

While carpets are a prime habitat for fleas, these pests can also infect other areas of the house. Fleas can be found in upholstery, such as couches and chairs, where they hide in the fabric and cushions. They may also inhabit bedding and linens, especially if pets have been in contact with them. Fleas can thrive in cracks and crevices of flooring, baseboards, and behind furniture, where they find warmth and protection.

In addition, fleas can lay eggs in pet bedding, which becomes a breeding ground for the larvae. If you have upholstered furniture or bedding that has been exposed to fleas, it’s essential to treat these areas thoroughly. Regular cleaning and vacuuming, along with targeted pest control treatments, are important to address flea infestations throughout the entire home, not just the carpeted areas.

FAQ

Can fleas survive in the washer?

Fleas are unlikely to survive a washing machine cycle, especially when using hot water and detergent. The heat and agitation help to kill fleas and their eggs, making washing an effective method for cleaning infested bedding and pet items.

Can a hair dryer kill fleas?

A hair dryer is not an effective method for killing fleas. While the heat from a hair dryer might provide some temporary relief by driving fleas away, it is not sufficient to eliminate fleas or their eggs. Using a dedicated flea treatment product is more effective.

What can I do to destroy flea colonies?

To destroy flea colonies, use a multi-faceted approach:
Treat your pets with vet-approved flea medications to kill fleas and prevent re-infestation.
Vacuum regularly and dispose of the vacuum bag or clean the canister to remove fleas and eggs from carpets and upholstery.
Use flea sprays or foggers in your home to target and kill fleas in their hiding spots, ensuring to follow the product instructions for safety and effectiveness.

Filed Under: Cleaning

Does Carpet Cleaning Kill Bed Bugs?

September 4, 2024 by bigfishtavernlagunaadmin Leave a Comment

Bed bugs are infamous pests that have troubled human dwellings for centuries. Their small size, ability to hide in tiny crevices, and resilience make them one of the most challenging household pests to eliminate. One common question homeowners face during an infestation is whether carpet cleaning can effectively kill bed bugs. While carpet cleaning is an essential part of maintaining a clean and healthy home, its effectiveness in combating bed bugs is often misunderstood. This article delves into the relationship between carpet cleaning and bed bug control, examining the methods, limitations, and complementary strategies needed for comprehensive pest management.

Does Carpet Cleaning Kill Bed Bugs?

Understanding Bed Bugs: Habits and Hiding Spots

To determine whether carpet cleaning can kill bed bugs, it’s crucial to understand the behavior and biology of these pests. Bed bugs are small, flat, reddish-brown insects that feed on human blood. They are most active at night and tend to conceal themselves during the day in cracks, crevices, and other dark, secluded spots. Common hiding spots include:

  • Mattresses and box springs
  • Bed frames and headboards
  • Baseboards and electrical outlets
  • Behind wallpaper and picture frames
  • Upholstered furniture

Although bed bugs are primarily associated with beds, they can also infest carpets, especially if the infestation is severe or if they are seeking alternative hiding spots.

Bed Bugs in Carpets

While bed bugs prefer to stay close to their food source (human hosts), they can and do migrate to carpets under certain conditions. For instance, in heavily infested homes, bed bugs may spread into carpets, especially in areas near beds, sofas, and other places where people rest. However, carpets are not their primary habitat. Unlike fleas, which live in and around carpets, bed bugs tend to favor tighter, more concealed spaces.When bed bugs infest carpets, they usually hide along the edges of the carpet, where it meets the wall, or within the fibers near furniture. Because of their small size and elusive nature, they are challenging to detect, even in heavily infested areas.

Evaluating Carpet Cleaning Methods

Heat and Temperature: The Critical Factor

The key factor in determining whether carpet cleaning can kill bed bugs is the temperature reached during the cleaning process.Bed bugs and their eggs die when subjected to temperatures higher than 120°F (49°C) for an extended duration. Among the carpet cleaning methods, steam cleaning is the most likely to reach these temperatures, making it the most effective for killing bed bugs.

However, even steam cleaning has its limitations. Bed bugs can hide in places where the steam cannot penetrate, such as in deep crevices, under baseboards, or within the padding underneath the carpet. Moreover, bed bugs are highly mobile and may quickly move to safer areas during the cleaning process, thereby escaping the treatment.

Shampooing and Dry Cleaning: Limited Impact

As discussed earlier, shampooing and dry cleaning methods are not effective against bed bugs because they do not generate the high temperatures necessary to kill these pests. While these methods can help clean the carpet and remove some surface bed bugs, they do not provide a comprehensive solution for bed bug infestations.

Vacuuming: A Partial Solution

Vacuuming is a useful tool for reducing the number of bed bugs in carpets, but it is not a standalone solution. A vacuum cleaner can remove adult bed bugs and some eggs from the surface of the carpet, but it cannot reach those hiding deep within the carpet or in other areas of the home. Additionally, vacuuming does not kill bed bugs; it merely removes them from one area, potentially spreading them to another if the vacuum bag or canister is not disposed of properly.

Comprehensive Bed Bug Control: Beyond Carpet Cleaning

Given the limitations of carpet cleaning alone in eliminating bed bugs, it’s evident that additional steps are required for complete eradication. A thorough approach to bed bug control involves several strategies to ensure every part of the home is addressed.

Professional Pest Control Services

Utilizing a professional pest control service is usually the most effective method for managing a bed bug infestation. Professionals use specialized equipment and insecticides that are not accessible to the general public. They can perform detailed inspections, locate all infested areas, and apply treatments that target bed bugs at every stage of their life cycle, including their eggs.

Heat Treatment

Heat treatment is extremely effective for eradicating bed bugs throughout your home. Pest control professionals use advanced equipment to raise the temperature of a room or an entire house to levels above 120°F (49°C), which is lethal to bed bugs. Unlike steam cleaning, which is limited to specific areas like carpets, heat treatment can penetrate all hiding spots, leaving no refuge for bed bugs.

 Insecticide Treatments

Insecticide Treatments Insecticide treatments play a crucial role in bed bug control. Pest control experts use a range of products including residual sprays, dusts, and aerosol insecticides to target bed bugs throughout the home. These treatments are applied to cracks, crevices, and other potential hiding spots, offering long-lasting protection against these pests.

 Integrated Pest Management (IPM)

Integrated Pest Management (IPM) is an all-encompassing approach that combines various strategies for efficient pest control while minimizing risks to humans and the environment. For bed bugs, IPM includes:

  • Inspection: Regularly checking for the presence of bed bugs and evaluating the extent of the infestation.
  • Monitoring: Utilizing bed bug monitors and traps to keep track of bed bug activity.
  • Sanitation: Minimizing clutter and cleaning infested areas to eliminate hiding places for bed bugs.
  • Exclusion: Exclusion means sealing cracks, crevices, and other possible entry points to prevent bed bugs from spreading.
  • Chemical Control: Applying insecticides as a last resort in a targeted and strategic manner.

By integrating these methods, you can effectively manage and eliminate bed bugs, ensuring a more thorough and lasting solution.

DIY Methods: What Works and What Doesn’t

While professional treatments are often necessary for severe infestations, there are also several DIY methods that can complement professional services or be used in the early stages of an infestation.

Encasements

Encasing your mattress and box spring helps contain bed bugs and prevents them from spreading further into your bedding. Encasements are specially designed covers that seal in bed bugs, preventing them from escaping and feeding.

Diatomaceous Earth

Diatomaceous earth is a natural powder that can be dusted around the home, especially in areas where bed bugs are suspected. This powder is abrasive to the bed bug’s exoskeleton, causing them to dehydrate and die. While diatomaceous earth can be effective, it works slowly and is best used as part of a broader control strategy.

Essential Oils and Natural Remedies

Some people use essential oils, such as tea tree oil or lavender oil, as natural repellents against bed bugs. While these oils may have some repellent properties, they are not a reliable method for eliminating an infestation. Bed bugs are highly resilient, and natural remedies alone are unlikely to be effective in controlling a severe infestation.

Freezing

Bed bugs are vulnerable to extreme temperatures, and freezing infested items can kill them. Freeze clothing, bedding, and small furniture at 0°F (-18°C) for at least four days to eliminate bed bugs. However, this method is limited to smaller items and is not practical for large-scale infestations.

Bed Bug control: Symptoms and  Prevention

Preventing bed bugs is always better than dealing with an infestation. By taking proactive steps, you can save yourself time, money, and stress down the road. To prevent bed bugs, it is important to know the symptoms first. Here are some symptoms:

Does Carpet Cleaning Kill Bed Bugs?
  • Common signs include small, red, itchy bumps on your skin, which often appear in lines or clusters.
  • Tiny blood spots on your sheets or pillowcases could be a sign of bed bugs.
  • Dark, rust-colored spots on your mattress, bedding, or walls are bed bug excrement.
  • As bed bugs grow, they shed their outer layer, leaving behind translucent skins.
  • A strong, musty smell in the room could signal a severe bed bug infestation.
  • Tiny white eggs or eggshells, often found in mattress seams or crevices, are another sign of bed bugs.

 Regular Inspections

Frequent inspections of your home, particularly in spots where bed bugs tend to hide, can help identify an infestation early. Look for signs such as tiny black spots (bed bug excrement), shed skins, or live bed bugs in mattresses, box springs, and upholstered furniture.

Be Cautious When Traveling

Bed bugs are notorious for hitchhiking on luggage, clothing, and personal belongings. When traveling, be on the lookout for bed bugs in hotel rooms and keep your luggage off the bed and floor. When returning home, inspect and wash all clothing and belongings before bringing them into the house.

Reduce Clutter

Minimizing clutter in your home can remove potential hiding places for bed bugs. This makes it easier to spot bed bugs early and reduces the risk of a large-scale infestation.

Use Bed Bug Proof Encasements

Investing in bed bug-proof encasements for your mattress and box springs can prevent infestations. These encasements create an impenetrable barrier, making it simpler to detect and control any bed bug issues.

Be Cautious with Secondhand Furniture

Secondhand furniture, particularly upholstered items, can be a source of bed bugs. Before bringing secondhand items into your home, make sure to thoroughly check them for signs of bed bugs If possible, avoid purchasing second hand furniture altogether, or treat it with heat or insecticides before use.

What Really, Does carpet cleaning kill bed bugs

Carpet cleaning, particularly steam cleaning, can kill bed bugs, but its effectiveness is limited. Steam cleaning uses high temperatures, which can reach levels sufficient to kill bed bugs on the surface and within the top layers of carpet. However, bed bugs often hide in deeper crevices, under baseboards, and in other areas that standard carpet cleaning methods cannot reach.While steam cleaning may help reduce the number of bed bugs, it is not a comprehensive solution. To fully eliminate a bed bug infestation, additional methods like heat treatment for entire rooms or professional pest control services are often required. Simply vacuuming or shampooing carpets is not effective, as these methods do not reach the necessary temperatures to kill bed bugs and often fail to address the entire infestation. Therefore, carpet cleaning should be included as part of a comprehensive pest management strategy.

Filed Under: Cleaning

How to Dry the Carpet After Cleaning: Best Techniques!

September 3, 2024 by bigfishtavernlagunaadmin Leave a Comment

It’s crucial to dry a carpet after cleaning to prevent mold, mildew, and unpleasant odors. If not done correctly, moisture can linger in the carpet fibers, leading to long-term damage and health risks. In this guide on how to dry the carpet after cleaning, we’ll explore the best five methods to ensure your carpet stays fresh, clean, and in great condition.

How to Dry the Carpet After Cleaning

Understanding the Importance of Proper Carpet Drying

Properly drying carpets is crucial for preserving their health and longevity.If carpets are not dried thoroughly, excess moisture can cause several problems.Mold and mildew growth is a significant concern because it can cause health problems and unpleasant odors. Additionally, persistent dampness can weaken carpet fibers, resulting in premature wear and possible structural damage.

 Effective drying also helps prevent water stains and discoloration, which can impact the carpet’s appearance. To achieve thorough drying, it’s crucial to employ appropriate methods such as using fans, dehumidifiers, and ensuring proper ventilation.

Acting quickly is essential for reducing damage and maintaining the carpet’s condition. By addressing moisture issues quickly and effectively, you can protect your investment and maintain a clean, healthy home environment.

Top 5 Methods How to Dry the Carpet after Cleaning

1. Air Drying: The Natural Approach

Air drying is a natural method for drying carpets that relies on the environment to remove moisture. This approach involves allowing the carpet to dry gradually by circulating air around it. To air dry a carpet, start by removing excess water using a wet/dry vacuum or towels. Next, place the carpet in a well-ventilated area to allow for free airflow. To enhance air circulation and speed up drying, open the windows and use fans.

 Ensure the room is kept at a moderate temperature to prevent the carpet from becoming too damp. While air drying is energy-efficient and environmentally friendly, it can be slower compared to other methods, taking up to 24 to 48 hours depending on moisture levels and room conditions. This method is best suited for minor water exposure and when you have sufficient time for natural drying.

2. Using Fans and Blowers: Boosting Air Circulation

Using fans and blowers can significantly boost air circulation, aiding in the drying process of wet carpets. When a carpet is soaked, it’s crucial to enhance airflow to prevent mold and mildew growth. Place fans in a strategic manner—one facing the carpet and others around the room to create a steady air movement. Blowers, with their higher air velocity, are particularly effective for large areas or deep carpet piles.

To ensure good ventilation, keep the windows open whenever possible.The increased air circulation helps evaporate moisture more quickly, reducing drying time and minimizing potential damage. For optimal results, use a combination of fans and blowers, adjusting their placement as needed to maximize airflow.

3. Dehumidifiers: Perfect for Humid Environments

Dehumidifiers are crucial for drying carpets in humid conditions. High humidity can significantly delay the drying process, increasing the risk of mold and mildew. A dehumidifier removes excess moisture from the air, creating a drier environment that accelerates carpet drying. Set up the dehumidifier in the room where the carpet is wet to enhance its effectiveness. By lowering the air’s moisture level, the dehumidifier enables the carpet to dry more quickly and evenly. For optimal results, use dehumidifiers in conjunction with fans to improve air circulation. This technique not only hastens the drying process but also helps to avoid damage and unpleasant odors.

4. Wet/Dry Vacuum: Extracting Excess Moisture

A wet/dry vacuum is a powerful tool for extracting excess moisture from carpets, crucial for effective drying. When a carpet is waterlogged, the first step is to use a wet/dry vacuum to remove as much water as possible. Begin by thoroughly vacuuming the damp area, making several passes to ensure maximum moisture removal. This process helps to lift water from the carpet fibers and padding, reducing the overall moisture content.

How to Dry the Carpet After Cleaning

After vacuuming, it’s important to complement this with proper ventilation and air circulation, such as using fans and dehumidifiers. For best results, tackle the area promptly and continue to monitor the carpet’s dryness. Regular use of a wet/dry vacuum can prevent mold growth and minimize potential damage, making it an essential tool in carpet maintenance and restoration.

5. Professional Carpet Drying Services: For When You Need Expert Help

Professional carpet drying services are ideal when you need expert help to quickly and effectively dry your carpets. These services utilize advanced equipment, such as high-powered fans, dehumidifiers, and specialized drying machines, to expedite the drying process. Professionals assess the extent of water damage, ensuring that all moisture is thoroughly removed to prevent mold growth and structural damage.

Their expertise also includes deep cleaning and sanitizing, which can address any lingering odors and potential contaminants. Opting for professional services is especially beneficial for large areas or severe water damage, where efficient and comprehensive drying is crucial. Trusting experts ensures your carpets are restored to their original condition, safeguarding your home from long-term damage.

How Long Does It Take for a Carpet to Dry?

The drying time for a carpet depends on various factors, including moisture level, room conditions, and drying methods used. Carpets generally require 6 to 12 hours to dry fully. However, if the carpet is heavily saturated, the drying process might extend to 24 to 48 hours.

Key factors influencing drying time include air circulation, humidity levels, and temperature. Employing fans and dehumidifiers can greatly accelerate the drying process by enhancing airflow and reducing air moisture.

Proper ventilation is also crucial; opening windows or using air conditioning can assist in speeding up drying. For carpets affected by severe water damage, professional drying services may be required to ensure thorough and efficient drying. Acting quickly is essential to prevent mold growth and reduce potential damage.

Finishing Statement

Drying a carpet after cleaning is an important step that must not be neglected. Whether you opt for air drying, use fans, dehumidifiers, or even call in the professionals, the key is to act quickly and efficiently to avoid potential damage. Each method has its advantages, and in many cases, combining these methods can yield the best results. Maintain your carpets in excellent condition by selecting the drying method that best fits your needs and environment.

Filed Under: Cleaning

Perfect Pool Cleanup: Vacuum Pool to Waste the Right Way

September 2, 2024 by bigfishtavernlagunaadmin Leave a Comment

Owning a pool is like having a personal oasis right in your backyard. It’s perfect for relaxation, exercise, and fun gatherings. But, keeping the water crystal clear is a big job. It needs regular cleaning, chemical balancing, and yes, vacuuming.
How to vacuum pool to waste is a key cleaning method that’s often not well understood. This guide will clear up what it means, why it’s good, and how to do it right. So, let’s dive in and make your pool shine.

How to vacuum pool to waste

Key Takeaways

  • Vacuuming your pool to waste is an essential pool maintenance technique.
  • Proper setup and execution of the vacuum process can effectively remove debris and algae.
  • Regular vacuuming, combined with backwashing and algaecide application, keeps your pool clean and clear.
  • Weekly shock treatment and cleaning are recommended for frequently used pools.
  • Transitioning to an automatic pool cleaner can simplify the vacuuming process.

What Is Vacuuming Your Pool to Waste?

Vacuuming your pool to waste is a special way to clean it. It skips the usual filter system. Instead, the water goes straight out of the pool. This method is great for getting rid of lots of debris, algae, or sediment.It’s mainly used when there’s a lot of algae, debris, or leaves in the pool, especially when opening it.

Why Vacuum to Waste?

Vacuuming to waste has many benefits for keeping your pool clean. It quickly removes debris, saving you time and effort. It’s especially good for getting rid of a lot of debris, algae, or sediment

It also helps avoid clogs and makes your filter last longer. You need a multiport valve to vacuum to waste. This valve sends debris through the waste line instead of the filter.

This method is perfect for tough algae or sediment that regular vacuuming can’t handle. It’s also great after a storm, when your pool might be full of leaves and twigs.

“Vacuuming to waste is a game-changer for deep cleaning and maintaining a pristine pool.”

You’ll need a vacuum head, the right length of hose, a T-Pole, and a skim-vac for inground pools. To set it up, attach the vacuum head to the T-Pole, connect the hose, extend the T-Pole, and attach the skim-vac correctly to get rid of air in the hose.

When vacuuming, start in the shallow end slowly and carefully. Watch the suction levels, as they might drop because of debris in the skimmer and pump baskets. After vacuuming, clean the skimmer and pump baskets. Make sure the water level is right in the skimmer, and put all your equipment away.

The AiDot Enhulk Cordless Pool Vacuum has a strong motor, powerful suction, long battery life, quick charging, and a 7.3FT telescopic pole. It’s a versatile and efficient tool for keeping your pool clean.

Setting Up the Vacuum for Waste Mode

Before you start vacuuming your pool to waste, make sure your equipment is ready. Follow a few key steps for a smooth and efficient process.

Step 1: Preparation

First, ensure your pool water level is higher than usual. This is important because you’ll lose water during vacuuming. Check your filter system to make sure it’s clean and working right. A clean filter is key for the vacuum’s effectiveness.

Step 2: Set Up Your Vacuum

Then, connect your vacuum head to the telescopic pole, and attach the vacuum hose to the head. Make sure all connections are tight to avoid leaks or disconnections.

Step 3: Prime the Hose

Next, put the vacuum hose underwater to get rid of any air inside. This makes sure the hose fills with water, which is vital for effective vacuuming.

Step 4: Connect to Skimmer

Finally, attach the hose’s other end to the pool’s skimmer. This connection is crucial for drawing water as you vacuum.

By doing these steps, your pool vacuum system will be set up and ready for waste mode. Paying attention to detail in preparation makes the vacuuming process smoother and more successful.

Engaging the Waste Mode

Now that you’ve set everything up, it’s time to turn on the waste mode and start vacuuming. First, switch your pool pump’s multiport valve to the “Waste” setting. Make sure to turn off the pump first to avoid any damage.

Next, begin vacuuming by slowly moving the vacuum head over the pool floor. This will help you pick up all the debris and dirt. Keep an eye on the pool’s water level as you vacuum. You don’t want it to get too low, which could harm the pump.

How to vacuum pool to waste

If the water level gets too low, stop vacuuming right away. Take steps to keep the water safe. Once you’re done vacuuming, turn off the pump and disconnect the vacuum. You’ve successfully cleaned your pool to waste.

“Proper water level maintenance, along with skimming and filter cleaning, significantly improves vacuuming effectiveness.

Remember, keeping an eye on the water level is key to a successful waste mode vacuuming. If it gets too low, stop vacuuming. By doing this, you’ll get a thorough and efficient pool cleaning. This makes your swimming area sparkle and stay well-maintained.

How to Vacuum Pool to Waste: Easy Step-by-Step Guide

Keeping your pool clean is key to its sparkle and health. Vacuuming your pool to waste is a great way to remove debris, algae, or sediment efficiently. This guide will show you how to do it right, so your filter stays healthy.

Start by getting your pool ready and setting up the vacuum correctly. When you turn on the waste mode, begin vacuuming and watch the water level carefully. It’s important to finish quickly to prevent losing too much water.

After vacuuming, refill the pool and balance the chemicals to get it back to perfect. By following these steps, you’ll keep your pool looking great all season.

  1. Prepare the pool and set up the vacuum correctly.
  2. Engage the waste mode and start vacuuming, monitoring the water level closely.
  3. Top up the water levels and perform chemical balancing after vacuuming to waste.

“Vacuuming a pool to waste is an essential pool maintenance best practice that can keep your pool in top shape all season long.”

For successful pool vacuuming, pay attention to details and follow the guide closely. With this advice, you’ll keep your pool clean and healthy all year.

Vacuuming Without a Waste Setting

Not all pool pumps have a “Waste” setting, making vacuuming a bit tricy. But, there are other ways to clean your pool effectively.

The Manual Drain Method: A Hands-On Approach

The Manual Drain Method uses a submersible pump to remove water as you vacuum, like the “Waste” setting. First, attach the vacuum head to a long pole and connect it to the hose. Then, push it into the pool and turn off the pump to start vacuuming.

Add water from a garden hose to keep the water level right.

The Backwash Method: A Convenient Alternative

If you have push-pull valves, the Backwash Method is a good choice. It uses the “Backwash” setting to clean your pool, similar to the “Waste” mode. It’s not as good as the real “Waste” mode, but it works well if you don’t have that setting.

These methods help pool owners keep their pools clean, even without a “Waste” setting.

The Ultimate Pool Vacuum for Effortless Cleaning

If you’re looking for a reliable pool vacuum, the AiDot Enhulk Cordless Pool Vacuum is a great pick. It’s designed for easy cleaning, making it perfect for pool owners. This tool is packed with features for a hassle-free experience.

The vacuum has a strong motor and powerful suction, tackling debris from leaves to fine particles. Its cordless design means you won’t get tangled in cords. It runs over 90 minutes and charges quickly, so you can clean your pool without stopping.

This vacuum is versatile. It fits different pool sizes and shapes, ideal for both in-ground and above-ground pools. It also comes with four reusable filter bags for easy debris collection and maintenance.

The AiDot Enhulk Cordless Pool Vacuum is a top pick for pool owners. Its strong performance, cordless design, and features make cleaning easy and efficient. It’s great for any pool type, ensuring effortless maintenance.

“The AiDot Enhulk Cordless Pool Vacuum is a game-changer in the world of pool cleaning. It’s powerful, convenient, and makes the entire process a breeze.” – Pool Enthusiast Magazine

Ready to improve your pool cleaning? The AiDot Enhulk Cordless Pool Vacuum is your best bet. With its top-notch features and performance, you’ll have a clean pool with little effort. Enjoy more time relaxing by the water.

Summary

Keeping your pool clean is essential for its longevity and water quality. This guide shows you how to vacuum your pool to waste, even if your pump lacks a “Waste” setting. With powerful tools like the AiDot Enhulk Cordless Pool Vacuum, which offers a max flow rate of 15.8 gallons per minute and up to 60 minutes of runtime, you’ll have everything you need to maintain a pristine pool. Follow these expert tips to keep your pool debris-free and inviting all season long.

Filed Under: Cleaning

Best Cleaning Products for LVT Flooring: Shine Like New!

September 2, 2024 by bigfishtavernlagunaadmin Leave a Comment

Maintaining the beauty of your luxury vinyl tile (LVT) flooring is essential. LVT floors are durable and easy to clean, but selecting the right cleaning products is crucial for keeping them in top condition. This guide highlights the best cleaning products for LVT flooring, offering expert tips and recommendations to ensure your floors shine like new.

Best cleaning products for lvt flooring

Whether you’re searching for a daily cleaner or a deep cleaner for your LVT floors, we’ve got the ideal solution for you. We’ll explore various LVT floor cleaners, each with unique advantages to help you make an informed choice. With our guidance, you’ll learn how to clean luxury vinyl floors effectively, preserving your investment for years to come.

Say goodbye to lackluster floors and hello to gleaming LVT perfection! Discover the best LVT floor cleaning products that will keep your flooring looking pristine and beautiful.

Unveiling the Importance of Proper LVT Floor Cleaning

LVT flooring is getting more popular, and it needs special care. Its design is different from traditional floors because it’s tough and won’t get damaged by water. Keeping it clean and maintained is key to keeping it looking great and lasting long.

Why LVT Floors Require Special Care

LVT floors can get scratched, scuffed, and lose their color if not taken care of. Their shiny surface shows dirt and dust easily. So, it’s important to vacuum and mop them often with the best cleaning products for lvt flooring.

The Consequences of Neglecting LVT Floor Maintenance

Not cleaning your LVT floors can cause big problems. They can look dull, change color, and even come apart at the seams. This can lead to expensive repairs or even needing a new floor.

Regular vinyl tile floor cleaning keeps your LVT floors looking good and lasting long. By using the right products and methods, you protect your investment. This way, you can enjoy your LVT flooring for many years.

Top 5 Cleaning Products for LVT Flooring

Zep Neutral PH Industrial Floor Cleaner

When it comes to keeping your LVT (Luxury Vinyl Tile) flooring clean and looking its best, finding the right cleaning product is essential. With so many options on the market, it can be challenging to determine which one is truly the best for your specific needs. That’s why we’ve taken the time to review one of the top choices – Zep Neutral PH Industrial Floor Cleaner. In this article, we’ll dive into the features, benefits, and potential drawbacks of this product to help you make an informed decision on the best cleaning products for LVT flooring. Whether you’re a home or business owner, having a reliable floor cleaner that gets the job done effectively and safely is vital. So let’s get started and find out if Zep Neutral PH Industrial Floor Cleaner is the right choice for you.

Specification

Size: 1 Gallon Type: Liquid Scent: Unscented Usage: Floor Rinsing: No Polish maintaining: Yes For: All-Purpose

Pros

  • Works on different floor types
  • Can be used on sealed floors
  • Product is safe for all floor surfaces
  • Trusted by professionals
  • Can get the job done when it comes to cleaning

Cons

  • May leave behind residue
  • Need a mop or sprayer for best results
Cheak Price on Amazon

OdoBan Ready-to-Use Luxury Vinyl Floor Cleaner

​In today’s fast-paced world, we are all constantly looking for convenient and efficient ways to keep our homes clean and presentable. And when it comes to our beloved luxury vinyl flooring, finding the best cleaning products is of utmost importance. Whether you have just installed beautiful LVT flooring or have had it for a while, maintaining its elegant appearance requires the right tools and techniques. That’s where OdoBan Luxury Vinyl Floor Cleaner comes into play. In this review, we will dive deep into the features and benefits of this product, exploring why it is considered one of the best cleaning products for LVT flooring in the market. So, if you’re ready to simplify your cleaning routine and achieve sparkling, spotless floors, let’s delve into the world of OdoBan Luxury Vinyl Floor Cleaner.

Specification

Weight: 1 Gallon Main Advantages: Effective, Streak-free cleaning Application: Floor, Tile PH: Neutral Brand: OdoBan Scent: Unscented

Pros

  • Freshens as it cleans
  • Leaves no residue
  • Safe for pets
  • Streak-free after air drying
  • Streak-free

Cons

  • Large container
  • Large jug size
Cheak Price on Amazon

Rejuvenate All Floors Restorer and Polish Fills

​In the vast world of cleaning and restoring products, it can be overwhelming to find one that truly lives up to its promises. In our busy lives, we all dream of finding that one magic solution that can efficiently restore and polish all types of floors with ease. Thankfully, Rejuvenate All Floors Restorer and Polish Fills may just be the answer we’ve all been searching for. With its revolutionary formula and remarkable results, this product has gained immense popularity among homeowners and cleaning enthusiasts alike. In this article, we will dive into a comprehensive review of Rejuvenate All Floors Restorer and Polish Fills, analyzing its key features, benefits, and consumer feedback. If you’re tired of lackluster floor restorers that fail to deliver, join us as we explore how Rejuvenate All Floors Restorer and Polish Fills can bring new life to your floors.

Specification

Weight: 32 oz Drying time: 45 minutes Usage: Residential and Commercial Volume: 50% Brand: Rejuvenate Application: Mop-On Feature: Natural Liquid

Pros

  • Shine lasts for months
  • Works on many flooring types
  • Works on many different types of floors
  • Can be used on multiple floor types
  • Works on many floor types

Cons

  • Can’t be used on tile or stone
  • Needs to be stripped and reapplied after a few months
Cheak Price on Amazon

Bona Premium Multi-Surface Floor Spray Mop

Keeping your floors clean and sparkling can sometimes feel like a never-ending battle. From dirt and dust to spills and stains, it’s easy for our floors to accumulate grime and lose their luster over time. That’s why investing in a good quality floor mop is essential for maintaining a clean and healthy home. Today, we’re going to take a closer look at the Bona Premium Multi-Surface Floor Spray Mop, a popular choice among homeowners looking for an efficient and convenient way to keep their floors looking their best. With its innovative features and ease of use, the Bona Premium Multi-Surface Floor Spray Mop has gained quite a reputation. Whether you have hardwood, tile, laminate, or any other type of surface, this versatile mop promises to deliver exceptional cleaning results. So, without further ado, let’s dive into our in-depth review of the Bona Premium Multi-Surface Floor Spray Mop and find out why it has become a go-to cleaning tool for many households.

Specification

Usage: Floor Weight: 5.8 Pounds Size: 28.44 x 5.75 x 4.5 inch Speed: 40% faster Batteries: No Machine Washable: Yes Package: 975 ml of solution

Pros

  • Comes with a full-size 34-ounce bottle of cleaner
  • With your own mixture
  • Good for all types of flooring
  • Comes with Bona Premium Hard-Surface Floor Cleaner
  • Comes with large 34-ounce cleaning solution cartridge

Cons

  • Handle doesn’t stay locked in upright position
  • Handle is on the shorter side
Cheak Price on Amazon

OdoBan Professional Series Neutral pH No Rinse Floor Cleaner

Keeping your floors clean and fresh is an essential part of maintaining a hygienic and welcoming home or workspace. And when it comes to finding a reliable and effective floor cleaner, OdoBan Professional Series Neutral pH No Rinse Floor Cleaner is a name that stands out. With its powerful formulation and convenient no-rinse feature, this floor cleaner has gained a loyal following among homeowners and professionals alike. In this article, we will delve into the features and benefits of OdoBan Professional Series Neutral pH No Rinse Floor Cleaner, revealing why it has become a trusted choice for achieving spotless and sanitized floors. So if you’re in search of a floor cleaner that delivers exceptional results, read on to discover what makes OdoBan Professional Series the go-to solution for maintaining clean and pristine floors.

Specification

Dilution: As needed Size: 1 Gallon Recommendation: Not for marble floors Style: Liquid Non-Toxic: Yes Surface: All hard floors

Pros

  • Works on multiple surfaces
  • No rinsing necessary
  • Safe for use on rubber and linoleum floors
  • Can be used with a mop or in a machine
  • No-rinse formula

Cons

  • Will strip wax or polish from floors
  • Can leave residue on floors if not diluted
Cheak Price on Amazon

Understanding the Different Types of LVT Floor Cleaners

Choosing the right cleaner is key to keeping your luxury vinyl tile (LVT) floors looking great. There are many cleaners out there, each with its own purpose. Knowing what each type does can help you pick the best one for your space.

Daily Maintenance Cleaners

Daily maintenance cleaners are perfect for everyday cleaning. They are mild and pH-balanced. They clean away dirt and spills without dulling your floors. Using them often keeps your floors shiny and new.

Deep-Cleaning Solutions

Even with good care, LVT floors can get dirty over time. Deep-cleaning cleaners are made for these tough jobs. They use strong ingredients to remove deep dirt and stains, making your floors look new again.

Feature

Daily Maintenance Cleaners

Deep-Cleaning Solutions

Purpose

Routine cleaning and preserving shine

Removing stubborn buildup and stains

Ingredients

Mild, pH-balanced solutions

Specialized, heavy-duty formulas

Frequency of Use

Regular, daily or weekly use

Periodic, as needed basis

Knowing about the different LVT cleaners helps you create a good cleaning plan. This way, your luxury vinyl tile floors will always look their best.

Top Tips for Effective LVT Floor Cleaning

Keeping your lvt flooring in top shape is key to its beauty and long life. Follow these expert tips for cleaning luxury vinyl floors to keep them looking great.

Maximizing the Lifespan of Your LVT Floors

Cleaning your lvt flooring regularly is a must to keep it looking good and lasting long. Sweep or vacuum your floors once a week to get rid of dirt and debris. For deep cleaning, use top-rated lvt floor cleaners made for vinyl tile floor cleaning.

Don’t use harsh chemicals or rough scrubbers, as they can harm your floors. To get the best results, spread a thin layer of the best cleaning products for lvt flooring on your floors. Let it sit for a few minutes before scrubbing and rinsing. This way, you remove dirt without leaving any residue. By doing this, your LVT floors will stay beautiful for many years.

Bottom Line

To keep your LVT floors in top condition, it’s crucial to use the right cleaning products and maintain a regular cleaning routine. By understanding the specific needs of LVT flooring and following expert advice, you can preserve the beauty of your luxury vinyl floors for years. Choose top-rated LVT floor cleaners tailored for vinyl plank and tile flooring, and incorporate them into your maintenance plan. This ensures your floors stay spotless and well-maintained. Don’t let dirt and grime take over—focus on LVT floor cleaning with the best products to keep your home looking its best for the long term.

Filed Under: Cleaning

How to Remove Dog Smell from Bagless Vacuum: Best Solution

August 31, 2024 by bigfishtavernlagunaadmin Leave a Comment

Dealing with dog odors in your bagless vacuum can be tough, but don’t worry! This guide will show you how to get dog smell out of a bagless vacuum and keep it fresh. We’ll provide you with simple tips and tricks to tackle dog hair and odors effectively. Follow these steps to ensure your vacuum remains odor-free and your home stays smelling fresh.

How to get dog smell out of bagless vacuum

We’ll cover deep cleaning methods and natural ways to deodorize your vacuum. Learn how to prevent dog smells from returning and keep your vacuum in top working condition. With these tips, you’ll enjoy a vacuum that smells fresh and contributes to a healthier home environment.

How to Get Dog Smell Out of Bagless Vacuum

Dealing with dog smells in your bagless vacuum can be tough. But, there are ways to get rid of these smells. The first step is to find out where the smells come from. Then, use steps to keep your vacuum smelling fresh.

Addressing Pet Odors in Your Vacuum Cleaner

To remove dog smells from your vacuum, start by cleaning the canister, filters, and parts you can take out. Use warm water and mild detergent to clean off pet hair and dirt that smells. Make sure to rinse everything well and let it dry before putting it back together.

Preventing Future Dog Smell Buildup

To stop dog smells from coming back, use a deodorizing powder or baking soda before vacuuming. Put a little bit of powder or baking soda in the canister and let it sit for a few minutes. This helps get rid of any smells and keeps your vacuum fresh.

Also, empty the canister after each use and clean the filters often. This keeps your vacuum working well and smelling good.

By following these steps, you can get rid of dog smells in your vacuum. Regular cleaning and taking steps ahead of time are important. They help keep your vacuum in good shape and your home smelling fresh.

Deep Cleaning Your Bagless Vacuum

Keeping your bagless vacuum clean is key to a fresh home and a well-working vacuum. Regular deep cleaning gets rid of tough dog smells and keeps your vacuum running smoothly. Let’s go through how to clean your bagless vacuum well.

Start by unplugging your vacuum and taking out the canister or dust bin. Then, take apart the vacuum, remembering how each piece fits for easy putting back together. Look inside the vacuum, including the suction hose, filters, and other parts you can remove. Use a soft-bristled brush or a vacuum attachment to carefully remove pet hair or debris.

Next, clean the filter by washing it under warm water and letting it dry completely before putting it back in. If the filter is damaged or too dirty, think about getting a new one to keep your vacuum’s suction strong. Clean the inside of the canister or dust bin with a damp cloth, focusing on any tough pet smells or stains.

After cleaning all parts, put your vacuum back together as the maker says. Make sure to check for any blockages or issues that came up during cleaning. With your vacuum clean and ready, you’ll enjoy a cleaner, fresher home thanks to your hard work in keeping it maintained.

Removing Pet Hair from Vacuum Filters

Keeping your vacuum filter clean is key to removing pet hair and stopping bad smells at home. Over time, pet hair and other stuff can block the filter. This makes your vacuum work less well. Clean your vacuum filter often to keep your dog hair vacuum running great and your home smelling fresh.

Maintaining a Clean Vacuum Filter

To keep your vacuum filter in great shape, just follow these easy steps:

Step

Action

1

Check your vacuum’s manual for how to get to and take out the filter.

2

Lightly tap the filter on a hard surface to get rid of any stuck dog hair or debris.

3

Use a soft-bristle brush or compressed air to clean the filter well, making sure all pet hair is gone.

4

Rinse the filter with clean water if the maker says it’s okay, then let it dry before putting it back in.

5

Put the filter back as the maker says, usually every 6-12 months.

With these easy vacuum cleaning hacks, you can keep your vacuum filter working great. This means your vacuum will have the best suction power and your home will always smell fresh.

Deodorizing Vacuum Canisters and Hoses

Keeping your vacuum fresh is key, especially if you have pets. Over time, the canister and hoses can trap pet odors. But, there are natural ways to keep your vacuum smelling good.

Natural Deodorizing Solutions

Baking soda is great for deodorizing your vacuum. Just put a lot of it in the canister and wait a few hours. Then, empty and clean the vacuum. Baking soda absorbs and neutralizes pet smells, making your vacuum fresh.

Essential oils are another good choice. Scents like lemon, lavender, or eucalyptus can cover up pet odors. Put a few drops of your chosen oil on a clean cloth and wipe the canister and hoses. This method deodorizes and adds a nice smell to your home.

Regular cleaning of your vacuum’s canister and hoses helps prevent pet odors. Using these natural methods, you can keep your deodorized vacuum and pet odor removal vacuum smelling fresh. This ensures a clean home for you and your pets.

Vacuum Maintenance Tips for Pet Owners

As a pet owner, keeping your bagless vacuum cleaner in good shape is key. It helps stop dog hair and odors from building up. Regular maintenance keeps your home fresh and your vacuum working well. Here are some important tips to keep your vacuum in great shape:

Start by setting a cleaning schedule. Empty the canister and clean the filters once a week, or more if your pet sheds a lot. This keeps your vacuum powerful and captures pet hair and dander well.

Don’t forget to replace filters as the maker suggests. Dirty or blocked filters make your vacuum less effective. Always have a new set ready. Think about getting high-quality filters that catch pet hair and smells for a long time.

Maintenance Task

Frequency

Empty Canister

Weekly

Clean Filters

Weekly

Replace Filters

As Needed

Deep Clean Vacuum

Monthly

Also, do a monthly deep clean of your vacuum. Take it apart, clean all you can, and check for any blockages. Cleaning your vacuum well keeps it running right and your home smells nice.

For pet owners, a well-kept vacuum is a must. These simple tips help your bagless vacuum work well and keep your home free of pet smells and hair. Get a fresh vacuum cleaner and enjoy a clean, comfy home with your pets.

Clean Bagless Vacuum, Fresh Home

Having a clean and deodorized bagless vacuum means your home smells fresher. It gets rid of any pet smells, making your home welcoming for you and your pets.

Eliminating Lingering Pet Odors

It’s important to get rid of pet smells in your vacuum for a fresh home. Start by cleaning the vacuum’s canister, hoses, and filters well. Use the tips from before to remove pet hair, dander, and smells.

To get rid of smells, try using baking soda or essential oils. Put baking soda in the vacuum’s canister and let it sit for a few hours before cleaning. Or, add a few drops of pet-safe essential oils like lavender or lemongrass to the filter or a cloth inside the canister.

Cleaning and deodorizing your bagless vacuum well makes your home fresh and inviting. Regular care and proactive steps keep your vacuum working well. This ensures your home stays clean and smells good.

Vacuum Cleaning Hacks for Dog Hair

Dealing with dog hair in your vacuum can be tough, but don’t worry! We have some easy vacuum cleaning hacks to help you. These tips will make your vacuum work better and keep your home clean.

One great trick is to use a lint roller on your vacuum’s crevices and attachments. Roll it over the areas with dog hair, and watch as the hair sticks to the roller. This is great for getting hair out of tight spots.

Another tip is to sprinkle some baking soda on carpets or floors before vacuuming. The baking soda loosens and lifts the dog hair, making it easier for your vacuum to pick up. Let it sit for a few minutes before vacuuming.

For tough pet hair, try using a rubber glove to clean the vacuum’s inside and attachments. The glove’s static electricity attracts and removes hair, leaving your vacuum clean.

Using these simple vacuum cleaning hacks will help you deal with dog hair. Say goodbye to pesky hair and enjoy a clean home. Happy vacuuming!

Remove Pet Smells Vacuum: Baking Soda Trick

If your bagless vacuum smells like pets, don’t worry. A simple trick might be in your kitchen. Baking soda can make your vacuum smell fresh and clean.

To use baking soda, just sprinkle it into your vacuum’s canister or bag. Let it sit for at least 30 minutes or even overnight. This lets the baking soda absorb and neutralize the pet smells.

Once the baking soda has worked its magic, vacuum it up. This not only gets rid of pet smells but also keeps your vacuum running well. It keeps the inside clean and smells fresh.

Adding this baking soda trick to your vacuum routine can change everything for pet owners. Say goodbye to those tough pet smells. Hello to a vacuum that’s fresh and ready for the next cleaning.

Dog Hair Vacuum: Maintaining Suction Power

It’s key to keep your dog hair vacuum in great shape for top performance. A common issue is clogged filters and blocked airways. Cleaning and replacing the filters often can greatly improve your vacuum’s efficiency.

Preventing Clogs and Blockages

To avoid clogs and blockages, start by emptying the canister or bag after each use. This keeps the vacuum clean and prevents hair and debris from clogging it. Also, check the hose and attachments for any blockages and clear them out.

Don’t forget to maintain the brush roll. Over time, it can get tangled with pet hair and debris. Use scissors to carefully cut out any hair or fibers, making sure the brush roll spins freely.

Fresh Vacuum Cleaner: Routine Maintenance

Keeping your bagless vacuum cleaner in top shape is key for a fresh, odor-free home. Regular maintenance keeps your vacuum working well and efficiently. This section offers vacuum maintenance tips to make your fresh vacuum cleaner last longer.

Replacing your vacuum’s filters is a must, as per the manufacturer’s advice. Dirty filters cut down on suction power and cause bad smells. Remember to check and clean or replace filters every few months to keep your vacuum running right.

It’s also vital to empty and clean the vacuum’s canister often. Dust, dirt, and pet hair can make it smell bad over time. Always empty the canister after each use and clean it every few weeks to stop grime from causing smells.

Don’t forget to check and clean the hose, wands, and other attachments too. Hair and debris can trap in these areas, reducing suction and causing smells. Use a soft-bristle brush or a damp cloth to clean them out, keeping your vacuum fresh and effective.

By following these easy vacuum maintenance tips, you can keep your fresh vacuum cleaner running well. A little routine maintenance means a cleaner, fresher home and a vacuum that lasts longer.

Wrapping Up

By using the tips from this guide, you can easily remove dog smell from your bagless vacuum. This keeps your pet-friendly home smelling fresh. You can clean the vacuum filters, use natural items like baking soda and essential oils, and more to fight pet odors.

Keeping your dog hair vacuum clean is important. It helps it work well and stops pet smells from coming back. By cleaning your vacuum regularly, you can have a clean, fresh-smelling vacuum cleaner. This makes your home feel welcoming and nice to be in.

A well-kept vacuum cleaner makes your home cleaner and healthier. It keeps your home free from pet smells. With the tips from this guide, you can easily deodorize your bagless vacuum. This makes your home feel fresh and clean for you and your pets.

Frequently Asked Questions

How can I get dog smell out of my bagless vacuum?

To get rid of dog smells in your vacuum, start by cleaning all parts like the canister, filters, and hoses. Use warm water and mild detergent to clean away pet hair and smells. You might also use baking soda or essential oils to deodorize it.

How do I prevent future dog smell buildup in my vacuum?

To stop dog smells from coming back, empty the vacuum canister often and clean the filters as the maker says. You might also use a vacuum deodorizer or add baking soda to the canister to fight off pet odors.

How do I deep clean my bagless vacuum to remove dog hair and odors?

Deep cleaning your vacuum is key to getting rid of dog smells. Take it apart and clean each part well, like the canister, filters, and hoses. Use warm water and mild detergent, and think about using a vacuum cleaning brush to get rid of pet hair.

How can I maintain a clean vacuum filter to prevent pet odors?

Keeping your vacuum filter clean is important to stop pet smells. Check and clean the filter as the maker suggests, and replace it if needed. You can also wash the filter with warm water and mild detergent to get rid of pet hair and smells.

What are some natural deodorizing solutions for my vacuum canister and hoses?

Natural things like baking soda and essential oils work well to deodorize your vacuum. Put baking soda in the canister and let it sit before emptying it. Or, make a DIY deodorizing spray with water and a few drops of your favorite essential oil to clean the hoses and other parts.

Filed Under: Cleaning

Can You Clean Rugs with a Carpet Cleaner? Expert Tips!

August 30, 2024 by bigfishtavernlagunaadmin Leave a Comment

Wondering if you can clean rugs with a carpet cleaner? The answer is yes, but it depends on several factors. Using a carpet cleaner on your rugs can be an effective way to remove dirt, stains, and odors, but it’s essential to use the right machine and cleaning solution. Some rugs are delicate and require special care, so understanding the type of rug you have and following the manufacturer’s guidelines is crucial. In this article, we’ll explore how to clean rugs with a carpet cleaner safely and effectively, ensuring your rugs stay fresh, vibrant, and damage-free. Whether you have a large area rug or a smaller throw, these tips will help you achieve the best results.

Can You Clean a Rug with a Carpet Cleaner

If you have a busy area rug or a delicate oriental one, this article has the tips and tricks you need. We’ll cover pre-treatment and picking the right carpet shampoo. By the end, you’ll know how to make your rugs look new again.

What is a Rug Cleaning Machine?

A rug cleaning machine, also known as a rug shampooer, is a special tool for cleaning area rugs and other types of rugs. It uses water, cleaning solutions, and suction to remove dirt, stains, and odors. Using a rug cleaning machine can make your rugs last longer, bring back their colors, and make your home look better.

Types of Rug Cleaning Machines

There are many kinds of rug cleaning machines out there, each with its own special features. Some common types are:

Type

Description

Handheld Models

Compact and portable, perfect for cleaning small rugs and spots.

Full-Size Upright Machines

Bigger and more powerful, great for deep cleaning big rugs and carpets.

Rental Units

You can rent them from stores, so you don’t have to buy one.

Benefits of Using a Rug Cleaning Machine

Using a rug cleaning machine has many advantages, such as:

  • Improved rug look and lifespan
  • Great at getting rid of dirt, stains, and smells
  • Brings back the rug’s colors and patterns
  • Saves time and is easier than cleaning by hand
  • A cheaper way to keep your rugs clean than hiring professionals

Whether your rug is small or big and gets a lot of foot traffic, a rug cleaning machine is a great tool. It helps keep your rugs clean and your home fresh.

Preparing Your Rugs for Cleaning

Before you start the deep cleaning rugs process with a carpet cleaner, make sure to prepare your rugs well. This means following a few important steps for a thorough and effective clean.

Start by carefully vacuuming the rug to get rid of loose dirt, debris, and pet hair. This makes the carpet cleaner work better on the deep dirt and rug stain removal. Then, look for any visible stains or spills and treat them with a special carpet shampoo for rugs or spot cleaner.

Also, move the rug to a location with good airflow, like outside or near an open window. This accelerates drying and helps prevent mold or mildew growth.

By preparing your rugs well, you’re setting up for a successful cleaning. This way, your rugs will look and feel new again.

Can You Clean a Rug with a Carpet Cleaner?

Yes, you can! A carpet cleaner is a great way to deep clean your rugs. It penetrates deeply into the fibers to eliminate dirt and stains. It uses special cleaning solutions for different rug materials and has strong suction to leave your rugs fresh.

Advantages of Using a Carpet Cleaner on Rugs

Carpet cleaners have many benefits for cleaning rugs. They can tackle tough stains and dirt that’s deep in the fibers. The solutions are gentle on the rug and the suction lifts out more dirt than manual cleaning.Using a carpet cleaner is also convenient. You don’t need to rent a rug cleaning machine or hire a pro. You can use the carpet cleaner you already have at home. This saves both time and money while still providing a thorough clean. Just make sure to follow the instructions and be careful when using a carpet cleaner on your rugs. This way, you’ll get the best results and keep your rugs safe.

Step-by-Step Guide to Cleaning Rugs with a Carpet Cleaner

Cleaning rugs with a carpet cleaner is easy if you know the steps. Begin by vacuuming the rug to eliminate loose dirt. This makes the cleaner work better.

Can You Clean a Rug with a Carpet Cleaner?

Pre-Treatment for Tough Stains

Then, treat tough stains or dirty spots. Use a special spot remover or solution. This helps the cleaner work better for a deep clean.

After treating the stains, use the carpet cleaner as directed. Mix the solution, apply it, and then suck it up. Make sure to cover the whole rug by overlapping your passes.

By following these steps, your rugs will be clean and fresh. Remember, preparing and using your carpet cleaner right makes a big difference in the outcome.

Choosing the Right Carpet Shampoo for Rugs

Choosing the right carpet shampoo is key when cleaning your rugs. Pick products made for rugs because they are softer on the fibers and don’t leave residue. Think about your rug’s material, how dirty it is, and if it needs special features like odor-fighting or stain resistance.

Can You Clean a Rug with a Carpet Cleaner

To find the best carpet shampoo for rugs, read the product label. Look for “rug-safe,” “low-residue,” or “gentle formula” keywords. These words mean the shampoo is made for your rug’s needs. Also, check the recommended dilution ratio to avoid over-wetting or residue.

For rugs in busy areas or those really dirty, a rug freshener can be a big help. These products clean and make your rugs look new. Some also get rid of odors, making your home smell nice.

Always test any carpet shampoo or rug freshener on a small, hidden part of the rug first. This checks if it works well and won’t harm your rug. With the right product, your rugs will stay clean and last longer.

Area Rug Cleaning Tips and Tricks

Keeping your area rugs clean is key to their beauty and longevity. If you’re facing tough stains or want a deep clean, a carpet cleaner can be a great choice. Here are some tips to make cleaning your area rugs with a carpet cleaner effective.

Dealing with Stubborn Stains

For tough stains, act before using the carpet cleaner. Apply a spot remover or pre-treatment solution to the stain. Let it work as instructed, then clean with the carpet cleaner. This method is effective against even the most persistent stains.When cleaning, clean in sections and overlap your passes for full coverage. Be careful around the rug’s edges, as they’re delicate. This method efficiently tackles even the toughest stains. Regular cleaning with a carpet cleaner keeps your rugs looking great. By following these tips, you can get professional results and keep your rugs’ colors bright and texture plush.

Spot Removal and Stain Treatment

Dealing with tough stains on rugs can be tough, but you can tackle them with the right methods and products. First, blot fresh spills with a clean cloth or paper towels. For set-in stains, try a spot remover or a mix of mild dish soap and water. Allow it to sit for a few minutes before cleaning and rinsing.

Common Rug Stains and How to Remove Them

For tough stains like red wine, grease, or pet messes, use a carpet shampoo made for rug stain removal. Always test cleaners on a small, discreet area first to avoid damaging the rug.

Act fast and use the right products for tough stains. With some effort and the right spot remover or carpet shampoo, you can make your rugs look great again. Keep them looking new for many years.

Can You Clean a Rug with a Carpet Cleaner

Maintaining and Freshening Rugs After Cleaning

After cleaning your rugs with a carpet cleaner, it’s key to keep them looking great. Regular vacuuming helps remove loose dirt and debris. Also, quickly spot-cleaning new stains is a must.

Using a rug freshener or deodorizer is a great way to keep your rugs smelling nice. These products neutralize odors and leave your rugs smelling fresh. When cleaning area rugs, keeping them smelling fresh is as important as the actual cleaning.

It’s important to let your rugs dry completely before putting them back. This prevents mold or mildew from growing. It keeps your rugs in top condition.

With a routine that includes vacuuming, spot-cleaning, and using a rug freshener, your rugs will stay clean and fresh. This way, they’ll look and feel great for many years.

Finishing Statement

Cleaning your rugs with a carpet cleaner is a great way to keep them looking good and lasting longer. This guide provides tips and techniques to simplify the rug cleaning process.You’ll learn how to prepare your rugs, pick the right cleaning solutions, and do a deep clean.

Always test cleaning products on a small, inconspicuous area first.This is important to make sure they won’t harm your rugs. Additionally, consider the material of your rugs and their specific needs.

Using a rug cleaning machine can make cleaning your area rugs and other types of rugs easy. It helps you deep clean and make your floors look new again. By following these steps, you’ll help your rugs maintain their beauty and extend their lifespan.

So, don’t wait to use your carpet cleaner on your rugs. You’ll see the difference it makes. With some care, your rugs will stay attractive and functional for many years.

Frequently Asked Questions

What types of rug cleaning machines are available?

Various types of rug cleaning machines are available. You can find handheld, full-size upright, and rental units. A rug cleaning machine, or rug shampooer, is made to clean area rugs and more. It uses water, cleaning solutions, and suction to remove dirt and stains.

What advantages does using a rug cleaning machine offer?

A rug cleaning machine can prolong the life of your rugs and enhance their appearance by deeply penetrating the fibers to eliminate dirt and stains.The machines use special solutions and strong suction to leave your rugs fresh.

How should I prepare my rugs for cleaning with a carpet cleaner?

Before cleaning, prepare your rugs well. Vacuum to remove loose dirt and spot-treat stains. Make sure the rug is clear of obstacles and furniture. You might move the rug outside for better drying.

What benefits come from using a carpet cleaner on rugs?

Carpet cleaners are highly effective for rugs because they reach deep into the fibers to eliminate dirt and stains. They use special solutions and strong suction for a fresh look and feel.

What’s the best way to clean rugs with a carpet cleaner?

Cleaning rugs with a carpet cleaner is easy but requires some steps. Start by vacuuming the rug. Then, pre-treat tough stains with a spot remover. Use the carpet cleaner as directed, working in sections for complete coverage.

Filed Under: Cleaning

  • « Go to Previous Page
  • Page 1
  • Page 2
  • Page 3
  • Page 4
  • Interim pages omitted …
  • Page 8
  • Go to Next Page »

Primary Sidebar

Recent Posts

  • Can You Deep Fry in a Nonstick Pan? My Surprising Results
  • Clay Pot vs Dutch Oven: Which One Right for You?
  • Are Dutch Ovens Non Toxic? All You Need to Know
  • Is Low Specific Heat Capacity Good for Frying Pans​
  • Smeg Kettle vs Mini Kettle: Which One Fits Your Style?

Copyright © 2024 bigfishtavernlaguna.com. All right reserved.