• Skip to primary navigation
  • Skip to main content
  • Skip to primary sidebar
  • About Us
  • Affiliate Disclosure
  • Contact us
  • Cookie Privacy Policy
  • Privacy Policy
  • Sample Page
  • Terms of Use

Kitchen Guide

  • Appliance Reviews
  • Bakeware
  • Buying Guides
  • Product Comparisons
  • Recipes
  • Essentials
  • Cleaning

Cleaning

How to clean hairspray off tile floor: Easy Methods

August 29, 2024 by bigfishtavernlagunaadmin Leave a Comment

Keeping your tile floor clean can be tough, especially with hairspray residue. This sticky mess can pop up in bathrooms or anywhere else in your home.How to clean hairspray off tile floor, there are simple ways to get rid of it and make your floors look new again. We’ll cover why hairspray residue is a problem, its effects, and how to remove it using natural and commercial cleaners.

Cleaning Hairspray Off Tile Floor

Understanding Hairspray Residue on Tile Floors

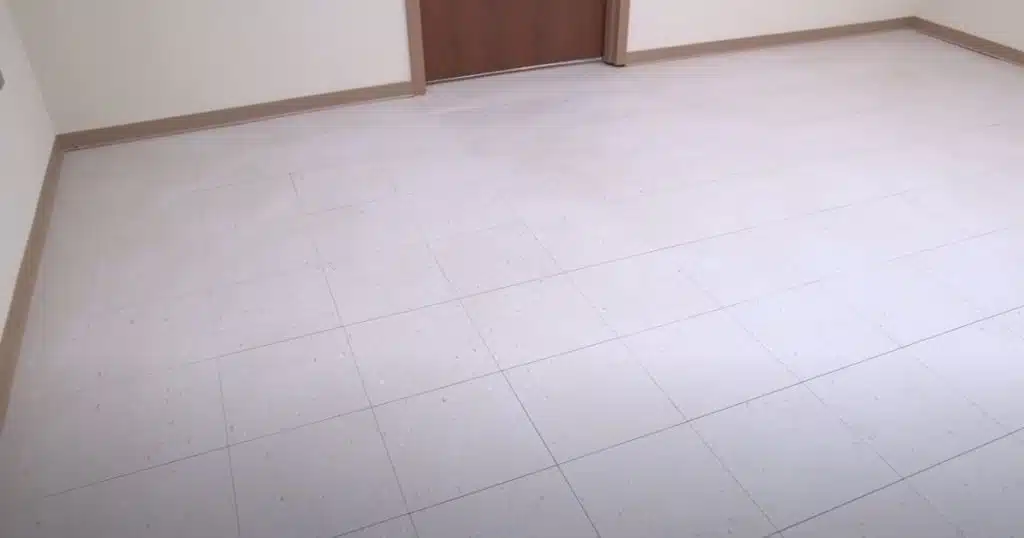
Hairspray is a must-have for many, but it can leave a sticky residue on tile floors. Knowing why it sticks and the damage it can cause is key to keeping your floors clean and looking great.

Why Hairspray Sticks to Tile Surfaces

Tile floors have pores that trap hairspray’s sticky polymers. These polymers help hold hair in place by forming a thin film. When you spray hairspray on the floor, these polymers stick to the tile, making a residue that’s hard to clean.

Potential Damage from Hairspray Buildup

Hairspray residue can cause big problems over time. It can make the tile look bad and harm the grout lines. If ignored, it can damage the tile, leading to cracks or chips.

It’s important to deal with hairspray residue quickly to protect your floors. By understanding why it sticks and the risks, you can keep your tile floors looking great.

Preparing for Hairspray Removal

Before you start removing hairspray from your tile floors, make sure you prepare the area well. To make the cleaning process more efficient and successful, follow these steps to prepare:To ensure a more efficient and successful cleaning process, prepare by following these steps:

First, open windows or turn on fans to improve air circulation. This is because hairspray can release strong fumes. Next, cover furniture, baseboards, and other areas you don’t want to clean with drop cloths or towels.

Collect all the cleaning supplies you’ll need, like a scrub brush, mild detergent or vinegar, and clean rags or paper towels. Having everything ready will make cleaning easier. Look at the tile and find any hairspray stains that need extra cleaning.

By following these steps, you’ll be set to remove the hairspray from your tile floors. With the right tools and a good plan, you can make your floors look clean and fresh again.

Natural Solutions for Cleaning Hairspray Off Tile

You can remove hairspray from tile floors without using harsh chemicals. Effective natural methods are available for cleaning it off. The vinegar and baking soda method, as well as the lemon juice and salt solution, are excellent choices.

Vinegar and Baking Soda Method

White vinegar’s acidity and baking soda’s abrasiveness make a strong cleaning pair. Combine equal parts vinegar and water in a spray bottle, then sprinkle baking soda on the stained areas.

Allow the solution to sit for a few minutes. After, scrub the tile with a stiff brush or sponge. The vinegar breaks down the hairspray, and the baking soda lifts it off.

Cleaning Hairspray Off Tile Floor

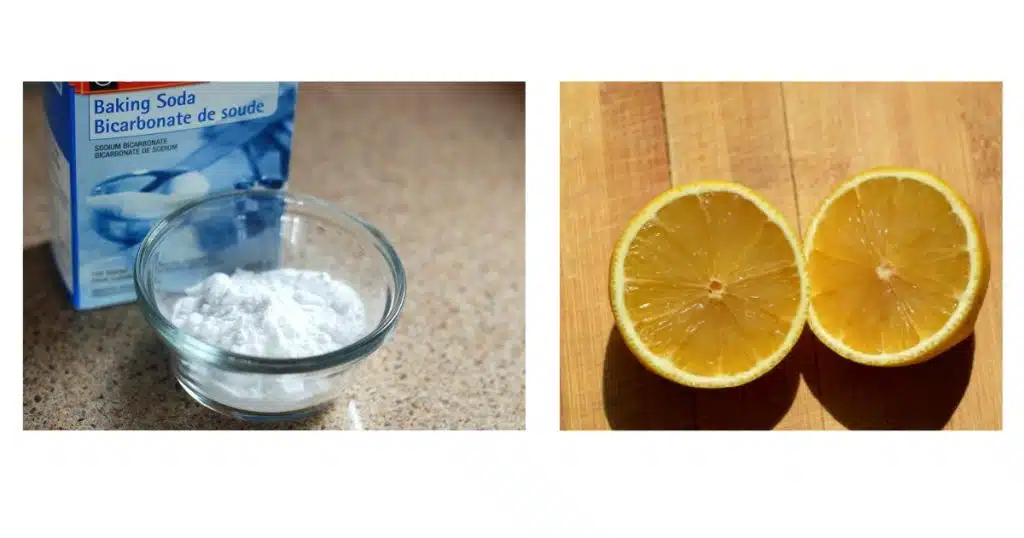
Lemon Juice and Salt Solution

A lemon juice and salt mix is another way to clean hairspray off tile. Pour lemon juice into a bowl and mix in a tablespoon of salt.Stir to make a paste.

Apply the paste to the stains and leave it for 5 to 10 minutes. Next, scrub the area using a damp cloth or sponge.The lemon’s acidity and salt’s grit remove the hairspray, leaving your tiles clean.

These homemade solutions are simple to prepare and use natural ingredients. They’re also gentle on your tile. Experiment with each method to see which one works best for you.

Commercial Cleaning Products for Hairspray Removal

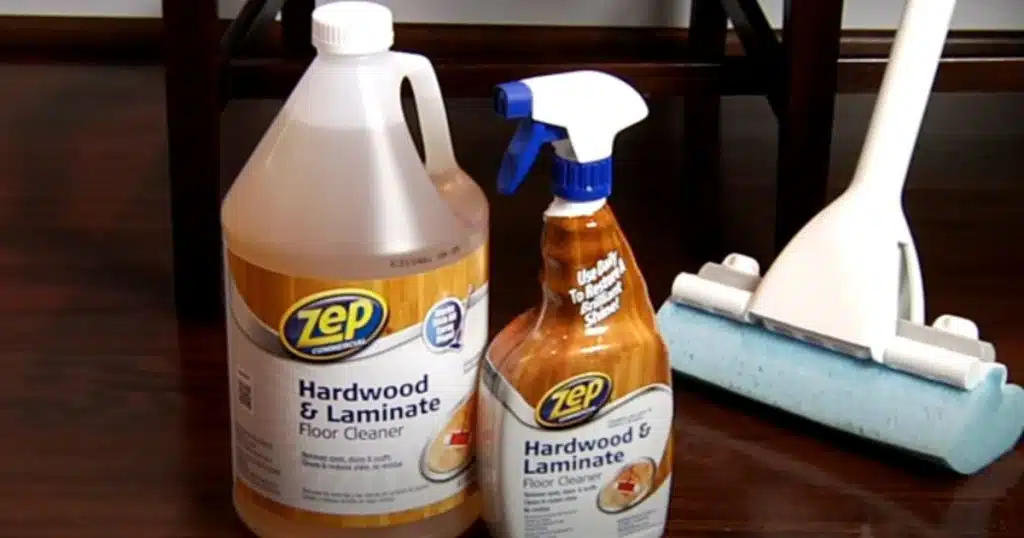
For those who prefer to use commercial cleaning solutions, picking the right product is key. When selecting store-bought cleaners for hairspray, it’s crucial to consider several factors. This ensures the best results.

Choosing the Right Product

When looking at commercial cleaners for hairspray on tile, the active ingredients matter a lot. Look for products with solvents or degreasers like acetone or isopropyl alcohol. These ingredients are made to break down the tough, sticky hairspray residue.

It’s also important to choose cleaners made for tile surfaces. They are less likely to damage or discolor your tile. This way, you avoid any unwanted surprises.

Cleaning Hairspray Off Tile Floor

Safety is crucial when picking a commercial cleaner for hairspray removal. Go for products with fewer harsh chemicals and a user-friendly formula. This ensures they are safer for you and the environment. Always use these cleaners in well-ventilated spaces and wear gloves to safeguard yourself.

By doing your homework and picking the right product, you can keep your tile floors clean and residue-free. With the right commercial cleaner, even stubborn hairspray stains won’t stand a chance.

Tackling Stubborn Hairspray Stains

Dealing with stubborn hairspray stains on your tile floor can be tough. But don’t worry, there are ways to remove even the most difficult hairspray residue and tough hairspray buildup. With the right steps, you can make your tile look new again.

Using special cleaning tools is a good strategy. Look for cleaners with solvents or enzymes made to break down hairspray. Let these cleaners sit for a bit to work on the stubborn hairspray stains.

Combining cleaning methods can also work well. Start with a vinegar and baking soda mix to loosen the difficult hairspray residue. Then, use a targeted cleaner for the tough hairspray buildup. This mix can be very effective in removing tough stains.

Remember, be patient and persistent with stubborn hairspray stains. If the first cleaner doesn’t work, try again. With some effort and the right techniques, you can get rid of those difficult hairspray residue stains for good.

How to Clean Hairspray Off Tile Floor

Removing hairspray from tile floors is easy with the right steps. This guide will show you how to get rid of hairspray and make your tiles look new again.

First, you’ll need a spray bottle, white vinegar, baking soda, and a soft-bristled brush. Mix equal parts vinegar and water in the spray bottle. Apply the solution to the area and allow it to sit for a few minutes to break down the hairspray.

Then, sprinkle baking soda over the damp tiles. Use the brush to scrub gently in circles. The baking soda helps remove the hairspray without damaging the tile.

Tool

Purpose

Spray Bottle

Applying the cleaning solution

White Vinegar

Breaking down hairspray residue

Baking Soda

Gently scrubbing and removing hairspray

Soft-Bristled Scrub Brush

Agitating the cleaning solution

Rinse the tiles with clean water after scrubbing to get rid of any leftover residue. Dry the tiles with a clean cloth or let them air dry. This method will make your tile floors look clean and free of hairspray.

Grout Cleaning After Hairspray Removal

After removing hairspray from your tile floors, it’s key to check the grout. Grout is porous and easily traps hairspray, causing discoloration and damage if ignored.

Importance of Grout Maintenance

Keeping grout clean and sealed is vital for your tile floors’ look and life. If you ignore grout, mold and mildew can grow, and dirt and grime will pile up. Cleaning and sealing the grout protects your floors and keeps them looking great for years.

Cleaning grout after hairspray removal and maintaining grout after tile cleaning is key. It’s a critical step in keeping your tile surfaces clean and whole.

Preventing Future Hairspray Buildup

To keep your tile floor clean, you need to take steps before hairspray buildup happens. Make sure your bathroom or any area where you use hairspray has good airflow. This helps reduce hairspray settling on the tile, making it look clean.

Be careful when you spray hairspray. Try not to spray it directly on the tiles. Instead, spray it on your hair. This simple trick helps avoid hairspray buildup on the tile.

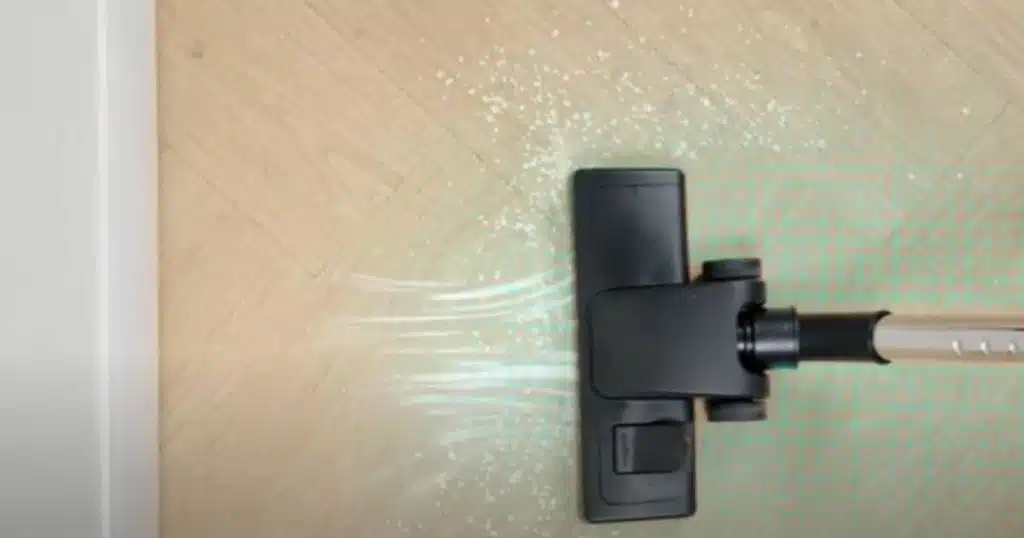
Regular cleaning helps prevent hairspray buildup too. Clean your tile floors every week or month. This keeps them free from hairspray residue. By cleaning often, you keep your tile floors looking great without needing to clean a lot later.

Follow these tips to stop hairspray buildup on your tile floors. A little effort in maintenance saves you from dealing with tough hairspray stains later.

Tips for Maintaining Clean Tile Floors

Keeping tile floors clean is more than just getting rid of hairspray residue. It’s about having a regular cleaning routine and checking on your tile’s condition. These tips will help your tile floors stay clean for many years.

Regular Cleaning Routine

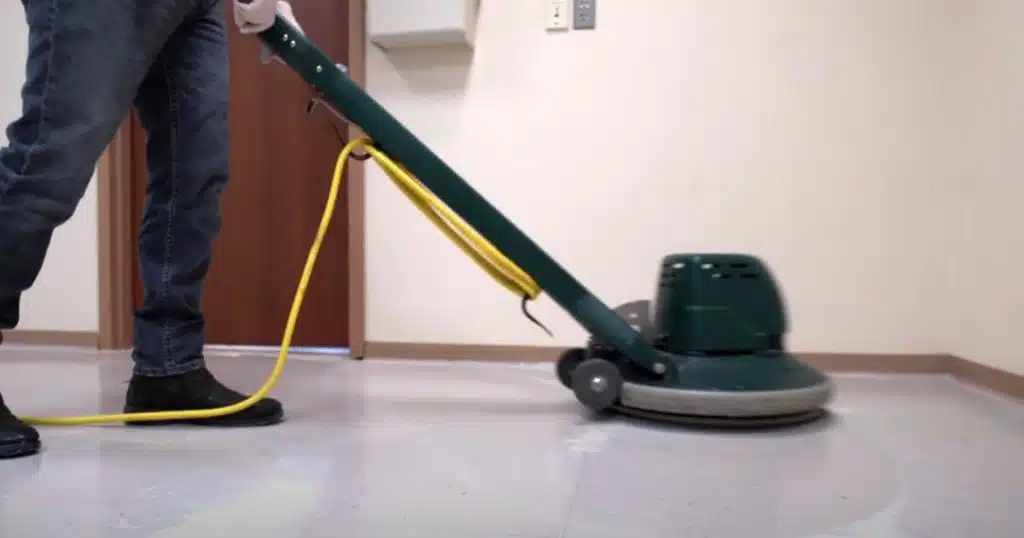
Keeping your tile floors looking great requires consistent cleaning. Create a cleaning schedule that includes sweeping, mopping, and deep cleaning regularly. This prevents dirt and grime from building up and making your tiles look dull. 

When you mop, use a cleaner made for tiles and make sure to rinse well to get rid of any leftover cleaner. For a deeper clean, try a steam mop or scrub the tiles with a stiff brush and mild detergent.

Cleaning Task

Frequency

Sweeping

Daily

Mopping

Weekly

Deep Cleaning

Monthly

Don’t forget how crucial tile floor maintenance is. Regular cleaning not only keeps your floors looking good. It also protects the tiles and grout from damage over time.

Wrapping Up

This guide has shown us how to clean hairspray off tile floors. We learned that using both natural and commercial products works well. Now, homeowners know how to remove hairspray without causing damage.

Keeping tile floors clean means having a regular cleaning routine. It’s good to use eco-friendly products when you can. Quickly fixing any tough stains or grout problems is also key. With the right methods and tools, tile floors can look as good as new.

This article has provided readers with the tools to easily address hairspray buildup. By following the steps outlined, homeowners can maintain their tile floors’ appearance, ensuring a clean and beautiful bathroom.

Frequently Asked Questions

How do I remove hairspray residue from my tile floor?

To get rid of hairspray residue on tile floors, try a mix of vinegar and baking soda. Or use lemon juice and salt. You can also opt for a special tile cleaner made for hairspray removal.

What can I use to clean hairspray off tile floors?

Besides vinegar and baking soda or lemon juice and salt, there are other options. You can use commercial tile cleaners, degreasers, or all-purpose cleaners.

How should I clean the grout after removing hairspray?

After removing hairspray from the tile, clean the grout too. Use a grout brush and a cleaner or a mix of warm water and baking soda. This keeps the grout looking good and prevents future stains.

What are some eco-friendly options for cleaning hairspray off tile floors?

For a green cleaning method, try natural ingredients like vinegar, lemon juice, baking soda, or essential oils. These homemade solutions are good for the planet and effectively remove hairspray residue.

How do I prevent future hairspray buildup on my tile floors?

To prevent hairspray buildup, ensure the area is well-ventilated when you spray.Clean up any spills right away. Also, stick to a regular cleaning schedule for your tile floors. Consider using styling products that don’t leave a sticky residue.

Filed Under: Cleaning

How to Easily Clean Commercial Vinyl Tile Floors

August 26, 2024 by bigfishtavernlagunaadmin Leave a Comment

Keeping Cleaning Commercial Vinyl Tile Floors is key to a professional and welcoming space for your business. This guide offers tips and techniques to keep your floors looking great. You’ll learn how to clean, deep clean, and maintain your floors for their best look and life.

Cleaning Commercial Vinyl Tile Floors

If you run a retail store, office, or any other business, this guide has what you need. It covers cleaning methods, special tools, and best practices. Your floors will stay clean, safe, and protected.

This guide gives you the confidence to clean commercial vinyl tile floors well. Follow these strategies to keep your space looking top-notch. Discover the secrets to easy, lasting care for your floors.

Preparing for Effective Vinyl Floor Cleaning

Getting ready is key to a good and lasting clean on commercial vinyl tile floors. First, collect all the needed supplies and gear. Also, make sure to take safety steps for a safe and successful clean.

Gathering Supplies and Equipment

You’ll need mops, buckets, pH-neutral cleaners, and floor scrubbing machines for vinyl. These machines make cleaning big areas easier. Also, having vinyl floor cleaners for tough stains and scuffs is a must.

Safety Precautions and Protective Gear

When cleaning vinyl floors, safety first. Wear gloves and slip-resistant shoes to avoid accidents and stay comfortable. Also, good ventilation and the right vinyl floor stripping and waxing products keep the cleaning safe and healthy.

By getting the right supplies and focusing on safety, you’re set for a clean vinyl floor. This will impress both clients and employees.

Understanding Vinyl Floor Types and Finishes

Knowing the different types and finishes of commercial vinyl flooring is key for good commercial vinyl flooring maintenance and vinyl floor care tips. There are many styles, textures, and performance levels. Each type needs its own cleaning and care methods.

Luxury vinyl tile (LVT) is a common choice. It looks like wood or stone but is tough and durable. LVT floors have a special layer that protects them from scratches, scuffs, and stains. Keeping them clean with damp mops and deep cleaning now and then is important.

Sheet vinyl is another popular choice. It’s seamless and waterproof. Though it’s easier to maintain, it still needs regular cleaning to stop dirt and stains from building up. Use dry and damp mops with a mild cleaner to keep sheet vinyl floors looking good.

Knowing what your vinyl floors are like is the first step to a good commercial vinyl flooring maintenance and vinyl floor care tips plan. By cleaning and caring for your floors based on their unique needs, they’ll stay looking great and working well for a long time.

Cleaning Commercial Vinyl Tile Floors-Routine Cleaning Procedures

Keeping commercial vinyl tile floors clean needs a regular cleaning plan. This plan includes dry mopping, vacuuming, and damp mopping with a mild, pH-neutral cleaner. By doing these steps, you can get rid of surface dirt and everyday messes. This helps make your commercial vinyl flooring last longer.

Dry Mopping and Vacuuming

Cleaning Commercial Vinyl Tile Floors

Start by dry mopping the vinyl tile floor to remove loose dirt, dust, or debris. Use a high-quality microfiber mop or a dust mop made for commercial use. Sweep the mop over the floor gently, making sure to cover it evenly.

After dry mopping, vacuum the floor to pick up any small particles or debris left behind. This two-step method makes sure the vinyl tile surface is clean and effective.

Damp Mopping with Mild Cleaners

Next, use a damp mopping method to clean any dirt and spills left. Mix a pH-neutral, mild cleaner as the manufacturer says. Dip a clean mop into the solution, wring it out well, and mop the floor in overlapping paths.

This damp mopping will remove stubborn dirt or stains, leaving your commercial vinyl tile floors clean and fresh.

Proper routine cleaning, including dry mopping, vacuuming, and damp mopping with mild cleaners, is key for keeping your commercial vinyl tile flooring looking good. By following these proven cleaning techniques, your floors will always look their best and provide a safe, clean space for your business.

Removing Stubborn Stains and Scuffs

Keeping commercial vinyl tile floors looking new can be tough, especially with tough stains and scuffs. But, the right techniques and products can help. Let’s look at how to spot different stains and clean them right to make your floors shine again.

Identifying Stain Types

First, figure out what kind of stain you’re dealing with. You might face oil-based stains like grease or food spills, or water-based ones like ink or juice. Knowing the type helps you pick the best cleaner and method.

Spot Cleaning Techniques

After identifying the stain, use spot cleaning methods to fix it. For oil stains, you might need a degreaser or solvent cleaner. Water-based stains can be cleaned with a mild detergent or all-purpose cleaner. Always test cleaners on a small, hidden spot first to avoid damage.

For tough scuffs and marks, use a soft brush or non-abrasive pad. Work the cleaner into the area gently, avoiding hard scrubbing to prevent scratches. Rinse well, let it dry, and you’re good to go.

By using these vinyl floor care tips and deep cleaning vinyl floors methods, you can keep your commercial vinyl tile floors looking great. They’ll stay durable and attractive for many years.

Deep Cleaning and Restorative Maintenance

Keeping commercial vinyl tile floors looking great takes more than just regular cleaning. Deep cleaning and restorative maintenance are key to keeping them in top shape. Techniques like stripping and waxing, and polishing and buffing, are vital for this.

Stripping and Waxing

Over time, vinyl floors get dirty and old finishes build up. Stripping the floors removes these layers, showing the original vinyl underneath. Then, applying a new wax coating protects the floors and makes them shine.

Cleaning Commercial Vinyl Tile Floors

This process not only makes the floors look better but also helps them last longer.

Polishing and Buffing

After stripping and waxing, polishing and buffing the floors is the next step. High-speed buffers are used to smooth and refresh the wax, making the floors shine. Doing this regularly keeps the floors looking new and prevents the wax from getting dull.

Adding these deep cleaning and maintenance steps to your routine keeps your commercial spaces looking professional. Regular vinyl floor stripping and waxing, along with deep cleaning vinyl floors, are key to keeping these floors beautiful and lasting a long time.

Specialized Equipment and Products

Cleaning commercial vinyl tile floors needs special tools and products. A key tool is the floor scrubbing machine. It gives a deep clean that traditional mops can’t match. These machines use brushes or pads to get rid of tough dirt and stains easily.

Floor Scrubbing Machines

Floor scrubbing machines are made for commercial vinyl tile floors. They let you adjust the cleaning to fit your space’s needs. You can tackle heavy dirt or clean detailed patterns with ease. Many machines also have built-in water tanks and detergent dispensers, making cleaning easier.

Heavy-Duty Vinyl Floor Cleaners

Using heavy-duty vinyl floor cleaners is key for keeping commercial vinyl tile floors looking good. These cleaners go deep into the floor to remove tough dirt and debris. Choosing cleaners made for commercial vinyl helps protect your floors from damage and keeps them looking great.

Adding floor scrubbing machines and heavy-duty cleaners to your cleaning routine makes it easier and gives better results. Your vinyl tile floors will stay in top shape for a long time.

Preventative Measures and Best Practices

Keeping your vinyl flooring looking great and lasting long is more than just cleaning it regularly. Using preventative steps and best practices helps cut down on deep cleaning. It also makes your floors last longer.

Matting Systems and Entryway Protection

Putting in top-notch matting at all entry points is key to protecting your vinyl floor care tips. These mats catch dirt, debris, and moisture before they hit the floor. This stops them from wearing out your flooring too fast. It’s also important to clean and replace these mats often for the best results.

Scheduling Regular Maintenance

Following a regular cleaning schedule is vital for keeping your commercial vinyl flooring looking good and strong. This means dry mopping, damp mopping with a gentle cleaner, and sometimes deep cleaning with stripping, waxing, and buffing. Doing these tasks often helps stop dirt and scuffs from building up. This keeps your floors looking great for many years.

Final Thought

Keeping commercial vinyl tile floors clean is key to a professional look and making your flooring last longer. This guide has shown you how to clean and maintain your commercial vinyl floors effectively.

It covered the different types of vinyl floors and finishes. It also talked about the best products and tools to use. Now, you know how to keep your commercial vinyl tile floors looking great. Always put safety first, use preventative steps, and keep up with regular cleaning to make sure your commercial vinyl floor cleaning techniques work well.

With the right steps and effort, your commercial vinyl tile floors will stay bright and safe. This makes your space welcoming for customers, employees, and guests. Follow these best practices to improve the cleanliness and look of your commercial areas.

Frequently Asked Questions

What are the essential steps for cleaning commercial vinyl tile floors?

Cleaning commercial vinyl tile floors starts with dry mopping or vacuuming to get rid of dirt. Then, use a mild, pH-neutral cleaner for damp mopping. For tough stains or scuffs, use spot cleaning methods.

What type of equipment and products are recommended for cleaning commercial vinyl floors?

You’ll need mops, buckets, scrubbing machines, and cleaners made for commercial vinyl. Always wear gloves and shoes that prevent slipping while cleaning.

How often should commercial vinyl tile floors be deep cleaned and maintained?

Deep clean commercial vinyl tile floors regularly, including stripping, waxing, polishing, and buffing. How often depends on how much they’re used and the damage they get.

What preventative measures can be taken to maintain the appearance of commercial vinyl tile floors?

Use matting and protect entryways to keep dirt out. Stick to a cleaning schedule to keep your floors looking great.

How can stubborn stains and scuffs be effectively removed from commercial vinyl tile floors?

To remove tough stains, figure out the type and use the right cleaning method. This might mean using special cleaners or techniques for the stain.

Filed Under: Cleaning

Fight Bed Bugs with the Best Steam Cleaner—See Top Picks

August 26, 2024 by bigfishtavernlagunaadmin Leave a Comment

Bed bugs are a big worry for homeowners in the U.S. Finding a chemical-free way to get rid of them is key. Steam cleaning is a powerful, natural method to kill these pests and their eggs. This guide will show you the best steam cleaner for bed bugs. We’ll cover top handheld and vapor steam cleaners to help you take back your home.Whether you’re dealing with a major infestation or aiming to prevent one, the right steam cleaner is your best ally. We’ve explored numerous options to identify the best ones. These cleaners work well without harsh chemicals.

Best Steam Cleaner for Bed Bugs

Steam cleaning kills bed bugs and their eggs safely. It also makes your home healthier for your family. Let’s dive into the latest steam cleaning tech. We’ll give you the info and tools to beat your bed bug problem and make your home safe again.

Understanding the Bed Bug Menace

Bed bug infestations are becoming a big problem in the U.S. These tiny pests can spread fast in any living area. They bring health risks and cause a lot of stress for those who deal with them. It’s important to know how to fight them with the right steam cleaning method.

Bed Bug Infestation: A Growing Concern

Bed bugs are coming back strong, and they’re showing up more in homes, hotels, and other places where people live together. These bugs need human blood to survive and can be hard to spot until it’s too late. They like to hide in small spaces, like cracks and mattresses, making them tough to get rid of.

Health Risks and Psychological Impact

Bed bug bites can cause skin problems, allergic reactions, and sometimes infections. However, the psychological effects can be equally severe. People may feel anxious, can’t sleep, and feel embarrassed, which can really hurt their daily life. It’s important to deal with the problem quickly to lessen these effects.

Why Steam Cleaning is Effective Against Bed Bugs

Steam cleaning is a top choice for getting rid of bed bugs and their eggs. It uses high temperatures that can get into tight spots, like deep in fabrics and crevices. This method is excellent because it’s chemical-free, providing a natural way to combat bed bugs.

The secret to steam cleaning’s success is its ability to kill bed bugs with heat. Bed bugs and their eggs can’t stand the high temperatures, reaching up to 200°F (93°C). This heat kills both the adults and the eggs, stopping the infestation from getting worse.

Steam also gets into small hiding spots where bed bugs like to stay. It goes deep into crevices and seams, making sure to cover every area. This thorough treatment is key to getting rid of bed bugs for good.

Steam cleaning is better for the environment because it avoids the use of harsh chemicals.This is good news for people who want to avoid dangerous pesticides and fumigants. These chemicals can pose risks to both human health and the environment. 

So, steam cleaning is a top pick for fighting bed bug infestations. It uses heat, gets into tight spots, and doesn’t use chemicals. Knowing how steam cleaning works can help people make the best choices for getting rid of bed bugs.

Factors to Consider When Choosing a Steam Cleaner

Selecting the right steam cleaner for bed bugs is essential.You need to look at the steam temperature and pressure, and how easy it is to move around. These factors greatly affect how well the treatment works.

Steam Temperature and Pressure

For killing bed bugs, you need a steam cleaner that gets really hot and has strong pressure. Bed bugs and their eggs are tough. A steam cleaner that can reach 200°F (93°C) will kill both bugs and eggs.

Also, the pressure of the steam matters. A cleaner with high pressure can get into tight spots, like where bed bugs hide. This makes the treatment more effective.

Portability and Maneuverability

When fighting bed bugs, you need a steam cleaner that’s easy to move around. Bed bugs can spread fast, hiding in many places. A light and easy-to-move cleaner helps you clean everything without getting tired.

Design and accessories also matter. Things like long hoses and different attachments help you get into tight spots. This lets you clean everywhere, even the hard parts.

Top 10 Best Steam Cleaner for Bed Bugs

McCulloch MC1375 Canister Steam Cleaner

​Are you tired of spending hours scrubbing away at tough stains and grime, only to be left with less-than-stellar results? If so, it’s time to say goodbye to your old cleaning methods and say hello to the McCulloch MC1375 Canister Steam Cleaner. This powerful tool is designed to revolutionize your cleaning routine, providing you with a quick and efficient way to tackle even the toughest messes. In this review, we’ll take an in-depth look at the features and benefits of the McCulloch MC1375 Canister Steam Cleaner, so you can decide if it’s the right cleaning solution for you. Whether you’re battling built-up dirt in your kitchen, soap scum in your bathroom, or grime on your floors, this steam cleaner is here to make your life easier. So, let’s dive in and discover the cleaning power of the McCulloch MC1375 Canister Steam Cleaner.

Specification

Dimensions: 8″D x 5.2″W x 10.7″H Size: 1-(Pack) Weight: 10.78 pounds Style: MC1375 Design: Canister Voltage: 120 Heat Time: 12 minutes

Pros

  • Long power cord and hose
  • Long run time
  • Long runtime
  • Long steam time

Cons

  • Canister design is heavy and hard to move
  • Long heat-up time
Cheak Price on Amazon

Dupray Neat Steam Cleaner

​If you’re tired of endlessly scrubbing and wiping surfaces, only to have dirt and grime linger, then it’s time to upgrade your cleaning routine. The Dupray Neat Steam Cleaner is here to revolutionize the way you clean your home, offering a powerful and efficient solution that will leave your space looking spotless. With its advanced steam technology and versatile features, this steam cleaner is truly a game-changer. In this review, we will dive into the many benefits and features of the Dupray Neat Steam Cleaner, giving you all the information you need to make an informed decision and take your cleaning game to the next level. Say goodbye to harsh chemicals and wasted hours of scrubbing, and say hello to a cleaner, healthier home with the Dupray Neat Steam Cleaner.

Specification

Weight: 9 pounds Temperature: up to 275°F Size: 10.5″D x 9.5″W x 10.5″H Power: 110 kWh Volume: 1.6 Liters Virus Killing: 99.99%*

Pros

  • Adjustable steam power
  • Large water tank
  • No chemicals necessary
  • Excellent cleaning power
  • Good for people with allergies or asthma

Cons

  • Long heat-up time
  • Small water tank
Cheak Price on Amazon

Wagner Spraytech 0282014 915e On-Demand Steam Cleaner

Are you tired of spending hours scrubbing and cleaning to remove stubborn stains and grime? Look no further than the Wagner Spraytech 0282014 915e On-Demand Steam Cleaner. This powerful cleaning tool uses the power of steam to tackle even the toughest messes, leaving your surfaces spotless and sanitized. Whether you’re cleaning floors, upholstery, or even your outdoor patio, this steam cleaner is designed to deliver exceptional results. In the following sections, we will dive deeper into the features and performance of this product, providing you with all the information you need to make an informed decision. So, let’s get started and discover how the Wagner Spraytech 0282014 915e On-Demand Steam Cleaner can revolutionize your cleaning routine.

Specification

Weight: ‎13.33 pounds Power: ‎1500 W Usage: Floor Style: ‎Steam Tank volume: ‎40 Fluid Ounces Brand: Wagner Spraytech Model: 915 (0282014)

Pros

  • Works 20 minutes per tank
  • Good cleaner for floors, cars, and outdoor equipment
  • Long run time
  • Cleans without chemicals
  • Powerful steamer

Cons

  • Cumbersome to carry
  • Can be awkward to use
Cheak Price on Amazon

Ewbank SC1800 Steam Chief

​Have you ever struggled to keep your home clean and free of dirt and grime? It’s a never-ending battle, but having the right tools can make all the difference. If you’re tired of scrubbing and mopping by hand, then the Ewbank SC1800 Steam Chief might just be the solution you’ve been looking for.

The Ewbank SC1800 Steam Chief is a powerful and versatile steam cleaner that is designed to deep clean and sanitize your home with ease. With its innovative technology and user-friendly features, this steam cleaner makes it easy to tackle tough stains and dirt on a variety of surfaces. From tile floors to carpets, upholstery to windows, the Ewbank SC1800 Steam Chief can handle it all.

In this review, we will take a closer look at the key features and benefits of the Ewbank SC1800 Steam Chief, as well as discuss its overall performance and customer feedback. If you’re considering investing in a steam cleaner for your home, keep reading to discover if the Ewbank SC1800 Steam Chief is the right choice for you.

Specification

Machine type: Steam Cleaner Power: 1800 W Weight: 8.8 pounds Design: Compact Maximum Temperature: 200°F Color: White Tank size: 1.5 Liters Usage: Handheld

Pros

  • Consistent steam power
  • Large water tank
  • Long run time

Cons

  • Long heat-up time
  • Short cord
Cheak Price on Amazon

COSTWAY Multipurpose Steam Cleaner

​In today’s busy world, keeping our homes clean and germ-free has become more important than ever. From dirty floors to greasy kitchen countertops, the list of cleaning tasks seems never-ending. That’s why investing in a high-quality steam cleaner can make all the difference. If you’re in the market for a powerful and versatile cleaning solution, then the COSTWAY 2000W Multipurpose Steam Cleaner is definitely worth considering. With its impressive features and unbeatable performance, this steam cleaner is designed to tackle any cleaning challenge with ease. In this review, we’ll delve into the key features and benefits of the COSTWAY Multipurpose Steam Cleaner, helping you make an informed decision on whether it’s the right choice for your home.

Specification

Size: 5″D x 11″W x 47″H Weight: 13.02 pounds Color: Red Type: Modern Tank: 1.5 Liters Accessories: 19

Pros

  • Large water tank
  • Large water tank for extended cleaning sessions
  • Comes with plenty of accessories for different cleaning tasks

Cons

  • Heavy to carry
  • Heavy at 15 pounds
Cheak Price on Amazon

Dupray Tosca Steam Cleaner

​If you’re tired of spending hours scrubbing and sanitizing your surfaces, then the Dupray Tosca Steam Cleaner might just be the ultimate solution for you. This powerful and versatile steam cleaner is designed to handle even the most challenging cleaning tasks effortlessly. Its advanced features and high-performance capabilities promise to revolutionize your cleaning experience. In this review, we will take a closer look at the Dupray Tosca Steam Cleaner and discover why it has quickly become a must-have tool for both homeowners and professionals alike. So, say goodbye to tiresome scrubbing and hello to a cleaner, healthier living environment with the Dupray Tosca Steam Cleaner.

Specification

Brand: ‎Dupray Weight: ‎16.66 pounds Item Size: ‎16.5″D x 10.5″W x 13″H Package Quantity: ‎1 Cleaning time: Up to 90 minutes per fill up Batteries: Not required

Pros

  • Long 27-foot power cord and 9.8-foot steam hose
  • Made in Italy
  • 10-minute heat up time
  • Lifetime warranty on boile
  • Adjustable steam pressure

Cons

  • Heavy
  • Very heavy
Cheak Price on Amazon

VEVOR Portable Steam Cleaner

Are you tired of spending hours scrubbing and cleaning your home, only to end up with lackluster results? If so, then you’re in luck! In this article, we will be taking a close look at the VEVOR Portable Steam Cleaner – a revolutionary cleaning tool that promises to make your chores a breeze. With its powerful steam technology and compact design, this portable steam cleaner is truly a game-changer for anyone looking to tackle dirt, grime, and stains in the most efficient way possible. So, if you’re ready to say goodbye to traditional cleaning methods and hello to a whole new level of cleanliness, then keep reading as we delve into this VEVOR Portable Steam Cleaner Review.

Specification

Weight: 10.83 pounds Wattage: 1500 Recommended surface: Floors, Marble, Tiles, Windows Model: Steam Cleaner for Home Use Color: White Heating Time: 15s Control: Steam

Pros

  • Large water tank capacity
  • Adjustable steam levels
  • Comes with 20 accessories
  • 20 different attachments for versatile cleaning
  • Express heating

Cons

  • Some customer complaints about quality
  • Short cord
Cheak Price on Amazon

Vapamore MR-100 Primo Steam Cleaner

​Are you tired of spending hours scrubbing and cleaning your home, only to be left with unsatisfactory results?This state-of-the-art tool has changed the way we deal with dirt, grime, and persistent stains. Aspiron Portable Multipurpose Steam Cleaner. With its powerful steam cleaning capabilities, the Vapamore MR-100 Primo Steam Cleaner effortlessly eliminates dirt and bacteria from various surfaces, leaving your home not just clean, but pristine. In this review, we will delve into the features and performance of this remarkable device, so you can make an informed decision on whether it’s the right steam cleaner for you.

Specification

Brand: Vapamore Attachments: 20 Wattage: 1500 Chemical-Free: Yes Model: MR-100 Primo Usage: Professional

Pros

  • Adjustable steam output with continuous steaming
  • Steam canisters replaceable
  • Effective against bedbugs and dust mites
  • Long runtime
  • Great cleaning and steam power for the price

Cons

  • Heavy
  • Cumbersome to use
Cheak Price on Amazon

Aspiron Portable Multipurpose Steam Cleaner

​Are you tired of spending hours scrubbing away at stubborn stains and grime? Do you wish there was a faster and easier way to clean your home? Look no further than the Aspiron Portable Multipurpose Steam Cleaner. This innovative and efficient cleaning tool is designed to make your life easier and your cleaning tasks a breeze. With its powerful steam capabilities, versatility, and compact size, the Aspiron Portable Multipurpose Steam Cleaner is a must-have for any homeowner. In this review, we will delve into the features, benefits, and overall performance of this incredible cleaning machine. Whether you’re tackling kitchen countertops, bathroom tiles, or even your car’s upholstery, the Aspiron Portable Multipurpose Steam Cleaner promises to deliver outstanding results. Join us as we take a closer look at this remarkable product and discover why it’s the perfect choice for all your cleaning needs.

Specification

Color: Silver Assembly required: Yes Weight: 16.66 pounds Water tank: 1.5L Power: 1500 W Model: steam cleaner

Pros

  • 21 useful accessories included
  • Large tank size with long steaming time
  • Extra-long power cord

Cons

  • Short power cord
  • No on-board storage for accessories
Cheak Price on Amazon

Dupray HOME Steam Cleaner

​In today’s fast-paced world, keeping our homes clean and germ-free has become more important than ever. One way to achieve this is by investing in a high-quality steam cleaner that can effectively remove dirt, grime, and bacteria from various surfaces. And when it comes to steam cleaners, the Dupray HOME Steam Cleaner stands out as a top contender. Whether you’re a busy parent trying to keep your home safe for your little ones or a clean freak who wants every nook and cranny spotless, this steam cleaner could be your best companion. In this review, we’ll dive deep into the features, performance, and benefits of the Dupray HOME Steam Cleaner, so you can make an informed decision before purchasing. So, let’s get started and take a closer look at what makes this steam cleaner a worthwhile investment.

Specification

Wattage: 1400 W Cleaning time: 40 minutes Temperature: Up to 293°F Color: White Chemical Free: Yes Product size: 16″D x 10″W x 10″H

Pros

  • Adjustable steam pressure
  • Comes with 14 accessories for a variety of cleaning tasks
  • Adjustable steam pressure and steam temperature

Cons

  • Takes a while to heat up
  • Small water tank
Cheak Price on Amazon

Natural Bed Bug Remedies: Harnessing the Power of Steam

Natural solutions are frequently the most effective choice for combating bed bugs. Steam cleaning is a popular method that uses high-temperature steam to get rid of bed bugs without harsh chemicals. This approach is safe and eco-friendly.

Steam cleaning is a chemical-free way to control bed bugs. The heat from steam cleaners penetrates deep into cracks and fabrics, effectively killing bed bugs and their eggs.This method not only gets rid of the pests but also cleans the area well, ensuring a lasting solution.

Steam cleaning is flexible and works well on various surfaces. It works on mattresses, furniture, carpets, and draperies, targeting where bed bugs hide. By treating these spots well, homeowners can lower the chance of bed bugs coming back and make their homes healthier.

Steam cleaning is also safe for families and pets because it doesn’t use chemicals. It’s a great choice for those who want to avoid the risks of traditional insecticides. Using steam, homeowners can fight bed bugs in a natural and eco-friendly way.

Finishing Statement

Steam cleaning effectively eliminates bed bugs without the need for chemicals. It’s important to pick the right steam cleaner by looking at temperature, pressure, and how easy it is to move. Adding steam cleaning to a full plan helps you fight bed bugs naturally.

Using the right steam cleaner and methods can make your home bug-free. Steam can reach deep into narrow crevices and eradicate bed bugs at every stage of their life cycle, including their eggs. When you mix steam cleaning with other effective strategies, you can keep bed bugs away for good.

Choosing between a handheld or a larger steam cleaner can really help in your fight against bed bugs. Steam cleaning is a chemical-free way to solve this common problem. It lets you take back your home and feel secure in a bed bug-free space.

Frequently Asked Questions

How do vapor steam cleaners perform in eliminating bed bug eggs?

Vapor steam cleaners are great at killing bed bug eggs with their high heat. This is crucial since eggs can resist many treatments. Using vapor steam cleaners ensures all bed bugs are gone.

Is steam cleaning a chemical-free solution for treating bed bug infestations?

Yes, steam cleaning is a chemical-free way to fight bed bugs. It uses high heat to kill bed bugs and their eggs without harmful chemicals, making it a top choice for many.

How do I properly steam clean mattresses and furniture for bed bugs?

To steam clean for bed bugs, use the right techniques and safety steps. Make sure to steam all hidden spots and protect the materials you’re cleaning.

What are some natural bed bug remedies that utilize steam cleaning?

Steam cleaning is a natural way to fight bed bugs. It uses high-temperature steam to kill pests without harsh chemicals or insecticides. This makes it a safe and eco-friendly choice for bed bug control.

Are there any handheld steam cleaners that are effective against bed bugs?

Yes, handheld steam cleaners are great for fighting bed bugs, especially in tight spots. They produce enough heat to kill bed bugs and their eggs.

Filed Under: Cleaning

Make Your Vacuum Smell Better: Easy Tips

August 25, 2024 by bigfishtavernlagunaadmin Leave a Comment

In today’s fast-paced world, keeping our homes clean and fresh is key. Ensuring your vacuum cleaner doesn’t have bad smells is often overlooked. Luckily, there are easy ways to make your vacuum smell better and keep your home inviting.

Make Your Vacuum Smell Better

Dealing with pet smells, musty odors, or wanting to add fragrance to your cleaning routine? This article will show you how to freshen up your vacuum. You’ll learn about using natural ingredients like baking soda and specialized vacuum deodorizers. These solutions help get rid of bad smells and keep your vacuum smelling fresh.

Let’s start exploring ways to make your vacuum smell better. This will make cleaning more pleasant and your home smell fresher.

Common Causes of Bad Vacuum Odors

Accumulation of Dust and Debris

Over time, dust and debris can build up inside your vacuum, creating a musty smell. This happens when particles are not fully removed during vacuuming, and they begin to decompose, leading to an unpleasant odor.

Pet Hair and Dander

Pet hair and dander can accumulate in your vacuum, causing it to emit unpleasant odors. The hair often holds moisture and organic material, creating an environment where bacteria and smells can thrive.

Mold and Mildew

Moist environments, such as vacuums that have sucked up wet debris, can foster mold and mildew growth. These fungi thrive in dark, damp conditions and can produce a distinctive, unpleasant smell.

Dirty Filters and Bags

Filters and bags are designed to trap dirt and dust, but over time, they can become clogged and start to smell. A dirty filter doesn’t just smell bad; it can also reduce your vacuum’s efficiency.

Odor-Causing Spills

Accidentally vacuuming up food particles, liquids, or other odor-causing substances can leave your vacuum smelling less than fresh. These spills can rot and lead to a lingering stench if not addressed promptly.

Vacuum Deodorizer Hacks

Keeping your vacuum smelling fresh is key to a clean home. There are many smart ways to make your vacuum smell nice. Let’s look at some top tips to keep your vacuum smelling great.

One easy trick is to put baking soda in your vacuum’s canister or bag. Baking soda grabs onto bad smells and gets rid of them. You can also mix baking soda with your favorite essential oils, like lavender or lemon, for a custom scent.

Another smart choice is to use special vacuum deodorizers. These can be sprays, discs, or scented bags that make your vacuum smell nice. Just follow what the maker says for the best results.With these easy vacuum deodorizer tips, say hello to a fresh-smelling vacuum. Try these ideas and enjoy a vacuum that smells as clean as it cleans.

Freshen Your Vacuum Cleaner with Natural Ingredients

Keeping your vacuum smelling fresh is key to a clean home. You can use baking soda and essential oils to get rid of bad smells. These natural items will make your vacuum smell nice.

Make Your Vacuum Smell Better

Baking Soda: A Versatile Odor Eliminator

Baking soda is a great choice for fighting vacuum odors. It’s affordable and works well. Just put a lot of baking soda in your vacuum’s dust cup or bag. It will soak up bad smells, making your vacuum smell fresh.

Essential Oils: Adding Pleasant Fragrances

For a nice smell that lasts, try essential oils. Oils like lemon, lavender, or peppermint are great choices. Put a few drops of your favorite oil on a cotton ball or cloth. Then, put it in your vacuum’s dust cup or bag.

As you vacuum, the heat will spread the oil’s scent. This will leave your home smelling nice. Using baking soda and essential oils makes your vacuum smell great. Say hello to a clean, nice-smelling home.

Eliminate Vacuum Odor with Proper Maintenance

Keeping your vacuum cleaner in top shape is key to a fresh smell. Regular cleaning stops dirt and debris from causing bad odors. By taking a few simple steps, your vacuum will stay clean and smell nice.

Cleaning the filters is a must to get rid of vacuum odor. Filters get clogged with dirt and can block airflow, making smells worse. Check your vacuum’s manual for how to clean the filters. Usually, you should rinse them with warm water every few months.

Filter Cleaning Frequency

Vacuum Usage

Every 3-6 months

Light to moderate use

Every 1-3 months

Heavy or frequent use

Don’t forget to clean out the vacuum’s canister or bag too. Buildup there can cause bad smells. Empty the canister or swap the bag often. Use a small brush or crevice tool for tough spots.

These easy maintenance tips will help get rid of vacuum odor. Regularly clean the filters, remove debris, and take good care of your vacuum. This way, your vacuum will work great and keep your home smelling nice.

Remove Vacuum Smell by Cleaning Filters

Keeping your vacuum fresh and odor-free is key to a clean home. Cleaning your vacuum’s filters is a great way to get rid of bad smells. Dirty filters can cause unpleasant odors, so cleaning them often is important.

Step-by-Step Guide to Filter Cleaning

Cleaning your vacuum’s filters is easy and helps remove bad smells. Here’s how to do it:

  1. Find the filter(s) in your vacuum. If you’re not sure, check your owner’s manual.
  2. Take out the filter(s) as the manual says. This might mean pulling it out or unscrewing a cover.
  3. Wash the filter(s) under warm water. Use your hands to gently squeeze and clean off dirt and dust.
  4. Let the filter(s) dry completely before putting them back in. Make sure they’re dry to avoid moisture smells.
  5. Once dry, put the filter(s) back into your vacuum, making sure they fit well.

By doing this often, you can remove vacuum smell and keep your vacuum working well. Clean filters ensure good airflow and suction, making your vacuum smell fresher.

Scented Vacuum Bags: A Fragrant Solution

Keeping your home fresh starts with a clean vacuum. Scented vacuum bags are a great way to do this. They trap dirt and leave your vacuum smelling nice, getting rid of bad smells.

These bags release a nice scent as you vacuum. You can pick from fresh linen, citrus, or floral scents. This makes your home smell clean and welcoming, especially if you’ve had trouble with bad vacuum smells before.

Top-Rated Scented Vacuum Bags

Fragrance

Compatibility

Customer Ratings

Febreze Vacuum Cleaner Bags

Fresh Linen

Most Upright Vacuums

4.7 out of 5 stars

Arm & Hammer Vacuum Cleaner Bags

Fresh Scent

Most Canister Vacuums

4.5 out of 5 stars

Glade Vacuum Cleaner Bags

Citrus Meadow

Select Upright and Canister Models

4.3 out of 5 stars

Adding scented vacuum bags to your cleaning routine is easy and effective. You can choose from many scents like fresh, floral, or citrus. This keeps your vacuum smelling great and your home smelling fresh.

Baking Soda for Vacuum Freshness

Keeping your vacuum smelling fresh is key to a clean home. Baking soda is a great and cheap way to get rid of bad smells in your vacuum. It absorbs and neutralizes odors, making your vacuum smell nice.

How to Use Baking Soda in Your Vacuum

It’s easy to use baking soda to make your vacuum smell better. Just put a lot of baking soda in the vacuum bag or canister. This will soak up any bad smells, leaving your vacuum smelling fresh.

You can also mix baking soda with a bit of your favorite essential oil for a special scent. This makes your vacuum smell nice and fresh.

Another way is to put baking soda on carpets or upholstery before vacuuming. The vacuum will pick up the baking soda and the bad smells, leaving everything smelling clean. This is great for busy areas or places with pets.

Adding baking soda to your vacuum care routine is easy and keeps your home smelling great. Baking soda’s natural odor-fighting abilities make it perfect for keeping your vacuum and home smelling fresh.

Vacuum Air Freshener Sprays and Discs

Keeping your vacuum cleaner smelling fresh is key to a clean and nice home. Regular upkeep, filter cleaning, and using baking soda help a lot. But sometimes, you need a bit more. That’s where vacuum air freshener sprays and discs come in handy.

These products are made to go right into your vacuum, filling the air with a nice scent as you vacuum. They have many scents, like citrus or lavender, to match what you like. Plus, they can last for many cleanings, keeping your vacuum smelling fresh for weeks or even months.

When picking a vacuum air freshener, choose ones made for vacuum cleaners. They’re stronger and last longer than regular air fresheners. Some great choices are the Febreze Vacuum Cleaner Freshener and the Mielle Vacuum Cleaner Deodorizer Disc. Both are easy to use and keep your home smelling fresh and welcoming.

Vacuum Cleaner Fragrance Boosters

Keeping your vacuum cleaner fresh can change how your home smells. Vacuum cleaner fragrance boosters add a nice scent to your vacuum. This makes vacuuming a nicer task, making your home smell clean and welcoming.

Vacuum deodorizer and vacuum cleaner fragrance boosters come in many forms. You can choose from scented discs, sprays, bags, and filters. These options let you pick the scent you like, making your home smell just right.

These boosters help get rid of bad smells or add luxury to cleaning. With a few easy steps, your vacuum becomes a tool that cleans and makes your home smell better.

Looking into vacuum cleaner fragrance boosters can make your home smell fresher and let you express yourself. Enjoy making cleaning more fun and fragrant. It can also make your home cleaner and more comfortable.

Vacuum Odor Eliminator Products

For tough vacuum smells, special odor eliminator products can really help. These products are made to get rid of bad smells, making your vacuum smell fresh. We’ll look at some top vacuum odor eliminators to find the best one for you.

Top-Rated Odor Eliminators for Vacuums

These top-rated odor eliminator products are great for getting rid of strong vacuum smells:

Feature

Full-Size Smeg Kettle

Smeg Mini Kettle

Outer heat

Slightly warm

Warmer to touch

Base insulation

Strong

Good

Using these top vacuum odor eliminator products can make your vacuum smell better. It also makes cleaning more enjoyable.

Bottom Line

Keeping your vacuum fresh is key to a healthy and nice home. This article has given you easy tips to get rid of bad smells. Now, you can have a vacuum that smells good and helps keep your home clean.

Using baking soda and essential oils is a great way to make your vacuum smell better. Also, taking care of your vacuum’s filters is important. And, don’t forget about vacuum deodorizer products for extra help.

With these tips, your vacuum will always be fresh and clean. It will make your home smell nice and stay clean. Try these simple steps to keep your vacuum working well and your home smelling great.

Follow these tips for a vacuum that cleans well and makes your home smell nice. You’ll enjoy a cleaner and more pleasant home with these easy solutions.

Frequently Asked Questions

Why do vacuums develop unpleasant odors?

Vacuums get bad smells from dust, debris, and bacteria that build up. Things like pet hair, spills, and wear and tear add to the smell.

How can I keep my vacuum smelling fresh?

To keep your vacuum smelling good, try using baking soda, essential oils, and special vacuum deodorizers. Clean the filters and remove debris regularly to help too.

What are some DIY vacuum deodorizer hacks?

For DIY vacuum deodorizers, mix baking soda and essential oils to fight smells. You can also buy vacuum air fresheners and fragrance boosters.

How do I clean my vacuum filters to remove odors?

Clean your vacuum’s filters to get rid of smells. Follow a guide to clean them right. This keeps your vacuum working well and smelling fresh.

Are scented vacuum bags a good option for keeping my vacuum smelling fresh?

Yes, scented vacuum bags make it easy to keep your vacuum smelling nice. Learn about their benefits and check out the best ones.

Filed Under: Cleaning

How to Get Nail Polish Out of Tile Floor | Easy Method

August 21, 2024 by bigfishtavernlagunaadmin Leave a Comment

Accidents can happen, and when nail polish spills on your tile floor, it can be a big problem. But how to get nail polish out of tile floor, but don’t worry, we have effective methods and simple tips to help you. Whether it’s a fresh spill or a dried stain, we’ll guide you through the steps to get your tile looking new again.

How to get nail polish out of tile floor

Key Takeaways

  • Act quickly to address nail polish spills on tile floors for best results
  • Identify the type of tile to determine the appropriate removal method
  • Use a combination of blotting, scraping, and solvents to effectively lift nail polish stains
  • Stubborn or dried stains may require baking soda and vinegar for deep cleaning
  • Proper tile cleaning and maintenance after removal is crucial to prevent future stains

Removing Nail Polish Stains from Tile Floors

Acting quickly is crucial when you have nail polish stains on tile floors. The longer a stain sits, the more difficult it becomes to remove. Knowing the type of tile you have is key, as different materials need different cleaning methods.

Act Quickly for Best Results

When you see nail polish on your tile floor, act fast. Starting the clean-up right away increases your chances of removing nail polish stains. Waiting can cause the polish to sink into the tile, making removal tough.

Identifying the Type of Tile

  • Ceramic and porcelain tiles work well with solvents and commercial removers.
  • Natural stone like marble or granite needs a gentle touch to avoid damage.
  • Knowing your tile type helps pick the best nail polish spill cleanup on tiles method.

Quick action and knowing your tile type lead to getting dried nail polish off tile floors. This approach will help you make your space look brand new again.

Essential Supplies for Nail Polish Removal

Removing nail polish stains from tile floors can be tough. However, having the right supplies makes it easier. Whether it’s a new spill or an old stain, the right cleaning tools and products can help a lot.

Start with a good nail polish remover. Choose one with acetone, as it works well on tile surfaces. Rubbing alcohol is also good for getting rid of nail polish.

  • Nail polish remover (with acetone)
  • Rubbing alcohol
  • Baking soda
  • White vinegar
  • Clean rags or paper towels

Baking soda is also key. Mix it with water or vinegar to form a paste. This paste can help remove tough stains from tiles. White vinegar is great for cleaning and breaking down stains.

Don’t forget clean rags or paper towels. You’ll need them for cleaning and removing polish residue as you work.

With these supplies, you can easily clean up after nail polish spills. You’ll be able to remove stubborn stains from your tiles quickly and effectively. Just use the right tools and some effort to get your tiles looking new again.

Step-by-Step Guide: How to Get Nail Polish Out of Tile Floor

Removing nail polish from your tile floor is easier than you think. With the right tools and methods, you can make your floors look new again. Here’s a simple guide to help you get nail polish out of the tile floor.

How to get nail polish out of tile floor

Blotting and Scraping

Start by blotting the stain with a clean cloth or paper towels. Press down gently to soak up as much polish as you can. Do not rub the stain, as it could make it spread more. Then, use a plastic scraper or a dull knife to carefully remove any dried polish from the tile.

Applying a Solvent or Remover

After removing the excess, focus on the nail polish stain on the tile. Put a little solvent or nail polish remover on the stain. For optimal results, follow the product’s instructions. Allow it to sit for a few minutes, then scrub with a soft brush or sponge.

If the stain is still there, you might need to repeat the process. Avoid pressing too hard, as it could damage the tile. Always work in a well-ventilated area and wear gloves to protect your hands.

With patience and the proper steps, removing nail polish from tile floors can be done easily. Follow these instructions to get your tile floors clean and stain-free quickly.

Dealing with Dried or Stubborn Nail Polish Stains

If you have a dried or stubborn nail polish stain on your tile floor, don’t worry. There’s a simple solution to help remove even the toughest stains. By using baking soda and vinegar together, you can make a powerful cleaner for nail polish stains on tile floors.

Using Baking Soda and Vinegar

First, mix equal parts of baking soda and white vinegar in a small bowl. This mix forms a paste that you can apply to the stain with a soft-bristled brush or cloth.The baking soda lifts and breaks down the nail polish. The vinegar dissolves and removes any left-over stains. If the stain is very stubborn, you might need to do this a few times to fully remove it.

“The combination of baking soda and vinegar is a game-changer when it comes to removing dried or stubborn nail polish stains from tile floors.”After removing the stain, rinse the area with clean water and dry it completely. This prevents moisture or residue from staying behind. With a bit of effort and this simple method, you can easily get rid of nail polish stains on your tile floors.

Tile Cleaning and Maintenance After Removal

After removing nail polish stains from your tile floors, it’s key to clean and maintain the surface well. This makes sure the tile looks great and stops any discoloration or damage.

Start by using a tile cleaner or a mixture of warm water and mild detergent. Gently scrub the area where the stain was, paying attention to any lingering residue. Rinse the tile well to get rid of any cleaning solution and let it dry completely.

Sealing the tile after cleaning is also a smart move. It protects the tile and stops future stains. Use a tile sealant or polish to keep your floors looking new and bright.

Ongoing Tile Maintenance

To keep your tile floors clean and lasting long, set up a regular cleaning schedule. Regularly sweep or vacuum to remove dirt and debris. Damp mop the tile with a pH-neutral cleaner every few weeks, based on how much it’s used.

If you get a tough stain or discoloration, deal with it quickly. The quicker you tackle it, the easier it will be to remove, and the better your tile will appear. By cleaning and maintaining your tile floors after a nail polish spill, you can make sure they look their best. With the proper products and methods, you can easily bring the shine back to your tile.

Preventing Future Nail Polish Spills on Tiles

Spilling nail polish on your tile floor can be frustrating. But, you can prevent future incidents with a few simple steps. Designate a specific area for your nail care to avoid spills.

How to get nail polish out of tile floor

Creating a Designated Nail Area

Choose a spot in your home for painting your nails, like a vanity or a table. Make sure it has a protective surface, like a towel or a mat, to catch drips. Taking this approach can greatly reduce the risk of spills on your tile floors.

  • Select a suitable spot in your home for nail care activities.
  • Cover the surface with a towel, mat, or other protective material to catch any nail polish drips.
  • Keep all nail polish, remover, and other related items within this designated area.
  • Avoid moving around with wet nail polish to prevent it from dripping onto the tile floor.

Removing Nail Polish from Different Tile Materials

Removing Nail Polish from Different Tile Materials.Removing nail polish stains from tile floors depends on the tile type. For ceramic and porcelain tiles, the methods mentioned earlier work well. Natural stone tiles such as marble or granite require a gentle approach to avoid damage.

Ceramic and Porcelain Tiles

The same methods are effective for ceramic and porcelain tiles. Use a solvent-based nail polish remover, rubbing alcohol, or a tile cleaner made for these stains.Always test the solution on a small, hidden area first to ensure it won’t damage the tile.

Natural Stone Tiles

Natural stone tiles, like marble and granite, need careful maintenance. Avoid harsh solvents or abrasive cleaners to prevent damage. Instead, opt for a mild detergent or a cleaner formulated specifically for stone. Gently blot the stain and don’t rub too hard to avoid spreading it.

To remove nail polish from any tile, act fast and choose the right cleaning method for the tile type. Identifying the tile and picking the correct products helps you remove stains effectively. This way, you can get your tile floors looking new again.

Common Mistakes to Avoid During Removal

When trying to get rid of nail polish stains from tile, be careful not to make mistakes that could harm your floors. Here are some key mistakes to avoid for a successful tile floor stain remover for a nail polish job.

  1. Excessive Scrubbing or Abrasion – Don’t scrub too hard, as it might scratch or dull the tile. Use gentle movements and avoid harsh materials that could damage your floors.
  2. Inappropriate Solvents or Cleaners – Not all cleaners are safe for all surfaces. Using the wrong best way to clean nail polish off tiles can cause discoloration or more damage. Always check which solvents or removers are safe for your tile type.
  3. Neglecting Prompt Action – The longer you wait to clean a nail polish spill, the harder it is to remove. Clean it as soon as you can for the best chance of success.
  4. Overlooking Tile Maintenance – After removing the nail polish, clean and seal your tile floors well. This protects them from future stains and keeps them looking good for longer.

By watching out for these common errors and taking the right steps, you can remove nail polish stains from tile without harming your floors.

Wrapping Up

Removing nail polish from tile floors is easier than you think with the right tools and steps. This guide has shown you how to get your tile looking new again. Always test cleaners on a small area first and protect your hands and floors while cleaning.

Whether it’s a new spill or an old stain, this guide has the solutions you need. You can use solvents, removers, baking soda, and vinegar to clean up. Now, you know how to get nail polish out of your tile floor confidently.

Be careful and use preventative steps to avoid future nail polish incidents. Designate a specific area for nail care to help. With the right steps and effort, you can make your tile look new again. Enjoy a clean, stain-free floor once more.

FAQ

How do I remove stubborn nail polish from tiled floors?

Start by blotting and scraping the stain. Then, apply a remover or solvent and let it sit. If it’s still there, try a baking soda and vinegar mix.

How do I prevent future nail polish spills on tiles?

Designate a specific area for nail care with a protective surface. This can prevent spills and save you from cleaning nail polish stains later.

How do I clean up a nail polish spill on tiles?

Act fast and blot the spill with a cloth or paper towels. Next, apply a remover or solvent and scrub. Rinse and dry well to prevent staining.

What’s the most effective way to clean nail polish off tiles?

Start by blotting and scraping the stain to remove polish. Next, use a nail polish remover or solvent as instructed. For dried stains, a baking soda and vinegar mix can help.

What are some nail polish stain hacks for tiles?

A good hack is using a baking soda and vinegar mix.Make a paste, spread it on the stain, and scrub gently.The mix can lift even stubborn stains.

Filed Under: Cleaning

How to Clean Central Vacuum: Easy Maintenance Tips

August 20, 2024 by bigfishtavernlagunaadmin Leave a Comment

Keeping your central vacuum system in good shape is key for its performance and longevity. It doesn’t matter if you’re new to homeownership or have had a central vacuum for years. But how to clean central vacuum, Knowing the right way to clean and maintain it can make a huge difference. This guide will show you how to keep your central vacuum running smoothly, from emptying the canister to deep cleaning the power unit.

How to Clean Central Vacuum

Understanding Your Central Vacuum System

Before you start cleaning your central vacuum system, it’s key to know its main parts and what they do. This knowledge helps you keep your system running well and ensures it works as it should.

Key Components and Their Functions

The power unit is at the center of a central vacuum system. It has the motor and makes the suction power. The hose connects to the power unit and is where you remove debris. Filters are vital in catching dust, allergens, and other small particles.

The canister is usually in a closet or basement. It holds the debris from the hose. It’s important to empty the canister regularly to keep the suction strong and avoid backflow problems.

Benefits of Regular Maintenance

Regular upkeep of your central vacuum system has many advantages. Cleaning and changing filters can make the system work better, last longer, and keep your home cleaner and healthier. Knowing about the central vacuum components and how they work helps you get the most out of central vacuum maintenance benefits.

Preparing for Cleaning Your Central Vacuum

Before you start cleaning your central vacuum, there are important steps to take. These steps make sure your cleaning is thorough and efficient. They also help keep your central vacuum working well for a long time.

By following these steps, you’re ready for a detailed and successful central vacuum cleaning. This will keep your system running well for many years.

Emptying the Central Vacuum Canister

Regularly emptying the canister is key to keeping your central vacuum system running well. It also contributes to keeping your home clean and healthy. By following simple steps, you can empty the canister and get rid of central vacuum debris in an eco-friendly way.

How to Clean Central Vacuum

Step-by-Step Instructions

Emptying the canister is easy. First, find the canister, usually near the power unit or in a special spot. Carefully take the canister off the vacuum hose to avoid spills. Next, open the canister and transfer the debris into a bag or container for disposal.Make sure the canister is empty before putting everything back together.

Disposal Tips for Collected Debris

After emptying the canister, dispose of the central vacuum debris correctly. Don’t just throw it in the trash because some parts might be harmful to the environment or your health. Here are some eco-friendly ways to get rid of it:

Disposal Method

Benefits

Compost

If the debris is mostly organic stuff like pet hair or dust, add it to your compost bin. It will help your garden grow.

Recycling

Some debris, like paper or cardboard, can go in your recycling bin. This cuts down on waste and protects natural resources.

Hazardous Waste Disposal

For dangerous materials like chemicals or electronics, take it to a special place for hazardous waste. This keeps the environment safe.

By following these steps and using eco-friendly ways to dispose of debris, you can easily take care of your central vacuum. This helps keep your home clean and supports a healthier planet.

How to clean central vacuum

Keeping your central vacuum clean is key for its best performance and long life. Regular cleaning of its parts helps your vacuum work well and last longer. Let’s look at how to clean your central vacuum to keep it running smoothly.

How to Clean Central Vacuum

Cleaning the Power Unit

The power unit is the core of your central vacuum system, so maintaining its cleanliness is crucial. Begin by unplugging the unit and wiping down the exterior with a soft-bristle brush or microfiber cloth.Open the motor and cyclonic chamber according to the manufacturer’s instructions. Use a vacuum attachment or compressed air to carefully clean internal parts, avoiding electrical components. Reassemble the unit, verify all connections, and test it to ensure it operates correctly.

Maintaining the Hose and Attachments

A clean hose ensures effective performance. Disconnect the hose from the vacuum unit and clear any blockages using a flexible rod or a specialized hose cleaning tool. For severe clogs, a wet/dry vacuum attachment can help remove debris, but make sure the hose is disconnected first. After cleaning, inspect the hose for damage, such as cracks or kinks, and replace it if needed to maintain airflow and suction power.

Cleaning the Filter

The filter is crucial for capturing dirt and particles, safeguarding the motor.  The filter is essential for trapping dirt and particles to protect the motor. Depending on your system, it may be either disposable or reusable. Replace disposable filters every 6-12 months or when they appear dirty. For reusable filters, shake off loose dirt and rinse under water, ensuring it’s completely dry before reinserting.

Proper filter maintenance enhances suction power and prolongs the life of your vacuum system. Following these maintenance steps will help your central vacuum system run efficiently, ensuring effective cleaning and a longer lifespan. Regular upkeep will help maintain performance and efficiency, making your home cleaner and more comfortable.

Troubleshooting Common Central Vacuum Issues

Even the best central vacuum systems can sometimes have problems. Issues like reduced suction or strange noises can happen. Knowing how to fix these problems is important for a smooth-running system. We’ll look at some common troubleshooting tips to help you fix your system quickly.

Identifying and Resolving Problems

Reduced Suction: Check for a dirty filter, blocked hose, or issues with the power unit. Clean or replace the filter, remove any hose blockages, and service the power unit if necessary.

Strange Noises: Grinding or squealing noises might indicate problems with the motor, bearings, or other parts. Consulting a professional is advisable when encountering these unusual sounds.

Vacuum Won’t Turn On: This might be due to a tripped circuit breaker, a broken switch, or wiring issues. Start by checking the circuit breaker, and seek technician assistance if needed.

Check for Blockages: Regularly check and remove any blockages from the hose or other components to maintain optimal performance.

Inspect for Damage: Examine the vacuum system for any signs of wear or damage that could impact its functionality, and address issues promptly.

Central Vacuum Maintenance Schedule

To keep your central vacuum system efficient and long-lasting, it’s essential to regularly clean and maintain it in optimal condition. This ensures your system works well, giving you a cleaner home.

The need for maintenance varies based on your home’s size, usage, and the debris it collects. Here’s a basic maintenance plan to follow:

Task

Recommended Frequency

Emptying the Canister

Every 1-2 weeks, or when it’s half full

Cleaning the Filter

Every 6-12 months, or as needed

Cleaning the Hose

Every 6-12 months, or as needed

Cleaning the Power Unit

Annually, or as needed

Stick to this maintenance plan to make your system last longer and work better. Remember, your vacuum might need different care. Always check the manufacturer’s advice for specific needs.

Tips for Extending Central Vacuum Lifespan

To maximize the lifespan of your central vacuum system and ensure it operates efficiently, consider these key tips:

  • Avoid overloading the canister to prevent motor damage and use the appropriate attachments for different tasks.
  • Handle the vacuum hose and attachments gently to avoid kinks and damage.
  • Coil the hose neatly and store accessories like wands and brushes in a designated spot to prevent wear and tear.
  • Maintain a regular cleaning and upkeep routine to ensure the system operates smoothly.

Ensure you’re using the vacuum effectively, adjusting settings as needed for different cleaning tasks.

Final Thought

Proper cleaning and maintenance are vital for ensuring the longevity and efficiency of your central vacuum system. Following this guide ensures your vacuum performs well, keeps your home clean, and extends its lifespan. Regular care enhances air quality, prevents issues, and saves on future repair costs. With the right maintenance, your central vacuum system will stay effective and dependable for many years. By investing a little time in its upkeep, you’ll enjoy the benefits of a reliable and efficient cleaning system, contributing to a healthier and more comfortable home.

FAQ

What are the key components of a central vacuum system?

A central vacuum system has the power unit, hose, attachments, filters, and pipes in the home.

Why is regular maintenance important for a central vacuum system?

Keeping your central vacuum system maintained is key. It ensures it works well, lasts longer, and keeps your home clean and healthy.

How do I prepare my central vacuum system for cleaning?

First, unplug the power unit. Then, gather your cleaning tools and supplies. Finally, set up a work area to catch any debris.

How do I properly empty the central vacuum canister?

Emptying the canister starts with unplugging the power unit. Next, take out the canister and throw away the debris in an eco-friendly way.

What are some techniques for cleaning the central vacuum power unit?

Clean the power unit by removing and washing the cyclonic chamber. Check and change the filters. Use a vacuum attachment to clean inside the unit.

Filed Under: Cleaning

Can You Use a Carpet Cleaner on Vinyl Floors

August 19, 2024 by bigfishtavernlagunaadmin Leave a Comment

As a homeowner, keeping your vinyl floors looking great is key. Whether can you use a carpet cleaner on vinyl floors, We’ll look into this topic and give you the info you need to keep your floors looking new.Vinyl floors are well-loved for their durability and ease of maintenance. Introduction to vinyl flooring But, not every cleaning method for carpets works on vinyl. It’s important to know the special needs of your vinyl floors and the dangers of using carpet cleaners.

Can you use a carpet cleaner on vinyl floors

Introduction to Vinyl Flooring

Vinyl flooring is a top pick for those wanting a tough, easy-care, and water-proof floor. It fits well in both homes and businesses. With many styles, from classic wood looks to bold designs, it matches any decor.

Understanding Vinyl Floor Types

There are different types of vinyl flooring. Luxury vinyl tile (LVT) and luxury vinyl plank (LVP) are well-known for their realistic appearance.They can look like hardwood or stone. These floors are thicker and last longer than sheet vinyl, great for busy areas.

Advantage

Description

Durability

Vinyl floors stand up well to scratches, dents, and wear. They’re perfect for homes with kids or pets.

Water Resistance

Being waterproof, vinyl is great for bathrooms, kitchens, and areas with spills.

Easy Maintenance

Keeping vinyl floors clean is simple. Just sweep, damp mop, and deep clean now and then.

Versatile Aesthetics

Vinyl floors offer many patterns and colors. This lets homeowners find the ideal style for their space.

Vinyl flooring is loved for its toughness, water resistance, and simple upkeep. It’s a smart and good-looking choice for floor care.

Is It Right or Worng to Can You Use a Carpet Cleaner on Vinyl Floors?

Many homeowners ask if they can use a carpet cleaner on vinyl floors. Carpet cleaners work well on carpets but might not be safe for vinyl floors. Vinyl floors are different from carpets and can be damaged by harsh chemicals or rough cleaning methods.

Using a carpet cleaner on vinyl floors depends on several things. These include the type of vinyl floor, the carpet cleaner, and how you clean. Here are some important points to consider:

Consideration

Explanation

Vinyl Floor Type

Different types of vinyl floors, such as luxury vinyl tiles (LVT) or sheet vinyl, may have varying levels of durability and sensitivity to harsh chemicals.

Carpet Cleaner Ingredients

Carpet cleaners often contain strong detergents, solvents, and other chemicals that can potentially damage or discolor vinyl floors.

Cleaning Methods

Aggressive scrubbing or the use of high-pressure steam cleaners can also compromise the integrity of vinyl flooring.

To keep your vinyl floors safe and looking good, use cleaning products and methods made for vinyl. Don’t rely on carpet cleaners. This way, you avoid any damage or color changes to your floors.

Precautions for Using Carpet Cleaners

Using carpet cleaners on vinyl floors needs careful steps to protect your floors. Carpet cleaners work well for deep cleaning but might not fit all vinyl floors. Also, harsh chemicals can change the color or damage the floor.

Checking Product Compatibility

Before using a carpet cleaner, read the label and instructions closely. Make sure it’s made for vinyl floors or works on many types of flooring. Not checking this can lead to residue or a slippery floor.

Avoiding Harsh Chemicals

Traditional carpet cleaners often have harsh chemicals that harm vinyl floors. These can break down the vinyl’s protective layer, causing fading, cracking, or discoloration. Choose cleaners labeled as “vinyl-safe” or “low-residue” to avoid damage.

Safe Cleaning Solutions for Vinyl Floors

Keeping your vinyl floors looking great is key. It’s important to use the right cleaners. Stay away from harsh chemicals and choose products made for vinyl floors. These safe cleaners help keep your floors clean without harm.

A gentle, pH-balanced floor cleaner is an excellent choice. It gently removes dirt and doesn’t leave residue. Just mix it with water and mop for a clean look.

Vinegar is a great option for cleaning vinyl floors. Mix equal parts white vinegar and water in a spray bottle, then spray and wipe to safely remove grease and grime.

For tougher stains, consider using a baking soda paste. Simply mix baking soda with water, then gently scrub the stain with a soft brush or cloth.

This method effectively lifts stains without scratching the floor. By using the right cleaning solutions, you can keep your vinyl floors looking their best. Opt for household products that are both safe and effective.

Proper Vinyl Floor Cleaning Techniques

Maintaining the beauty of your vinyl floors requires a thoughtful approach to cleaning. By mastering the right techniques, you can keep your floors in pristine condition. Let’s delve into the essential steps for effective vinyl floor care.

Can you use a carpet cleaner on vinyl floors

Sweeping and Vacuuming

The first step in cleaning your vinyl floors is to sweep or vacuum them regularly. This removes loose dirt, dust, and debris, preventing scratches and wear. Use a soft-bristled broom or a vacuum with a hard-floor attachment to ensure you clean thoroughly without damaging the vinyl surface.

Damp Mop

After sweeping or vacuuming, proceed with damp mopping. This method is ideal for vinyl floors, as it cleans effectively without over-saturating the surface. Use a quality vinyl floor cleaner diluted in water, and be sure to wring out the mop thoroughly to avoid leaving excess moisture behind. This keeps your floors clean while protecting them from water damage. By following these cleaning techniques, you can keep your vinyl floors looking new and prolong their lifespan. Proper floor care is crucial for maintaining their appearance and durability over the years.

Maintaining Vinyl Floors

To keep your vinyl floors in excellent condition, it’s important to establish a regular cleaning routine. Frequent cleaning not only preserves their beauty but also ensures their longevity. With a few simple practices, your floors will stay spotless for years to come.

Regular Cleaning Routine

The frequency of cleaning your vinyl floors depends on the level of foot traffic they receive. A weekly sweep or vacuum is recommended to remove dirt and debris, while a damp mop every two to three weeks helps tackle tougher stains. When mopping, use a pH-neutral cleaner diluted with water, as recommended by the manufacturer.

 Avoid harsh chemicals and abrasive scrubbers, as they can damage the vinyl. Opt for a soft-bristle mop or a microfiber pad to clean gently and effectively. Adhering to a consistent maintenance routine will keep your vinyl floors in top condition for years, ensuring they remain as attractive and durable as the day they were installed.

Choosing the Right Floor Cleaning Machine

Choosing the right floor cleaning machine is key to keeping your vinyl floors looking great. You need to think about power, suction, and how well it works with cleaning solutions. This ensures your floors get cleaned safely and effectively.

Can you use a carpet cleaner on vinyl floors

Avoid using standard carpet cleaners on vinyl floors. They have too much power and harsh chemicals that can harm your floors. Instead, pick machines made for hard floors. These machines have gentler suction and safer cleaning solutions.

Machine Type

Suitable for Vinyl Floors

Key Features

Mop and Bucket

Yes

Gentle, manual cleaning; Requires less water and cleaning solutions

Microfiber Mops

Yes

Effective at picking up dirt and debris; Can be used with cleaning solutions

Vacuum Cleaners with Hard Floor Attachments

Yes

Provide thorough dry cleaning; Gentle suction to avoid surface damage

Powered Floor Scrubbers

Yes

Automated cleaning with rotary brushes and water; Ideal for larger vinyl floor areas

When picking a floor cleaning machine, always read the instructions carefully. Make sure it’s safe for vinyl floors. This way, you can avoid damage and keep your floors looking beautiful for a long time.

Alternatives to Carpet Cleaners

Carpet cleaners are often the first choice for keeping vinyl floors clean. But, there are other ways to clean that work well too. It’s important to look into these options to keep your vinyl floors looking great and lasting longer.

DIY Cleaning Solutions

Creating your own cleaning solutions can save money and help the environment. A combination of warm water with a mild detergent or vinegar can effectively clean your floors. For harder stains, a baking soda paste works great, and then use a damp mop to clean.

Professional Cleaning Services

If you want a deep clean, think about hiring a professional service. They know how to clean vinyl floors correctly, using safe and effective solutions. This might cost more, but it’s a good investment for keeping your floors in top shape.

Choosing the right cleaning method is key. Look into these alternatives to carpet cleaners to keep your floors clean and protected. This way, your vinyl floors will stay beautiful for many years.

Wrapping Up

In this guide, we’ve looked at using carpet cleaners on vinyl floors. We’ve covered the types of vinyl flooring and how to use carpet cleaning machines safely. This ensures your vinyl floors stay beautiful and last longer.

It’s important to check if carpet cleaners work with your vinyl floors. Using the wrong chemicals or too much water can damage your floors. By cleaning right, using safe products, and cleaning often, your vinyl floors will look great for years.

Homeowners and property managers can use the tips in this article to take good care of their vinyl floors. Choosing the right cleaning methods and products helps keep your floors looking new. This makes your space welcoming and well-kept.

Frequently Asked Questions

How can I effectively clean vinyl floors?

Vacuum or sweep to remove dirt, then mop with a damp mop and a vinyl floor cleaner. For stubborn stains, use a soft cloth with a baking soda paste.

Is it safe to use a carpet cleaner with a low-moisture setting on vinyl floors?

Even with a low-moisture setting, carpet cleaners are not recommended for vinyl floors due to the risk of damage and residual moisture problems.

What should I do if I’ve already used a carpet cleaner on my vinyl floors?

If you’ve used a carpet cleaner, immediately dry the area thoroughly and inspect for any damage. Clean the area with a proper vinyl floor cleaner and monitor for any signs of warping or discoloration.

What are some alternatives to carpet cleaners for vinyl floors?

Alternatives include a vacuum for debris, a dust mop for daily maintenance, and a mop with a vinyl-specific cleaner for regular cleaning. For deep cleaning, consider using a vinyl floor cleaner that is recommended by the manufacturer.

What happens if I use a carpet cleaner on vinyl floors?

Using a carpet cleaner can lead to moisture damage, warping, or adhesive issues. The heavy water usage and chemicals are not compatible with vinyl surfaces.

Filed Under: Cleaning

Can you use a carpet cleaner on tile floors?

August 17, 2024 by bigfishtavernlagunaadmin Leave a Comment

Can you use a carpet cleaner on tile floors? Surprisingly, you can—if you use it correctly. While carpet cleaners are designed for carpets, they can also be effective on tile floors under certain conditions. This guide will help you navigate the benefits and drawbacks of using a carpet cleaner on tiles, identify suitable tile types, and provide tips for safe, efficient cleaning. With the right approach, you can tackle tough grout stains and restore the shine to your ceramic, porcelain, or other tile floors.Follow these steps to clean your tile floors thoroughly while avoiding any damage.

Using Carpet Cleaners on Tile Floors

Introduction to Cleaning Tile Floors with Carpet Cleaners

Tile floors are prized for their durability and low maintenance, but keeping them spotless can be challenging. Carpet cleaners offer an effective solution for deep cleaning these surfaces.In this article, we’ll assess the benefits and limitations of using carpet cleaners for tile floors.

Advantages and Disadvantages of Using Carpet Cleaners on Tiles Floors

Carpet cleaners excel at deep cleaning tile floors by removing stubborn dirt, grime, and stains with ease. They use powerful suction and specialized solutions to lift and eliminate embedded dirt, leaving your tiles looking pristine. Additionally, they can save time, making them ideal for large or high-traffic areas. 

However, there are drawbacks to consider. Some carpet cleaners may leave residue or streaks, impacting the appearance of your floors.

Choosing a cleaner specifically designed for tile is crucial to achieving the best results and avoiding damage. Additionally, the use of water can lead to moisture retention, potentially causing mold or mildew if not properly dried. Ensuring your floors are thoroughly dried and that there is adequate airflow after cleaning is essential. 

Before using a carpet cleaner on your tile floors, check its compatibility with your tile type and follow the manufacturer’s instructions carefully to ensure optimal results.

Can You Use a Carpet Cleaner on Tile Floors?

Yes, you can use a carpet cleaner on tile floors, but it requires careful consideration. Not all tile types are suitable for the suction and cleaning solutions of carpet cleaners, so it’s crucial to know what your floors can handle. Ceramic and porcelain tiles are generally safe for carpet cleaners due to their durable, non-porous surfaces. These machines can effectively deep clean, lifting dirt and grime from the tile and grout. However, natural stone tiles like marble or granite may be at risk of damage from the harsh chemicals and agitation of carpet cleaners. Always test a small, hidden area before proceeding, and consult with the tile manufacturer or a professional if you’re unsure. Proper preparation and technique are key to ensuring your tile floors remain undamaged while achieving a thorough clean.

Using Carpet Cleaners on Tile Floors

Types of Tile Floors Suitable for Carpet Cleaner Use

Not all tile types work well with a carpet cleaner for tile floor cleaning. But, ceramic tiles and porcelain tiles are usually okay. They have some differences to keep in mind.

Ceramic Tiles and Carpet Cleaners

Ceramic tiles are popular for their toughness and simple upkeep. They’re often glazed, which means they have a smooth, non-absorbent surface. This makes them safe for a carpet cleaner.

If the ceramic tiles are in good shape, with no cracks or loose grout, a carpet cleaner works well. It can steam clean tile floors and get rid of dirt and grime.

Porcelain Tiles and Carpet Cleaner Compatibility

Porcelain tiles are also a good match for a carpet cleaner. They’re strong, resistant to stains, and handle moisture well. But, make sure the tiles are sealed and in good condition. A carpet cleaner could damage any broken or chipped tiles.When using a carpet cleaner on tile floors, always follow the instructions. Start by testing a hidden spot to confirm that the cleaner is safe for your tiles and finish. With the right approach, a carpet cleaner can revitalize your tile floors.

Choosing the Right Carpet Cleaner for Tile Floors

When picking a carpet cleaner for your tile floors, make sure it’s made for hard surfaces or has the right features. Look for cleaners with adjustable suction and those that use low-moisture solutions. Also, check for specialized attachments for hard floors. Reading reviews and following manufacturer advice can help you pick the best one.

Features to Look for in a Carpet Cleaner for Tiles

Adjustable suction power is key for tile floors. It lets you set the right cleaning intensity to protect your tiles. Also, choose cleaners that use low-moisture solutions to prevent moisture from getting into the grout.

Don’t forget about specialized attachments for hard floors. These tools, like brushes and nozzles, are made for cleaning tile. They ensure a deep clean without scratching or dulling the surface.

Researching and selecting the right carpet cleaner for your tile floors is important. It ensures a professional-quality clean without harm or residue. Always check the manufacturer’s advice and read reviews to find the best carpet cleaner for your needs.

Step-by-Step Guide to Using a Carpet Cleaner on Tiles

A carpet cleaner can thoroughly clean tile floors and help restore their shine. But, you need to use it differently than on carpets. We’ll guide you on achieving the best results when cleaning tile floors with a carpet machine.

Start by pre-treating any dirty or high-traffic areas on your tile floors. Use a cleaning solution safe for tiles and let it work for the time suggested. Then, set your carpet cleaner to the right mode for hard floors. You might need to lower the suction or change the brush settings.

Then, move the carpet cleaner over the tile floor in overlapping passes. Keep going slow to let the cleaner work well. For tight spots and edges, use special tools that come with your carpet cleaner.

After the first clean, go over the tile floors again with the carpet cleaner in extract mode. This removes any leftover moisture and makes the floors shine. Let the floors dry completely before you walk on them or put back any furniture.

By following these steps, you can use a carpet cleaner for tile floors and get amazing results. Always check the carpet cleaner’s manual for the best way to use it safely and effectively when tile floor steam cleaning.

Maintenance and Care After Carpet Cleaner Treatment

After using a carpet cleaner on your tile floors, it’s key to keep them clean and shiny. Start by letting the tiles dry completely. Then, wipe away any extra moisture and protect the grout from stains. These steps will enhance the durability of your tile floors and ensure they remain in top condition.

First, make sure your tile floors are dry after cleaning. Allow them to air dry or use a dry mop to absorb any remaining moisture. If tiles stay wet, they can get mold, mildew, or stains. So, give them enough time to dry well.Next, remove any leftover moisture or cleaner. Blot and clean up with a dry cloth or paper towels. This stops water spots or discoloration from happening on the tiles.

Maintenance Task

Importance

Tile Drying

Allows tiles to fully dry, preventing mold, mildew, and staining.

Moisture Removal

Prevents water spots and discoloration on the tile surface.

Grout Protection

Helps maintain the grout’s appearance and prevent future staining.

Protecting the grout between your tile floors is also key. Use a grout sealant or a tile floor steam cleaning solution to keep it looking good. This makes your tile floors look better and cleaning easier later on.

By following these easy steps after cleaning your tile floors with a carpet cleaner, you keep your floors in top shape. Your effort in tile floor cleaning will pay off, giving you a beautiful, lasting surface.

Wrapping Up

Using a carpet cleaner on tile floors can be a great way to deep clean and refresh your surfaces. But, you must think about the tile type, prepare well, and pick the right carpet cleaner. This article gives you the advice you need to safely and effectively use a carpet cleaner on your tile floors.

The tips and methods here will help you get a deep and satisfying clean. With the advice from this article, you can keep your tile floors looking new and make them last longer. Remember, the right approach and tools make it easy to use a carpet cleaner on tile floors. You’ll get a tile floor cleaning that makes your floors shine. And you’ll enjoy the perks of using a carpet cleaner on tiles.

Frequently Asked Questions

What types of tile floors are suitable for carpet cleaner use?

Ceramic and porcelain tiles work well with carpet cleaners. Always check the manufacturer’s advice to make sure your tile can be safely cleaned with a carpet cleaner.

How do I effectively clean tile grout with a carpet cleaner?

Carpet cleaners are great for cleaning tile grout. They use suction and cleaning solutions to remove dirt and stains. Pre-treat any tough stains for the best cleaning results.

What maintenance procedures should I follow after using a carpet cleaner on tile floors?

After cleaning, let the tiles dry completely and wipe away any extra moisture. Prevent future stains and discoloration by protecting the grout. These steps will keep your tile floors looking clean and new.

Can a carpet cleaner be used on tile floors?

Yes, a carpet cleaner can usually be used on tile floors. But, make sure to check the tile type and follow safety steps to avoid damage. Not all tiles can handle the suction and cleaning solutions of carpet cleaners. How do I prepare my tile floors for carpet cleaner treatment?

What important features should you look for when choosing a carpet cleaner for tile floors?

Look for a carpet cleaner with adjustable suction, low-moisture cleaning options, and hard floor attachments. Reading reviews and following manufacturer advice can help you find the right one for your tile floors.

Filed Under: Cleaning

Carpet Cleaner on Hardwood Floors: Is It Safe?

August 14, 2024 by bigfishtavernlagunaadmin Leave a Comment

Hardwood floors shine in homes and are tough too. But making them look good can be hard. Many wonder if Carpet Cleaner on Hardwood Floors is safe. This article looks at the risks, right cleaning ways, and tips to keep your floors beautiful.

Carpet Cleaner on Hardwood Floors

Key Takeaways

  • Using a carpet cleaner on hardwood floors can potentially damage the surface and finish.
  • Proper cleaning methods for hardwood floors include dry cleaning techniques and using hardwood-safe cleaning solutions.
  • Consistent maintenance is essential for keeping your hardwood floors in top condition.
  • If you’re unsure, it’s best to get guidance from a professional hardwood floor cleaner.
  • Understanding the risks and proper care for hardwood floors can help preserve their beauty for years to come.

Understanding the Risks of Using Carpet Cleaners on Hardwood Floors

Carpet cleaners are great for carpets, but they are risky on hardwood floors. They use strong chemicals and powerful suction which can harm wood. This can lead to warping, discoloration, and damage that’s hard to fix.

The Potential for Damage

Hardwood floors are sensitive to moisture, rough actions, and wrong cleaning chemicals. Too much water can make the wood swell and warp. Scrubbing too hard can leave scratches. The chemicals in some products may even change the wood’s color.

To keep your hardwood floors safe, use the right products. Choose methods made for hardwood floors. This will help you avoid damage and keep your floors looking new.

“Using a carpet cleaner on hardwood floors is like using a sledgehammer to hang a picture – it’s just not the right tool for the job.”

It’s well known that cleaning hardwood floors with carpet cleaners is dangerous. So, always take special care with hardwood floor maintenance. By understanding the risks and being careful, you can protect your floors for a long time.

Can You Use a Carpet Cleaner on Hardwood Floors?

It’s not advisable to use a carpet cleaner on hardwood floors. They’re made for carpets, not hardwood, and can do more harm than good.

Hardwood floors need special care to avoid damage. A carpet cleaner’s powerful detergents, hot water, and strong suction can hurt the wood. This could lead to discoloration, warping, and damage over time.

Yet, you might use a hardwood-safe carpet cleaner in some cases. These products are mild and safe for wood. Follow the product’s instructions closely.

It’s safer to use products made just for hardwood floors. Dry cleaning and mild, pH-neutral cleaners work best. They keep your floors looking good without risking damage.

Carpet Cleaner on Hardwood

Hardwood-Safe Cleaning

Powerful detergents and hot water can strip the protective finish

Gentle, pH-neutral hardwood floor cleaners

High suction can cause warping and damage

Dry cleaning methods like dust mops or microfiber pads

Not recommended for regular use on hardwood floors

Specialized hardwood-safe products formulated for spot cleaning

Always be careful when cleaning your hardwood floors. It’s important to use the right products and methods. This will keep your floors beautiful and in good shape for a long time.

Proper Cleaning Methods for Hardwood Floors

Keeping your hardwood floors beautiful and long-lasting is simple. Use cleaning methods that are gentle on hardwood. To prevent damage to the wood surface, avoid using harsh chemicals and excessive amounts of water. Instead, choose dry cleaning methods and cleaners made for hardwood.

Carpet Cleaner on Hardwood Floors

Dry Cleaning Techniques

Employing dry cleaning techniques is a superb method for keeping your hardwood floors clean. It gets rid of dust and dirt without using water. Here are some dry cleaning methods to consider: 

Sweeping: Use a soft-bristle broom to regularly remove dirt and debris from your hardwood floors gently. 

Vacuuming: Choose a vacuum that includes a hardwood floor attachment or a microfiber mop for optimal cleaning.This method captures dirt and dust without harming the wood.

Microfiber Mopping: A microfiber mop can pick up dirt without making the floor wet. It’s a good choice for dry cleaning.

Hardwood-Safe Cleaning Solutions

When choosing cleaning products, pick ones made for hardwood floors. Harsh cleaners for tile and carpet can damage your floor. Try these options instead: Hardwood Floor Cleaners: These cleaners are gentle on wood but remove dirt and grime well.

Vinegar and Water: Mix white vinegar with water to make a safe and effective cleaning solution.

Soap-Based Cleaners: Use mild soap cleaners. They’re safe and don’t contain harsh chemicals.

Always test a small spot on your floor first. This is to make sure the cleaner won’t harm it.

By using dry cleaning and these safe cleaning methods, your hardwood floors will stay beautiful for longer. It’s easy to keep them in great shape.

Maintaining Your Hardwood Floors

Keeping hardwood floors beautiful and long-lasting demands a consistent routine including regular cleaning, occasional refinishing, and the application of protective products. Deep cleaning removes dirt and debris, restoring shine and protecting the wood. Refinishing addresses scratches and enhances durability. Applying sealants or polishes provides further protection against everyday wear and tear. By following these steps, you can help maintain your hardwood floors in pristine condition for years to come.

Maintenance Task

Frequency

Benefits

Deep Cleaning

Every 6-12 months

Removes accumulated dirt and debris, restores shine

Refinishing

Every 5-10 years

Sands down scratches and discoloration, applies fresh finish

Sealant/Polish Application

Every 1-2 years

Create a protective barrier against wear and tear.

“Consistent upkeep is essential for maintaining the pristine appearance of your hardwood floors over the years.”

Hardwood Floor Cleaning Products to Consider

Maintaining your hardwood floors’ beauty and lifespan needs the right cleaning products. It’s vital to pick the correct hardwood floor cleaning products to care for your floors safely. This avoids any damage.

Selecting the Right Cleaner

Not every cleaning solution for hardwood floors works well. You must choose products that fit wood surfaces perfectly. Opt for hardwood floor cleaning items that are pH-balanced, safe, and have no harsh chemicals.

Factor in your floor finish when selecting a cleaning hardwood floor product. Different finishes need special care to keep the wood’s shine and quality.

Hardwood Floor Finish

Recommended Cleaning Products

Polyurethane

Neutral pH cleaners, water-based wood cleaners

Lacquer

Gentle, non-abrasive cleaners, pH-neutral solutions

Wax

Cleaners designed for waxed floors, polishes to restore shine

Oil-based

Cleaners with natural oils, soap-based solutions

By choosing the right hardwood floor cleaning products, you can keep your floors beautiful for many years. Consider your floor type and finish to make the best choice.

Carpet Cleaner on Hardwood Floors

When to Hire a Professional Hardwood Floor Cleaner

Keeping your hardwood floors beautiful and durable takes work. This is crucial, especially for deep cleaning or restoration.

While you can clean them yourself often, sometimes it’s better to let a pro take care of it. At times, your floors may need more than just a thorough cleaning. If they’re badly damaged, like from water stains, deep scratches, or change of color, a pro is best. They can figure out what your floors need and use the right hardwood floor cleaning methods. This helps revitalize your floors.

“Hiring a professional hardwood floor cleaner can save you time, effort, and potential damage to your floors in the long run.”

Experts can also find and solve problems with your floors. This includes things like wrong installation or too much moisture. Fixing these issues helps keep your floors looking good for a long time.

Choosing to hire a professional or not means thinking about the benefits and costs. Yes, it might be more expensive upfront. But the value in keeping your floors looking great for the long haul is worth it.

Wrapping Up

Sometimes, you might find a carpet cleaner that’s safe for hardwood. It’s vital to be careful and read the label. To avoid any potential issues, always test the cleaner on a small, inconspicuous area first. It’s smarter to stick with hardwood floor cleaning solutions and tools. They are made to be safe and work well on wood. 

Taking good care of your floors is very important. Regularly sweeping and using the right cleaning methods helps a lot. It can keep your floors looking great and make them last longer. If you’re unsure about how to clean your hardwood floors, consulting with a professional is advisable. They can offer customized advice according to your specific flooring needs.

FAQ

What are the possible drawbacks of using a carpet cleaner on hardwood floors?

Carpet cleaners can damage hardwood floors. They use strong chemicals and suction. This could lead to problems like warping or discoloration of the wood.

When is it safe to use a carpet cleaner on hardwood floors?

In rare cases, you might use a soft, hardwood-safe cleaning solution. Always follow the guidelines carefully and with caution.

What are the proper cleaning methods for hardwood floors?

Use gentle, hardwood-safe methods and products for your hardwood floors. This includes dry cleaning like sweeping or vacuuming. Or you can use a microfiber mop. Consider using cleaning solutions specifically designed for hardwood floors to mitigate moisture-related damage.

What are the best hardwood floor cleaning products to consider?

Select cleaning products that are suitable and safe for your hardwood floors.Look for options that are pH-balanced, non-toxic, and free of harsh chemicals. Think about what kind of finish your floors have and their cleaning needs.

When should I hire a professional hardwood floor cleaner?

At times, it’s beneficial to hire professionals for your hardwood floors. This is for tasks like deep cleaning or restorations. Professionals know how to clean your floors without causing damage. They can help your floors stay beautiful for a long time.

Filed Under: Cleaning

How Much Does Rug Cleaning Cost?

July 16, 2024 by bigfishtavernlagunaadmin Leave a Comment

Professional rug cleaning is crucial for preserving their look and longevity. But how much does rug cleaning cost? the cost can fluctuate significantly due to multiple factors. This guide will give you a clear idea of what rug cleaning costs, including prices for different sizes, types of rugs, and cleaning methods. Knowing these details helps you figure out what professional rug cleaning might cost for your rugs and if it’s a good deal.

How Much Does Rug Cleaning Cost?

Breakdown of Rug Cleaning Costs by Square Footage

Professional rug cleaning costs are typically determined by the size of the rug. On average, prices range from $1.64 to $7.12 per square foot.To figure out the cost for your rug, just multiply the rug’s length and width to get the square footage. Then, multiply the rug’s size by the cost per square foot. For instance, a 4-foot by 6-foot rug (24 square feet) with a cleaning cost of $1.64 per square foot would cost $39.36 to clean.

Examples of Costs for Different Rug Sizes

Here are some examples of rug cleaning costs based on the size of the rug:

  • 3′ x 5′ rug: $15 – $75 for steam/dry cleaning, $75 – $120 for hand washing.
  • 4′ x 8′ rug: $32 – $160 for steam/dry cleaning, $160 – $260 for hand washing.
  • 5′ x 7′ rug: $35 – $175 for steam/dry cleaning, $175 – $280 for hand washing.
  • 6′ x 10′ rug: $60 – $300 for steam/dry cleaning, $300 – $480 for hand washing.
  • 8′ x 12′ rug: $96 – $480 for steam/dry cleaning, $480 – $770 for hand washing.
  • 6′ diameter rug: $28 – $140 for steam/dry cleaning, $140 – $220 for hand washing.
  • 8′ diameter rug: $50 – $250 for steam/dry cleaning, $250 – $400 for hand washing.
  • 10′ diameter rug: $110 – $570 for steam/dry cleaning, $570 – $900 for hand washing.

The size of the rug greatly affects the cleaning cost. Larger rugs usually cost more than smaller ones.

How much does rug cleaning cost by Rug Type

The cost of rug cleaning can vary significantly depending on its type. Professional rug cleaning can cost from $1 to $8 per square foot. This depends on the cleaning method and the rug type. On average, it costs between $105 to $450 to clean an area rug, with a national average of $250.

Domestic rug/carpet cleaning costs

Domestic carpets or rugs usually cost about $1.64 per square foot to clean.

Synthetic area rug cleaning costs

Synthetic area rugs are typically $2.69 per square foot to clean. Cleaning synthetic fiber rugs like polyester or nylon can cost from $1 to $3 per square foot.

Machine-made wool rug cleaning costs

Machine-made wool rugs average $3.55 per square foot to clean. Wool rugs, known for their durability, usually cost between $4 and $8 per square foot to clean. This is mainly through dry cleaning methods.

Handmade wool rug cleaning costs

Handmade wool rugs cost about $4.16 per square foot to clean. Cotton fiber rugs need more care and can cost between $3 and $5 per square foot to clean.

Specialty rug cleaning costs (tapestries, silk, animal hides)

Specialty rugs, like tapestries, silk, and animal hides, can cost up to $7.12 per square foot to clean. This is because rugs are delicate and require additional care. More unique or high-quality rugs can be pricier, costing from $4 to $10 per square foot. Antique, oriental, or heirloom rugs might cost more to clean because of their special construction, dyes, and delicate nature.

“Investing in professional rug cleaning can extend the lifespan and restore the appearance of your prized rugs, making it a worthwhile investment in the long run.”

Professional Rug Cleaning Methods and Their Costs

Professional rug cleaning employs three principal methods: dry cleaning, steam cleaning (also known as hot water extraction), and hand washing. The cost depends on the rug’s size, type, and how dirty it is.

How Much Does Rug Cleaning Cost?

Dry Cleaning Method and Associated Costs

Dry cleaning uses a chemical solution that doesn’t soak the rug. It costs between $1.50 and $5.00 per square foot8. This method is cheaper for small or lightly dirty rugs.

Steam Cleaning Method and Associated Costs

Associated Costs.Steam cleaning, also called hot water extraction, is highly preferred for cleaning rugs.

It uses hot water and a special solution to deeply clean. Prices range from $1.00 to $4.00 per square foot8. This method is great for removing deep dirt and smells from rugs.

Hand Washing Method and Associated Costs

Hand washing is the most hands-on method, with manual scrubbing and rinsing. It’s the priciest, costing $3.00 to $8.00 per square foot8. It’s usually for delicate or valuable rugs that need gentle care.

” Selecting the appropriate cleaning method for your rug is essential to preserve its longevity and uphold its appearance.” 

Factors such as the rug’s material, degree of dirt, and current condition should guide your decision. Consulting with a professional rug cleaner can assist in selecting the optimal and cost-effective cleaning solution for your needs.

Additional Rug Cleaning Services and Treatments

Having your rugs professionally cleaned is essential to preserve their appearance and ensure their longevity.But, there are more services and treatments that can make cleaning even better. These extras tackle things like allergens, pests, or smells, giving your rugs a full clean.

Costs for anti-allergen treatment

Dust mites, pet dander, and other allergens may exacerbate respiratory conditions. Anti-allergen treatments get rid of these troublemakers. They usually cost about $0.58 per square foot.

Moth-Repellent Treatment Costs

Rugs can get damaged by moths and their larvae. Moth-repellent treatments keep these pests away. They cost around $1.16 per square foot.

Odor Removal and Deodorization Costs

Rugs can smell bad from pet accidents, spills, or just getting old. For light smells, treatments cost about $0.81 per square foot. For strong smells, it’s up to $2.36 per square foot.

Service

Cost per Square Foot

Anti-Allergen Treatment

$0.58

Moth-Repellent Treatment

$1.16

Odor Removal and Deodorization (Light)

$0.81

Odor Removal and Deodorization (Intensive)

$2.36

These extra rug cleaning services and treatments help keep your rugs healthy, long-lasting, and looking good. Knowing what they cost helps you choose the best care for your rugs.

Factors That Influence Rug Cleaning Costs

Professional rug cleaning costs can change a lot based on several important factors. The type of rug and chosen cleaning method are significant factors, while the geographical location and local cost of living also exert substantial influence.  Also, the size of the rug matters a lot. Bigger rugs need more time and work to clean, so they cost more than .

Another thing that can change the price is the pickup and delivery fees. These fees are often free for local customers. But, if you live far from the cleaner, you might have to pay more for transport. Also, if your rug needs repairs like fixing the fringe or edges, you’ll pay extra.

Factor

Impact on Rug Cleaning Costs

Location and Cost of Living

Rug cleaning services in expensive urban areas like New York City or San Francisco come at a premium.

Rug Size

Bigger rugs cost more to clean because they take more time and effort.

Pickup and Delivery Fees

If you live far from the cleaner, you might pay extra for pickup and delivery.

Rug Repair Costs

Fixing things like the fringe or edges will add to the total cost.

Knowing these factors can help homeowners plan and budget for rug cleaning. Think about the location, size, and condition of your rug, and any extra services you need. This can make cleaning smooth and affordable.

Finding a Reputable Rug Cleaning Service

When picking a rug cleaning service, it’s key to research well. Make sure you pick a trusted and skilled provider. Begin by researching local rug cleaning companies in your area. Compare their services, prices, and what customers say about them. Aim for companies known for great results and top-notch customer service.Also, check the company’s credentials. Look for certifications, industry memberships, and awards. This shows they know their stuff in rug cleaning. It assists in locating a reliable rug cleaning service dedicated to the care of your rugs.

Researching Local Rug Cleaning Companies

  • Explore the websites and online profiles of local rug cleaning companies in your area.
  • Assess customer reviews and ratings to evaluate the company’s service quality and customer satisfaction levels.
  • Compare the services, pricing, and specialties of different rug cleaning providers to find the best fit for your needs.

Checking Reviews and Credentials

  1. Look for certifications from industry organizations, such as the Carpet and Rug Institute (CRI) or the Institute of Inspection, Cleaning and Restoration Certification (IICRC).
  2. Check if the company is a member of professional associations like the National Carpet Cleaners Association (NCCA) or the Association of Specialists in Cleaning and Restoration (ASCR).
  3. Research any awards or accolades the company has received, as these can be indicators of their commitment to quality and excellence.

By researching local rug cleaning companies and checking their reviews and credentials, you can be sure you’re choosing a reputable rug cleaning service. They will ensure the utmost care for your valuable rugs.

Final Thoughts

Even though it costs money, cleaning area rugs with professional services is a good idea. It keeps the rug in good shape and can make the air inside cleaner by removing allergens and smells. Knowing about these costs and why professional cleaning is important helps homeowners make smart choices for their rugs.

With the right steps and choosing a trusted cleaning service, homeowners can keep their rugs looking great for many years. This is true for synthetic, machine-made wool, or handmade rugs. Cleaning them professionally is a smart move that saves money over time.

FAQ

How much does it cost to clean different types of rugs?

Cleaning different rugs costs vary. Here are some examples: – Domestic carpets or rugs: $1.64 per square foot – Synthetic area rugs: $2.69 per square foot – Machine-made wool rugs: $3.55 per square foot – Handmade wool rugs: $4.16 per square foot – Specialty rugs (tapestries, silk, animal hides): $7.12 per square foot .

What are the different rug cleaning methods and their associated costs?

There are three main ways to clean rugs, and each has a price: – Dry cleaning: $1.50 to $5.00 per square foot – Steam cleaning: $1.00 to $4.00 per square foot – Hand washing: $3.00 to $8.00 per square foot.

What additional services or treatments can impact the cost of rug cleaning?

Some extra services can change the price of rug cleaning. These include: – Anti-allergen treatment: $0.58 per square foot – Moth-repellent treatment: $1.16 per square foot – Topical deodorization: $0.81 per square foot – Intensive antimicrobial/disinfectant treatment: $2.36 per square foot What should I consider.

When preparing my rug for professional cleaning?

Getting your rug ready for cleaning means a few things. First, figure out what your rug is made of and how big it is. Then, talk to the cleaning service about any special needs or concerns you have. Finally, agree on the cleaning method and any extra services you want.

How do I find a reputable rug cleaning service?

To find a good rug cleaning service, do some research. Look at local companies and compare their services, prices, and customer reviews. Ensure they possess appropriate certifications and are recognized for their high-quality work. Also, check if they have the experience and knowledge needed for professional rug cleaning.

Filed Under: Cleaning

  • « Go to Previous Page
  • Page 1
  • Page 2
  • Page 3
  • Page 4
  • Page 5
  • Interim pages omitted …
  • Page 8
  • Go to Next Page »

Primary Sidebar

Recent Posts

  • Can You Deep Fry in a Nonstick Pan? My Surprising Results
  • Clay Pot vs Dutch Oven: Which One Right for You?
  • Are Dutch Ovens Non Toxic? All You Need to Know
  • Is Low Specific Heat Capacity Good for Frying Pans​
  • Smeg Kettle vs Mini Kettle: Which One Fits Your Style?

Copyright © 2024 bigfishtavernlaguna.com. All right reserved.