• Skip to primary navigation
  • Skip to main content
  • Skip to primary sidebar
  • About Us
  • Affiliate Disclosure
  • Contact us
  • Cookie Privacy Policy
  • Privacy Policy
  • Sample Page
  • Terms of Use

Kitchen Guide

  • Appliance Reviews
  • Bakeware
  • Buying Guides
  • Product Comparisons
  • Recipes
  • Essentials
  • Cleaning

Cleaning

Can You Use a Carpet Cleaner on Laminate Flooring?

July 5, 2024 by bigfishtavernlagunaadmin Leave a Comment

When it comes to maintaining the pristine look of your home, understanding the proper care techniques for various surfaces is essential. Laminate flooring, known for its durability and aesthetic appeal, has specific cleaning requirements to ensure its longevity and appearance. One common question that arises is whether Can you use a carpet cleaner on laminate flooring. This guide delves into the considerations and best practices for using carpet cleaners on laminate floors, exploring the potential benefits and risks to help you make an informed decision. Whether you’re aiming to tackle tough stains or simply keep your laminate floors looking their best, this discussion provides the insights you need to maintain your home effectively.

Can you use a carpet cleaner on laminate flooring

Is it ok to use carpet cleaner on laminated floors?

Many homeowners question whether they can safely use a carpet cleaner on laminate floors. Laminate flooring is popular for its cost and durability. But, cleaning it right is key to avoiding damage.

Some carpet cleaners, like the Rug Doctor FlexClean, work on both carpets and laminate floors. These machines adjust spray rates and use different nozzles for various floors. This lets you clean your whole house with one machine.

Exercise caution when applying carpet cleaners to laminate floors. Too much moisture or heat can warp or damage the floor. Always follow the floor’s care instructions and use the right settings and cleaners.

Also, harsh chemicals or rough scrubbers can harm laminate floors, making them dull. Choose cleaners made for laminate to keep your floors looking good without damage.

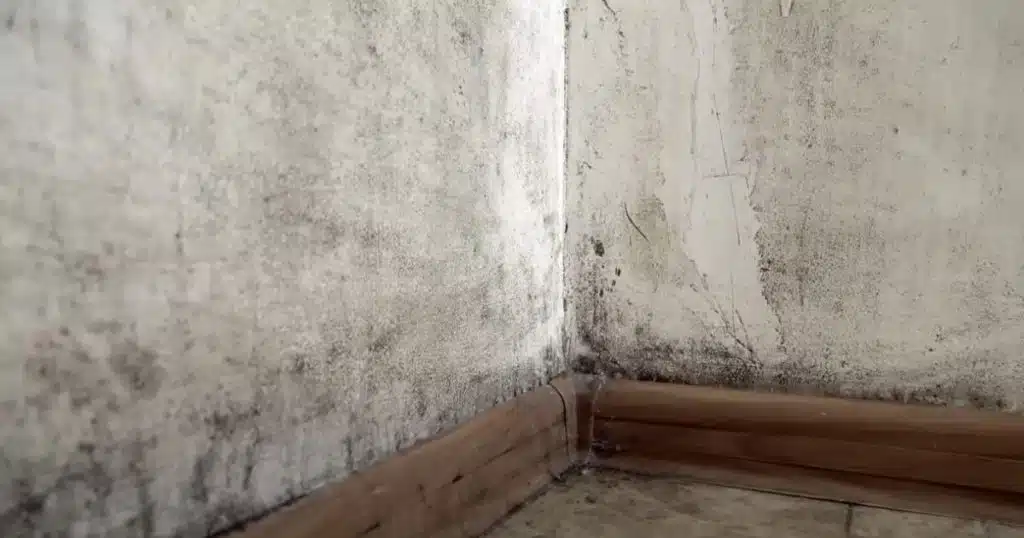
“Accumulation of excessive water is detrimental to laminate flooring, potentially leading to additional installation costs for replacing damaged planks.”

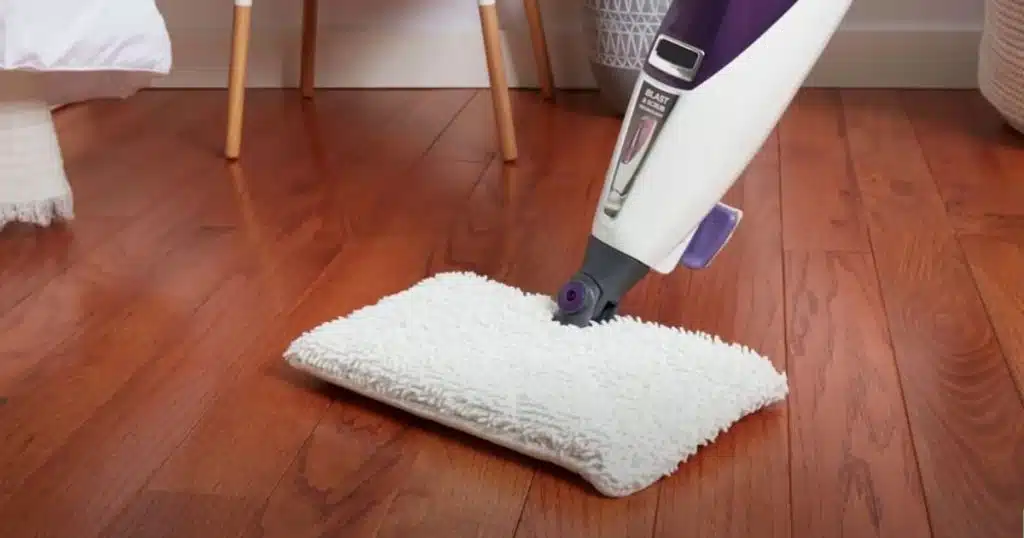
Experts advise against steam cleaners or wet mops on laminate floors5. Instead, use a damp microfiber cloth or a special laminate floor mop. Clean spills right away with a clean, damp cloth to stop moisture from getting into the floor.

In summary, some carpet cleaners can be used on laminate floors, but be careful and follow the manufacturer’s advice. Knowing how to care for laminate floors and using the right tools helps keep them looking great for a long time.

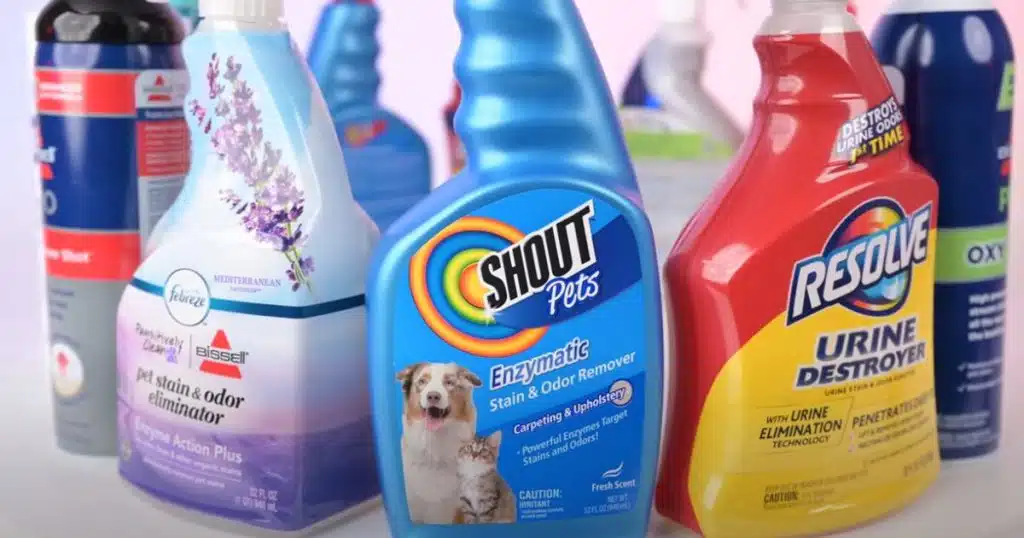
Potential Risks of Using Carpet Cleaners

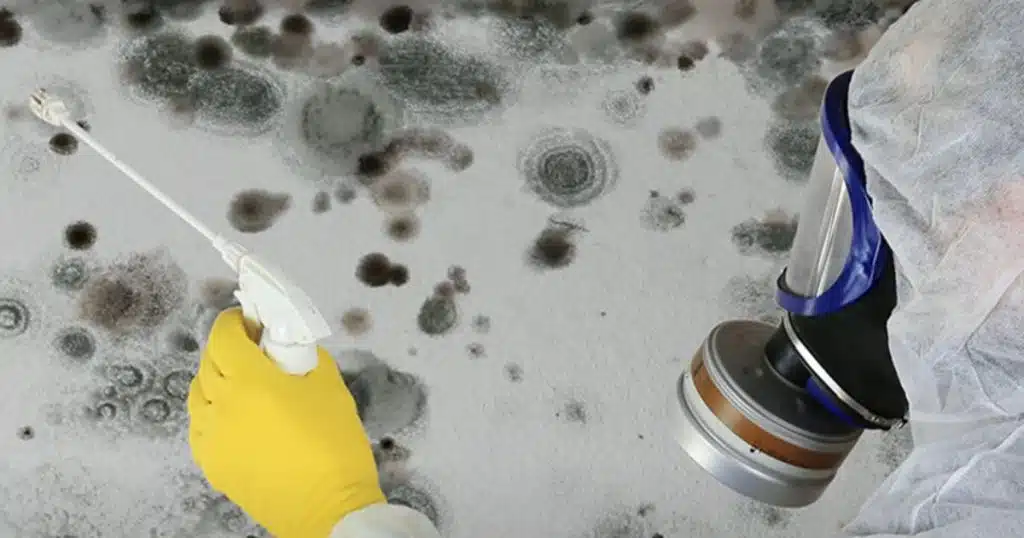
Laminate floors look tough but need careful cleaning. Carpet cleaners might not be safe for them. The chemicals can wear down grout, causing cracks in tile floors. Some cleaners can also change the color or stain laminate surfaces.

Moisture Damage

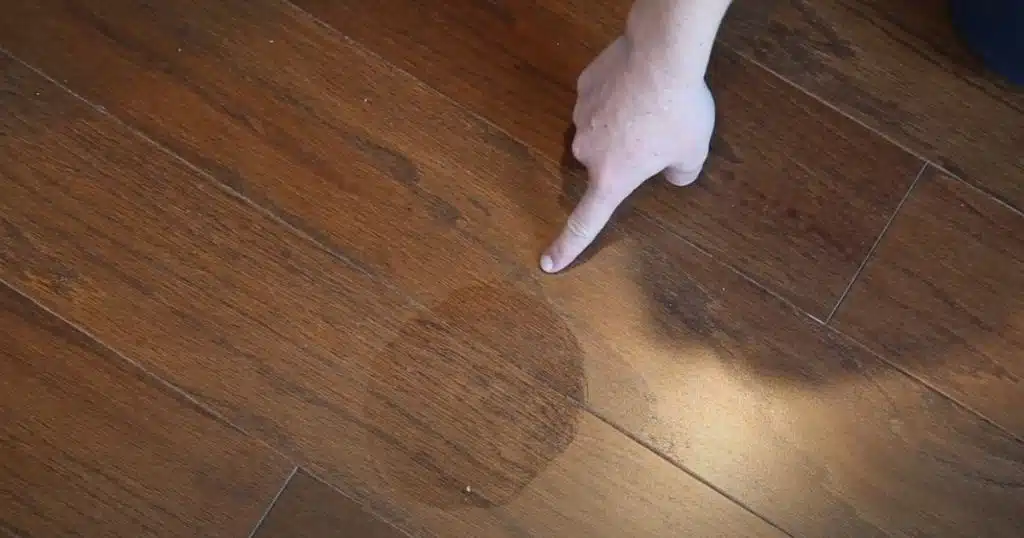
Using carpet cleaners on laminate floors can lead to moisture damage. Laminate is water-resistant but not completely safe from moisture. Too much water can make the floor lift, causing permanent harm.

Carpet cleaners often use water, which can add too much moisture to laminate floors. This can cause long-term problems.

Chemical Abrasion

Carpet cleaners also risk damaging laminate with their chemicals. Laminate is strong but can be scratched easily. Using cleaners may wear down the laminate’s protective layer, increasing susceptibility to damage and color alteration. For safe cleaning, use cleaners made for laminate floors. Tile-specific cleaners are best for tile floors. Getting professional cleaning services, like Green Fox Cleaning, is a good idea for keeping your floors clean.

Knowing the risks of carpet cleaners on laminate floors helps protect your investment. Selecting the correct cleaning solutions helps maintain your floors’ pristine appearance over time.

Recommended Cleaning Methods

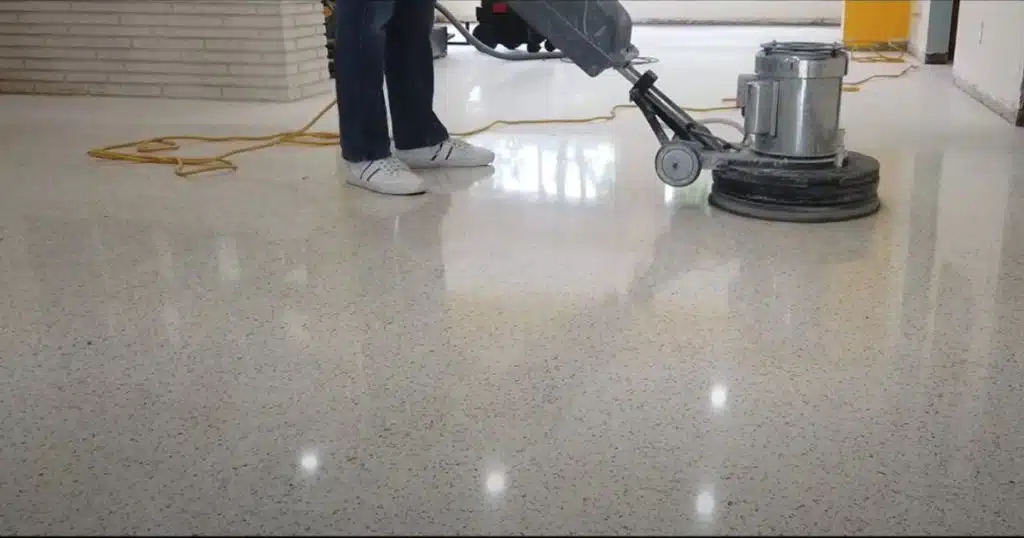
Keeping your laminate floors looking great needs a careful cleaning approach. Don’t use a traditional carpet cleaner on them, as it’s not recommended. Laminate floors are cheaper than real wood, making them a favorite for many. It’s important to clean them weekly to stop scratches and keep them looking new.

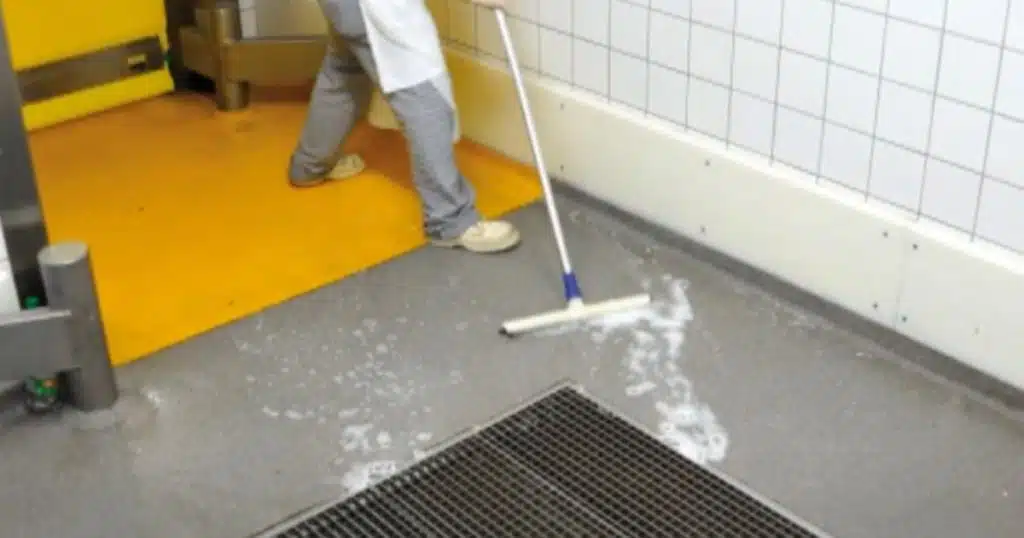
Dry Cleaning Techniques

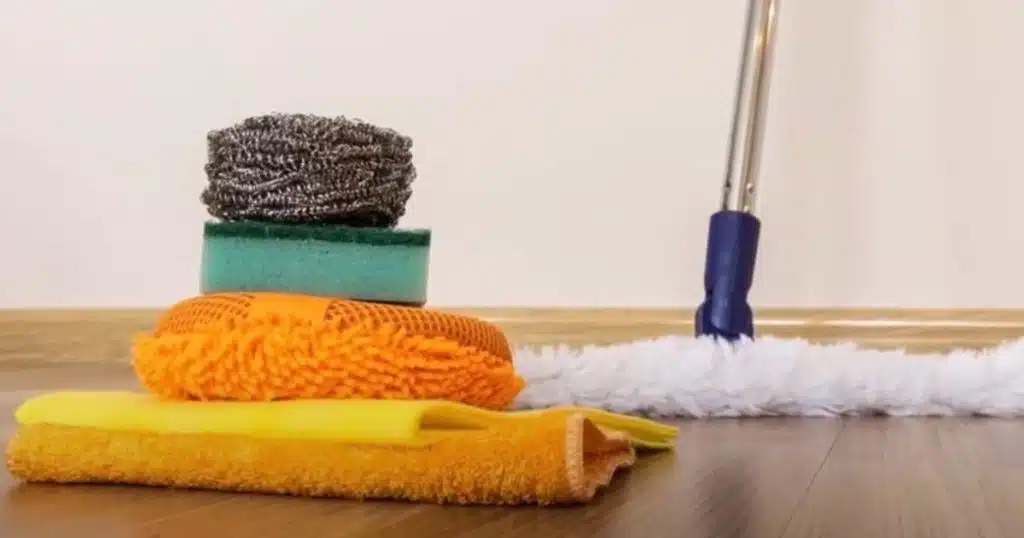
The best way to clean laminate floors is the “dry” method. Vacuuming every week helps avoid scratches. The cleaning advice varies based on your environment. Mop your floors every two to three months with a damp microfiber mop or a special laminate cleaner. Never use harsh tools on laminate floors to prevent scratches. Clean spills right away to stop damage or discoloration.

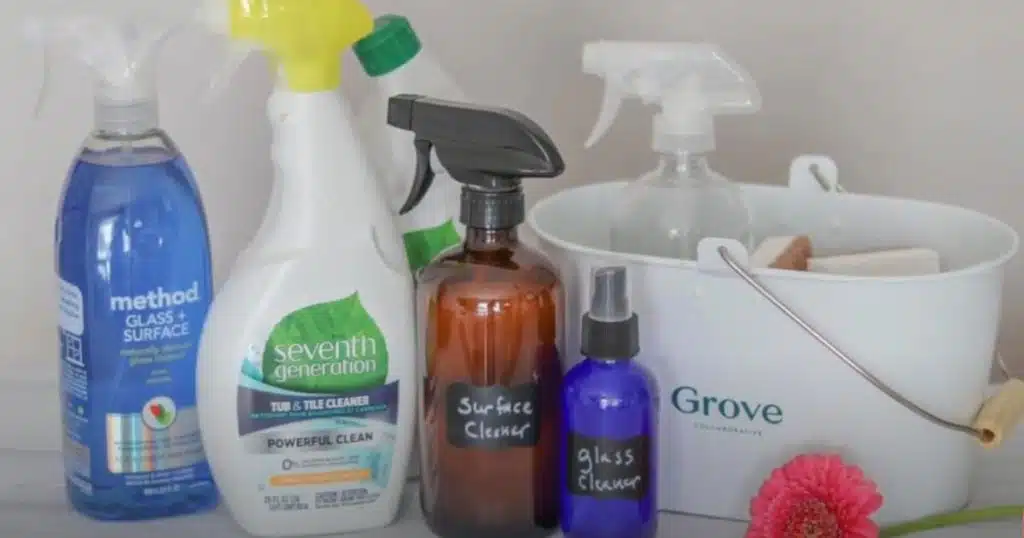
Manufacturer-Approved Cleaners

Follow the cleaning instructions from the manufacturer to keep your warranty valid. To avoid staining or fading, avoid using too much water when cleaning. Use cleaners made for laminate floors, not oil-based ones that can leave streaks. Waxing or polishing laminate floors is not allowed, unlike traditional hardwood.

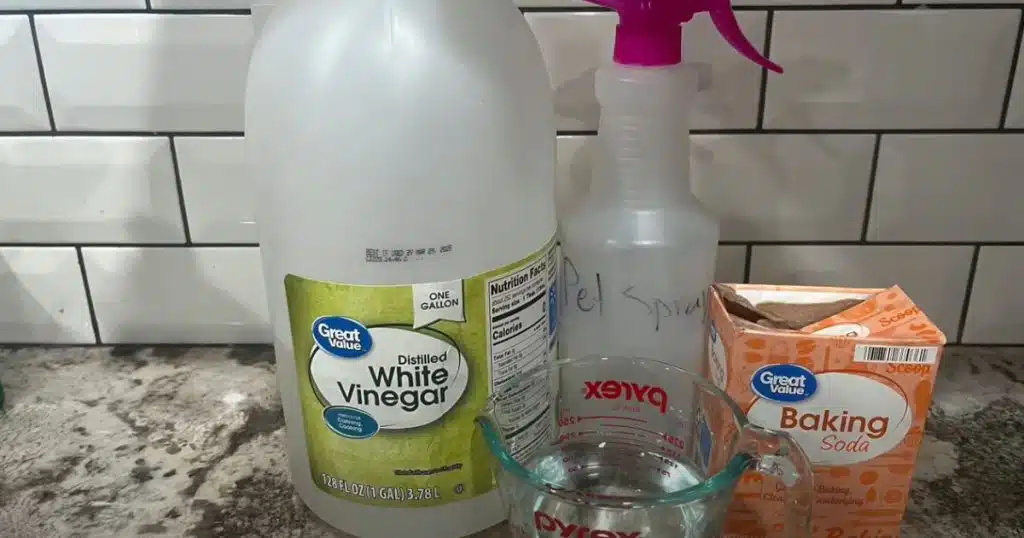
For small messes, use damp microfiber cloths with water, vinegar, or rubbing alcohol. For tough spots, apply Glass cleaners like Windex on a microfiber cloth and rub with the grain. Remove candle wax and gum with an ice cube and a credit card, and shoe scuffs with a dry tennis ball.

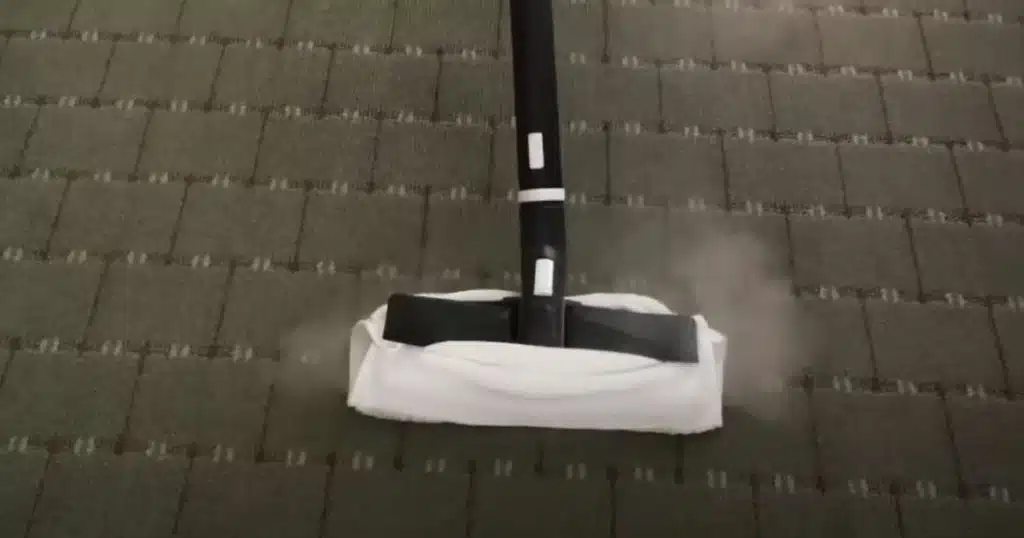
For cleaning a whole room, use a damp microfiber or spray mop like a Swiffer. This approach effectively removes dirt and grime, leaving behind a streak-free and dry surface.

Maintaining Laminate Floors 

To keep laminate floors looking great, a good cleaning routine is key. These floors are well-known for being durable and easy to maintain.Regular vacuuming and quick spot cleaning are musts. Regular Vacuuming

Keeping your laminate floors clean means vacuuming often. Sweeping and vacuuming regularly helps them stay clean longer. Use a vacuum with a cleaning head that won’t harm the floor’s surface. Avoid vacuums with aggressive beater bars to prevent damage.

Spot Cleaning Spills

Laminate floors should dry quickly after cleaning, within one to two minutes. Too much cleaner or water can slow drying. Some laminate is waterproof, but cleaning spills fast is best.

Microfiber mops are great for cleaning because they don’t spread water around. Too much moisture can warp laminate floors.

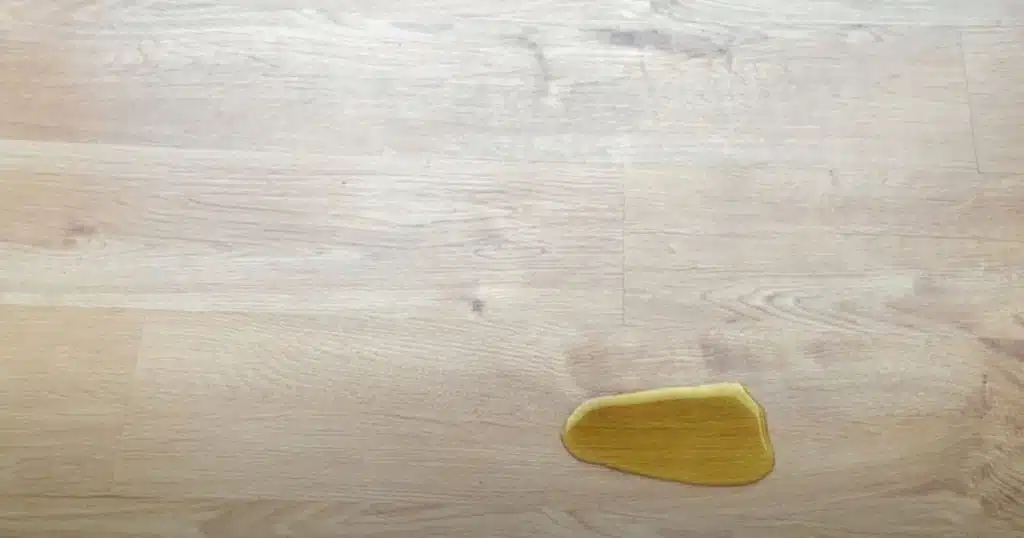
For oil stains, you might need to blot, use dish soap, rinse, and apply rubbing alcohol. For tough spots, acetone or nail polish remover can remove many substances.

Picking the right cleaner and using it correctly is key to avoid streaks or residue on laminate floors. Don’t use all-purpose cleaners, dish soap, or floor wax on laminate to keep it shiny and clean.

Laminate floors are easy to clean because their surface is hard and doesn’t hold onto dirt and dust well. Vacuuming and wiping with a dust mop are enough to keep it clean. Waxing or polishing is not necessary for laminate floors.

Putting floor protectors under furniture legs is a good idea to protect your laminate floor. You can fix minor damage with finishing putty in matching colors.

“Use manufacturer-recommended cleaning products to properly care for laminate floors.”

Using doormats inside and outside can reduce dirt tracked in. Asking guests to remove their shoes can also help protect your floors. Cleaning spills right away can prevent damage to laminate floors.Trimming pet nails can also reduce floor damage. These steps will help your laminate floors look great and last longer.

Final Thoughts

Using carpet cleaners on laminate floors needs care and following the maker’s cleaning tips. Laminate floors are delicate and can be harmed by harsh cleaners or tools. It’s key to clean them gently and use the right products for laminate floors.

For the best results, stick to dry cleaning like vacuuming and cleaning spills right away. Use cleaners approved by the floor’s maker to keep it looking good and strong. Tools like microfiber mops and vacuum settings that won’t scratch work well to clean without damage.

FAQ

What are the risks of using a carpet cleaner on laminate floors?

Carpet cleaners can damage laminate floors by causing moisture or chemical damage if not cleaned up right. Using just water or laminate cleaner can leave a film on the floor, making it hard to walk on in socks. This means carpet cleaners could also cause similar issues.

How can I maintain the appearance and longevity of my laminate floors?

Keep your laminate floors looking good by vacuuming and cleaning spills right away. Pergo says to remove spills within 24-72 hours to stop water damage. A good cleaning plan is key to keeping your floors in top shape and avoiding problems.

What cleaning method is recommended for laminate floors instead of a carpet cleaner?

The best method for cleaning laminate floors is to use a microfiber mop with a spray bottle of laminate floor cleaner. This method uses minimal water and effectively cleans without risking water damage.

How can I clean stubborn stains on laminate flooring without using a carpet cleaner?

To tackle stubborn stains, softly rub the affected area with a soft cloth dampened with a blend of water and a small quantity of vinegar or a laminate floor cleaner. Use a laminate-safe stain remover for tougher stains, testing it on a hidden spot first.

Are there carpet cleaners specifically safe for use on laminate floors?

In general, using carpet cleaners on laminate floors is not recommended. Instead, use a cleaner formulated specifically for laminate flooring or a damp mop with a laminate floor cleaner to maintain the floor’s integrity.

Filed Under: Cleaning

How Do Robotic Pool Cleaners Work? The Ultimate Guide

July 4, 2024 by bigfishtavernlagunaadmin Leave a Comment

Robotic pool cleaners are high-tech gadgets designed to clean pools with little effort from you. They use sensors, motors, and smart software to move around, clean, and even collect leaves and dirt. Understanding their function shows us how much easier they make pool maintenance.

Robotic pool cleaning robots are changing how we clean pools. They are smart machines that clean pools by themselves. These cleaners use sensors and can be set to clean every part of the pool. This changes the game for in-ground pool cleaners and self-propelled pool cleaners alike. They offer a whole new level of pool cleaning automation and make hands-free pool cleaning a reality.

Exploring how do robotic pool cleaners work gives us a look into their advanced technology. This technology makes automatic pool cleaners reliable and easy to use. If you own a pool and want to simplify your cleaning or just love learning about new tech in pool care, you’ll find this journey through how robotic pool cleaners work interesting.

How do robotic pool cleaners work

Understanding Robotic Pool Cleaners

Robotic pool cleaners are changing how we clean swimming pools. These gadgets do the work on their own. They keep pools clean without much effort from us. 

What Are Robotic Pool Cleaners?

These cleaners move by themselves. They have special technology like sensors and motors. These devices clean the walls, floor, and waterline of the pool. This removes dirt, debris, and algae. They work without needing the pool’s filtration system. Instead, they have their own power and filtration systems.

Benefits of Using a Robotic Pool Cleaner

Utilizing a robotic pool vacuum or pool cleaning robot can simplify pool maintenance significantly. They have several key benefits over other cleaning methods:

  • Hands-free operation: Robotic pool cleaners require little to no human intervention, allowing you to enjoy your pool without the hassle of manual cleaning.
  • Improved cleaning efficiency: These automatic pool cleaners are designed to thoroughly clean the pool, often reaching areas that manual cleaning may miss.
  • Reduced energy and water consumption: Robotic pool cleaners are generally more energy-efficient and use less water than traditional pool cleaning methods.
  • Versatility: Robotic pool cleaners can handle pools of various sizes and shapes, making them a suitable solution for both in-ground and above-ground pools.
  • Improved pool water quality: By effectively removing debris and contaminants, robotic pool cleaners can help maintain a cleaner, healthier pool environment.

That’s why many pool owners are choosing these self-propelled pool cleaners. They’re easy to use and make pool care simpler.

How Do Robotic Pool Cleaners Work

Robotic pool cleaners are changing how we keep our pools clean. They work on their own with sensors, motors, and smart software. This lets them move around the pool and clean well. They’re a hit with home owners and pool fans for their efficiency.

These cleaners plug into your pool’s power. They either suction or scrub to remove dirt from walls, floors, and the water. The software guides their movements, making sure they don’t bump into things. This helps them clean your pool without you watching them.

They clean every inch of your pool, even the hard-to-reach spots. You don’t need to monitor them constantly. This kind of cleaning saves you time and keeps your pool looking great.

Robotic cleaners use top-notch tech to clean your pool easily. They fit the pool’s shape and size and know how to deal with different dirt. This means thorough cleaning every single time.

Feature

Description

Navigation

Robotic pool cleaners scan the pool with advanced sensors and software. They avoid hitting things and adjust their path.

Cleaning Mechanism

They use suction or brushes to clean dirt from the pool’s surface and more.

Power Source

They connect to the pool’s power, so they always have energy to clean.

Automation

The software and sensors they use let them clean by themselves. You don’t always have to watch them clean.

Knowing how robotic pool cleaners work helps homeowners enjoy their pool time more. As technology gets better, these cleaners will likely become even more popular. They make keeping a clean pool easier than ever.

How do robotic pool cleaners work

Key Components of a Robotic Pool Cleaner

Robotic pool cleaners provide hands-free cleaning. They work automatically to keep your pool sparkling. These smart robots have essential components that make them excellent at their job.

Filtration System

The filtration system is key in robotic pool cleaners. It collects and retains dirt and debris from the pool. These cleaners use special filters to catch even tiny particles and stop them from going back in the water.

Navigation and Mobility

Robotic cleaners move around your pool with ease. They use smart systems to avoid obstacles and fully clean every surface. Their design makes sure your pool gets cleaned well without you needing to lift a finger. Thanks to these parts, robotic pool cleaners do a great job on their own. They keep your pool clean without you having to do much. This helps you make the most of your time in the pool.

Navigation and Mobility

Using a robotic cleaner in the pool needs careful steps for best results. This starts with setup and goes on to regular upkeep. Knowing how to do this can make your pool sparkle with little effort from you.

Maintaining and Operating a Robotic Pool Cleaner

Using a robotic cleaner in the pool needs careful steps for best results. This starts with setup and goes on to regular upkeep. Knowing how to do this can make your pool sparkle with little effort from you.

Setup and Programming

The first thing to do is set up the robot pool cleaner. You connect it to the power, set its cleaning times, and make sure it knows how to move through the pool properly.

  1. Ensure the robotic pool cleaner is securely and reliably connected to the power source.
  2. Set up the cleaning schedule by specifying how often and for how long the cleaning cycles should occur.
  3. Program the robotic cleaner to navigate the pool effectively, utilizing its sensors and algorithms to cover the entire surface area.

After setting up, it’s key to maintain the robotic cleaner. This means:

  • Cleaning its filter often to avoid blockages and keep debris removal efficient.
  • Check the unit for any damages or signs of wear and tear. Address issues promptly upon detection.
  • Make sure the power is good and all connections are well to let the robot work properly.

By sticking to these steps, you can enjoy a clean pool without much work or time needed from you. Your robotic pool cleaner will thank you and work well for a long time.

Task

Frequency

Connect to power source

Once during initial setup

Configure cleaning schedule

Once during initial setup, adjust as needed

Program navigation

Once during initial setup, adjust as needed

Clean filtration system

Regularly (every 1-2 weeks)

Inspect for damage

Regularly (every 1-2 weeks)

Check power connections

Regularly (every 1-2 weeks)

How do robotic pool cleaners work

Choosing the Right Robotic Pool Cleaner

Maintaining a clean swimming pool is key, and an in-ground pool cleaner or automatic pool cleaner helps a lot. Robotic cleaners are a top choice for many. They make pool cleaning easy and effective. With a lot of choices out there, picking the best pool cleaning robot can seem tough. Let’s explore key considerations when purchasing one for your pool.

Factors to Consider When Buying

Choosing the right robotic pool cleaner means checking several things. You want the model that fits your pool and needs it perfectly. Consider these points:

  1. Pool Size and Shape: Your pool’s size and shape matter a lot. Pick a model that matches your pool’s unique design.
  2. Pool Surface: Think about your pool’s surface material. Certain cleaners perform better on concrete, vinyl, or fiberglass surfaces.
  3. Cleaning Capabilities: Look into what each cleaner can do. Pick one with features that match your cleaning needs, like climbing walls or collecting debris.
  4. Energy Efficiency: Opt for a cleaner that uses energy wisely. It helps with costs and the environment.
  5. Cost and Warranty: Look at the full cost, including upkeep. Also, check the warranty to protect yourself.

Considering these points will help you choose wisely. Pick the robotic pool cleaner that will keep your pool clean and be a good investment.

Finishing Statement

Robotic pool cleaners are changing the game for pool maintenance. They keep the pool clean with little effort. By learning how they work, pool owners can see all the perks. No matter the type of pool, a robotic pool vacuum is a great help. It saves time and effort, ensuring your pool stays clean and ready for fun.

The way robotic pool cleaners work technology is getting better all the time. These automatic cleaners are a top pick for those who want to clean without lifting a finger. Thanks to their smart pool cleaning automation features, they’ve made pool care simple. They’ve become a must-have for many pool owners.

To sum up, a top-notch robotic pool cleaner is a real winner for anyone with a pool. It’s a simple and efficient way to keep a pool in top shape. Understanding what these devices can do helps you choose well. Then, you can enjoy a clean pool all through the year.

Frequently Asked Questions

What advantages does a robotic pool cleaner offer?

There are several notable advantages to robotic pool cleaners. They clean without needing you to be there, making things easier. They also use less energy and water, which is good for the environment. Plus, they can clean pools of different shapes and sizes well.

How do robotic pool cleaners work?

Robotic pool cleaners clean thanks to sensors, motors, and smart programs. They hook up to your pool’s power and either suck up debris or scrub it off. As they move, their smart software helps them avoid obstacles and stay on task.

What are the essential parts of a robotic pool cleaner?

The most important parts of a robotic pool cleaner are its filter and its moving system. The filter traps debris to keep your pool clean. The cleaner’s navigation and movement systems ensure it can clean every part of your pool thoroughly.

How can I set up and schedule a robotic pool cleaner?

Setting up and programming your robotic pool cleaner isn’t too hard. You’ll need to connect it to power. Then, you can set when and how you want it to clean. It’s also crucial to check and clean its filter and look for any damage regularly.

What factors should I consider when buying a robotic pool cleaner?

To pick the right robotic pool cleaner, you should think about your pool’s size and shape. Also consider what it’s made of and if the cleaner can handle its cleaning needs well. Think about the price and how efficient the cleaner is with energy too.

Filed Under: Cleaning

How to Get Urine Smell Out of Hardwood Floors

July 1, 2024 by bigfishtavernlagunaadmin Leave a Comment

How to get urine smell out of hardwood floors? why is it available and getting rid of pet urine smell on hardwood floors is although tough, but it can be done. We are here to help. Follow our steps to make your floors smell and feel fresh again. You can keep your home free of bad odors with the right advice.

How to get urine smell out of hardwood floors

Key Takeaways

  • Identify the source of the urine smell to target the affected area effectively.
  • Utilize natural cleaning solutions to neutralize odors and lift stains from hardwood floors.
  • Perform a thorough deep cleaning and deodorizing process to ensure long-lasting freshness.
  • Act quickly to minimize the absorption of urine into the wood, preventing deeper stains and odors.
  • Protect your hardwood floors by training pets and regularly cleaning high-traffic areas.

Identify the Source of the Urine Smell

It’s key to find where the urine smell is coming from on your hardwood floors. This helps you know how big the issue is. It also offers advice on the best techniques for cleaning and odor removal.

Locating the Affected Area

Check your hardwood floors for visible stains or damp areas. These signs could show where the urine smell is coming from. Look closely at spots where your pet often goes, like near their bed or favorite places to rest.

These areas are most likely the source of the smell.

How to get urine smell out of hardwood floors

Determining the Cause of the Odor

After finding the affected area, figure out why it smells of urine. Has your pet done this just once, or has it been occurring frequently? Knowing the cause helps in applying the right solution.

If it’s a recent problem, cleaning might be easier. But for long-standing issues, the wood may absorb more urine. This means you’ll need to clean deeply.

Understanding the urine’s source and how long it’s been an issue is important. This knowledge helps you clean properly. It aims to make your hardwood floors smell fresh and clean again.

Remove urine odor from hardwood floors

Managing the disagreeable odor of pet urine on hardwood floors can present a challenge. But, with the right steps, you can get rid of the smell. You’ll also restore the beauty of your flooring. Below are some guidelines to solve this problem.

 Blot up fresh urine immediately with clean, absorbent towels or paper. This stops the stain from spreading further. Acting quickly like this prevents the urine from seeping deep into the wood. Now, tackle the smell. Enzymatic cleaners work wonders for removing pet urine odor from wood floors. 

These cleaners break down the uric acid in the urine, which removes the ammonia smell effectively. Always follow the cleaner’s instructions. Let it sit for the right time before wiping it away. If the stain is set, you might need to work a bit harder. You might want to try a mixture of warm water and white vinegar.

 Leave the mixture on the stain for some time. This vinegar solution can help neutralize pee stains on hardwood. It also removes any leftover odor. Sometimes, a deeper clean is necessary. For tough stains, consider lightly sanding the area with a rented floor sander. 

This can remove stubborn stains and discoloration. Make sure to vacuum the area well after sanding. Lastly, remember that prevention is key. After getting rid of the urine smell, take steps to protect your floors. Use pet-friendly mats and train your pets to avoid certain areas. This will help prevent future accidents.

Effective Cleaning Solutions for Hardwood Floors

To get rid of urine smells on hardwood floors, using the right cleaning solutions is key. You can use commercial enzymatic cleaners or natural remedies. Each option can help remove the smell and leave your floors smelling fresh again.

How to get urine smell out of hardwood floors

Natural Cleaners for Removing Urine Odors

For those who like natural products, vinegar is great. Dilute it effectively with water in a spray bottle. Spray it on the area, leave it for a bit, then dry the floor.

Baking soda is also excellent for getting rid of urine smells. After a pet accident, sprinkle baking soda on the affected area and let it sit overnight. Afterwards, simply vacuum it up. Alternatively, you can mix baking soda with water to create a paste. Scrub this paste onto the floor and rinse off.

If natural options aren’t your first choice, enzymatic cleaners could be perfect for you. They break down urine at the source, removing the bad smell. Make sure to choose a good enzymatic cleaner made for hardwood floors.

Cleaning Solution

Effectiveness

Ease of Use

Cost

Vinegar

High

Easy

Low

Baking Soda

High

Easy

Low

Enzymatic Cleaners

High

Moderate

Moderate

Always test any cleaner first on a hidden part of your floor. This makes sure it won’t harm the floor’s look or color. With proper care, you can effectively eliminate the odor and maintain the appearance of your floors.

Deep Cleaning and Deodorizing Hardwood Floors

Is there still a urine smell on your hardwood floors after cleaning them? Consider performing a deep clean if needed.This thorough process can tackle tough smells and bring back their natural beauty.

Using special tools and techniques is essential for deep cleaning hardwood floors. First, thoroughly sweep or vacuum to remove any debris. Then, you can rent a floor buffer or orbital sander. This will gently buff the surface, revealing a fresh layer of wood.

Choose a deep cleaning solution designed for hardwood floors. These often contain enzymes or other ingredients. They can reach deep into the wood, breaking down the urine smell. If necessary, opt for a deep cleaning. Follow the instructions carefully, ensuring the cleaner sits for the recommended duration before scrubbing and rinsing.

Deodorizing your floors is also important. A natural spray or mist could be useful. Look for ones with essential oils or natural neutralizers. These can refresh the air and make your floors smell good.

It may take several cleaning and deodorizing stages to fully remove the urine smells. Doing it right will make your wooden floors clean and welcoming again.

Follow these steps to beat urine smells on your hardwood floors. Then, enjoy a fresh and inviting living area.

Finishing Statement

Getting rid of a urine smell on your wood floors might seem tough. But with the correct steps and tools, it’s entirely manageable. Start by identifying the source of the odor. Then, pick the best cleaning methods and use them well. With deep-cleaning techniques, your hardwood will look and smell fresh again.

 We’ve covered a lot on beating urine smells in this article. From finding the areas that need cleaning to getting rid of pee stains and the smell of ammonia. Use natural cleaners and specific deodorizers. This method really works to clean up after pets and get rid of the odor on wood floors.

 Say goodbye to stubborn urine odors with the right information and effort. A clean-smelling home is within reach. Just stay patient and use the best-known ways. This helps not only combat the odor but also maintain the appearance of your floors.

FAQ

How can I prevent urine from seeping into hardwood floors?

Clean up accidents promptly and use a pet-friendly enzyme cleaner to break down urine molecules.

Is it necessary to sand and refinish hardwood floors to remove urine smell?

Not always. Try cleaning with vinegar, baking soda, or enzymatic cleaners first before considering sanding.

Can I use essential oils to mask urine smell on hardwood floors?

Essential oils can help temporarily mask odors, but they do not eliminate urine smells. Use them in conjunction with cleaning solutions.

How often should I clean hardwood floors to prevent urine odor?

Regular cleaning and immediate cleanup of accidents are key. Aim for weekly maintenance and prompt spot cleaning.

What should I do if urine has soaked into the wood?

Use a cleaner specifically designed for hardwood floors and follow the manufacturer’s instructions for deep cleaning.

Can old urine stains on hardwood floors be removed?

 It’s challenging but possible. Try using a combination of enzymatic cleaners, vinegar, and baking soda, and consider professional refinishing if stains persist.

Filed Under: Cleaning

How to soften carpet after cleaning: Easy Tips

July 1, 2024 by bigfishtavernlagunaadmin Leave a Comment

Carpets enhance the comfort and warmth of our homes, but they can feel stiff after a deep clean. How to soften carpet after cleaning?This article provides simple tips to restore your carpet’s softness. You’ll discover ways to bring back the cozy and inviting feel of your carpet.New carpet fibers are designed to bounce back and stay soft1. But, they can lose their bounce due to wear, dirt, and heavy furniture1. This guide will show you how to re-fluff your carpet and keep it soft over time.

How to soften carpet after cleaning

Importance of Soft and Fluffy Carpets

Carpets are key in many houses. They add beauty and warm the space. Soft, fluffy carpets are very important. They give a room a cozy and inviting feel. They also help with air quality, keep the room warm, and are safe for kids and pets to play.

Benefits of Plush Carpets

Plush carpets offer more than looks. They trap dust and allergens, which makes the air better. This helps keep the place healthy and comfortable. They also keep the room’s temperature steady and save energy.  Plus, the soft surface is safer for playing, lowering the injury risk from falls.

Reasons for Stiff and Crunchy Carpets

Sometimes, carpets get stiff and crunchy. This happens after cleaning, if not rinsed well or if harsh cleaners were used. Improper cleaning, leaving soapy residue, is a main cause of this. Learning the cause is the first step to fixing it.

Prepare for Carpet Cleaning

Before you clean your carpet, set the stage the right way. Start by vacuuming well to get rid of dirt and debris. This dirt can mess up the cleaning job. Vacuum once a week, or maybe twice, if you have pets or kids.

Pre-cleaning Steps

Vacuuming isn’t the only step. You need to spot any stains or tough areas that need special care. Check what caused the stains. It could be gum, wax, or red wine. This info helps prepare for the cleaning. Doing these steps before deep cleaning makes it all work better. Plus, you’re more likely to end up with a nice, soft carpet.

Getting your carpets ready the right way is crucial. Vacuuming often and finding trouble spots are key steps. They pave the way for a great cleaning result. You’ll also enjoy the softness of your carpets after. Also, making your own carpet softeners is a smart move.

“Proper preparation is essential for successful carpet cleaning. Ensure you vacuum thoroughly and identify any problem areas before starting the cleaning process.”

Deep Clean the Carpet Thoroughly

Deep cleaning carpets is crucial for maintaining their appearance and texture. Whether using a cleaning machine, steam cleaner, or specific solutions, thoroughness is key to removing dirt, stains, and residues. Methods like a fabric softener mix or homemade blend of baking soda and detergent can effectively lift embedded grime, restoring softness and preventing stiffness.

 Careful execution ensures a comprehensive clean without damaging the carpet fibers. Always follow manufacturer guidelines, test solutions on a hidden area, and adapt methods based on carpet type and product specifications for optimal results. With proper techniques, carpets can regain their plush feel and look refreshed after deep cleaning.

How to soften carpet after cleaning

After cleaning your carpet, it might feel stiff and hard. But don’t worry. You can make your carpets soft again by using some simple tricks. This way, your floors will feel comfy once more.

Fabric Softener Solution

One way to make your carpet soft is with fabric softener. Just mix it with warm water and then spray it on the carpet. Allow it to sit for a while, then rinse. Your carpet will become soft to the touch again.

Vinegar and Detergent Solution

For a low-cost option, try a mix of white vinegar, warm water, and a bit of liquid detergent. This mix will get rid of any leftover cleaning stuff that makes your carpet hard. It will feel soft and fresh after using this.

Homemade Carpet Softening Recipes

Along with fabric softener and vinegar mixes, you can use baking soda, detergent, and water. This easy mix is safe and cheap. It lifts stains, removes leftovers, and makes your carpet feel soft again. Try these homemade softening methods to find what works for your carpet.

Baking Soda, Detergent, and Water Mix

To make this softening recipe, mix baking soda, detergent, and warm water. Baking soda and detergent clean, while water softens fibers. It’s an affordable way to get a soft carpet without harmful chemicals.

“Homemade carpet cleaners can be just as effective as commercial solutions, according to Nick Wilkesmann, owner of Cleaning King.”

Apply the mix by spraying or pouring it on, then wait and clean it up. It refreshes and softens the carpet, making it welcoming. Adjust the amounts to fit your carpet and cleaning needs.

These homemade recipes cut costs and make carpets soft without harsh chemicals. They’re made with easy-to-find items. Your carpets will look and feel better after using them. Try these methods for a comfy, cozy home.

Rejuvenate Carpet Fibers with Blow Drying

You can make your carpets soft again after a deep clean with a blow dryer. Areas like living rooms and bedrooms where people walk a lot can make carpets flat. Carpets that are especially fluffy or made from materials like polyester may look worn out. Gently blow dry your carpets to fluff the fibers up. This will restore their soft and inviting feel.

First, lightly spray the cleaned carpet with warm water, but don’t soak it. Then, use a blow dryer on these damp spots to make the fibers fluffy again. Ensure the blow dryer is set to medium heat. Gradually pass it over the carpet, gently using your fingers to separate the fibers. This method brings back the carpet’s plush feel.

Alongside blow drying, ironing over a damp towel can lift flattened areas. Melting ice cubes in places where the carpet has sunk helps too. Don’t forget to regularly vacuum with a beater bar to keep the carpet clean and fluffy. For certain carpets, such as shag or cut-pile, a carpet rake can work wonders. Deep steam cleaning from professionals also helps in maintaining your carpet’s softness.

Professional Carpet Cleaning Services

If your carpet feels stiff despite your best DIY efforts, consider a professional carpet cleaning service. Professionals in this field possess the essential expertise, tools, and experience required for thorough cleaning. They can get rid of all dirt and residues, leaving your carpet soft and inviting. Trusting your carpet with them guarantees it will be soft again, like new.

Benefits of Hiring Pros

Professional carpet cleaning firms select appropriate cleaning methods and solutions tailored to each carpet’s needs. They ensure proper rinsing and extraction of moisture, which are key for soft and clean carpets. Using the wrong cleaning techniques can make your carpet stiff and crunchy. This could potentially harm your carpet’s fabric over time. By leaving your carpets in the hands of professionals, you benefit from a deep, effective clean.

“Hiring a professional carpet cleaning service guarantees thorough cleaning and restoration, bringing your carpets back to their soft, plush state.”

Final Thoughts

Cleaning your carpets well can make them soft and plush.  Knowing the proper cleaning methods is crucial. Use fabric softener, vinegar mixtures, and dry them well to bring back that comfy feel.

Keeping your carpets soft needs work. But, it makes your home feel cozy. Stick to the softening tips, and your carpets will always welcome you. They’ll be the heart of your home, staying comfy every day.

If your rugs need professional help, try S&S Rug Cleaners. They’re great with all kinds of valuable rugs, from oriental to family heirlooms. Trust them to make your rugs feel as good as new.

Frequently Asked Questions

How can I soften my carpet after cleaning?

To soften your carpet post-cleaning, try these. Mix fabric softener with water. You can also use vinegar and detergent. Or, opt for a blend of baking soda, detergent, and water. To help, blow dry the carpet. This can revive the fibers, making them soft again.

What are the benefits of having soft, fluffy carpets?

Soft, fluffy carpets make a room cozier. They provide improved insulation for your space and create a safer play area for kids and pets. Plus, they improve the air quality, making your house feel more welcoming.

Why do carpets sometimes feel stiff or crunchy after cleaning?

If carpets feel stiff or crunchy after cleaning, it’s usually because of leftover cleaning products or poor rinsing. Ensure you remove all dirt and stains properly. This step is key to keeping your carpet soft and luxurious.

How can I ensure a deep, thorough clean of my carpet?

To achieve a comprehensive carpet cleaning, consider utilizing either a carpet cleaning machine or a steam cleaner. Then, use cleaning solutions that actually purify. The goal is to remove every trace of dirt and old cleaning agents. This leaves your carpet fresh, soft, and plush without any nasty surprises.

What steps are necessary to prepare my carpet for cleaning?

Start by vacuuming your carpet well to get rid of loose dirt. Give particular focus to any stains or trouble spots. Knowing these spots can help you clean them better later on. These steps lay a good foundation for deep cleaning. Your carpet will be cleaner, softer, and more welcoming after you’re done.

Filed Under: Cleaning

How to clean engineered hardwood floors : Easy Guide

June 30, 2024 by bigfishtavernlagunaadmin Leave a Comment

Keeping your engineered hardwood floors beautiful is key to any homeowner or property manager. Using appropriate cleaning techniques and tools can significantly impact the outcome. How to clean engineered hardwood floors? We will give you expert advice and proven methods in this guide. You will learn how to clean your floors well, remove tough stains, and create a routine.

This guide is for those new to caring for engineered wood or those looking to refresh their cleaning routine. We’ll discuss the importance of proper cleaning, the essential tools required, and a detailed step-by-step plan. After reading, you will know how to keep your engineered hardwood floors spotless.

How to clean engineered hardwood floors

Key Takeaways

  • Maintaining engineered hardwood floors’ longevity and beauty hinges on proper cleaning practices.
  • Learn the essential cleaning supplies and tools needed for effective hardwood floor care.
  • Discover a step-by-step guide for routine cleaning, including sweeping, vacuuming, and mopping.
  • Explore effective hacks for tackling stubborn stains and spills on engineered wood floors.
  • Explore effective methods for maintaining your engineered hardwood floors in top condition.

Importance of Proper Cleaning for Engineered Hardwood Floors

Keeping your engineered hardwood floors clean is crucial. It ensures they stay beautiful and last longer. If you don’t clean them well, you might see scratches, discoloration, or even warping.

Maintaining Longevity and Beauty

Cleaning your floors regularly keeps them looking new. This removes dirt and dust, protecting the surface. Consequently, your floors retain their shine and enhance the beauty of your home.

Preventing Damage and Costly Repairs

Bad cleaning can cause serious issues, needing expensive fixes. Dirt can scratch the floor or make it warp. But by cleaning them right, you can prevent these problems.

Doing your own cleaning helps avoid big problems. It lets you protect your investment and keep enjoying your floors. This maintains the look and feel of your home for a long time.

Step-by-Step Guide for How to clean engineered hardwood floors

To keep your engineered hardwood floors beautiful and lasting long, follow a good cleaning plan. We’ll go over the key steps to clean them properly. With the right methods, you can maintain the look of your floors and avoid damage.

How to clean engineered hardwood floors

Prepare the Surface

First, clear the floor of any dirt, debris, or pet hair by sweeping or vacuuming. This is vital to avoid marks or harm when cleaning. For optimal results, employ a soft-bristle broom or a vacuum specifically designed for hardwood floors.

Choose the Right Cleaning Solution

It’s key to pick a cleaner meant for engineered hardwood floors. Stay away from harsh chemicals or rough cleaners as they can hurt the surface. Your top choice should be a pH-neutral, water-based cleaner that is safe and leaves no residue behind.

Apply the Cleaning Solution

Follow the cleaner package directions closely. Usually, you mix the cleaner with water and apply with a damp mop or a cleaning pad. Avoid too much water which can enter the floor and cause damage.

Scrub and Rinse

Scrub gently using a soft brush or mop to effectively lift tough dirt or stains. Once scrubbed, use a clean, damp mop to rinse the floor and take off the cleaner.

Dry the Floor

Allow the floor to dry thoroughly before removing the furniture. To dry, use a dry mop or a microfiber cloth to remove moisture. Then, let the floor air dry fully.

These steps will help you clean your engineered hardwood floors well and keep them looking great for a long time. Always check the flooring’s care instructions too.

Essential Cleaning Supplies and Tools

Making your engineered hardwood floors last means using the correct cleaning items. This includes the right solutions, mops, and vacuums. The right gear is key to cleaning well without harm.

Hardwood Floor Cleaner Solutions

For engineered hardwood floors, the products you use must be designed for them. Hardwood floor cleaning hacks suggest a pH-neutral, water-based cleaner. It’s safe for engineered wood and works on dirt and spills, leaving the finish intact.

  • Look for cleaner formulas without harsh chemicals like ammonia or bleach.
  • Choose products that say they’re okay for engineered hardwood floors.
  • Avoid strong detergents and rough cleaners to keep your floors looking new.

Recommended Mops and Vacuums

Choosing the right recommended mops and vacuums for engineered wood floors is important. Microfiber mops and certain hard-floor vacuums are best. They keep your floors clean without harm.

  1. Microfiber mops are soft and clean without causing scratches.
  2. Look for hard-floor vacuums with soft-bristle brushes and settings for wooden floors.
  3. Refrain from using steam or wet mops, as too much water can harm the wood.

Using the correct hardwood floor cleaning hacks and engineered hardwood floor cleaning solutions keeps things easy. Pair them with the recommended mops and vacuums for engineered wood floors. This ensures your hardwoods stay beautiful and last a long time.

How to clean engineered hardwood floors

Dealing with Stubborn Stains and Spills

Engineered hardwood floors sometimes get tough stains or spills. But, with the right cleaning methods, you can make your floors look like new. It’s key to act fast and choose the best way to clean up. This works for wine spills, grease marks, or scuffs.

Tackling Stubborn Stains

Dealing with a stubborn stain means identifying it first. Then, you can pick the right cleaner. Here are ideas for getting rid of different stains on hardwood: 

  • Grease or Oil Stains: Start by sprinkling baking soda or cornstarch over it. After a few minutes, delicately blot the stain using a damp cloth.
  • Red Wine or Juice Stains: First, blot with a cloth. If the stain persists, gently scrub with a soft brush using a mixture of warm water and dish soap.
  • Ink or Marker Stains: Apply rubbing alcohol or acetone-free nail polish remover to a cloth. Always test this in a hidden spot to avoid damage.

Dealing with Spills

For spills on your hardwood, quick action is important. Follow these steps: 

  • Firstly, blot the spill with a dry cloth or paper towels to get rid of as much liquid as you can.
  • If it’s sticky or sugary, use a slightly wet cloth to clean it, but sparingly so the mess doesn’t spread.
  • Then, clean the spot with a wood-safe cleaner, or a mix of warm water and a little soap, wiping with the grain.
  • Make sure the floor dries out completely. Excess water is bad for engineered wood. Use a clean, dry cloth to help this along.

To keep your floors stunning and strong, focus on preventing stains and spills. Stick to these guidelines for cleaning engineered wood planks and dealing with stubborn stains on engineered floors. Your floors will thank you with their beauty for many years.

Tips for Hardwood Floor Cleaning Hacks

Keeping your engineered hardwood floors clean doesn’t need to be hard. In addition to standard cleaning methods, there are numerous hacks and tips for cleaning hardwood floors. These methods help maintain shiny floors without exceeding your budget. They range from making your cleaning solutions to using eco-friendly products.

DIY Cleaning Solutions

Forget about spending a lot on commercial cleaners.  You can craft your own using simple ingredients. Make a mild cleaner by mixing white vinegar and water. For tougher spots, a paste of baking soda and water works well. Just scrub it on and let it sit a bit.

Eco-Friendly Alternatives

If you prefer eco-friendly engineered hardwood floor cleaning, there are options. Natural oils and waxes can protect and shine your wood. Using lemon oil or beeswax is great for this. Or try a mix of castile soap and water. It’s gentle and free of harmful chemicals.

DIY Cleaning Hack

Ingredients

Benefits

Vinegar-Based Cleaner

White vinegar, water

Gentle, all-purpose cleaning

Baking Soda Paste

Baking soda, water

Effective for stubborn stains

Lemon Oil Polish

Lemon oil

Restores natural sheen

Castile Soap Solution

Castile soap, water

Chemical-free, eco-friendly cleaning

Adding these hardwood floor cleaning hacks into your cleaning can keep floors beautiful. Whether you choose DIY or eco-friendly, the right methods matter. Make sure they are gentle and targeted for your floors.

Best Practices for Engineered Hardwood Maintenance

Keeping your engineered hardwood floors beautiful and long-lasting goes beyond simple cleaning. Using these top maintenance tips, you’ll enjoy your floors for many years.

Regular Cleaning and Inspection

Start by setting a weekly cleaning schedule. Maintain cleanliness on your floors by regularly sweeping or vacuuming to remove dirt and dust.  Use a cleaner made for engineered wood when mopping.

Don’t forget to look closely at your floors on a regular basis. Check for wear, damage, or color changes. Use a cleaner made for engineered wood when mopping. Don’t forget to look closely at your floors on a regular basis.

Proper Cleaning Techniques

Be gentle with your cleaning. Avoid too much water and harsh chemicals. Opt for a cleaner with a neutral pH level. Use a microfiber mop or cloth when mopping to prevent scratches. Remember not to leave water sitting on the floors, which could cause them to warp or swell.

Protective Measures

  • Put area rugs or doormats in spots that get lots of foot traffic. This will help keep your floors in good shape.
  • Under heavy furniture, use felt pads or coasters. This stops them from leaving scratches or dents.
  • Trim your pet’s nails often to avoid scratches.
  • Don’t wear high heels on your floors. Also, be careful not to drag heavy things. These actions can harm your floors.

Refinishing and Resurfacing

Sometimes, your floors will need more than just regular care. Even with the best handling, they might need refinishing. This step includes sanding the top layer and applying a fresh finish.

This process refreshes your floors and adds to their life. Contact a professional for advice on when it’s time to refinish.

By using these top tips for engineered wood floor maintenance, you’re ensuring your floors look their best. Plus, they last longer, so you can enjoy them for many years.

Final Word

This guide provides all the necessary information to ensure your engineered hardwood floors remain clean. Just follow the cleaning steps and use the recommended supplies. With the right care, your floors can always look great.

Keeping your engineered wood floor nice is all about regular and proper upkeep. By using the hardwood floor cleaning tips and engineered wood floor maintenance advised, your home’s value and beauty will last.

Frequently Asked Questions

What are the essential tools and supplies needed for cleaning engineered hardwood floors?

You’ll need a vacuum or broom and a microfiber mop for the floors. Also, a hardwood cleaner, and a damp cloth. A soft-bristle brush helps with tough stains.

How can I prevent damage to my engineered hardwood floors?

Regular cleaning and using felt pads under furniture helps. So do not wear high heels and not drag things. Adding rugs or mats in busy spots also protects from scratches.

What’s the proper way to mop engineered hardwood floors?

Use a damp mop and an appropriate cleaner, being careful not to oversaturate to avoid damage. Mop part by part, washing the mop often.

How do I effectively remove tough stains from my engineered hardwood floors?

To tackle tough spots, softly scrub with cleaner and a brush. Avoid too wet cleaning or harsh chemicals that harm the floor. For hard stains, a professional might have the right solution.

Could you suggest eco-friendly cleaning solutions suitable for engineered hardwood floors?

Eco-friendly options like vinegar and water are good. Castile soap with water or natural plant-based cleaners are also safe. They clean as well as standard cleaners without hurting the earth.

Filed Under: Cleaning

How Often Should I Vacuum My Pool?

June 29, 2024 by bigfishtavernlagunaadmin Leave a Comment

Wondering how often you should vacuum your pool? Consistent vacuuming is crucial for keeping a swimming area clean and safe. How often you need to vacuum depends on factors like the pool’s location, usage, and surrounding environment. If your pool is exposed to a lot of debris, such as leaves, dirt, or pollen, you may need to vacuum it more frequently. This includes vinyl, saltwater, and gunite pools. We’ll also talk about why a clean pool is important. Vacuuming often keeps your pool looking great and ready for a swim anytime.

How Often Should I Vacuum My Pool?

Why is vacuuming your pool essential?

A luxury swimming pool is a beautiful retreat and keeping it clean is key. Pool vacuuming is crucial for a sparkling, welcoming pool.2 Vacuuming keeps algae at bay and makes the pool look better. It also helps your filter work well and ensures chemicals clean the water effectively.2 Regular vacuuming enhances your pool filtration system. It keeps debris from building up in your pool.

Benefits of a Clean and Well-Maintained Pool

A tidy pool offers a better, healthier swim for your loved ones and guests. With regular vacuuming, your residential pool looks great. It becomes a soothing spot that invites everyone to relax and have fun.

Types of Pool Vacuums

Choosing the right pool vacuum matters a lot for a sparkling pool. There are different types of pool vacuums, ranging from manual to robotic, each with its own unique advantages. So, it’s good to know what each kind offers for your pool’s cleaning.

Manual Pool Vacuums

Manual pool vacuums cost less and need you to do the work. You connect the vacuum to a pole and clean the pool yourself. Even though it can be tiring, vacuuming empowers you with total control over the cleaning process.

Automatic Pool Vacuums

Automatic pool vacuums are a step up in convenience. You can find them as suction-side, pressure-side, or robotic models.4 Suction-side ones use the pool’s pump to work. Pressure-side models, while effective, cost more to run. They need an extra line and pump.Depending on your pool, it can take up to six hours for them to clean.

Robotic Pool Vacuums

Robotic vacuums are top-tier. They clean the floor, walls, and even the tile lines. Thanks to advanced tech, they map the pool for an efficient clean that takes at least two hours. These are ideal for those seeking a smart, hands-free cleaning option.

Frequency Recommendations

Pool Usage Level

Frequency

High Usage

Daily

– For pools with heavy use, frequent parties, or lots of swimmers.

Moderate Usage

2-3 Times a Week

– For pools used regularly but not heavily.

Low Usage

Weekly

– For pools that are used occasionally.

After Storms

Immediately After

– To remove debris and maintain water quality.

During Fall

2-3 Times a Week

– To manage increased leaf and debris accumulation.

Before Pool Parties

Day Before Event

– Ensures the pool is clean and inviting for guests.

This chart provides general guidelines for how often you should vacuum your pool based on different usage levels and circumstances.

How Often Should I Vacuum My Pool?

To keep a luxury swimming pool in top shape, you have to vacuum it often. How often you should vacuum your pool varies based on its type. For vinyl pools, doing it weekly helps keep the surface smooth and flexible.

Recommended Vacuuming Frequency for Different Pool Types

Saltwater pools need less care, so they can be vacuumed every two weeks. This cleaning helps stop algae from growing, an essential step. When it comes to Gunite pools, the rough concrete needs weekly vacuuming to fight off dirt and tough algae.

Factors Influencing Vacuuming Needs

Heavy pool use or sudden storms can make your pool dirtier faster. These factors mean you might have to vacuum more often to keep your pool looking good.

Keeping up with regular vacuuming is key to make sure dirt doesn’t build up. It makes your pool a more beautiful place to swim in.

How Often Should I Vacuum My Pool?

Signs Your Pool Needs Vacuuming

Visible Debris

When you notice leaves, dirt, insects, or other debris accumulating on the pool floor and walls, it indicates the need for vacuuming. Excessive debris can impair water circulation and lead to poor water quality.

Algae Growth

Algae thrive in stagnant water with nutrient-rich debris. Regular vacuuming helps remove organic matter that algae feed on, reducing the risk of algae blooms and keeping the pool water clear and safe for swimming.

Cloudy Water

Cloudiness in the water is often caused by suspended particles like dirt, dust, and algae. Vacuuming helps eliminate these particles, improving water clarity and enhancing overall pool aesthetics.

Seasonal Adjustments

During summer, when pools are used more frequently and warmer temperatures encourage algae growth, it’s essential to increase vacuuming frequency. Try to vacuum your pool weekly to prevent debris buildup and keep the water clear. This frequent cleaning regimen helps combat algae and ensures a clean swimming environment for optimal enjoyment.

In contrast, winter typically sees reduced pool usage and lower temperatures, resulting in slower debris accumulation. Adjust vacuuming frequency to bi-weekly or even monthly sessions during this time to efficiently manage cleanliness without excessive effort. By adapting your vacuuming schedule based on seasonal changes, you can effectively preserve the health and appearance of your pool throughout the year, promoting a longer lifespan for pool equipment and a more enjoyable swimming experience.

Tips for Effective Pool Vacuuming

Keeping a pool clean means using the right vacuuming techniques and being safe. When you clean your pool, focus on getting rid of small debris and dirt. Don’t worry about big stuff. Make sure the vacuum is in the water all the time. Don’t vacuum when people are swimming.

How Often Should I Vacuum My Pool?

Proper Vacuuming Techniques

Vacuuming a pool well takes a careful approach. First, clear out any dirt from the filters and pumps. Move the vacuum slowly and take breaks to clean the pump strainer. This helps avoid jams.

Safety Considerations

Safety is key when cleaning a pool. Always wait until the water is empty to start. After you’re done, store the vacuum away safely to prevent any mishaps. If your pool has a vinyl lining, use a vacuum with a soft brush. For pools made of concrete or granite, choose a vacuum with wheels for easy gliding.

Maintaining Pool Vacuum Equipment

Taking care of your pool vacuum equipment is important. Keep the vacuum in a safe place after each cleaning to avoid harm. Also, make sure the filter pump is set to “Filter” and check the water’s pH. This keeps the pool’s chemistry in check.

Follow these pool vacuuming tips and best practices to keep your pool sparkling. This will make swimming a joy for you and your friends.

Enhancing Pool Cleanliness with Professional Services

Vacuuming your pool is key, but you might need pros at times. They provide lots of cleaning and care, keeping your pool top-notch. With their skills and tools, they can handle tough spots. This makes your pool look great.

Professional Pool Cleaning Services

Frequency

Benefits

Filter Cleaning

3-6 months

Prevents clogs and disruption to cleaning schedule

Green to Clean Service

As needed

Removes algae and restores pool water clarity

Acid Wash

Annually

Removes stubborn stains and built-up scale

Resurfacing

5-10 years

Renews pool surfaces and extends lifespan

Mosquito Barrier Treatments

Seasonal

Prevents mosquito breeding and keeps the area safe

Look out for certain signs for professional pool cleaning. These include weird colored water, bugs, and irritation after swimming.

Also, watch for scale on surfaces and bubbles in water. America’s Swimming Pool Company, a 20-year expert, is a top choice for pool cleaning.

Final Thought

Keeping a luxury swimming pool nice needs regular care, with vacuuming as a big part. It’s key to know how often to clean various pools and use the right techniques. This keeps your pool crystal clear, inviting, and well-maintained. It doesn’t matter if you go manual, automatic, or robotic. What’s important is to clean it often to keep its beauty and use intact. 

By vacuuming your pool often, you not only make the water clearer but also use fewer chemicals and make your pool stuff last longer. Making this a top priority means you can have fun swimming with peace and clarity in your own space.

FAQ

Does vacuuming frequency change based on pool size?

Yes, vacuuming frequency typically increases with larger pool sizes. Because of their larger surface area and greater volume of water, larger pools accumulate debris more quickly. Weekly or bi-weekly vacuuming is often necessary for larger pools to maintain cleanliness effectively.

Should vacuuming frequency differ in summer vs. winter?

Yes, vacuuming frequency should be adjusted seasonally. In summer, pools see higher usage and warmer temperatures that promote algae growth and debris accumulation. Therefore, weekly vacuuming is usually recommended. In winter, when pools are used less and debris accumulates slower, vacuuming can be reduced to bi-weekly or even monthly sessions.

How does pool usage affect vacuuming?

Higher pool usage introduces more debris, such as dirt, leaves, and sunscreen residues. Pools with frequent swimmers may require more frequent vacuuming, typically on a weekly basis, to maintain cleanliness and water clarity.

Can I vacuum less if I have a good filtration system?

While a good filtration system can effectively capture debris, it’s still essential to maintain a regular vacuuming schedule. Vacuuming removes debris settled on the pool floor and walls, preventing algae growth and maintaining overall water quality.

What are the benefits of regular vacuuming?

Regular vacuuming enhances water clarity, reduces the need for chemical treatments, prevents algae growth, and extends the life of pool equipment such as filters and pumps. It also provides a cleaner and safer swimming environment.

Filed Under: Cleaning

Is Carpet Cleaner Toxic? Essential Safety Tips

June 29, 2024 by bigfishtavernlagunaadmin Leave a Comment

Many families aim to keep their carpets clean and smelling nice. However, this has raised significant concerns about the safety of the cleaning products we use. The question “Is carpet cleaner toxic?” is increasingly on the minds of homeowners as they seek to balance cleanliness with health. Often, the chemicals in these cleaners can be very harmful, posing risks to both our health and the environment. This guide will delve into the dangers associated with traditional carpet cleaners, offer tips on how to stay safe during the cleaning process, and highlight the benefits of opting for safer alternatives to maintain a healthy home.

Is Carpet Cleaner Toxic?

Understanding the Toxic Chemicals in Carpet Cleaners

Carpets get dirty and collect stains, so cleaning them often is a must. However, many products for cleaning carpets have toxic chemicals. These substances can be bad for our health, making it key to know about them.

Butoxyethanol: A Respiratory Irritant

Butoxyethanol is in many carpet cleaners and it’s a hazardous chemical. It’s known to irritate the respiratory system and can also be toxic if exposure is long.

Naphthalene: A Possible Carcinogen

Naphthalene is another toxic chemical found in carpet cleaners. According to the International Agency for Research on Cancer (IARC), it has been classified as carcinogenic. It’s linked to a condition called hemolytic anemia.

Perchloroethylene: A Degreasing Agent

Perchloroethylene, or tetrachloroethylene, is often in “dry” carpet cleaners. It works as a degreasing agent and can be harmful if you breathe in a lot. It can also irritate the skin because it’s a degreaser.

Precautions to Take During Carpet Cleaning

Precautions for carpet cleaning are crucial for your safety. First, vacuum well to get rid of loose dirt. This makes cleaning easier and less likely to cause allergies to stir up.

Then, it’s important to wear protective equipment. Gloves and a mask protect you from harmful fumes and direct exposure to cleaners. Workers used to skip gear because it didn’t look good. Now, gear makers are focusing on style and comfort to change this.

Handling Wastewater

After cleaning, handle the wastewater properly. Strain it to prevent drain clogs. It’s often safe to dump this water in city drains, but check with local waste officials to be sure.

Keep pets and kids away from the wet carpet. This avoids them interacting with harmful chemicals or the damp environment.

These precautions for carpet cleaning keep you safe from harm. They also help in handling wastewater responsibly. This way, your home becomes a healthier and safer place.

Proper Disposal of Carpet Cleaners

When you need to throw out an old carpet cleaner, start by checking the label. Look for how it should be disposed of. You can also ask your local garbage or water waste office about any special rules for these products.

Reading Product Labels

It’s key to look at what the product label says on how to dispose of it safely. Some carpet cleaners have harmful chemicals. They need to be thrown away in a certain way. By reading the label fully, you will learn the right way to toss out any extra or unused cleaner.

Consulting Local Waste Management Authorities

Also, don’t forget to get in touch with the folks at your local waste office. They give advice on throwing out carpet cleaners. They tell you where to bring them to keep our environment safe. Your area might also have special events or places where you can drop these items off.

Is Carpet Cleaner Toxic? The Surprising Health Risks

Carpet cleaning might seem boring, but it’s not without risks. Many commercial carpet cleaners contain harmful chemicals. These can lead to breathing problems or even raise the risk of cancer. It’s important for families to know these dangers when doing routine home maintenance.

Personal Experience: How Carpet Cleaning Made Me Sick

Imagine hiring pros to make your floors sparkle, only to end up feeling awful. That’s what happened to me. Shortly after the procedure, I started experiencing flu-like symptoms: dizziness, fatigue, and sudden nausea.  The toxins from the cleaners, especially perchloroethylene and naphthalene, were to blame.

The Dangers of Perchloroethylene and Naphthalene

Perchloroethylene, often used in dry cleaning, irritates your breathing. It can make you dizzy and nauseous. Naphthalene, another common cleaner chemical, is bad for your nerves. Both can especially harm those already dealing with asthma or allergies.

After my bad experience, I avoid these strong cleaners. I stick to safe ways to keep my carpets clean. It’s better than risking my health for a short-term clean look.

Non-Toxic Carpet Cleaning Tips

Keeping a home clean and safe is important for most families. It’s vital to choose non-toxic ways to clean carpets. This keeps your home beautiful and your family healthy. Here are tips for stopping dirt and stains while using safe carpet cleaning methods.

Is Carpet Cleaner Toxic?

Preventing Dirt and Stains

One great way to protect your carpets is to stop dirt and stains before they happen. Take off your shoes when you come in, as this can lower lead dust indoors by 60%. Regularly vacuum your carpet on a weekly or biweekly basis using a HEPA-filtered vacuum to effectively trap small particles and prevent dirt buildup.  Also, using throw rugs at entrances can keep dirt and debris off your carpets. Clean up spills right away to avoid tough stains.

Safe Cleaning Methods

For a deep clean, choose non-toxic methods and products. Baking soda is perfect for removing odors and soaking up moisture. Just sprinkle it on, leave for 30 minutes to an hour, and then vacuum. Or, hire a professional cleaner that uses eco-friendly products. These cleaners can lift dirt, grease, and stains without harsh chemicals.

If you’re cleaning your carpets, pick products that are Green Seal certified. These are safer for the air and your skin. They don’t contain harmful VOCs. Always wear a mask and open windows when using any cleaning solution to reduce chemical exposure.By implementing these tips, you can uphold a clean and healthy home.  Being proactive in avoiding dirt and using safe cleaning methods is key. This helps maintain a comfortable and safe living space for your family.

Choosing Safe Carpet Cleaning Products

It’s key to pick safe and non-toxic cleaning for your home’s carpets. Some cleaning companies use strong chemicals. These can harm your health and our world.  Things like naphthalene, perchloroethylene, and ammonia in these products can cause serious health issues. This includes cancer and liver disease.  For the safety of those you love and your pets, pick carpet cleaners that are both eco-friendly and safe from harm.

Green Seal Certification

Looking for the Green Seal certification helps find safe products. It’s backed by groups like Greenguard and the Carpet and Rug Institute. They make sure products meet strict standards for the environment and health. With the Green Seal, you know you’ve chosen a cleaner that’s not just safe but also effective.

Reading Ingredient Lists

Reading product labels is vital when selecting a carpet cleaner.  Many people don’t know about the harmful chemicals in these cleaners. They can cause sickness, tiredness, and harm to vital organs.  Look out for chemicals like butoxyethanol, hydroxyacetic acid, and formaldehyde. These can be bad for you and the planet.  Instead, go for natural cleaners. Look for ingredients like citrus and grapefruit seed extracts. They are not just safe but also good for the environment.

Choosing green seal certified carpet cleaners and carefully reading carpet cleaner ingredient lists helps keep your home’s carpets clean and safe. This way, you protect your family from toxic chemicals.

Wrapping Up

This article has shown how some carpet cleaning products can be dangerous. It focuses on three risky chemicals: butoxyethanol, naphthalene, and perchloroethylene. There’s also advice on how to handle carpet cleaning safely and dispose of old cleaners.

The article talks about personal stories with harmful carpet cleaners. It gives tips to keep carpets clean without the dangers, using safe methods.  Knowing about these risks helps keep families safe when cleaning the house.

Homeowners should prioritize learning about the hazards of toxic carpet cleaners and opt for environmentally friendly products and safe cleaning methods. This way, people can have a clean home that’s also healthy for everyone.

FAQ

How should old or unused carpet cleaners be disposed of?

Read product labels for disposal info. Contact local waste agencies for advice. Consider taking hazardous household products to a collection center.

How can carpets be cleaned safely without toxic chemicals?

To clean carpets safely, prevent dirt and stains first. Do this by vacuuming and cleaning spills regularly. You can also hire companies that use non-toxic cleaners. Look for Green Seal certified products when cleaning by yourself.

How can consumers identify safe, non-toxic carpet cleaning products?

To find safe carpet cleaners, look for Green Seal certification. This certifies the cleaner meets strict health and environmental rules. Read the labels to avoid dangerous chemicals like perchloroethylene and naphthalene.

What health risks come with using toxic carpet cleaners?

People have reported getting very sick soon after using some carpet cleaners. They had flu-like symptoms. This was because of chemicals like perchloroethylene and naphthalene.

Filed Under: Cleaning

How to Mop a Freezer Floor: Easy Guide

June 29, 2024 by bigfishtavernlagunaadmin Leave a Comment

Making sure your freezer stays clean and works well is key for any kitchen. A key aspect is maintaining a clean floor. This guide provides a step-by-step process for how to mop a freezer floor. It helps keep your freezer clean, efficient, and lasting for years

Freezer floors need regular cleaning for health and to work right. Doing this often and deep cleaning once a year stops big problems like mold and too much ice. By using the tips in this guide, your freezer floors will be in great shape. This means a safer and cheaper kitchen.

How to Mop a Freezer Floor

Introduction to Cleaning Freezer Floors

Keeping the freezer floor clean is very important for places that serve food. To ensure food safety, it’s crucial to prevent dirt, debris, and contaminants from reaching your food. Also, a clean floor means fewer chances of slipping, which is good for the people working there.

Importance of Maintaining a Clean Freezer

It’s crucial to keep the freezer clean in places where food is handled. A clean floor means safer food and the freezer works better. It also lasts longer. During COVID-19, places that do take-out or are closed can clean their coolers and freezers well.

Challenges of Cleaning Freezer Floors

Cleaning a freezer floor is not easy. There’s the cold, hard-to-reach spots, and you can’t move the frozen food much. The cold makes cleaning hard. Plus, you can’t use a lot of tools because of the small space and frozen items.  With proper planning and knowledge, cleaning can be done efficiently.

Preparing to Clean the Freezer Floor

Before you start mopping, it’s vital to get the freezer floor ready. First, take out any big chunks of dirt or items. Be sure to cover all your food. Also, get your cleaning tools ready.

Removing Debris and Items from the Floor

Start by sweeping the freezer floor. Begin by clearing away loose debris like dust or food particles. It leaves a clean space for mopping. And remember, throw away the dirt safely to keep your food clean.

Covering Food Products for Safety

Next, cover up your food inside the freezer. Use something like a plastic sheet or a tarp. This makes sure your food stays safe to eat while you clean.

Gathering Necessary Cleaning Supplies

Now, get all your cleaning stuff together. You’ll need a broom, mop, and a bucket. Don’t forget the special cleaners made for freezers. These cleaners will do the job well without ruining your frozen food or freezer.By getting everything ready this way, your cleaning process will be thorough and worry-free. This prepares you for mopping the freezer floor.

Step-by-Step Process for Mopping a Freezer Floor

It’s vital to keep a commercial freezer floor clean for safety and to last longer. This area often gets forgotten but needs special care because of the cold. Follow these steps to mop a freezer floor correctly:

Start by turning off and unplugging the freezer. Put on gloves, a mask, and safety glasses. This is crucial for your safety due to the cold conditions.Then, clear out the freezer completely to clean well and prevent contamination.

 How to Mop a Freezer Floor

Let any ice on the floor melt to make cleaning easier.  Utilize a broom or a vacuum equipped with a brush attachment to remove dirt and ice remnants.  Make a cleaning mix with warm water and the right cleaner or mild soap. Dip a mop or stiff brush in the mix and clean the floor thoroughly. Pay special attention to tough spots or lots of dirt. Always use cleaners meant for freezers. The wrong ones might freeze and cause more problems.

After mopping, rinse the floor thoroughly to remove any residual cleaner. This step is key to avoiding food contamination. Dry with clean towels or let it air-dry. This prevents slipping and more ice forming.

Next, sanitize the floor with a solution that’s safe for food. This makes the space even cleaner and safer for storing food. Regularly cleaning the freezer keeps food safe and helps the freezer last longer.

Follow these steps for keeping your commercial freezer floor clean and safe.

Specialized Freezer Cleaning Solutions

Keeping your freezer floor clean is vital. Regular cleaning items don’t work well in the cold. They might even make ice that’s dangerous. Using the right cleaning solutions keeps the process safe and thorough, even in very cold conditions.

Benefits of Using Freezer-Specific Cleaners

Special cleaners for freezers are made to work in cold places. They clean deeply without freezing, unlike ordinary products. With a freezer-specific cleaner, your freezer stays clean and safe.

One good product is Freezer Cleaner FP. It’s made for freezers and comes in different sizes. You can dilute it to clean at various cold temperatures efficiently. This flexibility makes your cleaning process easier and saves money.

Using eco-friendly cleaners like Freezer Cleaner FP benefits the environment. It’s safe for the planet and your freezer. This cleaner meets environmental standards in every state.

Adding these cleaning solutions to your cleaning routine keeps your freezer perfect. It also prevents harmful ice build ups and meets health regulations. Specific cleaners for freezers are made for these jobs. They are a must for keeping your freezer in top shape.

Maintaining a Clean Freezer Environment

Keeping your freezer clean goes way beyond just cleaning the floor. It requires looking after many parts of your freezer. This is key to keeping it working well and lasting a long time.

Keeping Freezer Doors Sealed

It’s vital to keep the freezer doors tightly sealed to avoid air leaks and ice buildup. Checking the hinges and gaskets often helps ensure everything seals properly. This keeps your appliance running smoothly.

Cleaning Surrounding Areas

Clean more than just the floor; walls and shelves matter too. This prevents dirt, debris, and pests from coming close. Sweeping and mopping, along with wiping down, keep things hygienic.

Monitoring Freezer Temperatures

It’s important to check the freezer’s temperature regularly. This ensures your food stays frozen safely. Identifying problems early allows for swift solutions and reduces food waste.

Following these tips helps keep your freezer clean and functioning well. This is essential to maintain the safety and freshness of your food.

Maintaining a clean freezer is very important for businesses. By sealing doors, cleaning everything around, and checking temperatures, you can make sure your freezer works perfectly. This is good for your business and the safety of the food you store.

“Proper maintenance of freezers leads to better performance and reduced repair costs.”

 How to Mop a Freezer Floor

Additional Freezer Cleaning and Maintenance Tips

Remember, your freezer needs good airflow to work well. Keep space between the walls and your items. Also, make sure items don’t touch each other. This helps your freezer work optimally and prevents freezer burn.

Also, keep these tips in mind to maintain your freezer:

Tip

Benefit

Maintain storage temperature at 0°F or lower

This keeps your food cold and fresh

Defrost manual-defrost freezers at least yearly, or when frost is more than 1/4 inch

It prevents too much frost, saving space and reducing cost

Use one tablespoon of baking soda per quart of warm water for cleaning

It gets rid of smells and dirt effectively

Look at the manual for how to defrost and clean your specific model

It keeps your freezer in top condition

By sticking to these extra cleaning and maintenance steps, your freezer will last longer and work better. This saves you money and time. It also keeps your food safe and sound.

Finishing Statement

Keeping your freezer clean is key for any large kitchen. This guide demonstrates the correct method for mopping a freezer floor. It gives you the best ways to keep your freezer clean and safe17. You’ll learn to prep the floor, pick the right cleaners, and keep up the maintenance. These steps will make sure your frozen foods stay safe and of high quality. They will also enhance the safety of your kitchen for everyone working there.

Frequently Asked Questions

What are the challenges associated with cleaning a freezer floor?

Cleaning a freezer floor is tough due to the cold, hard-to-reach spots, and not wanting to mess with the frozen food.

How should I prepare the freezer floor before mopping?

Before you mop, clear the floor of any big bits. Make sure food is safe from cleaning products. Get your cleaning gear ready, like a broom, mop, bucket, and special freezer cleaner.

Why is it important to use specialized freezer cleaning solutions?

The right cleaners won’t freeze in the cold. This keeps the job safe and effective. Regular cleaners can turn into slippery ice. Freezer cleaners work well even in low temperatures.

What other maintenance practices should be considered for a clean freezer environment?

Keeping a freezer clean is more than just the floor. It includes sealing the doors tight, cleaning around, and checking the temperature often. This keeps everything running well and prevents damage.

What are some additional tips for cleaning and maintaining a freezer?

Remember to defrost regularly to stop too much ice. Clean the parts that make it cold, like coils and fans, for better use. Also, always check if any food is too old or bad to eat.

Filed Under: Cleaning

How to Polish Terrazzo Floors: Achieve a Stunning Shine

June 27, 2024 by bigfishtavernlagunaadmin Leave a Comment

Terrazzo is a beautiful flooring material with a history of over 500 years. It began when Venetian workers mixed scrap marble with clay. This was in the late 1800s in the United States. By the 1920s, it was well-loved. Today, terrazzo is still very durable and a smart choice for floors. It’s becoming more popular again. This guide will demonstrate how to polish and maintain your terrazzo floors.

How to Polishing Terrazzo Floors

Benefits of Terrazzo Floors

Terrazzo floors have many benefits, which is why they’re a top choice in flooring. Terrazzo floors are renowned for their durability, cost-effectiveness, and ease of maintenance.  Besides the practical benefits, terrazzo is beautiful, good for the environment, and can be used in many places, both inside and out.

There are different types of terrazzo floors, like epoxy, cementitious, and more. Each type has its own uses. Today, terrazzo can be installed on top of old or new surfaces like concrete. This adds to its versatility.Terrazzo is not just for floors anymore. Now, it’s used for countertops, sinks, and even walls. Its strength and easy care have made it a hit in homes and businesses.

To keep terrazzo looking good for a long time, it’s best to work with qualified installers. The NTMA (National Terrazzo and Mosaic Association) certifies these professionals. They know how to prevent cracks and include cool design features.

Preparing for Polishing Terrazzo Floors

Before you start polishing your terrazzo, make sure you know if it’s cementitious or epoxy-based.Most terrazzo floors are over 40 years old, some up to 60 years.Understanding the type aids in selecting appropriate tools and methods to achieve optimal results.

Identifying Cementitious vs. Epoxy-Based Terrazzo

Cementitious terrazzo, made before the 1960s, looks dull with few colors and shine.Epoxy terrazzo, from after the 1960s, shines with bright colors and patterns. To check, a peroxide solution foams on cementitious floors.

Gathering Necessary Tools and Materials

Once you know your terrazzo’s type, get the tools you need. You’ll need a 50 grit diamond pad for deep cleaning.This pad can remove nearly all contaminants from the surface. You can rent a concrete grinder from Home Depot for $60 to achieve a smooth floor. A 50 grit hand-held sander is also necessary, along with a solid 150-pound pressure while you work.

It’s also key to have a quality polishing machine, different diamond pads, and a mop with a gentle cleaner. With these, you’re set to revive your terrazzo floors’ beauty.

“Terrazzo flooring originated in ancient Rome where discarded marble remnants were used in construction, showcasing a historical use of recycled materials.”

Thinking about using terrazzo for a project? Its history, benefits, and new technology make it a great choice. It’s durable, affordable, and looks great.

How to Polish Terrazzo Floors

Polishing terrazzo floors is a detailed process that can change your floors’ look from boring to beautiful. It’s been done for over 500 years. Venetian workers first used pieces of marble and clay in their homes and on terraces. Terrazzo gained popularity in the United States during the 1920s due to the introduction of divider strips and the adoption of grinding machines. To get a perfect terrazzo floor, you should perform these steps:

  1. First, clean the floor well to get rid of any loose dirt. This makes the polishing easier.
  2. Look for any places that are not smooth or are damaged. Fix these before you start polishing.
  3. Use rough diamond pads at first (about 50 grit), then move to finer grits (up to 400 grit). This will make the floor smooth and eved.
  4. For the final touch, use resin-bond diamond pads (starting at 800 grit). Continue using progressively finer grits until you achieve the desired shine.
  5. Finally, put on a terrazzo sealer. This protects the floor and makes it last longer.

The terrazzo polishing process can be made easier with systems like the Diamond Devil® Polishing System. This system cuts the typical six steps of polishing down to two, saving both time and effort. The Diamond Devil® tools come in different sizes and have wear indicators to tell you when you need new blades.

Service

Starting Price

Kitchen Cleaning

Rs. 359

Bathroom Cleaning

Rs. 359

Full House Cleaning

Rs. 359

Sofa Cleaning

Rs. 359

Carpet Cleaning

Rs. 349

The Innovative Diamond Devil® Polishing System

The Diamond Devil® Polishing System is changing the game in terrazzo floor polishing. It introduces a special 3+1 polishing method that’s more effective than the old 6-step way. With the Mastic Demon® and its larger blades, it cuts better and leaves surfaces smoother. It’s also quicker by up to 30% in getting rid of debris, making the whole process faster.

What makes this system great is how well it works with different floor machines. You won’t need expensive or bulky grinders, which opens it up to many maintenance experts. The Diamond Devil® tools have blades that don’t wear out easily, cutting down on replacement needs and making work simpler.

The final touch with the Red Shine Tool is truly top-notch. It enhances the gloss and image quality of your floor unlike anything else. This step is what makes the Diamond Devil® Polishing System shine the brightest.

The Malish Corporation, behind this system, has led the floor care field since 1945 with innovative products. If you’re making your terrazzo floor beautiful, it’s wise to work with a Diamond Devil® expert for the best results.

“The Diamond Devil Concrete Restoration & Polishing System was designed to save time and money,” said Jeff Malish, the head of The Malish Corporation.

For any big or small project, the Diamond Devil® Polishing System stands out for its outstanding finishing. It’s efficient and easy to use, making it a top choice for many.

Final Thought

Bright and durable, terrazzo floors need proper care to stay stunning. This guide shows you how to restore and polish them. By doing this, you help keep their beauty for many years.

To keep your terrazzo floors shining, clean them often with a damp mop or a soft brush. Always use gentle cleaners meant for this type of floor. Harsh chemicals can damage them. Placing mats and rugs at key spots also protects your floors, making them last longer.

If you want an easier way to polish, consider the Diamond Devil® system. It’s quick and gives your floors a shiny finish. This method makes your terrazzo floors look even more welcoming. By maintaining proper care and using suitable products, your terrazzo floors can maintain a perpetually new appearance and retain their value over time.

Frequently Asked Questions

Why should I polish my terrazzo floors?

Polishing terrazzo floors enhances their appearance by bringing out the natural beauty of the embedded materials and provides a durable, smooth surface.

Can polished terrazzo floors be repaired if damaged?

Yes, damaged areas of terrazzo floors can be repaired by grinding and filling with a matching epoxy or resin, followed by polishing to blend with the surrounding area.

How can I enhance the longevity of polished terrazzo floors?

Protecting the floor from scratches and wear by using felt pads under furniture legs, promptly cleaning up spills, and avoiding harsh chemicals helps maintain the floor’s longevity and appearance.

How frequently should I polish my terrazzo floors?

The frequency of polishing depends on factors like foot traffic and wear. Typically, polishing terrazzo floors every 1-3 years is advised to uphold their luster and durability.

What kinds of finishes can you apply to polished terrazzo floors?

Terrazzo floors can be polished to various degrees of shine, from matte to high gloss, depending on the desired aesthetic and maintenance preferences.

Filed Under: Cleaning

Does Steam Cleaning Kill Mold? Know the True

June 27, 2024 by bigfishtavernlagunaadmin Leave a Comment

Steam cleaners are now a go-to for many in the U.S. to fight mold, thanks to their effectiveness and safety. They utilize hot water vapor instead of chemicals to eliminate mold and germs, making them a great choice for individuals with asthma, allergies, or those wanting to avoid harsh chemicals.

But does steam cleaning kill mold effectively? The answer lies in the heat. Steam cleaning involves temperatures exceeding 100°C, which is essential for effectively killing mold.This high temperature not only destroys visible mold but also wipes out small, unseen mold spores that can lead to regrowth. Additionally, the steam penetrates hard-to-reach spots where mold often hides, ensuring a thorough and deep clean.

Does steam cleaning kill mold

How Steam Cleaners Work

Steam cleaners use superheated water vapor to clean a variety of surfaces. They heat water to over 200°F, turning it into steam. This steam is then pushed out through nozzles and tools. It removes dirt and grime without needing strong chemicals.

Mechanism Behind Steam Cleaning

Steam cleaning is simple yet powerful. Water turns to steam when heated, which a cleaner then sprays out. This process kills germs and pests effectively because of the high heat and pressure. Ultimately, it sanitizes the surface, leaving it feeling and looking clean.

Types of Steam Cleaners

  • Steam Mops: Ideal for floors, these are simple and affordable.
  • Handheld Steam Cleaners: They’re portable and good for small, tricky spots. They can clean for about 10 minutes on one fill.
  • Canister Steam Cleaners: More advanced, with many tools for different jobs, and can clean longer, up to 45 minutes at a time.

All steam cleaners work by using heat to clean. The type you choose depends on what and how you want to clean.

Feature

Steam Mops

Handheld Steam Cleaners

Canister Steam Cleaners

Primary Use

Floors

Small jobs and hard-to-reach areas

Versatile, multiple surfaces

Water Tank Capacity

N/A

Around 10 minutes

Up to 45 minutes

Cost

Inexpensive

Significantly cheaper than canister models

More expensive

Does Steam Cleaning Kill Mold?

Steam cleaning can remove visible mold effectively. The combination of steam’s heat and moisture can foster optimal conditions for mold to thrive.The heat and moisture from steam can make a good environment for mold to grow. This is because mold loves areas that are wet.

Steam cleaning mostly tackles mold you can see. But, 90% of mold is so tiny you can’t see it. It’s hidden in porous materials.

First, you need to stop the moisture causing the mold. After this, you should use mold-killing sprays and seal up the areas. This helps get rid of the mold completely.

Does steam cleaning kill mold

Special high-temperature steam cleaners can effectively remove mold. They are able to clean grease, dirt, and kill bacteria and viruses too. The hot steam from these machines can get rid of almost all bacteria and viruses. But, some mold might still remain in really porous materials.

“Mold can cause a variety of health issues, including wheezing, skin or eye irritation, nasal congestion, fever, and shortness of breath. Dealing with mold growth promptly and effectively is essential.”So, steam cleaning is good, but not enough on its own. The best approach involves implementing a comprehensive removal plan. This includes finding and stopping the moisture, using mold killers, and sealing surfaces. By doing all this, you can get rid of the mold for good.

Benefits of Steam Cleaning for Mold Removal

Steam cleaning is great for mold removal because it doesn’t use harsh chemicals. It only needs water heated to a high temperature. This means no toxic chemicals are left behind. So, it’s safe for people and the planet.

Steam’s high heat gets deep into surfaces to tackle hidden mold. It’s much better than using chemicals that only clean up what you can see. So, steam cleaning really gets the job done right.

Chemical-Free and Eco-Friendly

Without chemicals, steam cleaning is safer for your health and the environment. It even gets rid of leftover chemicals from other cleaners. This is super important for people with health issues like asthma or allergies.

Penetrates Surfaces for Deep Cleaning

Steam’s high temperatures break down dirt, grime, and mold. It reaches into surfaces better than most cleaners. This makes steam cleaning the best way to clean deep under the surface.

Steam cleaning is not the only solution to mold. But, it’s a key method that’s good for the earth and effective. It’s important for keeping your home both clean and healthy.

Steam Cleaning Effectiveness on Different Surfaces

Steam cleaning is great for getting rid of mold from many surfaces. It uses hot steam to go deep into materials, wiping out nearly all bacteria. This method is also good at disinfecting against COVID-19, and other germs, as recommended by the CDC.

Steam cleaning works well on several surfaces. It can clean carpets, curtains, and countertops, as well as door knobs and railings. This flexibility makes it perfect for deep cleaning multiple areas.

Steam cleaning is highly effective for tile and grout. Its heat can kill mold and mildew in the porous grout. But, avoid it for non-sealed or glued surfaces to prevent damage. Always test a small area first.

When it comes to carpets and upholstery, steam cleaning does wonders. It zaps allergens and odors, leaving your home healthier. Just make sure everything dries fully to avoid mold growth.

Surface

Steam Cleaning Effectiveness

Considerations

Tile and Grout

Highly effective, can penetrate porous grout

Test on a small area first to check for potential damage

Carpets and Upholstery

Excellent for eliminating allergens, odors, and stains

Ensure surfaces dry completely to prevent mold and mildew

Non-sealed, Porous, or Glued Surfaces

Not recommended due to potential damage risk

Test on a small area before full application

Remember that steam cleaning might not kill all bacteria. In places with lots of bacteria, like after the flu, you might need to scrub too. This ensures everything becomes truly clean.

Overall, steam cleaning offers a safe and greener way to clean. It’s good for fighting mold, bacteria, and allergens. Ensuring your home remains fresh and healthy when used appropriately.

Safety Precautions for Steam Cleaning Mold

Steam cleaning mold requires a focus on safety. Mold is dangerous, especially for those with breathing issues or weak immune systems. It’s important to protect both the cleaners and the people in the area. This means using the right protective gear and taking necessary steps.

Does steam cleaning kill mold

Proper Protective Equipment

Those removing mold with steam need the right gear. They should wear:

  • Goggles to shield eyes from mold and steam
  • Gloves for touching mold and hot items
  • A mask to block mold spores from the lungs.

Make sure the protective gear fits well and is used properly. Also, the place you’re working in should have good airflow. This helps stop mold spores from spreading as you clean.

After you finish cleaning with steam, take care to clean the equipment well. This prevents mold from spreading further. Always think about safety, keeping everyone’s health in mind.

Stick to these safety tips to get rid of mold safely with steam. This lowers the health risks related to dealing with mold.

“To ensure the health and safety of both the cleaning crew and the occupants in the affected area, appropriate safety measures must be implemented.”

Alternative Mold Removal Methods

Steam cleaning is a great way to remove mold.  However, it might not always be the most effective approach. There are many other methods to choose from. These include using special cleaners, hiring experts, and doing it yourself.

Certain cleaning products are good for getting rid of mold. For example, vinegar kills 82 percent of mold and germs. Tea tree oil stops mold from coming back. Grapefruit seed extract and hydrogen peroxide kill mold and keep it from growing.

Does steam cleaning kill mold

Professionals can handle big mold problems well. They have special tools and know a lot. They’ve worked on many mold jobs. They use strong chemicals that work well against mold.

Doing it yourself can work too. Scrubbing and using sealants can help. Homeowners can use simple things like vinegar to clean mold. But, DIY has its limits. It’s better to get help for big or hidden mold problems.

Choosing the right mold removal method depends on many things. How bad the mold is and what materials it’s on matter. So does your skill and comfort level. Talking to a pro can guide you to the best solution.

“For mold prevention, it is recommended to keep humidity levels below 50 percent to deter future mold growth.”

Wrap-up

Steam cleaning is good for getting rid of visible mold. However, it may not be the most effective solution for dealing with a mold problem. Why? It’s because the high heat and moisture from steam can make mold grow more.  Also, steam cleaning only deals with mold on the surface.

Yet, most mold is hidden and tiny. To effectively eliminate mold, you must first address any moisture issues. Then, you should use various methods including mold-killing sprays and scrubbing. Taking safety measures to avoid mold exposure is crucial. To effectively eliminate mold, you must first address any moisture issues. Dealing with mold often needs using different ways together.

This makes the removal last longer and do a better job.  Steam cleaning is indeed a useful part of mold cleanup. But, taking extra steps is necessary for mold removal and stopping it from coming back.. Mixing steam with other reliable methods helps. It lets homeowners and pros keep their places free from mold.

Frequently Asked Question

How do steam cleaners operate?

Steam cleaners heat water to over 200°F. They make a vapor that’s sprayed out. This heat and steam clean by breaking dirt and grime off surfaces. There are steam mops, handheld cleaners, and larger ones with many tools.

What are the advantages of using steam cleaning for mold removal?

Steam cleaning for mold is safe for people and the environment. It can reach deep into surfaces, cleaning more mold than chemicals can. This deep cleaning makes it better at removing mold than chemical cleaners.

How effective is steam cleaning on different surfaces?

Steam cleaning kills mold well on many surfaces. It’s good for tiles, grout, floors, and carpets. The heat and steam kill the mold. The scrubbing attachments also help remove it. Yet, it might not work as well on very porous things.

What safety precautions should be taken when steam cleaning mold?

Use safety gear and keep the area well-ventilated when steam cleaning mold. Mold can be very dangerous. Clean your equipment well to stop mold from spreading. 

Are there alternative mold removal methods besides steam cleaning?

Steam cleaning is great, but other methods like chemicals or professional services work too. You can also scrub and seal mold to stop it. Mix methods for the best results.

Filed Under: Cleaning

  • « Go to Previous Page
  • Page 1
  • Page 2
  • Page 3
  • Page 4
  • Page 5
  • Page 6
  • Interim pages omitted …
  • Page 8
  • Go to Next Page »

Primary Sidebar

Recent Posts

  • Can You Deep Fry in a Nonstick Pan? My Surprising Results
  • Clay Pot vs Dutch Oven: Which One Right for You?
  • Are Dutch Ovens Non Toxic? All You Need to Know
  • Is Low Specific Heat Capacity Good for Frying Pans​
  • Smeg Kettle vs Mini Kettle: Which One Fits Your Style?

Copyright © 2024 bigfishtavernlaguna.com. All right reserved.