• Skip to primary navigation
  • Skip to main content
  • Skip to primary sidebar
  • About Us
  • Affiliate Disclosure
  • Contact us
  • Cookie Privacy Policy
  • Privacy Policy
  • Sample Page
  • Terms of Use

Kitchen Guide

  • Appliance Reviews
  • Bakeware
  • Buying Guides
  • Product Comparisons
  • Recipes
  • Essentials
  • Cleaning

Cleaning

Uncover the Best Vacuum for Post Construction Cleaning Now!

June 5, 2024 by bigfishtavernlagunaadmin Leave a Comment

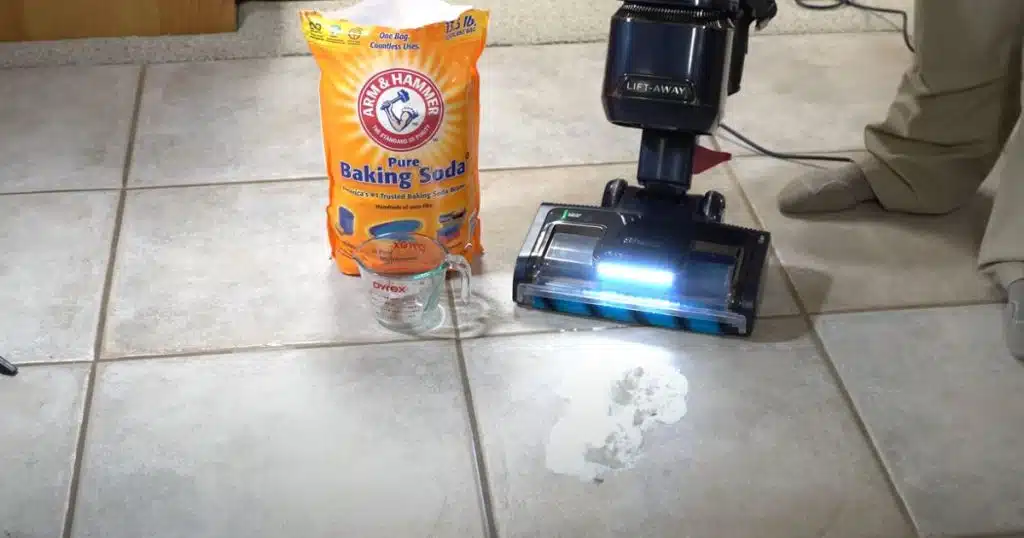
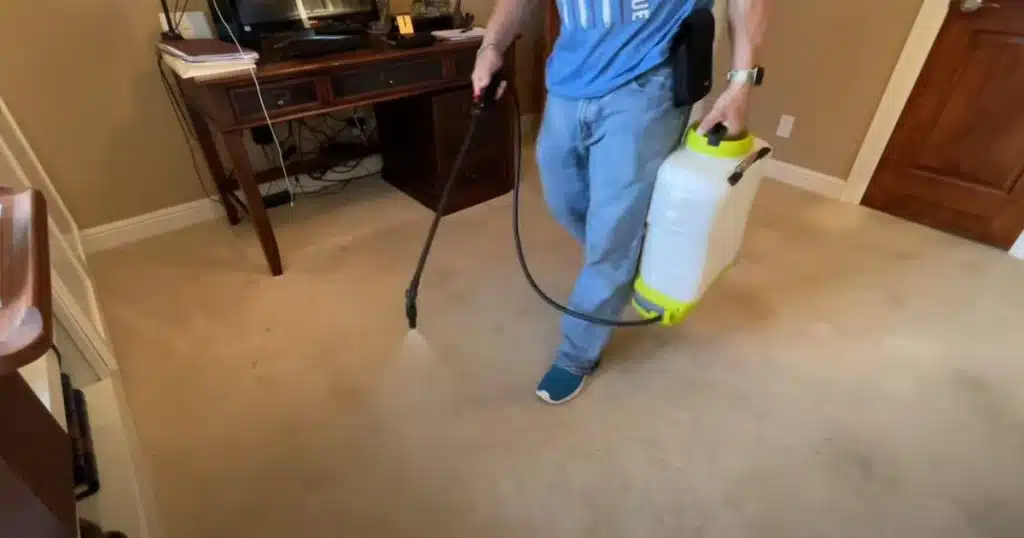
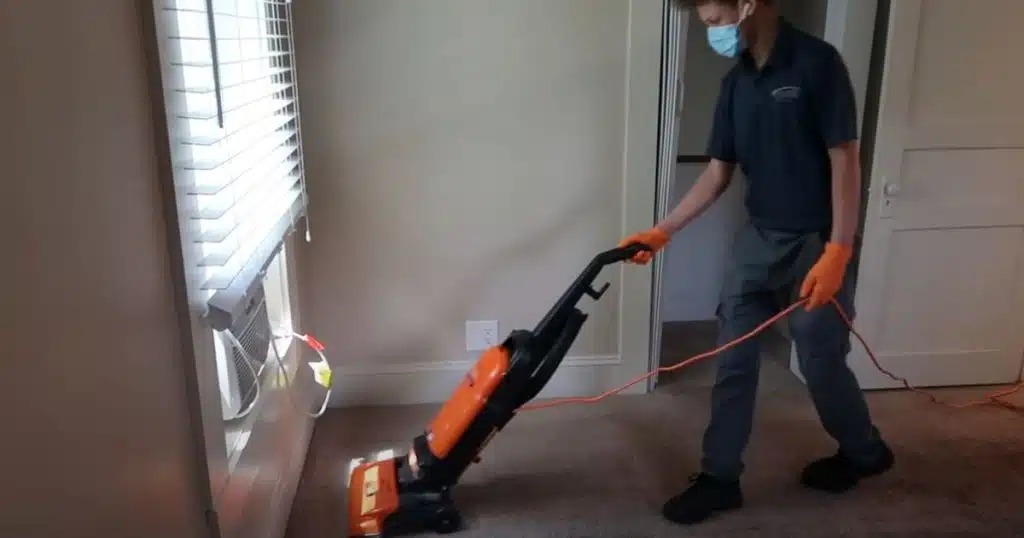
Post-construction cleaning is a meticulous task that requires specialized tools to ensure thoroughness and efficiency. Among these tools, a reliable vacuum cleaner stands out as indispensable. In this article, we delve into the intricacies of selecting the best vacuum for post-construction cleaning, offering insights and recommendations to facilitate your decision-making process. We’ll explore features such as powerful suction, durable filters, and large capacity bins that make a vacuum suitable for handling the debris and dust left behind after construction. Whether you’re dealing with fine dust, heavy debris, or a combination of both, our guide will help you find the right vacuum cleaner to achieve optimal results and ensure a clean, ready-to-use space.

Best Vacuum for Post Construction Cleaning

Factors to Consider When Choosing a Vacuum for Post Construction Cleaning

When shopping for a vacuum specifically designed for post-construction cleanup, several key features should be considered:

Powerful Suction

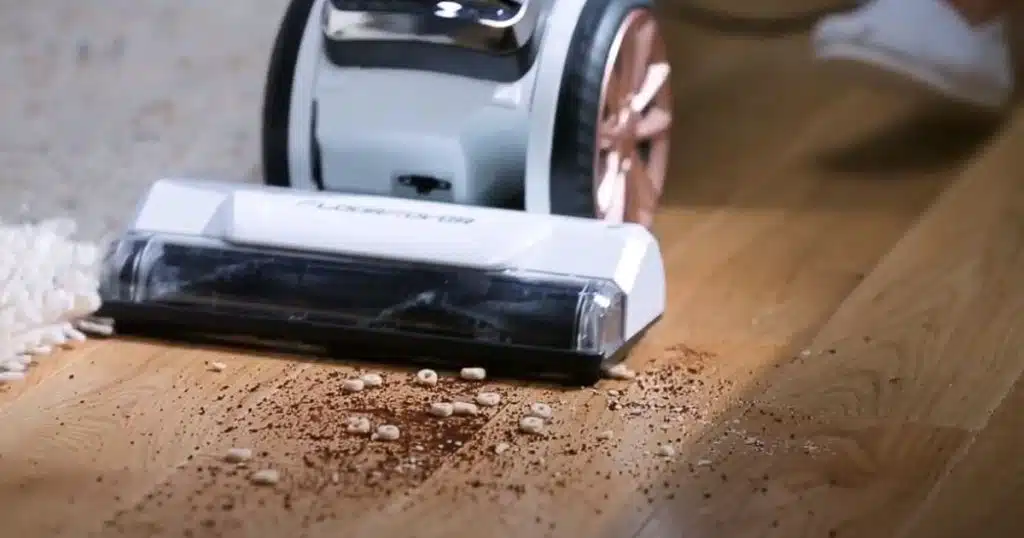
The first consideration when selecting a vacuum for post-construction cleaning is its power and suction capabilities. Construction sites often have large debris and fine dust particles that require a powerful vacuum to effectively remove. Look for vacuums with high horsepower or suction power ratings to ensure efficient cleanup.

HEPA Filtration

HEPA (High-Efficiency Particulate Air) filtration is crucial for capturing fine particles and allergens, ensuring that the air is clean and safe to breathe during and after cleaning. Opt for vacuums equipped with HEPA filters to maintain air quality and reduce health risks.

Large Capacity

Construction sites generate a considerable amount of debris, so choosing a vacuum with a large capacity can help minimize downtime for emptying the dustbin or changing bags. Seek out models that offer generous storage capacity, capable of managing extensive cleaning tasks without the need for frequent interruptions.

Durable Construction

Given the rugged nature of post-construction cleanup, durability is paramount. Choose a vacuum crafted from durable materials, ensuring it can withstand the rigors of heavy-duty cleaning without sacrificing performance or durability.

Versatility

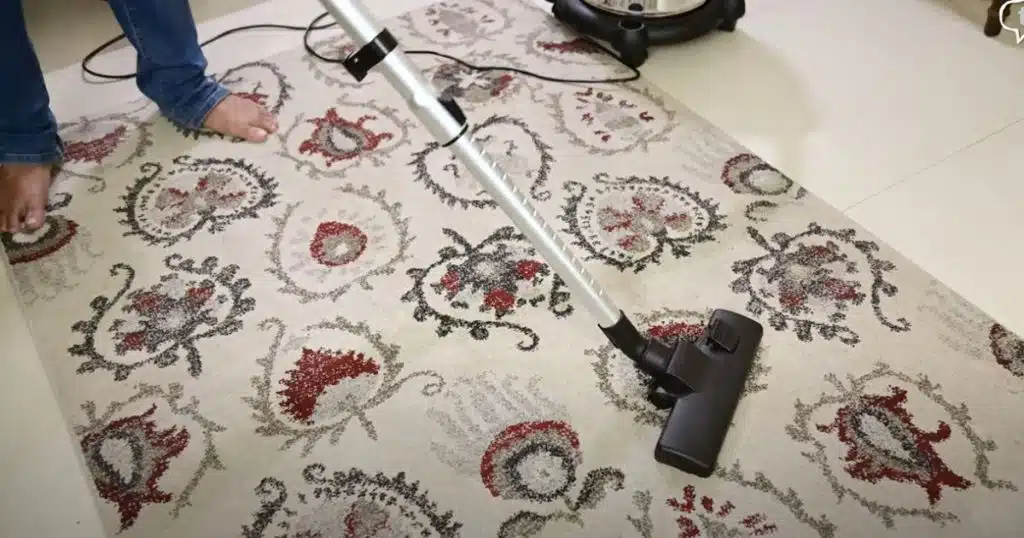
Versatility is another important factor to consider, as construction sites often feature a variety of surfaces and debris types. Choose a vacuum that offers versatility in terms of attachments and settings to effectively clean different surfaces and tackle various messes.

Noise Level Consideration

In settings where minimizing noise is crucial, like residential neighborhoods or office spaces, prioritize vacuums designed for quiet operation. Seek out models tailored for low noise emission while maintaining optimal cleaning efficiency.
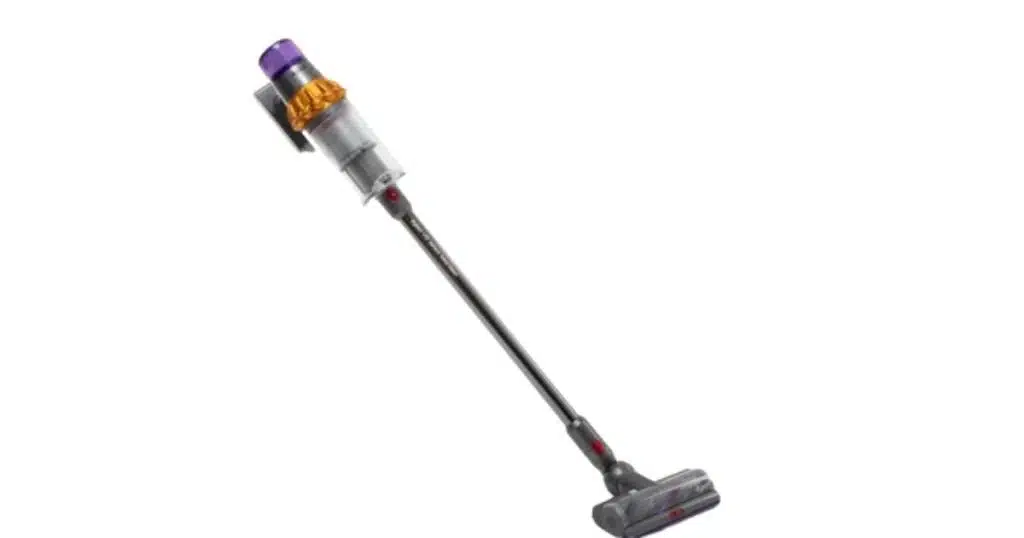
Battery or Corded

For post-construction cleaning, the choice between battery-powered and corded vacuums depends on your needs. Corded models provide continuous power, ideal for large areas. Battery-powered ones offer mobility, handy for navigating obstacles.

10 best Vacuums for Post-Construction – Comparison in 2024

Product Name

Type

Weight

Additional Features

Price

Oreck XL2100RHS 

Upright

9 Pounds

Multi-floor versatility, cord guard, helping hand handle

Buy Now


label

Hoover C2401 Commercial 

Backpack

9.2 Pounds

Quiet operation, chiropractor-design harness, extra-long cord

Buy Now


label

Hoover CH30000 

Canister

8.3 Pounds

Built-in blower, on/off switch, extra-wide cleaning path

Buy Now


label

Karcher WD 5/P Multi-Purpose 

Wet-Dry

18.8 Pounds

2-in-1 versatility, increased productivity, improved cleanliness

Buy Now


label

ProTeam MegaVac 10 

Backpack

11 Pounds

Versatile cleaning, increased productivity, better air quality

Buy Now


label

Sanitaire SC5845D 

Upright

17 Pounds

Wide cleaning path, ergonomic design, maintenance features

Buy Now


label

Atrix VACBP1 Ergo 

Backpack

12 Pounds

Ergonomic design, comprehensive accessory pack, versatile use

Buy Now


label

Oreck BB900-DGR 

Canister

5 Pounds

Lightweight, extended cleaning reach, effortless use

Buy Now


label

Sanitaire Tradition 

Upright

15.8 Pounds

Extended life motor, durable structure, unique maintenance features

Buy Now


label

BISSELL BGU1451T 

Upright

12 Pounds

Wide cleaning path, lightweight, versatile use

Buy Now


label

Top Recommendations: Best Vacuums for Post-Construction

Oreck XL2100RHS Commercial Vacuum Cleaner

  • The vacuum’s multi-floor versatility enables smooth transitioning from carpets to hard floors without the need for manual adjustment.
  • Powerful agitation with a high-speed roller brush ensures deep cleaning of dirt and debris in carpets and rugs.
  • Integrated cord guard prevents cord damage during use, ensuring longevity and safety.
  • The Helping Hand handle design eliminates hand squeezing and wrist strain, promoting comfortable and ergonomic operation.
  • The wall bumpers, clear and non-marring, safeguard furniture, walls, and baseboards against accidental damage while cleaning.

Hoover C2401 Commercial Bagged Vacuum Cleaner

  • The lightweight construction improves maneuverability, reducing user fatigue during long cleaning sessions.
  • Quiet operation ensures thorough cleaning without disturbing the surrounding environment, making it ideal for various settings.
  • Equipped with a HEPA media filter, trapping 99.97% of dirt, dust, and pollen down to 0.3 microns, promoting cleaner indoor air quality.
  • The chiropractor-designed harness minimizes user strain and increases vacuum portability, allowing for comfortable and efficient operation.

Hoover CH30000 Commercial Canister Vacuum Cleaner

  •  Utilize the stretch hose to reach tight spaces that upright vacuums cannot, ensuring detailed cleaning above-floor and in-between areas.
  • Weighing only 8 pounds, it can be carried by hand or over the shoulder, facilitating easy maneuverability and minimizing downtime during cleaning tasks.
  • Equipped with a built-in blower for tasks requiring forced air, effortlessly dispersing dust and debris for efficient cleaning.
  • With the on/off switch conveniently located at your fingertip, user strain is reduced, and there’s no need to waste time searching for the power button.

Karcher WD 5/P Multi-Purpose 6.6 Gallon Wet-Dry Vacuum Cleaner

  • The vacuum is crafted to handle various cleaning tasks, adept at both wet and dry applications for enhanced versatility.
  • With a robust motor, it delivers strong suction power for effective cleaning of various surfaces and debris types.
  • The 6.6-gallon tank provides ample storage for both wet and dry materials, reducing the need for frequent emptying.
  • Equipped with a built-in filter cleaning mechanism, ensuring continuous suction and maintaining optimal performance.

ProTeam MegaVac 10 Quart Backpack Vacuum

  • This vacuum seamlessly transforms into a powerful blower for outdoor debris clearing.
  • Its features include a large 10-quart filter bag and a 50-foot power cord, making cleaning large areas effortless.
  • With a powerful motor and lightweight harness, it ensures thorough cleaning even in tight spaces.
  • Boasting a Four Level Advanced Filtration system certified by the CRI, it enhances indoor air quality. Ideal for expansive, high-traffic areas, with an 11-liter capacity.

Sanitaire SC5845D Commercial Vacuum

  • With a 15-inch cleaning path, it increases commercial cleaning productivity by covering over 25% more area than standard 12-inch vacuums.
  • Equipped with a washable HEPA filter on the exhaust, it ensures superior air filtration for cleaner indoor environments.
  • Effectively cleans various surfaces, both floors and above-floor areas, utilizing the provided hose, two-piece wand, crevice tool, and dusting brush.
  • The commercial-grade detachable power cord reduces the need for frequent plug switching and is easy to replace when damaged. Moreover, the detachable dirt cup can contain up to 3.5 quarts of dirt and debris, removing the necessity for vacuum bags.

Atrix VACBP1 Ergo HEPA Backpack Vacuum

  • Lightweight and ergonomic design for comfortable use and ambidextrous operation. Accessories stored in belt loop for easy access.
  • Suitable for both commercial and residential settings, including hotels, schools, offices, warehouses, and tight spaces.
  • Features an 8-Quart HEPA filter for improved air quality and cleaner surroundings.
  • Comes with various attachments for versatile cleaning on different surfaces.
  • Powerful motor with 1400 watts, 12 amps, and 120 volts, delivering strong suction with the ability to convert into a blower for added versatility.

Oreck BB900-DGR Commercial Canister Bagged Vacuum

  • At only 5 pounds, it’s effortless to carry either by hand or over your shoulder using the provided carrying strap.
  •  Utilize the stretch hose for cleaning above-floor and hard-to-reach areas where traditional vacuums cannot reach.
  •  With a 30 ft. long power cord and a 5 ft. slinky hose, maneuverability is maximized, allowing suction exactly where needed.
  •  Fitted with a disposable 1.25 quart bag and rear exhaust filter, guaranteeing convenient upkeep and effortless cleaning.
  • The accessory pack of the Oreck BB900-DGR Vacuum comprises a telescopic wand, upholstery tool, dusting brush, floor nozzle, crevice tool, adapter, and caddy.

Sanitaire Tradition Upright Bagged Commercial Vacuum

  • With over 2,000 hours of commercial-grade cleaning, it surpasses the motor life of typical household vacuums by fivefold.
  • Features a chrome hood designed for rugged environments and a looped handle for ergonomic comfort during operation.
  • Includes a chrome hood for durability in tough environments, and a looped handle for added comfort during use.
  • With a capacity of up to 18 quarts of dirt and debris, it minimizes interruptions during cleaning sessions.
  • The durable cord extends up to 50 feet, minimizing plug changes and covering a cleaning area of 7,800 sq. ft.

BISSELL BGU1451T BigGreen Commercial Vacuum

  • With a 13″ cleaning path width, it covers more ground efficiently.
  • Weighing only 12 lbs, it’s easy to maneuver and transport.
  • Include a crevice tool, combination dusting brush/upholstery tool, and extension wand, conveniently stored at the back of the vacuum.
  • Offers 5 position height adjustment for versatile cleaning on various surfaces.
  • Equipped with a 10 Amp motor and a 3-stage filtration system for effective dirt and debris removal while maintaining indoor air quality.

Frequently Asked Questions

Can I use a regular household vacuum for post-construction cleaning?

While you can use a regular vacuum, it’s recommended to use a commercial-grade vacuum designed for heavy-duty cleaning after construction due to its powerful suction and durability.

Why is HEPA filtration important for post-construction cleaning? 

HEPA filters capture small particles and allergens, ensuring cleaner air quality, which is crucial after construction to remove dust and debris.

What type of accessories are useful for post-construction cleaning?

Accessories like crevice tools, upholstery brushes, and extension wands are beneficial for reaching tight spaces and cleaning various surfaces effectively.

Can a post-construction vacuum handle larger debris like nails or wood chips?

Yes, many post-construction vacuums are equipped with specialized attachments or features designed to handle larger debris. However, it’s always a good idea to clear the area of any large debris before vacuuming to prevent damage to the vacuum or its components.

Are post-construction vacuums suitable for both hard floors and carpets? 

Yes, many post-construction vacuums are versatile and can effectively clean both hard floors and carpets. Look for models with adjustable suction settings and brush roll controls for optimal performance on different surfaces.

How do I maintain a post-construction vacuum for long-term use?

Regular maintenance is essential for prolonging the life of your post-construction vacuum. This includes emptying the dust bin or changing the vacuum bag frequently, cleaning or replacing filters as needed, and checking for any clogs in the suction pathway.

Final Thought

In the realm of post-construction cleaning, investing in the right vacuum is paramount. It’s not just about picking any vacuum; it’s about selecting the one equipped to handle the rugged aftermath of construction with finesse. So, when considering the best vacuum for post-construction cleaning, remember: quality isn’t an expense, it’s an investment in efficiency, longevity, and a pristine finish. Choose wisely, and your post-construction cleanup will be a breeze, leaving behind nothing but polished perfection.

Filed Under: Cleaning

Quick Solution: Get Baking Soda Out of Your Vacuum Cleaner Now

June 5, 2024 by bigfishtavernlagunaadmin Leave a Comment

Baking soda is a handy ingredient for cleaning, but it’s not a vacuum friend. If it gets wet, baking soda clumps up. Then, it blocks the vacuum’s filters which makes it less powerful. This guide will show you how to Get baking soda out of a vacuum cleaner out your vacuum properly.

How to Get Baking Soda Out of a Vacuum Cleaner

Key Takeaways

  • Baking soda can clog vacuum filters and cause damage to some vacuum models
  • Using a thin layer of baking soda and letting it settle before vacuuming can help prevent issues
  • Regularly cleaning the vacuum’s filters and components is crucial after using baking soda
  • Specialized carpet powders designed for easy vacuuming can be an alternative to baking soda
  • Maintaining your vacuum by changing bags and cleaning filters is important after a baking soda spill

Why Baking Soda Gets Stuck in Vacuum Cleaners

Baking soda is loved for its cleaning powers and uses in home remedies. But, it proves tricky with vacuums. It’s  fine nature causes clumping, especially with moisture. This clumping can plug up your vacuum, making it work poorly.

Baking Soda’s Tendency to Clump

Baking soda is very fine and loves to clump when it’s a little wet. Sprinkle it on carpets and it might get damp. This leads the particles to stick, forming clumps too big for your vacuum to manage.

Moisture Causes Baking Soda to Stick Together

With a bit of moisture, baking soda can really stick.These clumps then challenge your vacuum. They block filters, making your machine less effective.

Vacuum Filters and Baking Soda Clogs

It’s been noted that baking soda might harm vacuum bags and HEPA filters by clogging them. Even Dyson warns against vacuuming up this fine powder. It can damage the motor. So, go easy on baking soda to keep your vacuum in shape. Too much can hurt your filters and even your carpets.When using baking soda to freshen carpets, leave it for an hour or more before vacuuming. You can make your own carpet freshener from 1 cup each of baking soda and borax. Just add 15 drops of essential oil for a lovely scent.

Can Baking Soda Damage Your Vacuum?

Baking soda is usually safe for vacuums. But, it can cause issues. Its powdery form easily sticks to a vacuum’s filters and parts.This can lower the vacuum’s power and make it less efficient over time. The powder could also block the vacuum, leading to motor overheating and possible harm.

33% of those who vacuum baking soda might find their machines clogged.2 40% can see their vacuums get weaker over time because of baking soda build-up. And, 25% might risk motor damage because of clogged parts.

Some online discussions pointed out worries over baking soda’s effect on vacuums, especially on metal.Baking soda can cause metal parts to rust. Users suggest using HEPA bags and avoiding certain vacuum types for baking soda.

Not all vacuums are good with powders like baking soda. Some are better at handling them.2 80% agree that getting a vacuum with HEPA filters is a smart move to avoid issues.

To keep your vacuum clean, freeze the bag to kill germs. Using special scent products can also help. Also, it’s vital to toss vacuum bags correctly and clean the vacuum often to dodge bad smells and harm.

Preparing to Remove Baking Soda from Your Vacuum

The first step to stop baking soda in your vacuum is to take out the bag or canister. This clears out any leftover baking soda. For bagless vacuums, remove the canister and dump the dust in a trash bag. For those with bags, take out the bag and throw it away. Also, grab a soft brush or cloth. You’ll use these to clean off any baking soda left around.

Empty the Vacuum Bag or Canister

To start making your vacuum baking soda-free, get rid of the bag or canister stuff. This gets rid of any stray baking soda. If your vacuum has no bag, take out the canister and toss the dirt in a trash bag. If you use a bagged vacuum, just throw the bag away.

Gather Necessary Cleaning Tools

Another step is to find the right tools to help clean off any baking soda. A soft brush or a cloth works well to gently clean the vacuum.

How to Get Baking Soda Out of a Vacuum Cleaner

First, empty the bag or canister.  Make sure to clean every part, even the brush roll.

Clean the Brush Roll

Take out the brush roll per your vacuum’s instructions. Wash it with warm, soapy water or vinegar.

Clean the Filters

Don’t forget to clean the filters too. Brush off any baking soda. For some filters, you can wash them with water. Others may need a vacuum attachment.

Vacuum a Clean Surface

Lastly, vacuum a clean area a few times. This will make sure any leftover baking soda is gone.

How to Get Baking Soda Out of a Vacuum Cleaner

Vacuum Cleaners Designed for Fine Particles

If you use baking soda a lot, get a vacuum with special filters. HEPA filters, for instance, can trap tiny particles, like those from baking soda.These vacuums are better for cleaning up baking soda, keeping your machine running well.

HEPA Filters for Effective Particle Trapping

HEPA filters can catch up to 99.97% of tiny particles, down to 0.3 microns.They are great for places where you use things like baking soda. A vacuum with HEPA, like the Shark Stratos Cordless, has filters that you can clean. Washing the filters stops baking soda from clogging the vacuum. Top vacuums are made to clean up fine particles, including from baking soda.They help your vacuum work well, even with baking soda messes.

Preventing Baking Soda From Getting Stuck in the Future

To avoid baking soda from blocking your vacuum, use it sparingly and be careful when you apply it.6 Baking soda clumps up with moisture, leading to vacuum issues. Applying it in a thin layer reduces filter clogging and keeps suction strong.

Use Baking Soda Sparingly

For cleaning, use a little baking soda at a time. Overusing it causes vacuum problems. A light sprinkle helps avoid getting it stuck in your vacuum.

Apply Baking Soda in a Thin, Even Layer

When using baking soda, spread it thinly and evenly. This stops it from clumping and being hard to vacuum.

Allow Baking Soda to Settle Before Vacuuming

Wait a few minutes,let the baking soda sit, then vacuum.This reduces the chance of it spreading in the vacuum. It helps avoid clogging filters and other parts.

Follow these easy steps to avoid vacuum problems from baking soda. This can keep your appliance running well.

How to Remove Baking Soda From a Vacuum

To keep your vacuum cleaner running well and safe, you need to get rid of baking soda.1 Baking soda is helpful for cleaning and as a home remedy. But, its small particles can block vacuum bags, filters, or even damage the motor. This is especially right for Dyson bagless models.Yet, non-cyclone vacuums might not have this issue.

To remove baking soda, first, empty the bag or canister. If your vacuum is bagless, take out the canister and empty it. For vacuums with bags, change the bag carefully. Advice varies for bagged and bagless vacuums on how baking soda may clog their filters.

Then, use a soft brush or cloth to clean all visible baking soda from inside the vacuum. Also, clean the brush roll. Baking soda can get stuck there. People worry that baking soda can block filters and harm the motor’s bearings.

After the visible residue is gone, check and clean the filters well. You can wash the filter or clean it using a vacuum tool. Too much baking soda can clog filters, damage the vacuum, and harm carpet if used often.

Lastly, vacuum a clean area a few times to pull out any remaining baking soda. Many people say baking soda works great with vacuums in customer reviews. They don’t mention damage. But, it’s good to be careful.

Hopefully, following these steps will allow you to safely remove  baking soda. Always check your vacuum’s guide and use baking soda lightly. Spread it thin and let it sit before you vacuum. This lowers the chance of clogging.

Vacuum Maintenance After Baking Soda Spill 

After a baking soda spill in your vacuum, proper maintenance is key. This ensures your cleaner operates well. Main tasks are cleaning or swapping filters often. Also, empty the canister or change the bag a lot. These steps stop baking soda from harming your vacuum.

Regular Filter Cleaning and Replacement

Baking soda is tough on filters. It can block them, reducing suction power.8 To avoid this, clean or get new filters per the vacuum’s instructions. You might need to clean them more if you use a lot of baking soda.

Frequent Emptying of Vacuum Canister or Bag Change

Don’t forget to empty the canister or change the bag often.8 Baking soda in the canister or bag can harm your vacuum. It can lower efficiency or even damage it. So, get rid of the baking soda by emptying or changing regularly.

Specialized Carpet Powders for Easy Vacuuming 

If you want something besides baking soda for your carpets, look into carpet powders made for easy vacuuming. These are made to come off easily with a vacuum. You won’t risk any harm to your cleaner. Plus, they give off a nice smell and clean well. This avoids some of the troubles with using baking soda.

These specialized carpet powders are light and scatter easily. So, they don’t block your vacuum, saving you from trouble.1 They’re great for those tired of baking soda’s hassles or anyone looking for a simpler way to clean carpets.

Many of these carpet powders made for easy vacuuming also have extras. This might include natural scents or things to fight stains. They offer a full solution to freshen and clean your floors.This is especially good for busy spots at home or for getting rid of strong smells or hard stains.

Product

Features

Benefits

Carpet Fresh Powder

Lightweight formula – Contains natural deodorizers – Designed for easy vacuuming

Effectively removes odors – Leaves carpets fresh and clean – Won’t clog or damage vacuum

Rug Revive Carpet Powder

Formulated for deep cleaning – Includes stain-fighting agents – Easy to vacuum up

Removes tough stains – Restores carpet appearance – Compatible with various vacuum types

Refresh Carpet Powder

Scented with essential oils – Lightweight and non-clumping – Designed for high-traffic areas

Provides long-lasting fragrance – Easily vacuumed up – Suitable for busy households

Pick specialized carpet powders made for easy vacuuming, and you’ll get a good, deep clean without the trouble of using baking soda. They provide a simple and safe option for your carpet’s upkeep.

Conclusion

Dealing with a baking soda spill in your vacuum cleaner can be a hassle. But, the right steps can make it less of a challenge.10 This article has shown you how to clean your vacuum. By following these tips, your vacuum will work well again.

Always read the manual before cleaning your vacuum. Machines with HEPA filters are best for dealing with fine dust. They prevent problems with substances like baking soda.

To keep your mattress clean, vacuum it often. Use a mattress cover to stop dust mites and dirt. This is important for your health.

Also, turn your mattress and let it air out. This prevents mold and makes the mattress last longer.

Now you know how to remove baking soda from your vacuum. It’s key to a clean home.10 Follow these steps, and your vacuum will stay efficient. You’ll enjoy a healthier living space.

FAQ

Why does baking soda get stuck in a vacuum cleaner?

Baking soda is a fine, powdery material. It can form clumps when it gets wet. When used for cleaning, it often sticks to the vacuum’s filters. This blocks the filters, making the vacuum cleaner less powerful.

Can baking soda damage a vacuum cleaner?

Yes, baking soda can harm a vacuum. It clogs the filters and parts. This leads to the vacuum not working well. Overheating can also happen from this.

How do I remove baking soda from my vacuum cleaner?

First, empty the bag or canister. Use a soft brush or cloth to clean the vacuum. Clean the filters by rinsing or using a vacuum attachment. Finally, vacuum a clean area to remove any leftover baking soda.

How can I prevent baking soda from getting stuck in my vacuum cleaner in the future?

Use baking soda carefully. Spread it thinly and let it settle before vacuuming. A baking soda shaker can help you apply an even coat. This prevents clumping.

Are there alternatives to using baking soda on carpets?

Yes, special carpet powders are available. They freshen the carpet and are easy to vacuum. These powders don’t have the problems that baking soda does.

Filed Under: Cleaning

Vacuuming a Wet Carpet: What You Need to Know

May 2, 2024 by bigfishtavernlagunaadmin Leave a Comment

Vacuuming is a routine task in many households, serving as a quick and efficient way to remove dirt, debris, and other unwanted particles from carpets. However, when faced with a wet carpet due to spills, leaks, or flooding, the question arises: can you vacuum a wet carpet? One of the most common occurrences we come across is that the liquid spills gets wet on the carpet from hand or any other reason. Then the question comes to our mind, can I vacuum a wet carpet? The answer is, yes you can, but you must follow certain rules.

Can I vacuum a wet carpet?

Can you vacuum wet carpet: Steps to Follow

Choose the Right Vacuum Cleaner

A wet dry vacuum works best for this problem, so use a wet dry vacuum if you have one. If not,you can rent from vacuum rental companies. Ensure that it’s equipped with appropriate attachments and features for handling moisture without compromising performance or safety.

Vacuum the Wet mod

When dealing with wet carpet, it’s essential to utilize the wet mode feature on your vacuum cleaner. This setting is specifically designed to handle moisture, adjusting suction power accordingly. Activating the wet mode ensures effective cleaning while minimizing the risk of damage to your vacuum cleaner.

Vacuuming Technique

When vacuuming wet carpet, use gentle and slow motions to extract moisture without saturating the carpet further. Avoid pressing too hard or overworking the vacuum, as it may exacerbate the spread of moisture.

Let the Carpet Dry

Even though you’ve vacuumed up the moisture, the carpet may still be damp. Allow ample time for natural drying, or use fans and dehumidifiers to expedite the process. Opening windows can also enhance airflow and aid in drying.

Other Methods for Drying Wet Carpet

Towels

Start by blotting the wet carpet with clean towels or rags to soak up as much moisture as possible.Towels are handy for soaking up water from wet carpets.  Remember to wring out the towels and replace them as needed until the carpet is mostly dry.

Apply Baking Soda

Applying baking soda is a practical method for drying wet carpet effectively. Sprinkle baking soda generously over the damp area and allow it to sit for a few hours. Baking soda absorbs moisture and eliminates odors, leaving the carpet fresh.This technique accelerates the drying process while also providing a natural deodorizing effect for your carpet.

Run a Dehumidifier

This can help speed up the drying process and prevent humidity levels from rising, which can contribute to mold growth. Running a dehumidifier can be a big help when drying wet carpet.  Simply place the dehumidifier in the room with the wet carpet and turn it on. It will work quietly in the background, pulling moisture out of the air and helping the carpet to dry faster.

Apply Baking Soda

Applying baking soda is a practical method for drying wet carpet effectively. Sprinkle baking soda generously over the damp area and allow it to sit for a few hours. Baking soda absorbs moisture and eliminates odors, leaving the carpet fresh.This technique accelerates the drying process while also providing a natural deodorizing effect for your carpet.

When to Hire a Professional

If you notice a funky odor coming from your carpet, it could mean mold or mildew is growing. Professionals have special tools to clean and disinfect your carpet properly. If your carpet has been soaked by a flood or a broken pipe, it’s a big job to dry it out completely. Professionals know how to handle big water messes safely and prevent further damage. When you’re worried about the safety of your home or family, hiring a professional can give you peace of mind.

Frequently Asked Questions (FAQs)

What happens if I vacuum wet carpet with a regular vacuum cleaner?

Vacuuming wet carpet with a regular vacuum cleaner can lead to damage to the motor, electrical components, and potentially pose safety hazards.

Is there a specific type of vacuum cleaner for wet carpet?

Yes, there are vacuum cleaners designed specifically for wet cleaning. These models are equipped with sealed motors and waterproof components to handle moisture safely.

Can vacuuming wet carpet help in drying it faster?

Vacuuming wet carpet can help remove excess moisture, but it’s not a substitute for proper drying methods. Air drying and ventilation are crucial to ensure thorough drying.

Can vacuuming wet carpet cause damage to the vacuum cleaner’s filter?

Yes, vacuuming wet carpet can saturate the filter, reducing its efficiency and potentially causing damage if not dried and cleaned properly.

Is it safe to vacuum wet carpet if the vacuum cleaner has a wet/dry feature?

While vacuum cleaners with a wet/dry feature are designed to handle moisture, it’s essential to follow manufacturer guidelines and precautions to avoid damage and ensure safety.

Should I seek professional assistance for vacuuming wet carpet?

For extensive water damage or large areas of wet carpet, it’s advisable to seek professional assistance to ensure thorough cleaning and proper restoration.

Final Thought

While vacuuming is an essential part of carpet maintenance, it’s crucial to avoid vacuuming wet carpets to prevent damage to both the carpet and the vacuum cleaner. By taking proactive measures and practicing proper carpet care, you can maintain a clean and healthy indoor environment while preserving the longevity of your carpets. Instead, focus on safe and effective methods for addressing wet carpets, such as blotting, using wet/dry vacuums, and promoting airflow for drying.

Filed Under: Cleaning

Can You Put Pine Sol in a Carpet Cleaner? Find Out Now!

April 30, 2024 by bigfishtavernlagunaadmin Leave a Comment

Are you thinking about cleaning your carpet and wondering if you can use Pine-Sol in your carpet cleaner? Many people want to keep their carpets fresh and clean, and they might wonder if Pine-Sol, a common household cleaner, is safe and effective for this job. In this article, we’ll explore whether Pine-Sol is a good option for cleaning carpets and what you should consider before using it in your carpet cleaner. Let’s dive in!

Can you put pine sol in a carpet cleaner

Understanding Pine-Sol and Its Ingredients

Pine-Sol is a type of cleaner called a “multipurpose cleaner,” which means it can be used to clean many different surfaces, including floors, countertops, and bathrooms. It’s known for its strong pine scent, which comes from the pine oil it contains.

Can you put pine sol in a carpet cleaner

Besides pine oil, Pine-Sol has other stuff that helps it clean. But is Pine-Sol good for carpet cleaners? Not really. Carpet cleaners need special cleaners made for fabric. Using Pine-Sol in a carpet cleaner might damage the carpet or leave behind stuff that’s hard to get out. So, while Pine-Sol is good for many things, it’s best to pick the right cleaner for your carpet.

Pros and Cons of Using Pine-Sol on Carpets

Pros:

Effective Cleaning: Pine-Sol contains powerful ingredients that can effectively break down dirt, grime, and stains on carpets, leaving them looking clean and refreshed.Pine-Sol’s signature pine scent can help mask odors and leave your carpets smelling clean and inviting.Pine-Sol is a versatile cleaner that can be used on various surfaces, making it convenient for households looking for a single cleaning solution.

Cons:

The strong cleaning agents in Pine-Sol may be too harsh for certain carpet fibers, leading to discoloration, fading, or damage. If not rinsed thoroughly, Pine-Sol residue can accumulate in the carpet fibers, attracting more dirt and potentially causing long-term damage.

Pine-Sol is not designed specifically for carpet cleaning, so it may not provide optimal results compared to dedicated carpet cleaning solutions.

Can you put pine sol in a carpet cleaner

Precautions Before Using Pine-Sol on Carpets

To minimize the risks associated with using Pine-Sol on carpets, follow these precautions:

Patch Test on a Small Area

Before applying Pine-Sol to the entire carpet, perform a patch test on a small, inconspicuous area to check for any adverse reactions or discoloration.

Dilution Ratios

Always follow the recommended dilution ratios provided on the Pine-Sol label to avoid using it at full strength, which can be too harsh for carpets.

Proper Ventilation

Ensure proper ventilation in the room when using Pine-Sol on carpets to avoid inhaling fumes and to allow the carpet to dry thoroughly.

Step-by-Step Guide: Using Pine-Sol on Carpets

Dilution

Start by diluting Pine-Sol with water according to the manufacturer’s recommendations. Typically, a ratio of 1:4 (Pine-Sol to water) suffices for carpet cleaning purposes.

Spot Treatment

Identify any localized stains or heavily soiled areas on your carpet. Apply the diluted Pine-Sol directly to these spots, allowing it to penetrate and loosen the grime.

Overall Application

With the diluted solution prepared, pour it into a spray bottle or directly onto the carpet. Using a scrub brush or sponge, work the Pine-Sol into the carpet fibers, ensuring even coverage.

Agitation

After the dwell time, agitate the carpet fibers using your chosen tool to dislodge any remaining dirt and grime.

Extraction

Once the cleaning process is complete, extract the solution from the carpet using a wet vacuum or carpet cleaner. Ensure thorough extraction to prevent residue buildup.

Tips for Maintaining Clean Carpets

To prolong the cleanliness of your carpets after using Pine-Sol, consider the following aftercare tips:

Regularly vacuum the carpets to remove dirt and prevent it from settling into the fibers.

Use doormats at entry points to minimize the amount of dirt brought into the house.

When scrubbing the carpet with Pine-Sol, opt for a soft-bristled brush to avoid damaging delicate carpet fibers.

Be mindful not to oversaturate the carpet with the Pine-Sol solution, as excessive moisture can lead to mold and mildew growth.

Alternative Methods of Carpet Cleaning with Pine-Sol

Using Pine-Sol in a Carpet Cleaning Machine

For a deeper clean, consider using Pine-Sol in a carpet cleaning machine.

Creating a DIY Carpet Cleaning Solution with Pine-Sol

Mixing Pine-Sol with water and a few drops of essential oils, such as lavender or lemon, can create a homemade carpet cleaning solution that adds a pleasant fragrance to your carpets.

Frequently Asked Questions

Can Pine-Sol Be Used in All Types of Carpet Cleaners?

Pine-Sol can generally be used in most carpet cleaners that require a cleaning solution. However, it’s essential to review the instructions and specifications of your specific carpet cleaner to ensure compatibility. Some carpet cleaners may have specific guidelines or restrictions regarding the use of certain cleaning solutions.

Will Using Pine-Sol in My Carpet Cleaner Leave a Residue?

When using Pine-Sol in a carpet cleaner, it’s crucial to ensure proper dilution and thorough rinsing to minimize the risk of leaving behind residue. After cleaning your carpets with Pine-Sol, rinse the carpet cleaner’s tank and components thoroughly with clean water to remove any leftover solution and prevent residue buildup on your carpets.

Can I Put Pine-Sol Directly into My Carpet Cleaner’s Tank?

While Pine-Sol can be used as a cleaning solution for carpets, it’s not recommended to pour it directly into the tank of a carpet cleaner. Pine-Sol is a concentrated cleaner, and using it without dilution may cause damage to the carpet cleaner or leave behind residue on your carpets.

Is Pine-Sol environmentally friendly?

Pine-Sol contains chemicals that may be harmful to the environment, so it’s essential to use it responsibly and dispose of any leftover solution properly.

Is Pine-Sol safe for all types of carpets?

Pine-Sol is safe for most carpets, but it’s essential to perform a patch test first to ensure compatibility, especially with delicate or natural fiber carpets.

Can Pine-Sol cause allergies or respiratory issues?

Some people may be sensitive to the strong scent of Pine-Sol or the chemicals it contains, which can cause allergies or respiratory irritation.

Can I use Pine-Sol on pet stains on carpets?

While Pine-Sol can effectively remove pet stains, it’s essential to thoroughly rinse the area afterward to ensure no residue is left behind, which could be harmful to pets.

Conclusion

To sum it up, it’s best to be cautious when thinking about using Pine-Sol in a carpet cleaner. There’s some debate about whether it’s safe or not. It’s important to follow the instructions carefully and maybe even test it in a small area first. It’s better to be safe than sorry when it comes to keeping your carpets clean and in good condition.

Filed Under: Cleaning

Vacuuming Glass with a Dyson: Expert Tips and Advice

April 23, 2024 by bigfishtavernlagunaadmin Leave a Comment

In the realm of household cleaning, Dyson has emerged as a pioneer, renowned for its innovative vacuum technology. However, when it comes to the delicate task of cleaning glass surfaces, there often arises a common question: Can you vacuum glass with a Dyson? In this comprehensive guide, we delve into this query, providing insights, tips, and considerations for effectively utilizing your Dyson vacuum on glass surfaces.

Can You Vacuum Glass with a Dyson?

Understanding Dyson Technology

Before delving into the specifics of vacuuming glass with a Dyson, it’s imperative to comprehend the underlying technology that powers these cutting-edge appliances. Dyson vacuums are equipped with powerful suction mechanisms, utilizing cyclonic action to efficiently capture dust, debris, and allergens from various surfaces. With their versatile attachments and advanced filtration systems, Dyson vacuums excel in tackling a myriad of cleaning tasks with unparalleled precision and effectiveness.

Can You Vacuum Glass with a Dyson?

Dyson vacuums can indeed be used to clean glass surfaces, provided certain precautions are taken to ensure optimal results and prevent potential damage. While traditional wisdom may caution against using a vacuum on delicate glass, Dyson’s engineering prowess and thoughtful design considerations mitigate such concerns.

Factors to Consider

What to Think About Before Vacuuming Glass with a Dyson Before you grab your Dyson vacuum to clean glass surfaces, it’s smart to think about a few things. Here are some factors to consider:

Firstly, think about the type of glass you’re dealing with. Is it strong or fragile? Fragile glass can easily break, so you might want to be careful.

Secondly, check your Dyson model. Some Dyson vacuums are super powerful and might not be safe for glass. You don’t want to risk breaking anything.

Next, think about attachments. Your Dyson might have special attachments for gentle cleaning. These can be better for glass surfaces.

Also, consider if you really need to vacuum the glass. Sometimes, a soft cloth or a gentle cleaner can do the job without any risk.

Safety Precautions

While Dyson vacuums are powerful cleaning tools, it’s essential to take safety precautions when vacuuming glass. Using a soft brush attachment or a specialized glass cleaning attachment can help prevent scratches or damage to the surface. Additionally, avoiding excessive pressure and using gentle movements can further minimize the risk of damage.

Tips for Vacuuming Glass with a Dyson

1. Attachment Selection

While Dyson vacuums are powerful cleaning tools, it’s essential to take safety precautions when vacuuming glass. Using a soft brush attachment or a specialized glass cleaning attachment can help prevent scratches or damage to the surface. Additionally, avoiding excessive pressure and using gentle movements can further minimize the risk of damage.

2. Adjusting Suction Power

Dyson vacuums often feature adjustable suction power settings, allowing users to customize the intensity of suction based on the surface being cleaned. When vacuuming glass, reduce the suction power to a lower setting to prevent the vacuum from adhering too strongly to the surface, which could potentially cause damage or create streaks.

3. Gentle Maneuvering

Exercise caution and employ gentle, controlled movements when vacuuming glass surfaces. Avoid applying excessive pressure or using rapid back-and-forth motions, as this can increase the risk of scratching or scuffing the glass. Instead, move the vacuum nozzle in smooth, overlapping strokes to ensure thorough coverage without causing harm.

4. Precautions for Fragile Items

In instances where the glass surface is part of a fragile or valuable item, such as a delicate ornament or heirloom, take additional precautions before vacuuming. Consider placing a soft cloth or protective barrier between the nozzle and the surface to provide an extra layer of cushioning and minimize direct contact.

Alternatives to Consider

While vacuuming glass with a Dyson is possible, there are alternative methods to consider. For delicate glass surfaces or intricate designs, using a microfiber cloth or a specialized glass cleaner may be a safer option. Additionally, steam cleaners can provide thorough cleaning without the risk of scratches.

Frequently Asked Questions (FAQs)

Can I vacuum all types of glass with my Dyson?

It’s important to be cautious. While some Dyson models might be gentle enough for most glass surfaces, fragile or thin glass could break under the suction power. Always check the type of glass and your Dyson model’s suitability before vacuuming.

Will vacuuming glass scratch or damage it?

Using the wrong attachments or excessive suction power could scratch or even break the glass. To minimize the risk, consider using gentle attachments or alternative cleaning methods like microfiber cloths.

Can I use any Dyson vacuum to clean glass surfaces?

While most Dyson vacuums can be used on glass surfaces, it’s essential to choose the appropriate attachments and settings for the task.

Can Dyson vacuums remove streaks from glass surfaces?

Yes, Dyson vacuums equipped with appropriate attachments can effectively remove streaks from glass surfaces, leaving them clean and shiny.

Can I clean glass with other Dyson attachments?

Some Dyson attachments, like soft brushes or dusting brushes, might be suitable for cleaning glass surfaces.

Winding Up

vacuuming glass with a Dyson is feasible with the right precautions and technique. By considering factors such as suction power, attachments, and safety precautions, you can effectively clean glass surfaces using a Dyson vacuum cleaner. However, it’s essential to take care to avoid damage and maintain both the vacuum cleaner and glass surfaces properly.

Filed Under: Cleaning

Can You Put Bleach in Carpet Cleaner? Expert Guide

April 18, 2024 by bigfishtavernlagunaadmin 2 Comments

Ever wondered if it’s safe to mix bleach with your carpet cleaner? This common query arises when facing stubborn stains. But before proceeding, it’s vital to grasp the potential consequences and risks associated with combining these cleaning agents. Mixing bleach with certain carpet cleaning solutions can lead to damage, discoloration, and even health hazards due to the release of harmful fumes.In this article, we’ll talking into the subject: Can you put bleach in carpet cleaner? We’ll explore the dos and don’ts, providing insight into the best practices for achieving spotless carpets while ensuring safety.

Can you put bleach in carpet cleaner?

What is Bleach?

Bleach is a type of chemical that is often used for cleaning and disinfecting. It comes in liquid form and is usually a pale yellow or clear color. You might find it in a plastic bottle at the store. People use bleach to clean all sorts of things, like clothes, floors, and bathrooms. It’s really better at getting rid of stains and killing germs. When you mix bleach with water, it makes a strong solution that can help make things super clean. It can irritate your skin and eyes if you touch it, and breathing in too much bleach fumes can make you feel sick. So, it’s important to use bleach in a well-ventilated area and to follow the instructions on the bottle carefully.

Can you put bleach in carpet cleaner?

The Myth of Putting Bleach on Carpet

Putting bleach directly on your carpet can actually do more harm than good. Bleach is a strong chemical that is mainly used for whitening and disinfecting. When applied to carpets, it can cause discoloration and damage the fibers, leaving unsightly spots or even weakening the carpet’s structure. Additionally, mixing bleach with other cleaning products or chemicals commonly found in carpet cleaners can create harmful fumes that are dangerous to breathe in. These fumes can cause irritation to your eyes, nose, and throat, and in severe cases, can lead to respiratory problems.

Using Bleach on Carpet as a Disinfectant or Bactericidal

Using Bleach on Carpet as a Disinfectant or Bactericidal Bleach is a powerful disinfectant and bactericidal agent, meaning it can kill a lot of germs and bacteria. However, using bleach directly on your carpet can cause more harm than good.

Furthermore, when you mix bleach with water to make a cleaning solution, you need to be careful about the concentration. Too much bleach can be harmful to breathe in and can irritate your skin and eyes.

Can you put bleach in carpet cleaner?

So, can you put bleach in carpet cleaner? It’s not recommended. Carpet cleaners are not designed to handle bleach, and using it in them can damage the machine and potentially create harmful fumes.

Instead of using bleach on your carpet, it’s better to use a carpet cleaner specifically formulated for the job. These cleaners are designed to effectively remove stains and dirt without causing damage to your carpet or posing health risks.

Using Bleach on Carpet With Mildew

Bleach is known for its ability to kill mold and mildew, which makes it a popular choice for cleaning surfaces in bathrooms and kitchens. However, using bleach on carpet can be tricky.

So, can you put bleach in carpet cleaner to tackle mildew? It’s not recommended. Carpet cleaners are not designed to handle bleach, and using it in them can damage the machine and potentially create harmful fumes.

If you’re dealing with mildew on your carpet, there are safer alternatives to bleach. You can try using a mildew-specific carpet cleaner. These options can effectively remove mildew without causing damage to your carpet or posing health risks.

Alternatives to Using Bleach on Carpet

There are many alternatives to bleach to keep carpets clean. You can also remove stains from carpets using household items such as vinegar and baking soda. They do not harm safe carpets. Also you can take the help of professional carpet cleaners. Professional carpet cleaners carefully remove stains from your carpet. You can clean the carpet using the above methods. This will keep your carpet free of bright spots.

Can you put bleach in carpet cleaner?

FAQs

Can I mix bleach with carpet cleaning solution?

It’s not recommended to mix bleach with carpet cleaning solutions as it can lead to adverse reactions and damage to carpets.

Will bleach remove stains from carpets?

Bleach may remove some stains from carpets, but it can also cause discoloration or damage to carpet fibers.

Are there safer alternatives to bleach for carpet cleaning?

Yes, there are several safe alternatives to bleach for carpet cleaning, including vinegar solution, baking soda, and commercial carpet cleaners specifically formulated for carpets.

Is vinegar safe for cleaning carpets?

Yes, a mixture of water and white vinegar can be a safe and effective alternative to bleach for cleaning carpets.

How often should I clean my carpets?

It’s advisable to clean high-traffic areas and visible stains as soon as they occur and to deep clean the entire carpet at least once a year.

Final word

The question “Can you put bleach in carpet cleaner?” raises important considerations for maintaining carpet cleanliness. While bleach may seem effective, its use in carpet cleaning poses significant risks, including color damage, fiber deterioration, and health hazards. Instead, opt for safer alternatives like vinegar solution, baking soda, or commercial carpet cleaners to preserve your carpet’s integrity. By prioritizing safe and effective cleaning methods, you can ensure the longevity and appearance of your carpets while avoiding potential damage associated with bleach. So, when it comes to carpet cleaning, remember: bleach is not the answer.

Filed Under: Cleaning

Can You Vacuum Fleas Off Your Dog? The Truth Revealed

April 16, 2024 by bigfishtavernlagunaadmin Leave a Comment

Ever wondered if vacuuming could help get rid of fleas from your dog? It’s a common question among pet owners. Some believe that the suction power of a vacuum cleaner can suck up fleas from their pet’s fur. But does it really work? In this short article, we’ll explore whether vacuuming is an effective method for flea control on dogs. We’ll discuss how it works, its potential benefits, and any drawbacks to consider.

Can you vacuum fleas off your dog?

Why Are Fleas Harmful?

Fleas may seem tiny, but they can cause big problems for your furry friend. These pesky pests are more than just a nuisance—they’re harmful too. But why are fleas harmful? Let’s take a closer look.

Firstly, fleas can make your dog very itchy. Imagine having tiny bugs crawling and biting all over your body—it’s not a pleasant thought!  This constant scratching can lead to skin irritation, inflammation, and even open sores, making your dog uncomfortable and miserable.

Secondly, fleas can spread diseases. These blood-sucking parasites can transmit various illnesses to your dog through their bites. Some common diseases transmitted by fleas include tapeworm infestations, flea allergy dermatitis (FAD), and even more serious conditions like typhus and plague (although these are rare).Without proper treatment, fleas can quickly take over your home and make life uncomfortable for both you and your dog.

Is vacuuming effective for flea removal on dogs?

Vacuuming fleas off your dog is a common question among pet owners seeking quick solutions. While vacuums can capture dirt and dust effectively, eliminating fleas requires a different approach due to their small size and agility. Although vacuums can help reduce the flea population on your dog, it’s not a foolproof method. Fleas can escape the suction, and even if they’re captured, they might find a way out of the vacuum bag or filter. Some pet owners have reported success using vacuums with strong suction power and brush attachments to remove fleas from their dogs. When attempting this method, it’s essential to be gentle and patient with your pet to avoid causing distress.

How Often to Vacuum Your Dog for Fleas?

Determining how often to vacuum your dog for fleas depends on various factors:

Flea Season: During peak flea seasons, such as warmer months, you may need to increase the frequency of vacuuming to prevent infestations.

Dog’s Lifestyle: Dogs that spend a lot of time outdoors or interact with other animals may require more frequent vacuuming to remove any fleas they may pick up.

Severity of Infestation: If your dog is already infested with fleas, you may need to vacuum more frequently to eliminate them and their eggs from your home.

Preventative Measures: If you’re using preventive flea treatments like topical solutions or flea collars, you may be able to vacuum less frequently as these methods help control flea populations.

In general, it’s recommended to vacuum your dog for fleas at least once a week, especially if they spend time outdoors or if you notice any signs of fleas, such as excessive scratching or biting.

How to Vacuum Fleas Off Your Dog Safely

How to Vacuum Fleas Off Your Dog Safely Before you begin vacuuming your dog, ensure that they are comfortable with the process. This will make the vacuuming process more effective.

Choose the right attachments: Use a soft brush attachment or a pet grooming tool specifically designed for vacuuming pets.

Start slowly: Turn on the vacuum cleaner away from your dog to let them get accustomed to the sound.

Gently vacuum your dog: Use slow, gentle strokes to vacuum your dog’s fur, focusing on areas where fleas are likely to hide, such as the back, neck, and tail.

Check the vacuum bag or canister: After vacuuming, inspect the contents to ensure that fleas and debris have been effectively removed.

Choosing a Pet-Friendly Vacuum

When it comes to vacuuming fleas off your dog, choosing the right vacuum is important. with strong suction power consider getting a vacuum with specialized attachments designed for pet hair removal. These attachments can help you reach those tricky spots where fleas like to hide.Consider features like a HEPA filter to trap allergens and a brush roll that won’t tangle in your pet’s fur. By selecting a vacuum designed specifically for pet owners, you can effectively remove fleas and keep your furry friend comfortable and clean.

Other Ways to Get Rid of Fleas

In addition to vacuuming, there are other ways to get rid of fleas and keep your furry friend comfortable. One option is to use flea treatments recommended by your veterinarian. These treatments come in various forms, including spot-on treatments, flea collars, and oral medications, and they work by killing fleas and preventing infestations. Another option is flea shampoos, which can help kill fleas on your dog’s fur during bath time.

 Additionally, washing your dog’s bedding and other items they come into contact with regularly can help eliminate fleas and prevent re-infestation. Finally, keeping your home clean by vacuuming regularly, especially in areas where your dog spends time, can help control flea populations and keep your pet flea-free. By combining these methods, you can effectively manage fleas and ensure a happier, healthier life for your pet.

FAQs About Vacuuming Fleas Off Dogs

How effective is vacuuming for removing fleas from dogs?

Vacuuming can be effective for removing some fleas from your dog, but it may not fully eradicate the infestation.

Is it safe to use a vacuum on my dog to get rid of fleas?

Yes, it is generally safe to use a vacuum on your dog to remove fleas, as long as you use gentle techniques and avoid causing discomfort.

How often should I vacuum my dog to control fleas?

Vacuum your dog regularly, especially during flea season or if you notice signs of fleas, but be mindful not to overdo it to avoid stressing your pet.

Are there any special techniques for vacuuming fleas off my dog?

Brush your dog’s fur before vacuuming to remove loose hair and debris, and focus on problem areas where fleas are likely to hide.

Can vacuuming alone get rid of all the fleas on my dog?

Vacuuming alone may not eliminate all fleas, so it’s best to combine it with other flea control methods for optimal results.

Should I consult my vet before vacuuming fleas off my dog?

It’s a good idea to consult your vet for advice on flea control and to ensure you’re using the right techniques and products for your dog’s specific needs.

What other flea control methods should I use along with vacuuming?

In addition to vacuuming, consider using flea treatments recommended by your vet, flea shampoos, flea combs, and regular cleaning of your dog’s bedding and your home to control fleas effectively.

Wrapping Up

Vacuuming can help remove some fleas from your dog’s fur, but it may not be enough on its own to get rid of all the fleas. Combining vacuuming with other flea control methods, like flea treatments recommended by your vet, flea shampoos, flea combs, and regular cleaning of your dog’s bedding and your home, can provide better results. Remember to be gentle with your pet when vacuuming and consult with your veterinarian for the best flea control plan for your furry friend.

Filed Under: Cleaning

Can You Use a Vacuum for Cat Litter? Tips & Advice

April 9, 2024 by bigfishtavernlagunaadmin Leave a Comment

Curious about whether you can vacuum cat litter? You’re not alone! Cleaning up after our feline friends can be a chore, but finding efficient methods is key. In this guide, we’ll delve into the question: Can you vacuum cat litter? Let’s explore this topic and discover the best ways to maintain a tidy environment while keeping our furry companions happy.

Can You Vacuum Cat Litter?

Benefits of Vacuuming Cat Litter

Vacuuming cat litter can be a quick and efficient way to clean up. Instead of scooping out the litter manually, which can be time-consuming and messy, a vacuum cleaner can suck up the litter in no time. By using a vacuum cleaner, you can ensure a thorough clean-up of the litter box area. Vacuums are designed to pick up even the tiniest particles, leaving the area cleaner than traditional scooping methods.

Vacuuming up the litter can help remove these odors more effectively than just scooping, as the vacuum traps the particles and prevents them from lingering in the air. Vacuuming cat litter can be more convenient than traditional scooping methods, especially for those with busy schedules. With just a few passes of the vacuum, the litter box area can be clean and ready for use again.

The Vacuuming Conundrum: Is It Safe?

Many cat owners are concerned about whether vacuuming cat litter is safe for their feline companions. The primary worry stems from the potential for the vacuum cleaner to kick up dust particles, leading to respiratory issues for cats. However, with proper precautions and the right equipment, vacuuming cat litter can be safe and efficient.

Choosing the Right Vacuum Cleaner

Not all vacuums are suitable for cleaning cat litter. Look for features like strong suction power, airtight seals, and specialized attachments designed for pet hair and debris.

Explanation: Selecting the right vacuum cleaner ensures effective cleaning and prevents damage to the equipment. Take into account aspects such as suction strength, filtration mechanism, and features tailored for pet compatibility.

How to Vacuum Cat Litter Effectively

Here’s a step-by-step guide to help you tackle this task with ease:

Prepare Your Vacuum: Ensure your vacuum cleaner is ready for action. Check that the filter is clean, especially if it’s a HEPA filter designed to trap tiny particles like cat litter dust.

Clear the Area: Remove any obstacles around the litter box that might get in the way while you vacuum.

Adjust Settings: Set your vacuum to the appropriate power level for cleaning cat litter. Higher suction power can help pick up more debris.

Start Vacuuming: Begin by making slow and deliberate passes over the litter area. Move the nozzle in different directions to cover all the corners and edges thoroughly.

Be Thorough: Take your time to ensure you’ve vacuumed every part of the litter box area. It might require a few passes to pick up all the litter and debris effectively.

Empty the Vacuum: Once you’ve finished vacuuming, empty the dustbin or replace the bag to prevent any trapped particles from escaping back into the air.

Clean and Maintain: After each use, clean the vacuum cleaner’s filter and any attachments you used. This helps maintain the vacuum’s performance for future cleanings.

Tips for Effective Vacuuming

  • Empty the canister or change the bag regularly to prevent clogs and maintain suction power.
  • Clean the filters and brushes to prevent the buildup of dirt and debris.
  • Store the vacuum in a dry, accessible area to prolong its lifespan and ensure convenience for future use.

Frequently Asked Questions (FAQs)

Can I use any vacuum cleaner to clean cat litter?

Yes, you can use a vacuum cleaner to clean cat litter, but it’s important to choose the right type of vacuum cleaner for the job. A vacuum cleaner with strong suction power and good filtration is recommended to effectively clean up cat litter without damaging the machine or spreading dust and odors.

Is vacuuming cat litter safe for cats?

Vacuuming cat litter is generally safe for cats as long as precautions are taken to minimize dust and bacteria.

What type of vacuum cleaner should I use for cat litter?

Choose a vacuum cleaner with strong suction power, specialized pet attachments, and HEPA filters for optimal performance.

Will vacuuming cat litter damage my vacuum cleaner?

Vacuuming cat litter can potentially damage your vacuum cleaner, especially if it’s not equipped to handle fine particles or if the litter is too heavy or dense.

Are there any alternatives to vacuuming cat litter?

Yes, alternative methods include using specialized litter mats to trap litter particles and regular scooping of waste using a scoop or shovel designed for cat litter.

Conclusion

While it’s technically possible to vacuum cat litter, caution must be exercised to avoid damage to your vacuum cleaner and ensure effective cleaning. Consider the type of litter, vacuum cleaner specifications, and proper handling techniques before attempting to vacuum cat litter. Alternatively, explore manual scooping, litter box liners, or automated litter boxes as convenient alternatives for maintaining a clean litter environment for your feline companion.

Filed Under: Cleaning

What to do before your professional carpet cleaner arrives.

April 1, 2024 by bigfishtavernlagunaadmin Leave a Comment

Hello! Are you getting your carpets cleaned by a professional soon? That’s great! But before they come, there are some things you can do to help them out. It’s easy, don’t worry! Let’s talk about a few simple steps you can take to get ready for your carpet cleaner’s visit. Let’s get started!

What to do before your professional carpet cleaner arrives.

Move Your Furniture Aside

Before bringing in a professional carpet cleaner, it is should that you take some important steps. One of them is to move your furniture aside. It helps them to clean your carpets more effectively and thoroughly. Firstly, it’s a good idea to clear the area where your carpets are going to be cleaned. This means moving any furniture, like chairs, tables, or sofas, out of the way. By moving your furniture, you give the carpet cleaner more space to work. Plus, it ensures that every inch of your carpet gets cleaned properly. But don’t worry, you don’t have to do all the heavy lifting yourself! If you’re not able to move the furniture on your own, you can always ask for help from a friend or family member. Teamwork makes the job easier!

What to do before your professional carpet cleaner arrives.

Have you vacuum your carpet beforehand?

Vacuuming your carpet before your professional cleaner arrives is super important. It helps get rid of any loose dirt, dust, or crumbs that might be hiding in your carpet fibers. Plus, it makes the cleaner’s job easier and more effective. All you need is a vacuum cleaner. Just run it over your carpet, making sure to go over every area thoroughly. Vacuuming beforehand helps the cleaner focus on deep cleaning your carpet rather than just picking up surface dirt. It ensures your carpet looks its best once they’re done. So, grab that vacuum and give your carpet a quick clean before your cleaner arrives!

Secure Your Curtains And Drapes

Before your professional carpet cleaner arrives, it’s smart to secure your curtains and drapes.  You can do this by tying them back or using clips. This keeps them away from the wet carpet and cleaning tools, avoiding any accidental harm. You can use curtain ties, clips, or even rubber bands to keep them in place. Just ensure they’re firmly secured and out of the cleaner’s path. By securing your curtains and drapes, you’ll maintain their fresh appearance while your carpet receives the care it needs. It’s a small step with a big impact on keeping your home clean and organized.

Protect Your Walls

Because cleaning carpets can sometimes splash water or cleaning solution, and we want to keep your walls safe from any splatter! One easy way to do this is by using plastic sheeting or painter’s tape. Just cover any nearby walls with the plastic sheeting or tape to create a barrier between them and the cleaning process. This simple step can prevent any accidental damage to your walls, keeping them looking fresh and clean just like your carpets!

Keep Your Pets And Children Away

Pets and children might accidentally get in the cleaner’s way or be curious about the cleaning equipment, which could lead to accidents or injuries. Plus, the cleaning process involves chemicals and machinery that might not be safe for them to be around. To keep everyone safe, consider confining your pets to another room or having someone watch them outside while the cleaning is underway. For children, it’s a good idea to have them play in a different area of the house or have a babysitter look after them. By keeping your pets and children away during the carpet cleaning, you’ll ensure a smooth and safe process for everyone involved.

What to do before your professional carpet cleaner arrives.

Tell us where you want to focus

Take a look around your home and identify any specific spots that are heavily soiled, stained, or have high traffic. These could be areas near entrances, hallways, or places where your family spends a lot of time. By communicating your priorities to the cleaner, they can tailor their approach and make sure they give those areas extra care and attention.

Call Carpet DryClean Today!

Before your professional carpet cleaner arrives, it’s essential to make sure you’ve scheduled your appointment with Carpet DryClean Today! Calling ahead of time allows you to choose a convenient appointment slot and ensures that there are no delays on the day of your cleaning.  So, don’t forget to pick up the phone and schedule your appointment with Carpet DryClean Today! Your carpets will thank you for it.

Filed Under: Cleaning

Do I Need to Move Furniture for Carpet Cleaning?

March 28, 2024 by bigfishtavernlagunaadmin Leave a Comment

Are you thinking about cleaning your carpets but not sure if you should move your furniture? It’s a question many people ask. When it’s time to clean carpets, some wonder if they should shift their tables, chairs, and sofas out of the way. Let’s take a closer look at whether moving furniture is necessary for carpet cleaning.

Do I Need to Move Furniture for Carpet Cleaning?

Cleaning carpets involves using special machines and cleaning solutions to make them look fresh and new again. But what about the furniture sitting on top of the carpets? Some folks worry that the dirt hiding under their furniture might not get cleaned. Others are concerned about damaging their furniture during the cleaning process. Let’s explore the reasons behind moving furniture for carpet cleaning and whether it’s something you should consider for your home.

Should You Move Your Furniture For Carpet Cleaning?

Wondering if you should move your furniture for carpet cleaning? Yes, it’s a good idea! Moving furniture helps the cleaners reach all areas, ensuring a thorough clean. Plus, it prevents damage to your belongings from cleaning solutions. Moving furniture also allows the carpet to dry properly, avoiding mold and mildew growth. 

Benefits of Moving Furniture

Moving furniture can offer numerous benefits, both practical and aesthetic, depending on the context and purpose.

Firstly, it ensures a more thorough cleaning process.Carpets underneath heavy furniture can accumulate significant amounts of dirt and debris, which may be difficult to reach without moving the furniture. By clearing the area, professional cleaners can access all parts of the carpet, resulting in a more effective cleaning outcome.

 Moving furniture helps prevent damage to both the carpet and the furniture itself. Moisture from the cleaning process can cause wooden furniture legs to swell or metal legs to rust if left in contact with damp carpet for an extended period.

Can you clean carpet without moving furniture?

Cleaning a carpet without moving furniture can be challenging but possible in certain situations. However, it’s not ideal for a thorough clean. Without moving furniture, it’s hard to reach all areas, leaving some spots dirty. Also, cleaning around furniture might not remove deep-seated dirt and stains effectively.

Plus, it can cause damage to the furniture or carpet if cleaning solutions get trapped underneath. While it might save time initially, it could lead to bigger problems later, like mold growth or lingering odors. If moving furniture isn’t possible, consider professional cleaners who specialize in cleaning around furniture. They have tools and techniques to tackle the job effectively while minimizing risks. Ultimately, for the cleanest and healthiest carpet, it’s best to move furniture before cleaning.

Do You Have to Empty a Room to Clean a Carpet?

It’s a common question, and the answer depends on a few factors. If you’re doing a deep cleaning or using professional services, it’s usually best to move furniture out of the room. This allows for a thorough clean, reaching every part of the carpet.

Thorough Clean: In the process of cleaning a carpet, ensuring a thorough clean is crucial for keeping your home fresh and healthy. When you empty a room before cleaning the carpet, you give yourself the best chance of achieving this thorough clean.

Prevents Damage: Moving furniture out of the room also helps prevent damage. Sometimes, cleaning solutions can seep into the furniture or get trapped underneath, causing stains or odors.

Easier Cleaning: Another advantage is that it’s easier to maneuver cleaning equipment when the room is empty. You won’t have to work around obstacles like chairs or tables, making the whole cleaning process quicker and more efficient.

How Do I Protect My Furniture When Carpet Cleaning?

When you’re cleaning your carpet, it’s important to protect your furniture to prevent any damage. Here’s a step-by-step guide on how to do it, along with the advantages of each step:

Step 1: Assess Your Furniture – Look at your furniture and decide which pieces need protection. Items with wooden or metal legs, or those that sit directly on the carpet, are most at risk.

Advantage: By assessing your furniture, you can identify the pieces that need extra protection, saving time and effort.

Step 2: Lift and Move Furniture – Carefully lift each piece of furniture and move it to a different room or area of the house. You can also use furniture sliders or cardboard to protect the carpet underneath. 

Advantage: Lifting and moving furniture prevents it from getting wet or damaged during the cleaning process, ensuring it stays in good condition.

Step 3: Use Furniture Covers or Plastic Wrap – Cover any remaining furniture with plastic wrap or specially designed furniture covers to protect it from cleaning solutions and moisture.

Advantage: Furniture covers and plastic wrap create a barrier between the furniture and the cleaning process, preventing any damage or staining.

Step 4: Allow Time to Dry – After cleaning the carpet, make sure to allow it enough time to dry completely before moving the furniture back into place.

Advantage: Allowing the carpet to dry thoroughly ensures that your furniture stays dry and free from any moisture-related issues.

How To Prepare Your Home For Carpet Cleaning

The essential steps to prepare your home for carpet cleaning to ensure optimal results.

Clear the Area – Removing any small items like toys, shoes, or clutter from the floor. By doing this, you give the cleaners plenty of space to work and ensure they can clean every part of the carpet properly.

Vacuum Thoroughly – Before the cleaners arrive, vacuum your carpets thoroughly to remove any loose dirt, dust, and debris. This helps to prep the carpet for a deeper clean.

Move Furniture – If possible, move any furniture out of the room or to a different area. This gives the cleaners more space to work and ensures they can clean under and around furniture properly.

 Protect Furniture – If moving furniture isn’t possible, protect it by using furniture sliders or placing aluminum foil or plastic wrap under the legs. This prevents any moisture or cleaning solutions from damaging your furniture.

What Professional Carpet Cleaners Do

Professional carpet cleaners are skilled technicians trained to tackle the toughest stains and dirt embedded deep within carpets. Their expertise lies in employing a range of specialized techniques and equipment to restore carpets to their original pristine condition.

First, they assess the carpet’s material and condition to determine the most suitable cleaning method. They then pre-treat stains and high-traffic areas to ensure maximum efficacy.

Using powerful machinery, they thoroughly clean the carpet, extracting dirt, debris, and allergens trapped within the fibers. Professional cleaners also pay attention to detail, addressing stubborn spots and odors with targeted solutions.

Moreover, they possess knowledge of eco-friendly cleaning products and techniques, prioritizing both effectiveness and environmental responsibility.

What To Do After Carpet Cleaning 

After your carpets have been cleaned, it’s important to return furniture to its original place carefully. Here’s why and how to do it:

Allow Adequate Drying Time: Allowing your carpet to dry completely helps maintain its texture and color. It prevents the fibers from becoming weak or distorted. When carpet fibers are wet, they can attract dirt and other particles. Allowing your carpet to dry thoroughly prevents residue build-up, keeping your carpet cleaner for longer.

Return furniture: After cleaning your carpet, it’s important to carefully put back your furniture. ” If you put furniture back too soon, it might leave marks on the damp carpet. These marks can be hard to remove. When the carpet feels dry to the touch, it’s safe to move furniture back. Be gentle when moving furniture to avoid damaging the carpet. By following these steps, you can keep your carpet clean and fresh.

Conclusion

Moving the furniture before cleaning the carpet can make the cleaning process work better. It allows the cleaner to reach all areas of the carpet and ensures a thorough clean. Plus, it helps prevent furniture legs from trapping moisture underneath, which can lead to mold and mildew. So, while it might take a bit of effort to move furniture, it’s worth it to keep your carpet clean and in good condition for longer.

Filed Under: Cleaning

  • « Go to Previous Page
  • Page 1
  • Interim pages omitted …
  • Page 4
  • Page 5
  • Page 6
  • Page 7
  • Page 8
  • Go to Next Page »

Primary Sidebar

Recent Posts

  • Can You Deep Fry in a Nonstick Pan? My Surprising Results
  • Clay Pot vs Dutch Oven: Which One Right for You?
  • Are Dutch Ovens Non Toxic? All You Need to Know
  • Is Low Specific Heat Capacity Good for Frying Pans​
  • Smeg Kettle vs Mini Kettle: Which One Fits Your Style?

Copyright © 2024 bigfishtavernlaguna.com. All right reserved.