• Skip to primary navigation
  • Skip to main content
  • Skip to primary sidebar
  • About Us
  • Affiliate Disclosure
  • Contact us
  • Cookie Privacy Policy
  • Privacy Policy
  • Sample Page
  • Terms of Use

Kitchen Guide

  • Appliance Reviews
  • Bakeware
  • Buying Guides
  • Product Comparisons
  • Recipes
  • Essentials
  • Cleaning

Cleaning

Does vacuum sealing clothes ruin them?

March 27, 2024 by bigfishtavernlagunaadmin Leave a Comment

Vacuum sealing clothes has become a popular method for maximizing storage space and protecting garments from various environmental factors.Have you ever wondered if putting your clothes in a vacuum-sealed bag could damage them? It’s a common question among people trying to save space or preserve their clothes. Let’s explore whether vacuum sealing really ruins your clothes or if it’s a safe way to store them.

Does vacuum sealing clothes ruin them?

What Are Vacuum Storage Bags?

These bags are like big plastic pouches that can shrink down when you remove the air inside them. They work by removing air from the bag, which compresses the items inside and makes them take up less room. Vacuum storage bags are great for storing things you don’t need right away, like bulky winter clothes or extra blankets. 

Does vacuum sealing clothes ruin them?

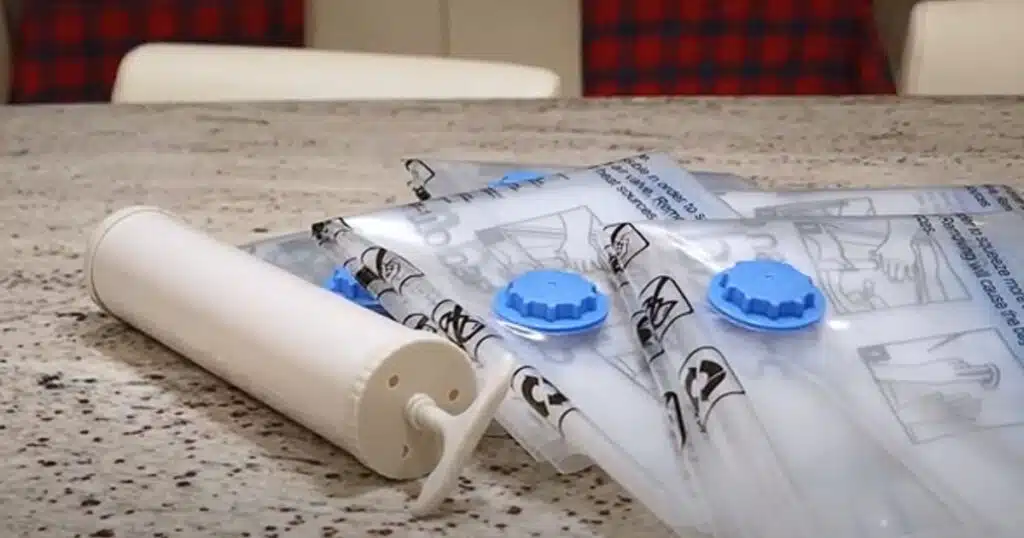
To use a vacuum storage bag, you simply place your items inside, seal the bag tightly, and then use a vacuum cleaner to suck out the air through a valve on the bag. Once the air is removed, the bag shrinks down, creating a compact and flattened package. This makes it easier to store the items in closets, under beds, or in suitcases, and helps protect them from dust, moisture, and pests.

Why Use Vacuum Storage Bags?

So, why would you want to use vacuum storage bags? Here are a few good reasons:

Save space: Your ultimate space-saving solution! These nifty bags work wonders by compressing your clothes and bedding, allowing you to fit more in less space. Imagine reclaiming your closet shelves or having extra room in your luggage for souvenirs. With vacuum storage bags, you can make the most of your storage areas and keep things neat and tidy.

Protect your stuff: These bags can help keep your clothes and bedding safe from dust, moisture, and pests. By sealing your belongings in an airtight cocoon, vacuum storage bags create a protective barrier against the elements.

Organize better: Vacuum storage bags are here to rescue your wardrobe from chaos and bring order to the madness! These amazing bags make it a breeze to organize your belongings. By compressing your clothes and bedding into compact packages, vacuum storage bags help you neatly categorize items and maximize space in your closet or storage area.

Travel smarter: Vacuum storage bags are your secret weapon for smarter travel. These bags help you pack more efficiently by compressing bulky items like clothes and bedding. vacuum storage bags can help you fit more stuff into your suitcase, so you don’t have to leave anything behind.They also keep your clothes organized and wrinkle-free during your journey.

Pros and Cons of Vacuum Sealing Clothes

Pros:

 Vacuum sealing compresses clothes, maximizing storage space in closets or suitcases.

It helps protect clothes from dust, moisture, and pests.

Clothes stay neatly packed and easy to find.

 Ideal for packing more efficiently when traveling.

Vacuum sealing can help keep clothes smelling fresh for longer.

Cons:

Delicate fabrics or embellishments may get damaged from

 compression.

 Clothes may become wrinkled or creased when vacuum sealed.

 Once sealed, accessing individual items may be cumbersome.

Initial investment in vacuum sealing equipment may be required.

How Do You Pack Clothes In A Vacuum Bag?

Packing clothes in a vacuum bag is like performing a magic trick that saves space and keeps your clothes organized.

First, gather your clothes and neatly fold them to prevent wrinkles. Separating them into categories like tops, bottoms, and bulky items can make packing easier.

Next, open the vacuum bag wide and start placing your folded clothes inside. Be careful not to overfill the bag; leave some room for compression.

Does vacuum sealing clothes ruin them?

Once your clothes are in, seal the bag tightly using the zipper closure or slider provided. Make sure it’s completely sealed to prevent air from getting back in.

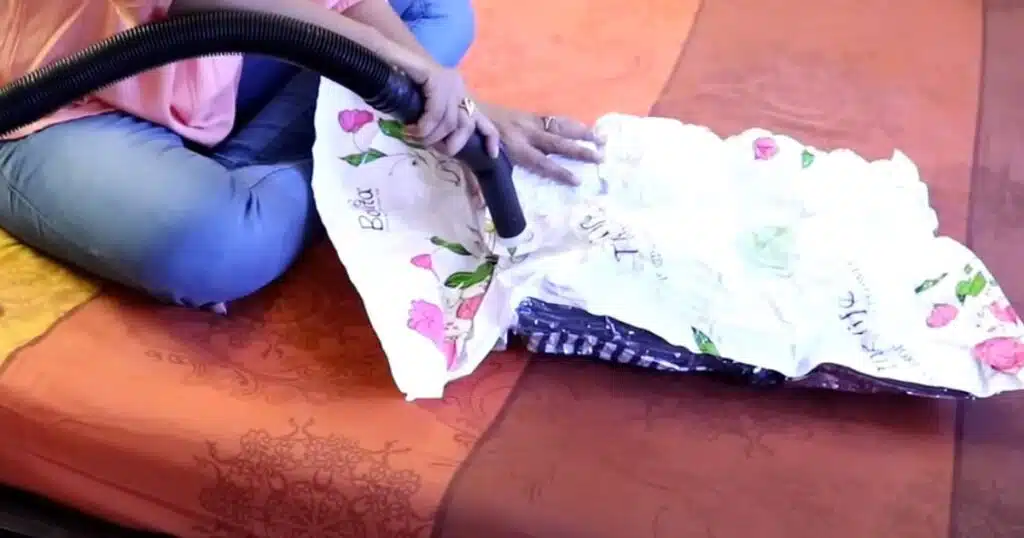
Now, it’s time for the magic! Using a vacuum cleaner with a hose attachment, remove the excess air from the bag. Watch as the air gets sucked out, and the bag shrinks down, tightly wrapping around your clothes.

Once all the air is removed, quickly close the valve to keep your clothes compressed. Your clothes are now snugly packed and ready to be stored in your closet or suitcase.

Remember, while vacuum sealing can save space, it’s essential to avoid over-packing delicate fabrics or items with sharp edges to prevent damage.

Do Vacuum Storage Bags Wrinkle Clothes? 

Vacuum storage bags work by sucking out the air, which compresses the clothes inside. This compression is what saves space. But some people worry that it might also crush or wrinkle their clothes.

 Well, the truth is, it depends. If you pack the bags too tightly or squish delicate fabrics inside, they might indeed get wrinkled. Imagine stuffing a suitcase too full – your clothes would get creased, right?

It’s the same idea with vacuum bags. But if you’re careful and fold your clothes neatly before vacuum sealing them, you can minimize wrinkles. Make sure not to overpack the bags, especially with items like dresses or suits that can easily get creased.

Think about the kind of material your clothes are made from. Some fabrics wrinkle more easily than others. For instance, light fabrics such as silk or chiffon can get creased easily in vacuum bags.

On the other hand, strong fabrics like denim or cotton tend to handle vacuum storage better. It’s also a good idea to test it out with a few less important items first to see how they react to being vacuum-sealed.

Does vacuum sealing clothes ruin them?

Check for damage on clothing that might have happened during storage

When you store your clothes for a long time, sometimes they can get damaged without us even knowing. It’s important to check them carefully when we bring them out again. Look closely for stains, especially ones that might have set in. Smell your clothes for any musty odors, which could mean there’s mold or mildew. Check for tiny holes or signs of bugs that might have nibbled on them. Make sure to inspect the seams and hems for tears or fraying. If the elastic in your clothes feels weak, it might need replacing. Also, see if the colors have faded unevenly due to sunlight. Regularly checking for damage on clothing that has been stored is essential for preserving its quality and preventing further deterioration.Taking a few moments to check our clothes after they’ve been in storage can save us a lot of trouble later on.

Wash and dry everything immediately

Depending on the fabric, Use a detergent that’s suitable for your clothes. Look for ones that can remove stains and bad smells without harming the fabric. Air drying is gentler on fabrics like cotton, while a dryer can be faster for things like towels or jeans. Efficient washing machines and dryers can save you time and energy in the long run. Look for ones that have features like quick wash cycles or energy-saving settings.

Hang or lay clothing flat

When you hang or lay your clothes flat, you’re giving them a chance to breathe. You see, when clothes are squished together for a long time, they can get all wrinkled up. But if you let them air out before storing them, it can help prevent those pesky wrinkles from forming. Here’s how it works: when you hang your clothes, the air can circulate around them, helping to smooth out any wrinkles that might have formed. And if you lay them flat, it can be even better because it gives every part of the fabric a chance to relax and straighten out.

Use an iron or iron-alternative for remaining creases

Gently run the iron over the creased areas of your clothes, applying light pressure. If you’re using a garment steamer, hold it a few inches away from the fabric and move it up and down until the wrinkles disappear.

Does vacuum sealing clothes ruin them?

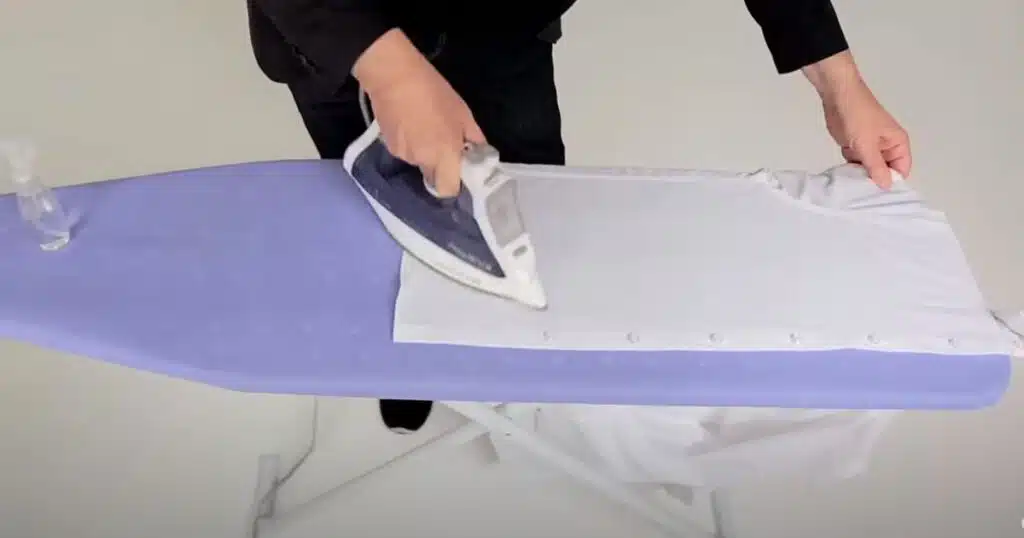
Keep an eye on your clothes as you iron or steam them to make sure you’re not causing any damage. If you come across any particularly stubborn creases, you can apply a little more heat or steam to help them smooth out. Hang or fold your clothes: Once you’ve ironed out all the wrinkles, hang your clothes up or fold them neatly to keep them looking fresh.

FAQs for Does vacuum sealing clothes ruin them?

Will vacuum sealing stretch or distort my clothes?

Vacuum sealing compresses clothing by removing air, but it doesn’t stretch or distort them. However, overly tight packing may cause wrinkles or creases in delicate fabrics.

Will vacuum sealing cause mold or mildew to grow on clothes?

Vacuum sealing creates an airtight environment that can prevent mold and mildew growth by depriving them of moisture. However, it’s essential to ensure clothes are completely dry before sealing to avoid trapping any moisture inside.

Is vacuum sealing suitable for long-term storage of clothes?

Vacuum sealing can be an effective option for short to medium-term storage, especially for items like seasonal clothing or bedding. However, for long-term storage, it’s important to periodically check and refresh the seal to prevent potential damage from prolonged compression.

Can vacuum sealing cause discoloration or fading of clothes?

Vacuum sealing itself does not cause discoloration or fading of clothes. However, prolonged exposure to sunlight or improper storage conditions (such as high humidity) could lead to color changes over time, regardless of whether the clothes are vacuum sealed or not.

Are there any types of clothes that should not be vacuum sealed?

While most clothes can be vacuum sealed safely, certain items like leather or fur garments, heavily embellished clothing, and delicate fabrics like tulle or chiffon may be better off stored using alternative methods to avoid potential damage.

Conclusion

You might be wondering, do vacuum storage bags ruin your clothes? Well, for the most part, they’re pretty safe to use. Just be careful not to pack them too full or squish delicate fabrics too much, and your clothes should be just fine.

Filed Under: Cleaning

why are my floors still dirty after mopping

March 26, 2024 by bigfishtavernlagunaadmin Leave a Comment

Mopping the floors is a routine chore for many households, but it can be incredibly frustrating when, despite your efforts, the floors remain dirty. This common concern often leaves people wondering why their floors are not getting the clean finish they desire, even after mopping diligently. In this piece, we’ll examine the causes of this problem and investigate practical remedies to achieve impeccably clean floors.

why are my floors still dirty after mopping

Common Reasons for Dirty Floors After Mopping

Quality of Cleaning Products

One of the primary reasons for dirty floors post-mopping could be the quality of the cleaning products used. Substandard cleaners may fail to remove stubborn stains, leaving behind residue that dulls the floor’s appearance.

Ineffective Mopping Technique

Another common culprit is an ineffective mopping technique. Simply swishing a mop across the floor may not be sufficient to lift dirt and grime effectively, especially in high-traffic areas or spots with stubborn stains.

Dirty Mop or Equipment

Using a dirty mop or equipment can inadvertently spread dirt rather than clean it. Mops that haven’t been cleaned properly or have accumulated debris over time are ineffective at removing dirt and may leave floors looking dull and grimy.

Residue Buildup

Over time, residue from cleaning products, dirt, and grime can accumulate on the floor’s surface, making it increasingly difficult to achieve a clean finish with each mopping session. This buildup can contribute to the persistent dirtiness of floors despite regular cleaning efforts.

Ways to Prevent Dirty Floors After Mopping

Have Several Mop Pads Handy or Frequently Rinse Rag Mops

Having multiple mop pads ready or rinsing rag mops frequently is a smart move to stop your floors from getting dirty right after mopping. When you mop with a dirty mop pad, you’re basically spreading grime around instead of cleaning it up.

By having several mop pads available, you can easily switch to a clean one when needed.  If you’re using a rag mop, it’s essential to rinse it out regularly while mopping. As you clean, the mop head collects dirt and grime, which can make it less effective.

By rinsing it frequently in clean water, you’re removing the dirt and preventing it from being spread back onto the floor. So, whether you’re using a mop with replaceable pads or a traditional rag mop, having a few extras on hand or rinsing them frequently can make a big difference in keeping your floors clean after mopping.

Dry the Floor or Use a Dry Mop Method

When you leave the floor wet after mopping, it can attract dust and dirt, making it dirty again in no time. So, grab a clean towel or cloth and gently dry the floor. This not only helps to prevent dirt from sticking but also gives your floor a nice shine. You can also try using a dry mop, which is designed to collect dust and dirt without using water. Simply run the dry mop over the floor to pick up any remaining dirt particles and leave your floor looking clean and spotless.

Sweep/Vacuum More Often

When we mop without sweeping or vacuuming first, we’re just pushing around dirt and dust, not really getting rid of it. Imagine trying to clean a sandy beach with a wet cloth without sweeping first – it wouldn’t work very well, right? Sweeping or vacuuming before mopping helps to pick up all the loose dirt and debris, so when we mop, we’re actually cleaning the floor instead of just spreading around dirt.

Don’t Forget About Professional Cleanings

Professional cleaners have powerful equipment and special techniques to deep clean your floors. They can reach deep into the fibers of carpets or grout lines in tiles, removing stubborn dirt and grime that regular mopping can’t tackle. Over time, dirt and oils can build up in hard-to-reach places, making your floors look dull and dirty no matter how much you mop. Professional cleanings can restore the shine and freshness to your floors, leaving them looking and feeling brand new.

FAQs (Frequently Asked Questions)

Why do my floors look dirty even after mopping?

Several factors could contribute to this, including improper cleaning techniques, dirty cleaning tools, and residue buildup.

What can I do if my floors remain dirty after mopping?

Try using appropriate cleaning products, adopting proper mopping techniques, and implementing regular maintenance to keep your floors clean.

 Is steam cleaning effective for dirty floors?

Yes, steam cleaning can be highly effective as it penetrates grime and kills bacteria without harsh chemicals.

How often should I mop my floors to keep them clean?

It depends on factors such as foot traffic and the type of flooring, but generally, a weekly mopping schedule is sufficient for maintenance.

Conclusion

Dirty floors after mopping can be a frustrating problem, but with the right approach, it’s possible to achieve consistently clean and sparkling floors. By addressing common issues such as ineffective cleaning products and techniques, and implementing proper maintenance strategies, you can enjoy the satisfaction of pristine floors in your home.

Filed Under: Cleaning

Can you use fabuloso in carpet cleaner?

March 21, 2024 by bigfishtavernlagunaadmin Leave a Comment

The cleanliness and maintenance of carpets are crucial aspects of ensuring a comfortable and hygienic living environment. With numerous cleaning products available in the market, homeowners often wonder if they can use multipurpose cleaners like Fabuloso in their carpet cleaning machines. In this article, we’ll explore the compatibility of Fabuloso with carpet cleaners, potential risks, and safer alternatives for effectively cleaning carpets.

Can you use fabuloso in carpet cleaner?

Understanding Fabuloso

Fabuloso is a popular multi-purpose household cleaner known for its vibrant colors and pleasant scents. It is manufactured by Colgate-Palmolive and is widely used for cleaning various surfaces such as floors, countertops, and bathrooms. Fabuloso is available in several fragrances, including lavender, citrus, and ocean paradise, catering to different preferences. Overall, Fabuloso is a popular choice for household cleaning due to its effectiveness, versatility, and pleasant scents.

Can Fabuloso Be Used in Carpet Cleaners?

Have you ever wondered if you can use Fabuloso in carpet cleaners? Well, let’s find out!

Fabuloso is a popular cleaner that many people use for cleaning floors, countertops, and other surfaces around the house. 

Firstly, Fabuloso is not specifically designed for carpet cleaning. It’s more commonly used on hard surfaces like tile or wood. Using it on carpets might not give you the best results because carpets have different materials and textures.

Secondly, Fabuloso is a liquid cleaner, and using too much liquid on carpets can cause them to become too wet. Plus, excessive moisture can damage the carpet fibers over time.

Additionally, some carpet manufacturers may not recommend using Fabuloso or other similar cleaners on their carpets. They might have specific instructions or recommendations for cleaning their carpets to maintain their quality and warranty.

However, if you still want to try using Fabuloso on your carpets, it’s essential to proceed with caution.

Risks of Using Fabuloso in Carpet Cleaners

Over-wetting: Fabuloso is a liquid cleaner, and using it in carpet cleaners can lead to excessive moisture on the carpets.

Damage to Carpet Fibers: Excessive moisture from Fabuloso can weaken and damage the carpet fibers over time.

Residue Build-up: Fabuloso may leave behind a sticky residue on carpets, especially if not properly rinsed.

Voiding Warranty: Some carpet manufacturers specifically state that using Fabuloso or similar cleaners may void the warranty of the carpet.

Using unauthorized cleaners can impact the performance and longevity of the carpet, leading to potential warranty issues.

Steps to Clean Carpets Safely

Diluting Fabuloso properly

For carpet cleaning, it’s recommended to dilute Fabuloso with water to avoid leaving behind a sticky residue. Follow the instructions on the packaging for the correct dilution ratio, typically one part Fabuloso to ten parts water.

Application technique

Using a spray bottle or a clean cloth, apply the diluted Fabuloso solution to the carpet in sections. Work the solution into the carpet fibers using a gentle circular motion, focusing on areas with stains or heavy soiling.

Alternative Carpet Cleaning Solutions

You can create effective carpet cleaning solutions using simple, natural ingredients commonly found in your kitchen. Ingredients like baking soda, vinegar, and essential oils can be combined to create powerful yet gentle cleaners that effectively lift dirt and stains from your carpets without leaving behind any harmful residues.

Professional Opinions and Recommendations

When it comes to cleaning carpets, it’s always a good idea to seek professional opinions and recommendations. Professional carpet cleaners and experts can offer valuable insights and advice to ensure effective and safe cleaning practices.

 Regular Maintenance: Many professionals recommend regular vacuuming and spot cleaning to maintain carpets’ cleanliness and prolong their lifespan. Vacuuming at least once a week and addressing spills and stains promptly can prevent dirt and grime from building up and causing damage to the carpet fibers.

Proper Technique: Professionals stress the importance of using proper cleaning techniques to avoid damaging the carpet fibers or causing over-wetting. This includes using the right amount of cleaning solution, applying it evenly, and ensuring thorough rinsing to remove any residue.

Consider Professional Cleaning: For deep cleaning and restoring heavily soiled carpets, many professionals recommend hiring a professional carpet cleaning service.

Follow Manufacturer’s Recommendations: Carpet manufacturers often provide specific cleaning guidelines and recommendations to maintain their carpets’ quality and warranty. It’s essential to follow these guidelines and avoid using cleaners or methods that could void the warranty or cause damage to the carpet.

Case Studies: Success Stories and Failures

Case studies provide valuable insights into both success stories and failures in various endeavors. In carpet cleaning, success stories often involve using professional-grade equipment and techniques to effectively remove stains and restore carpets to their original condition.

 Conversely, failures in carpet cleaning can occur due to using improper cleaning solutions, over-wetting carpets, or inadequate equipment. These instances underscore the risks of DIY approaches without proper knowledge and expertise. Such failures can result in carpet damage, including discoloration, fiber damage, or even mold growth, leading to costly repairs or replacement.

Frequently Asked Questions

Is Fabuloso safe for all types of carpets?

Fabuloso is generally safe for most carpet materials but perform a patch test to check for compatibility, especially with delicate or sensitive carpets.

Can I mix Fabuloso with other cleaning solutions?

It’s not recommended to mix Fabuloso with other cleaning solutions, as this may affect its efficacy and could lead to adverse chemical reactions.

Is Fabuloso environmentally friendly?

Fabuloso contains biodegradable ingredients and is generally considered safe for the environment when used as directed. However, always follow proper disposal practices and avoid excessive use.

Will Fabuloso leave behind a strong scent on my carpets?

Fabuloso does have a distinct fragrance, but it should dissipate once the carpet dries completely.

Can I use Fabuloso to remove pet stains from carpets?

Fabuloso can help lift pet stains from carpets, but it’s essential to address the stains promptly and follow up with proper cleaning techniques.

Conclusion

Using Fabuloso in a carpet cleaner is not recommended. While Fabuloso is a versatile cleaner suitable for various surfaces, it lacks specific ingredients necessary for effective carpet cleaning. Attempting to use it in a carpet cleaner may result in subpar cleaning results, potential damage to the machine, or even harm to the carpet fibers. To ensure optimal cleanliness and longevity of your carpets, it’s best to use cleaning solutions explicitly formulated for carpet cleaning.  By following this advice, you can maintain a clean and healthy carpeted environment in your home, free from the risks associated with using inappropriate cleaning products.

Filed Under: Cleaning

Can landlord charge for carpet cleaning?

March 16, 2024 by bigfishtavernlagunaadmin Leave a Comment

Hey there! Have you ever wondered if landlords can make you pay for cleaning the carpet? There are misunderstandings between both landlords and tenants on this matter. Let’s find out together if it’s fair or not!

Can landlord charge for carpet cleaning?

When Landlords Should Not Charge A Tenant For Dirty Carpets

There are times when landlords shouldn’t ask tenants to pay for cleaning them.

Normal Wear and Tear: If the carpet gets dirty just from regular use over time, it’s considered normal wear and tear. This means the tenant shouldn’t be held responsible for cleaning it.

Pre-existing Conditions: Sometimes, carpets are already dirty or worn out when a tenant moves in. In such cases, it’s unfair for the landlord to expect the tenant to foot the bill for cleaning.

Health Hazards: If the carpet is dirty due to mold, pests, or other health hazards, it’s the landlord’s responsibility to clean it up. Charging the tenant in such situations would be unethical and possibly even illegal.

Unreasonable Charges: Landlords shouldn’t charge tenants excessive amounts for cleaning the carpet. They should follow these rules and not unfairly burden tenants with extra costs.

When Landlords Should Charge A Tenant For Dirty Carpets

Here’s when landlords might think about charging tenants for dirty carpets:

Damage Beyond Normal Wear and Tear: If tenants cause serious damage to the carpets beyond what’s normal, like big stains or rips, landlords might ask them to cover the cleaning costs. 

Negligence or Carelessness: Sometimes, tenants don’t take care of the carpets properly. They might spill things and not clean them up or allow pets to cause damage.If so, the tenant should bear the cost. 

Clear Rental Agreement: If the rental agreement clearly states that tenants are responsible for keeping the carpets clean and in good condition, then landlords can ask them to pay for cleaning if they fail to do so.

Security Deposit Agreement: Many rental agreements include a security deposit. This money is held by the landlord and can be used to cover damages beyond normal wear and tear. If the carpets are left dirty and need professional cleaning, the cost can be taken from this deposit.

Professional Cleaning Required: Sometimes, carpets need professional cleaning to get them back to a clean state. If the carpets were clean at the start of the lease but are left dirty by the tenant, the landlord can ask them to cover the cost of professional cleaning.

Who Pays For Carpet Cleaning Tenant Or Landlord? 

When it comes to cleaning carpets in a rented home, who should foot the bill? It depends on the situation and what’s in the rental agreement.  They want to keep their property in good shape for new renters. However, if a tenant causes significant damage beyond normal wear and tear, like stains or odors, they may have to cover the cost. Always check your lease agreement to see who is responsible for carpet cleaning. If it’s not clear, talk to your landlord to find a fair solution.

What Are Other Landlords Saying About When To Charge A Tenant For Dirty Carpets 

When it comes to deciding whether to charge tenants for cleaning dirty carpets, it’s helpful to hear what other landlords have to say. Here’s what some landlords think about this topic:

Fairness Matters: Many landlords believe that it’s important to be fair when charging tenants for dirty carpets. They consider factors like whether the damage is beyond normal wear and tear and whether the tenant caused the damage through negligence.

Communication is Key: Some landlords emphasize the importance of clear communication with tenants about carpet cleaning expectations.

Document Everything: Several landlords recommend documenting the condition of the carpets before a new tenant moves in. This can help establish whether any damage occurred during the tenant’s occupancy and whether they should be held responsible for cleaning costs.

Security Deposit Usage: Many landlords use the security deposit as a way to cover cleaning costs for dirty carpets. However, they stress the importance of adhering to local laws and rental agreements when deducting expenses from the security deposit.

Flexibility is Key: Some landlords adopt a flexible approach when it comes to charging for carpet cleaning.

Professional Cleaning vs. DIY: There’s a debate among landlords about whether to hire professional cleaners or ask tenants to clean the carpets themselves. Some prefer professional cleaning to ensure thorough results, while others believe that tenants should be given the opportunity to clean the carpets on their own.

Conclusion:

whether landlords can charge tenants for carpet cleaning depends on various factors such as the extent of damage, normal wear and tear, legal obligations, rental agreements, and communication between both parties. While landlords have the right to expect tenants to maintain the property in good condition, it’s essential to be fair and reasonable in assessing the need for cleaning costs. Clear communication, documentation, and adherence to local laws can help ensure a fair resolution and maintain a positive landlord-tenant relationship.

Filed Under: Cleaning

How often to vacuum gravel in fish tank?

March 9, 2024 by bigfishtavernlagunaadmin Leave a Comment

Fish tank gravel serves as a crucial component of the aquarium ecosystem, providing a substrate for beneficial bacteria and a habitat for aquatic plants.One important aspect of tank maintenance is vacuuming the gravel to remove waste and debris. But how often should you do this? In this post, we’ll discuss the best practices for vacuuming gravel in your fish tank to ensure a clean and healthy environment for your fish.

How often to vacuum gravel in fish tank?

Importance of Gravel Vacuuming

Gravel vacuuming is an essential task in maintaining a healthy and clean fish tank environment. Regular vacuuming helps remove waste and debris that can accumulate in the gravel, preventing the build-up of harmful bacteria and toxins. It also helps to maintain water quality and clarity, ensuring a healthy and thriving aquatic ecosystem for your fish. By vacuuming the gravel regularly, you can also prevent the formation of algae and other unsightly substances, keeping your tank looking clean and attractive. Overall, gravel vacuuming is a crucial part of fish tank maintenance that promotes the well-being of your aquatic pets and creates a visually appealing aquarium environment.

Factors Influencing Vacuuming Frequency

But how often should you vacuum? Well, it depends on a few things. Let’s talk about the factors that influence how often you need to vacuum your gravel.

Tank Size: If your fish tank is big, it might need less frequent cleaning. That’s because there’s more water to spread out the mess. Smaller tanks require more vacuum than larger.

Quantity of fish: More fish means more waste. So, if you have a lot of fish swimming around, you’ll probably need to clean the gravel more often to keep the water clean.

Feeding Habits: Do you feed your fish a lot? If you do, there might be more leftover food in the gravel. Leftover food can make the tank water more dirtier faster, so you might need to clean it more often.

Fish Type: Different types of fish produce different amounts of waste. Some fish are messier than others, so their tanks might need more frequent cleaning.

Gravel Appearance: Take a look at your gravel. Does it look dirty? If it does, it’s probably time to clean it. Trust your eyes – if it looks dirty, it probably is! 

So, these are the things that influence how often you should vacuum your fish tank gravel. Keep them in mind and adjust your cleaning schedule accordingly. Your fish will thank you for it!

Step-by-Step Guide to Vacuuming Gravel

Prepare your equipment: Before you start vacuuming the gravel in your fish tank, gather all the necessary equipment. You will need a gravel vacuum, a bucket, and a siphon hose. 

Begin the vacuuming process: Insert the gravel vacuum into the tank and start the siphon process. Move the vacuum through the gravel, making sure to pick up any debris and waste that has accumulated. Be thorough in your cleaning, but be gentle to avoid disrupting the fish and plants.

Monitor the water level: As you vacuum the gravel, the water level in the tank will begin to decrease. Make sure to keep an eye on it and stop the siphon process before the water level gets too low. You can do this by pinching the hose to stop the flow of water.

Watch for Clean Water: Once all the dirty water is out, you can clean the bucket and get it ready for next time.

Monitor your fish: After you have finished vacuuming the gravel and replaced the water, keep an eye on your fish to make sure they are not stressed by the cleaning process. If necessary, you can add some water conditioner to the tank to help reduce any stress on the fish.

Repeat as necessary: The frequency of gravel vacuuming will depend on the size of your tank, the number of fish, and the amount of waste they produce.

 By following this step-by-step guide, you can keep your fish tank gravel clean and provide a healthy environment for your aquatic pets.

Recommended Vacuuming Schedule

A good rule of thumb is to vacuum the gravel every one to two weeks, depending on the size of your tank, the number of fish, and the amount of waste they produce. As you vacuum the gravel, monitor the water level in the tank and stop the siphon process before the water level gets too low. Once all the dirty water is out, clean the bucket and monitor your fish to make sure they are not stressed by the cleaning process. If necessary, you can add some water conditioner to the tank to help reduce any stress on the fish.

Tips for Effective Gravel Maintenance

  • Avoid over-cleaning: While it’s essential to remove excess waste, be careful not to disturb the beneficial bacteria living in the substrate.
  • Use a gravel vacuum with a suitable size: Choose a vacuum that matches the size of your gravel to ensure efficient cleaning without damaging the substrate.
  • Incorporate live plants: Live plants can help maintain water quality by absorbing nutrients and providing natural filtration, reducing the need for frequent gravel vacuuming.

Conclusion

Regular maintenance of your fish tank gravel is vital for creating a healthy environment for your aquatic pets. By understanding the factors influencing vacuuming frequency and following proper techniques, you can ensure a thriving aquarium ecosystem for years to come.

Filed Under: Cleaning

How to Vacuum a Wool Rug: A Comprehensive Guide

March 8, 2024 by bigfishtavernlagunaadmin Leave a Comment

Many people find vacuuming wool carpets a bit of a hassle. But with the right strategy it will seem quite easy.Wool rugs are renowned for their durability and luxurious feel, but they require specific care to keep them looking their best. Wool rugs are special because they’re soft and cozy, and they need gentle care to keep them clean. In this guide, we’ll walk you through the simple steps of vacuuming your wool rug so it stays looking fresh and beautiful for a long time. Let’s get started!

How to Vacuum a Wool Rug

Importance of Regular Vacuuming

Regular vacuuming is super important for keeping your wool rug clean and nice. When you vacuum often, you get rid of dirt, dust, and other yucky stuff that can make your rug look dirty and old. Plus, vacuuming helps to fluff up the wool fibers, making your rug feel soft and cozy again.

Here’s why regular vacuuming is so important:

Keeps Your Rug Clean: Vacuuming removes dirt and dust that can get trapped in the wool fibers. This helps to prevent your rug from looking dingy and dirty.

Prevents Damage: Dirt and debris can rub against the wool fibers, causing them to wear down faster. By vacuuming regularly, you help to prevent this damage, keeping your rug looking good for longer.

Clean air: It has dust in its stomach that can be dispersed with the air in your home. Therefore, regular carpet vacuuming is necessary to keep the air fresh in the house.

Maintains Appearance: Regular vacuuming helps to fluff up the wool fibers in your rug, keeping it looking soft and plush. This makes your rug feel nicer underfoot and keeps it looking beautiful.

Choosing the Right Vacuum Cleaner

Picking the perfect vacuum cleaner for your wool rug is important to keep it clean without causing damage. Here’s what to look for:

Gentle Brushes: Make sure the vacuum cleaner has soft brushes or a suction-only mode. Hard brushes can pull or snag the delicate wool fibers.

Changeable Height: When you’re looking for the best vacuum cleaner for your rug, one important thing to consider is whether it has changeable height settings. This means you can adjust how high or low the vacuum cleaner sits on the floor.

Good Suction Power: A vacuum cleaner with strong suction power helps to lift dirt and debris from deep within the rug fibers, leaving it clean and fresh.

Simple Filter: Avoid vacuum cleaners with a simple filter. These don’t trap tiny particles like dust and allergens, making the air quality in your home worse.

Lightweight and Maneuverable: A lightweight vacuum cleaner that’s easy to maneuver makes it simpler to clean your rug thoroughly without tiring yourself out.

Edge Cleaning Tools: Look for vacuum cleaners with edge cleaning tools or attachments. These are handy for getting into tight spaces and along the edges of your rug where dirt tends to accumulate.

Good Reviews: Check out reviews from other users to see what they say about how well the vacuum cleaner performs on wool rugs.

Preparing the Rug for Vacuuming 

Preparing the Rug for Vacuuming Getting your rug ready for vacuuming is an important step to make sure it gets really clean. Here’s what you should do to prepare:

Take your rug outside and give it a gentle shake. This will remove loose dust from the carpet.

If your rug is small enough, you can use a rug beater or a brush to gently beat or brush out any remaining dirt. This helps to get the rug even cleaner before you start vacuuming.

Take a quick look at your rug to see if there are any stains or spills that need to be treated before you vacuum. If you spot any, you can use a gentle cleaner or spot treatment to try to lift the stain before vacuuming.

Sometimes the carpet is so big it can be under the furniture, in that case you can move the furniture slowly and vacuum.

Before you start vacuuming, take a close look at your rug to make sure there are no loose threads or frayed edges that could get caught in the vacuum cleaner. If you find something, remove it.

Vacuuming Techniques for Wool Rugs

Vacuuming wool rugs might seem tricky, but with the right techniques, it’s easy peasy! Here’s how to do it:

Begin by setting your vacuum cleaner to a gentle suction mode or use a brush attachment. Edges and corners of the rug Use the edge attachment or crevice tool to clean thoroughly as dirt often collects there.

Take your time when vacuuming your wool rug. Slow and steady wins the race! Rushing can cause you to miss spots or accidentally damage the rug.

Turn the wool rug over occasionally and vacuum the underside as well. Don’t hesitate to do another pass if necessary.

Once you’re done vacuuming, give your rug a gentle shake outside to remove any remaining dirt or debris.

Dealing with Stubborn Stains 

Don’t Delay

If you see a stain on your wool rug, don’t wait! Take steps to remove the stain as soon as it occurs.Get some clean cloths or paper towels and gently press on the stain to soak up as much as you can.

Pick the Right Cleaner

Not all cleaners are good for wool rugs. Potent chemicals rendering wool susceptible to irreversible damage. Instead, go for a mild detergent or a cleaner specifically made for wool. It is imperative to opt for a gentle detergent or a specialized cleanser formulated explicitly for woolen surfaces. Moreover, one may even elect to concoct a bespoke cleaning solution by amalgamating water with a modicum of vinegar or dish soap.Step

Check in a Secret Place

Before using any cleaner on the stained spot, test it in a hidden area of the rug.This precautionary measure serves to ensure that no alterations in hue or inflictions of harm will befall the fabric under scrutiny.

Be Gentle When Cleaning

Once you’ve tested the cleaner and it’s safe, put a bit on the stain. Use a clean cloth or soft brush to softly work the cleaner into the fibers, starting from the outside of the stain and moving inwards. Exercise caution and refrain from exerting excessive force while cleansing, for such vigorous actions may inadvertently result in harm to the delicate woolen fibers.

Frequency of Vacuuming

How often should you vacuum? Well, it depends on how much your rug gets used. If your rug gets lots of traffic, you might need to do it more often, like two or three times a week. But if your rug doesn’t get used much, once every couple of weeks should be okay. Just remember, the more you vacuum, the cleaner your rug will be. Thus, endeavor to instill within yourself the practice of regularity in maintaining the pristine appearance and enduring freshness of your rug.

Preventive Maintenance Tips

vacuum your wool rug regularly to get rid of dirt and dust. Selecting the appropriate vacuum cleaner is crucial for wool rug care. Rotate your rug again after a few days. If something spills on your rug, clean it up right away to prevent stains from setting in.

Conclusion:

In conclusion, vacuuming your wool rug is easy when you follow these simple steps. Remember to use a gentle vacuum setting, go with the flow of the fibers, and be patient. By vacuuming regularly and treating stains promptly, you can keep your rug clean and cozy for years to come. So, grab your vacuum cleaner and give your wool rug some love—it’ll thank you with softness and beauty!

Filed Under: Cleaning

Pee Smell in Carpet After Cleaning? Here’s Why It Lingers!

March 2, 2024 by bigfishtavernlagunaadmin Leave a Comment

Dealing with a carpet that still smells like pee after cleaning can be frustrating, but understanding the reasons why it’s happening can help you find a solution. Whether it’s ensuring you’re using the right cleaning products, thoroughly cleaning and drying the carpet, or addressing any underlying pet issues, there are steps you can take to eliminate the odor for good. There is nothing to be disappointed about. To remove the smell from your carpet, we will discuss some effective steps in this article. Also, how can you get rid of carpet urine smell,we will try to show you his way and provide you with some tips. Stay with us to know.

Why does my carpet still smell like pee after cleaning?

Why does it smell now?

Pee can hide in a special way. Rugs with dried pee might not smell strong before cleaning or if it has been on the rug for a long time and aired out. When water touches the rug, two things occur. Firstly, the pee’s bacteria and ammonia wake up. Secondly, the water makes the pee spread out more. If urine is not cleaned up immediately, cleaning the carpet later can exacerbate the urine odor rather than eliminate it.

Common Cleaning Mistakes

Regular carpet cleaners might not be strong enough to tackle pee stains and odors. Take proper action with understanding.

Another mistake is not cleaning the area thoroughly. Pee can seep deep into the carpet fibers and padding, so just cleaning the surface might not be enough. Make sure to thoroughly clean and treat the entire affected area.

Also, using too much water can spread urine around instead of removing it. This can make the smell worse and cause the bacteria in the urine to reactivate. Also, if you don’t let the carpet dry all the way, it can cause bad smells to stick around. Water stuck in the carpet helps bacteria grow and keeps the smell there.

Prevention is Key

  • Training your pet is super important to stop those pesky accidents on your carpet.Start by setting up a designated bathroom spot outside and take your pet there regularly, especially after meals and playtime. They will get used to this.
  • Act quickly for fresh stains. Neglecting can cause stains to sink deeper into the carpet fibers.
  • Keep pets under close supervision, especially when they spend time on the carpet.

Effective Cleaning Strategies

Enzymatic Cleaners: These cleaners are made to fix the stinky stuff in pee.

Steam Cleaning: Steam cleaning can reach deep into carpet fibers. It helps to get rid of strong odors.

Replacing Padding: If pee has soaked into the padding under the carpet, you might have to swap out the padding to totally get rid of the smell.

Scrubbing:

Urine stains should be cleaned by scrubbing very lightly. This will reduce the chances of urine spillage. Press a clean cloth or towel over the urine as soon as possible so that the cloth absorbs it.

Seeking Professional Help:

If your carpet still smells like pee after cleaning, it might be time to call in the professionals. Even though you’ve tried your best, sometimes those pesky odors just won’t budge.

Experts know exactly what to do to tackle tough pee odors. They have special tools and cleaners that can get deep into your carpet fibers to remove the smell for good. Plus, they have lots of experience dealing with these kinds of problems, so you can trust them to do a great job.

Additional Tips

Q.Is it possible to remove urine smell completely?

A.Yes, with proper cleaning techniques and products, it is possible to completely eliminate urine odor from carpets. However, it may require multiple cleaning attempts, especially for deep-seated odors.

Q.Can I use homemade solutions to clean urine from carpets?

A.Homemade solutions like vinegar and baking soda can help get rid of urine odors. Commercial cleaners are often more effective for tough stains. Enzymatic cleaners are often more efficient at breaking down urine molecules.

Q.How often should I clean my carpet to prevent odor buildup?

A. It depends on how much you use and care for your carpet.Clean up spills quickly to avoid smells. Sometimes, you might need deep cleaning or professional help. 

Q.What should I do if the smell persists after multiple cleaning attempts?

A.If the smell doesn’t go away after cleaning many times, ask a professional carpet cleaner for help.

Conclusion:

If your carpet still smells like pee after cleaning, it can be a tricky problem to solve. The odor might stay because the pee went deep into the carpet fibers or wasn’t cleaned properly. By following our instructions, you can easily deodorize your carpet without the help of a professional. Will bring you success in your endeavours.

Filed Under: Cleaning

Can You Vacuum Artificial Turf? Right Answers

February 26, 2024 by bigfishtavernlagunaadmin Leave a Comment

Have you ever wondered if it’s okay to vacuum artificial grass? Well, you’re not alone! Many people have the same question. Fake grass is a common pick for yards since it’s easy to care for and remains green throughout the year. But when it comes to cleaning, things can get a bit confusing. Let’s explore whether it’s safe to vacuum artificial grass and how to do it properly.

can you vacuum artificial grass?

Vacuuming Artificial Grass: Important Considerations

Neglecting your fake grass isn’t really important to ensure its short life and ugly look. Vacuuming your fake grass can change the appearance of the grass and may not last long.

Not vacuuming fake grass may not remove any debris, yet it’s safe because it won’t move the infill. Infill, made of sand or crumb rubber, is useless for stability and cushioning.

When opting for not vacuuming, choosing any equipment is okay. A heavy vacuum, positioned super close, maximizes the risk of infill displacement. Using a vacuum with a rotating brush can be harmful to artificial grass. You can use the broom safe brush instead.

A vacuum is not a suitable replacement system for your fake grass. Rather see that mango fill can cause various damage to the trough.

Ignoring a consistent maintenance schedule is essential for fake grass longevity. Over time, dust and dirt can dull the appearance of artificial turf, making it look worn and faded.

What About the Turf Vacuums Used in Sports Stadiums?

You may be wondering how the stadium grass stays so nice and green even though so many people walk on it.? Well, one secret weapon they use is called a turf vacuum!

Turf vacuums are like super-powered cleaners specially made for artificial grass. They help keep the grass looking fresh and neat by sucking up dirt, leaves, and other stuff that might make it messy.

But you might ask, can you vacuum artificial grass? Absolutely!The design of the trough vacuum is very simple yet it cleans the dirt with great care. Trough vacuum settings are pretty consistent.

Using a turf vacuum is easy. The cleaning staff of the stadium entrusts the entire cleaning responsibility the vacuum. Now carefully sucks up dirt and dust, leaving grass looking clean and shiny.

These vacuums aren’t just for regular cleaning, though. Sometimes, after significant events like concerts or games, there’s a lot of mess to clean up. That’s when the turf vacuum shines, ensuring the grass is spotless and ready for the next big game.

When to Vacuum Artificial Grass

A vacuum is not always appropriate on fake grass. Leaf Small pieces of paper  can be used to vacuum for light dirt.

When Not to Vacuum Artificial Grass

Avoid vacuuming if the grass is wet. Pick up big things like rocks or broken glass by hand. These things could break the vacuum cleaner. If the dirt is really stuck in the grass, don’t use a regular vacuum. Try using a special cleaner made for artificial grass instead. Don’t try to dig deep with the vacuum unless you’re ready to fill in any holes that are made.

How to Vacuum Artificial Grass

Lightweight vacuums are recommended for use. Avoid vacuums with weak suction and stationary brushes. Refrain from vacuuming close to the floor and avoid excessive force while vacuuming. Lightweight vacuums, on the other hand, are easier to maneuver and less likely to cause harm. Additionally, vacuums with strong suction and rotating brushes can be too aggressive. This can lead to potential damage. Follow these simple guidelines and opt for lighter vacuum options. You can effectively clean your space without causing any unnecessary harm. Gentle cleaning methods often yield the best results. They help preserve the integrity of your surroundings. Remember this as you clean.

Preferred Alternative Methods for Cleaning Artificial Grass

Instead of using a vacuum, try these methods:

Sweeping: Use a broom to gently sweep away dirt and leaves. It’s easy and doesn’t require any fancy equipment.

Rinsing: If your grass just needs a quick clean, use a hose to spray water over it. This helps wash away any dust or light debris.

can you vacuum artificial grass?

Spot Cleaning: If you see a stain or spill, use a mild soap mixed with water to gently scrub the area. Just be sure to rinse it well afterward.

If you have one, a leaf blower can be handy. It blows away leaves and loose debris without causing any damage to the grass. These methods are simple and effective. They keep your artificial grass looking nice and clean!

conclusion:

You can vacuum artificial grass? Yes, it’s important to use a vacuum cleaner with a brush attachment. Gently remove any debris or dirt from the surface of the grass. Don’t use a vacuum with a rotating beater bar. This can cause damage to the artificial grass fibers. Instead, use alternative methods. You can sweep, rinse, spot clean, or use a leaf blower. These methods will keep your artificial grass clean and looking its best. Not taking care of artificial grass can make it look bad and not last long. Instead of using the vacuum cleaner, think about using other ways to take care of your artificial grass and keep it in good condition.. Your grass will thank you for it!

Filed Under: Cleaning

Should you vacuum after shampooing carpet?

February 23, 2024 by bigfishtavernlagunaadmin Leave a Comment

Vacuuming after shampooing your carpet is a common question among homeowners. Some believe that it’s necessary to remove any leftover residue, while others think it’s not needed. In this post, we’ll delve into the debate and provide you with the information you need to decide whether or not to vacuum after shampooing your carpet.

Should you vacuum after shampooing carpet?

Understanding Shampooing and Vacuuming

Shampooing and vacuuming are two important steps in keeping your carpet clean and fresh. But what do they really mean, and why are they necessary?

Shampooing: When you shampoo your carpet, you’re giving it a deep clean. This involves using a special cleaning solution that helps to break down dirt, stains, and odors trapped in the carpet fibers.This process involves spraying the shampoo solution onto the carpet and then scrubbing it in with a machine or brush. After letting it sit for a while to work its magic, you typically use a wet vacuum or extractor to suck up the dirty water and leftover shampoo.

Vacuuming: Vacuuming is a crucial step in maintaining your carpet’s cleanliness. It involves using a vacuum cleaner to suck up dirt, dust, and debris from the surface of the carpet. Vacuuming helps to prevent dirt from building up and keeps your carpet looking neat and tidy.

How Shampooing Affects Different Fibers

Nylon: Nylon carpets are sturdy and can handle shampooing well. They usually bounce back nicely after being shampooed and look good as new.

Polyester: Polyester carpets also respond well to shampooing. They may need a little extra drying time, but overall, they tend to come out clean and fresh.

Wool: Wool carpets are more delicate and may need special care when shampooing. Too much moisture or harsh chemicals can damage wool fibers, so it’s important to use a gentle shampoo and be careful not to over-wet the carpet.

Olefin: Olefin carpets are resistant to moisture, which makes them great for shampooing. They usually clean up well and dry quickly, but it’s still important to use a compatible shampoo to avoid any potential damage.

The Role of Vacuuming in Carpet Care

Vacuuming plays a big role in taking care of your carpet. Here’s why it’s so important:

Removes Dirt and Dust: Vacuuming helps to suck up all the dirt, dust, and crumbs that get trapped in your carpet. It’s like giving your carpet a nice, thorough cleaning.

Should you vacuum after shampooing carpet?

Prevents Allergies: Dust mites and allergens love to hide in carpets. By vacuuming regularly, you can get rid of these pesky allergens and keep your home allergy-free.

Keeps Carpet Looking Fresh: Vacuuming fluffs up the carpet fibers and keeps them looking nice and neat. It helps to maintain the appearance of your carpet and prevents it from looking dull and worn out.

Maintains Hygiene: Vacuuming removes bacteria and germs from your carpet, making your home a cleaner and healthier place to live.

How soon after steam cleaning the carpet can you vacuum?

Steam cleaning uses water and heat to clean the carpet. Afterward, the carpet needs time to dry completely. If you vacuum too soon, you might suck up dampness, which could damage your vacuum or even make the carpet dirty again.It’s a good idea to wait at least 12 to 24 hours after steam cleaning . This gives the carpet enough time to dry thoroughly. You can speed up the drying process by opening windows or using fans.

Benefits Of Vacuuming Your Carpets shampooing

Vacuuming your carpets after Carpets shampooing is important because it helps to remove any leftover dirt and debris from the carpet fibers. This can make your carpets look cleaner and fresher. It also helps to fluff up the carpet fibers and make them look more fluffy and soft. Vacuuming after cleaning can also help to prolong the life of your carpets, as it removes any dirt and debris that can cause the fibers to deteriorate over time. Overall, vacuuming after cleaning is an essential step to keeping your carpets looking and feeling their best.

Clarifying Misunderstandings About Vacuuming After Shampooing

There are some misunderstandings about whether you should vacuum after shampooing your carpet. Let’s clear them up:

False: “Vacuuming isn’t necessary after shampooing.”
True: Vacuuming after shampooing is important. It helps to remove any leftover shampoo residue and dirt, leaving your carpet clean and fresh.

False: Shampooing alone is enough to clean the carpet.
True: While shampooing is great for deep cleaning, it’s not enough on its own. Vacuuming helps to fluff up the carpet fibers and remove any dirt that the shampoo might have missed.

False: Vacuuming can damage the carpet after shampooing.

True:Vacuuming after shampooing is safe as long as you use the right technique. Be gentle and avoid using too much force to prevent any damage to the carpet fibers.

False: You should wait a long time before vacuuming after shampooing.
True:While it’s important to let the carpet dry completely after shampooing, you don’t need to wait too long before vacuuming. Waiting 12 to 24 hours is usually enough to ensure that the carpet is dry and ready for vacuuming.

Case Studies: Real-Life Examples

Sarah’s Story: Sarah shampooed her carpet to get rid of a stubborn stain. However, she forgot to vacuum afterward. A few days later, she noticed that her carpet looked dull and felt sticky. She realized that vacuuming after shampooing would have helped to remove any leftover shampoo residue and keep her carpet clean and fresh.

Mark’s Mishap: Mark decided to skip vacuuming after shampooing his carpet because he thought it wasn’t necessary. However, a week later, he started noticing a strange odor coming from the carpet. He realized that the leftover shampoo residue had trapped dirt and started to smell bad. Mark learned the hard way that vacuuming after shampooing is essential for maintaining a clean and odor-free carpet.

These real-life examples highlight the importance of vacuuming after shampooing your carpet. It helps to remove any leftover shampoo residue, dirt, and debris, keeping your carpet clean, fresh, and looking its best. So, don’t forget to vacuum after shampooing to ensure that your carpet stays clean and healthy for longer.

Vacuuming carpet long-Term Effects on Carpet Health 

Prevents Damage: Vacuuming regularly helps to remove dirt and debris.If the carpet is dirty for a long time, it can damage the carpet fibers.Vacuuming carpet can prevent your carpet from looking old and worn out.

Extends Lifespan: Keeping the carpet clean and free of dirt and stains will make the carpet last longer. This means you don’t have to replace your carpet sometimes now and then, saving you money in the long run.

Improves Air Quality: Carpets can trap allergens like dust and pet dander. Vacuuming helps to remove these allergens, making the air in your home cleaner and healthier to breathe.

Reduces Allergies: For people with allergies, vacuuming regularly can help to reduce allergy symptoms by removing allergens from the carpet.

conclusion:

It is usually best to vacuum after shampooing the carpet. while vacuuming after shampooing helps to remove any leftover shampoo residue and ensures that the carpet dries faster. This extra step can help to improve the overall cleanliness and appearance of your carpet.

Filed Under: Cleaning

How to remove dead algae from pool without a vacuum?

February 21, 2024 by bigfishtavernlagunaadmin Leave a Comment

If you’re struggling with removing dead algae from your pool without a vacuum, this post will provide practical solutions to clean and prepare your pool for swimming. We’ll discuss alternative methods and tools. This will give you a better understanding of what you need to do to remove dead algae from your pool and keep the pool clean and swimmable. These tips will help you get your pool back in top condition. 

How to remove dead algae from pool without a vacuum?

Why Is There Algae in the Pool?

Have you ever noticed green stuff floating in your pool? It might be algae! But what is algae, and why is it in your pool?

Algae are tiny plants that can thrive in water. They love sunlight and nutrients, like phosphates and nitrates, found in many places, including pool water. Algae can grow and spread in your pool when these conditions are right.

Poor Water Circulation: If your pool’s water isn’t circulating properly, algae can settle and grow in stagnant areas.

How to remove dead algae from pool without a vacuum?

Imbalanced Chemicals: When your pool doesn’t have the right water chemistry, the pool creates an environment where algae can begin to thrive. For example, algae will spread quickly if chlorine levels are too low.

Debris Build-Up: Leaves, dirt, and other organic matter that fall into your pool can provide nutrients for algae growth.

Low Temperatures: Algae growth is more significant in water at lower temperatures.

More Use: Using too many pools adds waste to the water, which the algae use as food.

What Are the Signs of Algae in the Pool?

Have you ever wondered if there might be algae in your pool? Here are some signs to look out for:

Green Water: If your pool water looks green or cloudy, it could indicate algae growth.

Slimy Surfaces: Feel the walls and floor of your pool. If they feel dirty or slippery, algae might be present.

Visible Blooms: Sometimes, you can see patches of green, brown, or black algae floating on the water or sticking to surfaces.

Strange Smells: If your pool water smells terrible, like rotten eggs or something musty, algae could be the culprit.

The Types of Algae in the Pool

The Types of Algae in the Pool

While cleaning your pool, you may see different types of algae in the water; you need to know what kind of algae they are; there are different types of algae. Some types of algae are discussed below.

Green Algae: This is the most common type found in pools. It can turn your water green and make surfaces slimy. Green algae is relatively easy to clean up, but it can quickly increase in large numbers in a pool if not cleaned up.

Yellow Algae (Mustard Algae): Yellow algae typically appears as small yellowish-green spots on pool surfaces. It’s stubborn and can be challenging to get rid of completely.

How to remove dead algae from pool without a vacuum?

Black Algae: Black algae forms dark, blackish-green spots on pool surfaces, often with a hard, protective outer layer. It’s the most challenging type to eliminate and requires thorough scrubbing and treatment.

Pink Algae: Despite its name, pink algae can appear red, orange, or even brownish. It tends to grow in areas with low circulation and sunlight and can be challenging to eradicate.

How do you remove dead algae from a pool without a vacuum?

 Easy Ways to Get Rid of Dead Algae in Your Pool Without a Vacuum

Manual Skimming: Grab a pool skimmer net and scoop out the dead algae floating on the water’s surface. It may take a bit of time and effort, but it’s an effective way to remove large clumps of algae.

Use a Leaf Rake: If a lot of dead algae has settled on the bottom of your pool, try using a leaf rake to scoop it up. Gently rake the bottom of the pool, collecting the dead algae as you go.

Brushing:  Use a pool brush to clean dead pool algae. Scrub the pool floor and walls thoroughly to loosen the dead algae, and then you can manually remove the dead algae.

Shock Treatment: Consider giving your pool a shock treatment with chlorine to help break down and remove the dead algae. Follow the manufacturer’s instructions carefully and ensure proper safety precautions.

Filtration: Run your pool’s filtration system continuously to help capture and remove dead algae particles from the water. Make sure to clean or backwash the filter regularly to maintain its effectiveness.

Using these methods, you can clean up dead algae from your pool without a vacuum. Stay patient and thorough; your pool will be sparkling clean soon!

Conclusion:

While removing dead algae from your pool without a vacuum might seem daunting, it’s achievable with the right approach. Using methods like manual skimming, leaf raking, brushing, shock treatment, and filtration, you can effectively clean up the mess and keep your pool clean and inviting. If you need help, don’t hesitate to seek professional help. With a little effort and determination, your pool will be algae-free and ready for swimming in no time!

Filed Under: Cleaning

  • « Go to Previous Page
  • Page 1
  • Interim pages omitted …
  • Page 5
  • Page 6
  • Page 7
  • Page 8
  • Go to Next Page »

Primary Sidebar

Recent Posts

  • Can You Deep Fry in a Nonstick Pan? My Surprising Results
  • Clay Pot vs Dutch Oven: Which One Right for You?
  • Are Dutch Ovens Non Toxic? All You Need to Know
  • Is Low Specific Heat Capacity Good for Frying Pans​
  • Smeg Kettle vs Mini Kettle: Which One Fits Your Style?

Copyright © 2024 bigfishtavernlaguna.com. All right reserved.