• Skip to primary navigation
  • Skip to main content
  • Skip to primary sidebar
  • About Us
  • Affiliate Disclosure
  • Contact us
  • Cookie Privacy Policy
  • Privacy Policy
  • Sample Page
  • Terms of Use

Kitchen Guide

  • Appliance Reviews
  • Bakeware
  • Buying Guides
  • Product Comparisons
  • Recipes
  • Essentials
  • Cleaning

Cleaning

Eureka Vacuum Filter Cleaning: Easy Guide

February 19, 2024 by bigfishtavernlagunaadmin Leave a Comment

Keeping your Eureka vacuum working well is important. One thing you need to do is clean the filter. Cleaning the filter helps the vacuum suck up dirt better and keeps your home cleaner. This guide will show you how to clean your Eureka vacuum filter easily. Let’s get started!

How to clean a Eureka vacuum filter

Step-by-Step Guide to Cleaning a Eureka Vacuum Filter

Safety first! Turn off and unplug the vacuum before starting. Then, carefully disassemble the vacuum to access the filter. Refer to your vacuum’s manual for guidance if needed.

Gather Necessary Supplies

Before you begin, gather the following supplies:

Eureka vacuum cleaner

Soft brush or cloth

Mild detergent or soap

Warm water

Towels or paper towels

Optional: Replacement filter (if necessary)

Remove and Inspect the Filter

It’s time to remove the filter from your Eureka vacuum. This part is important because we must see if the filter is dirty or damaged. 

Gently take the filter out. Be careful not to break it. Now, take a good look at the filter. Is it covered in dust and dirt? Are there any tears or holes in it? We need to check these things to ensure our vacuum works well.

If the filter looks dirty, it’s time to clean it. But if it’s damaged, you should get a new one. Checking and cleaning the filter regularly helps keep our vacuum running smoothly.

Shake off Loose Debris

Now, let’s eliminate the dirt and dust on the filter. We want to shake them off so our filter can work better.

Take the filter outside if you can. Please give it a gentle shake or tap to loosen up the debris. You might also use a soft brush or cloth to help remove the stubborn bits.

By shaking off the loose debris, we’re ensuring our filter is nice and clean. This helps our vacuum suck up dirt more effectively, so our floors can be super clean!

Wash the Filter with Mild Detergent

When it comes to cleaning the filter of your Eureka vacuum, using mild detergent is paramount. Unlike harsh chemicals, which can deteriorate the filter material and compromise effectiveness, mild detergent offers a gentle yet effective solution for removing dirt and grime without causing damage.

Additionally, mild detergent helps to break down oily residues and stubborn stains, leaving the filter clean and refreshed. Take lukewarm water in a big bowl and put a very small amount of detergent into it. Submerge the filter completely, fully immersed in the soapy solution. Use gentle, circular motions to agitate the filter, allowing the detergent to penetrate and lift away dirt and stains.
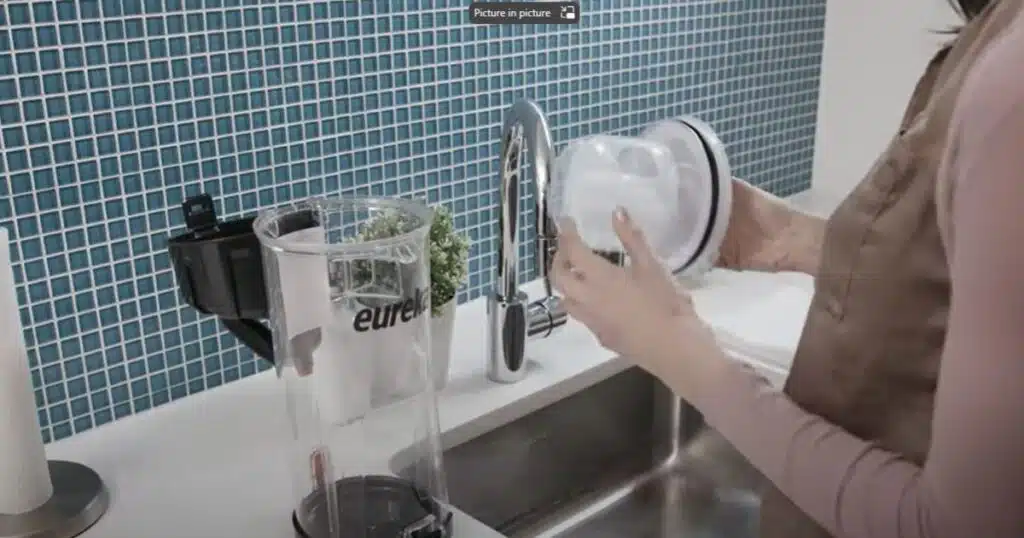
Rinse the Filter

When it comes to maintaining the efficiency and longevity of your Eureka vacuum cleaner, understanding the phrase “rinse the filter” is crucial. This simple step can significantly impact the performance of your vacuum and ensure that it continues to pick up dirt and debris effectively. While rinsing, gently squeeze the filter. This will help loosen up any trapped dirt and ensure it gets cleaned well.

This helps prevent excess dirt from clogging the filter or entering the vacuum cleaner’s motor. Rinse with Water: After removing the filter, rinse it under lukewarm water. To prevent damage to the filter, refrain from using hot water. Instead, hold the filter under the faucet and rinse away any trapped dirt and debris.

Dry the Filter Thoroughly

Drying the filter is easy. Here’s what you need to do:

 First, take the filter out of your vacuum. You don’t want to try drying it while it’s still inside – it’ll take forever!

Give the filter a little shake to get rid of any excess water. You don’t need to go crazy here; a gentle shake will do the trick.

Now, leave the filter out to air dry. You can put it on a clean towel or a drying rack – whatever works best for you. Just ensure it’s in a warm, dry place where it can get plenty of air circulation.

Okay, this part may be boring, but it’s important. Let the filter dry completely before you put it back in your vacuum. This could take a few hours or overnight, depending on how wet it is.

Pop it Back In. Once the filter is dry, you’re good to go! Just pop it back into your vacuum, and you’re ready to tackle those dust bunnies again.

Reinstall the Filter

When you’re done cleaning your Eureka vacuum, putting the filter back in place is important. This step seems simple, but it’s really important. Let’s talk about why.

Take a look at your vacuum and find where the filter goes. It’s usually pretty easy to spot – look for a compartment or slot that’s the right size and shape for the filter.

Once you’ve found the spot, ensure the filter is properly lined up. It should fit snugly into place without any gaps or wobbling.

Depending on your vacuum model, a latch, clip, or cover might hold the filter in place. Ensure it’s securely fastened so the filter won’t loose while vacuuming.

Give the filter a little wiggle to ensure it’s firmly in place. You want it to stay intact halfway through your cleaning session!

Regular Filter Maintenance and Replacement

Taking care of the filter is important to keep your Eureka vacuum working its best. This means cleaning it regularly and replacing it when needed. Let’s talk about why this is so important.

Depending on how often you use your vacuum, you may need to clean the filter every month. 

While cleaning the filter, please take a moment to inspect it for any signs of damage, such as tears or holes. If the filter is damaged, it’s important to replace it immediately to ensure continued performance.

Even with regular cleaning, filters can wear out over time. Generally, replace the filter in your Eureka vacuum every six months to a year, depending on use. Be sure to check the manufacturer’s recommendations for your specific model.

Conclusion:

Cleaning your Eureka vacuum filter is important to keep it running long. By regularly replacing and cleaning the filter, you can ensure that your vacuum will function properly. It is a simple task that increases your productivity.

Finally, remember to clean your Eureka vacuum filter regularly to keep your home clean and healthy.

Filed Under: Cleaning

DIY Dirt Devil Vacuum Cleaner Cleaning: Effective Methods

February 14, 2024 by bigfishtavernlagunaadmin Leave a Comment

Cleaning your Dirt Devil vacuum cleaner is essential to maintaining its performance and longevity. This article will detail adequately cleaning your Dirt Devil vacuum to keep it running efficiently. We’ll cover crucial steps and tips to ensure your vacuum remains in top condition for years to come, regardless of whether you have a bagless or bagged model.

How to Deep Clean a Dirt Devil Vacuum Cleaner

How to clean dirt devil vacuum cleaner

Before We Begin…

Gathering all the necessary tools and materials before we begin cleaning your Dirt Devil vacuum cleaner is essential. To avoid accidents, ensure the vacuum cleaner is unplugged before cleaning. Once you have everything ready, you can proceed with the cleaning process to ensure that your Dirt Devil vacuum cleaner continues to work efficiently.

Empty the Bin and Clean the Dirt Devil Filters

Cleaning your Dirt Devil vacuum cleaner is essential to maintaining its performance and longevity. Ensuring the peak performance and prolonged endurance of your Dirt Devil vacuum cleaner hinges upon meticulous cleaning. In this intricate discourse, we shall unveil a comprehensive compendium elucidating the complex art of immaculately cleansing your Dirt Devil vacuum cleaner to sustain its operational prowess.

Within this labyrinth of guidance, we shall unravel the indispensable steps and arcane insights essential to preserving the pristine condition of your vacuum cleaner for eons. Whether you have a bagless or bagged Dirt Devil vacuum, we have covered you with the best cleaning practices.

Start by unplugging the vacuum. The first step in deep cleaning your Dirt Devil vacuum cleaner is to empty the dustbin or replace the vacuum bag if you have a bagged model. This will ensure that your vacuum has maximum suction power and can effectively pick up dirt and debris.

You can remove the filter for bagless models and tap out any excess dirt. You can also wash the filter with water, ensuring it dries completely before putting it back in the vacuum. Should your device be adorned with the regalia of a replaceable filter, adhere religiously to the tenets set forth by its maker for the substitution thereof.

Engage in the cyclical rite of regular purification and replacement of filters to maintain the sanctified suction and forestall the scorching wrath of an overheated motor; thus fortified, your sanctum sanctorum shall persist in its divine mission to capture the sinister amalgamation of dirt and allergens that assail your domicile. By adhering to these mystic rites, thou shalt guarantee that thy vacuum shall continue its hallowed quest for purification and enlightenment throughout the ages.

Clean the Dirt Devil’s Dust Cup

Cleaning the Dirt Devil’s dust cup is vital to maintaining your vacuum’s performance. First, Unplug the vacuum and clean the dust cup from the unit to clean it. Empty the contents into the trash bin and use a brush or cloth to remove any remaining debris. Regularly cleaning the dust cup ensures that your Dirt Devil vacuum operates at its best, efficiently removing dirt and keeping your home clean and fresh. Periodically cleaning the dust cup ensures that your Dirt Devil vacuum works at its best, effectively capturing dirt and allergens from your floors and surfaces and prolonging its lifespan.

Remove Tangles and Dust From the Brush Roll

Removing tangles and dust from the brush roll of your vacuum cleaner is essential for maintaining optimal performance. As you vacuum, hair, threads, and other debris can get tangled around the brush roll, hindering its ability to agitate and pick up dirt from your floors effectively. 

You can do this by turning off the vacuum and flipping it over to access the brush roll. Use a pair of scissors or a brush to carefully remove any hair, strings, or debris that may be tangled around the brush roll. Next, use a damp cloth or brush to wipe away dust and debris from the brush roll’s surface. Ensure that the brush roll spins freely without any obstructions before reattaching it to the vacuum.

Regularly cleaning the brush roll not only improves the vacuum’s suction power but also extends the lifespan of the brush roll itself. Invest in the longevity of your cleaning companion by prioritizing its maintenance today.

Check for Any Blockages

Checking for blockages in your vacuum cleaner is crucial in maintaining efficiency and preventing damage. Whether it’s your plumbing, air ducts, or even computer networks, blockages can cause severe disruptions and damage if left unattended.

To check for blockages:

  • Start by unplugging the vacuum and examining the hose for any visible obstructions.
  • Use a flashlight to inspect the interior of the hose for clogs caused by debris or foreign objects.
  • Remove the wand and nozzle attachments and check them for blockages as well.

If you encounter a blockage, carefully remove it using a long, flexible tool like a broomstick or a plumbing snake. Be gentle to avoid damaging the vacuum components.

Regularly checking for blockages is essential for maintaining your vacuum’s performance and prolonging its lifespan. By clearing any obstructions promptly, you can ensure that your vacuum operates at its best, thoroughly cleaning your home’s floors and surfaces. 

Clean the Dirt Devil’s Tools

Ensuring the relentless supremacy of your Dirt Devil demands unwavering dedication to the maintenance of its tools. The relentless onslaught of dust, debris, and pet hair relentlessly besieges the brushes, nozzles, and attachments, mercilessly compromising their suction prowess and operational efficiency. To clean them:

  • Start by removing each attachment from the vacuum.
  • Employ a damp cloth or a brush imbued with the essence of cleanliness to meticulously erase any vestige of dirt and debris that dares to besmirch the sacred surfaces of your tools.
  • Pay special attention to crevices and bristles to ensure thorough cleaning.

In the face of tenacious grime that dares to defy the very essence of cleanliness, summon forth the powers of a mild detergent solution to vanquish such audacious impurities. Allow the attachments to dry completely before reattaching them to the vacuum. Regularly cleaning the Dirt Devil’s tools ensures better cleaning performance and prevents the spread of dirt and allergens in your home. 

(Optional) Dust the Rest of the Vacuum Exterior

Dusting the exterior of your vacuum cleaner is an optional yet beneficial task for maintaining its appearance and cleanliness. Use a soft, dry cloth or a duster to gently wipe down the surfaces of the vacuum, including the body, handle, and buttons. This helps remove any dust, dirt, or smudges that may have accumulated during use. Additionally, it keeps your vacuum looking tidy and well-maintained. While this step isn’t essential for the vacuum’s functionality, it contributes to a more pleasant and hygienic cleaning experience. 

Summary

Maintaining a Dirt Devil vacuum cleaner requires diligence and attention to detail. Regularly clean the tools, dust the exterior, and address any stubborn dirt with mild detergent solutions. Remember, cleanliness is not just a task but a commitment to preserving the efficacy and efficiency of your Dirt Devil vacuum cleaner.

Filed Under: Cleaning

  • « Go to Previous Page
  • Page 1
  • Interim pages omitted …
  • Page 6
  • Page 7
  • Page 8

Primary Sidebar

Recent Posts

  • Can You Deep Fry in a Nonstick Pan? My Surprising Results
  • Clay Pot vs Dutch Oven: Which One Right for You?
  • Are Dutch Ovens Non Toxic? All You Need to Know
  • Is Low Specific Heat Capacity Good for Frying Pans​
  • Smeg Kettle vs Mini Kettle: Which One Fits Your Style?

Copyright © 2024 bigfishtavernlaguna.com. All right reserved.