As an Amazon Associate I earn from qualifying purchases.
Cooking a turkey in a roaster oven is a game-changer — trust me, I’ve been doing it for years, especially when hosting big family gatherings. It’s one of my go-to tricks to free up my conventional oven for side dishes and desserts while ensuring the turkey stays juicy and full of flavor. Over the years, I’ve perfected this method, and I want to share it with you so you can impress your guests too!
Why Choose an Electric Roaster Oven?
An electric roaster oven offers several advantages:
- Space Efficiency: It frees up your main oven for side dishes and desserts, so you don’t have to juggle multiple dishes in the oven.
- Energy Efficiency: From my experience, it uses less energy than a conventional oven, which is a huge bonus, especially when cooking large meals.
- Moist Cooking Environment: The enclosed space helps retain moisture, resulting in a juicy turkey. I remember the first time I used my roaster, I was skeptical about whether it would brown the skin properly, but the turkey turned out so tender and flavorful that no one even noticed the skin wasn’t as crispy as I expected.
Ingredients
- 12 to 14 lbs thawed turkey
- 8 Tbsp salted butter
- 1 Tbsp poultry seasoning
- 1 Tbsp paprika
- 1 Tbsp Kinder’s Garlic Herb Blend
- 1 Tbsp onion powder
- 1 Tbsp chicken bouillon powder
- 2 tsp dried thyme
- Extra seasoning for the exterior of the turkey
Equipment
- 22-quart electric roaster oven
- Meat thermometer
Instructions Cook a Turkey in a Roaster
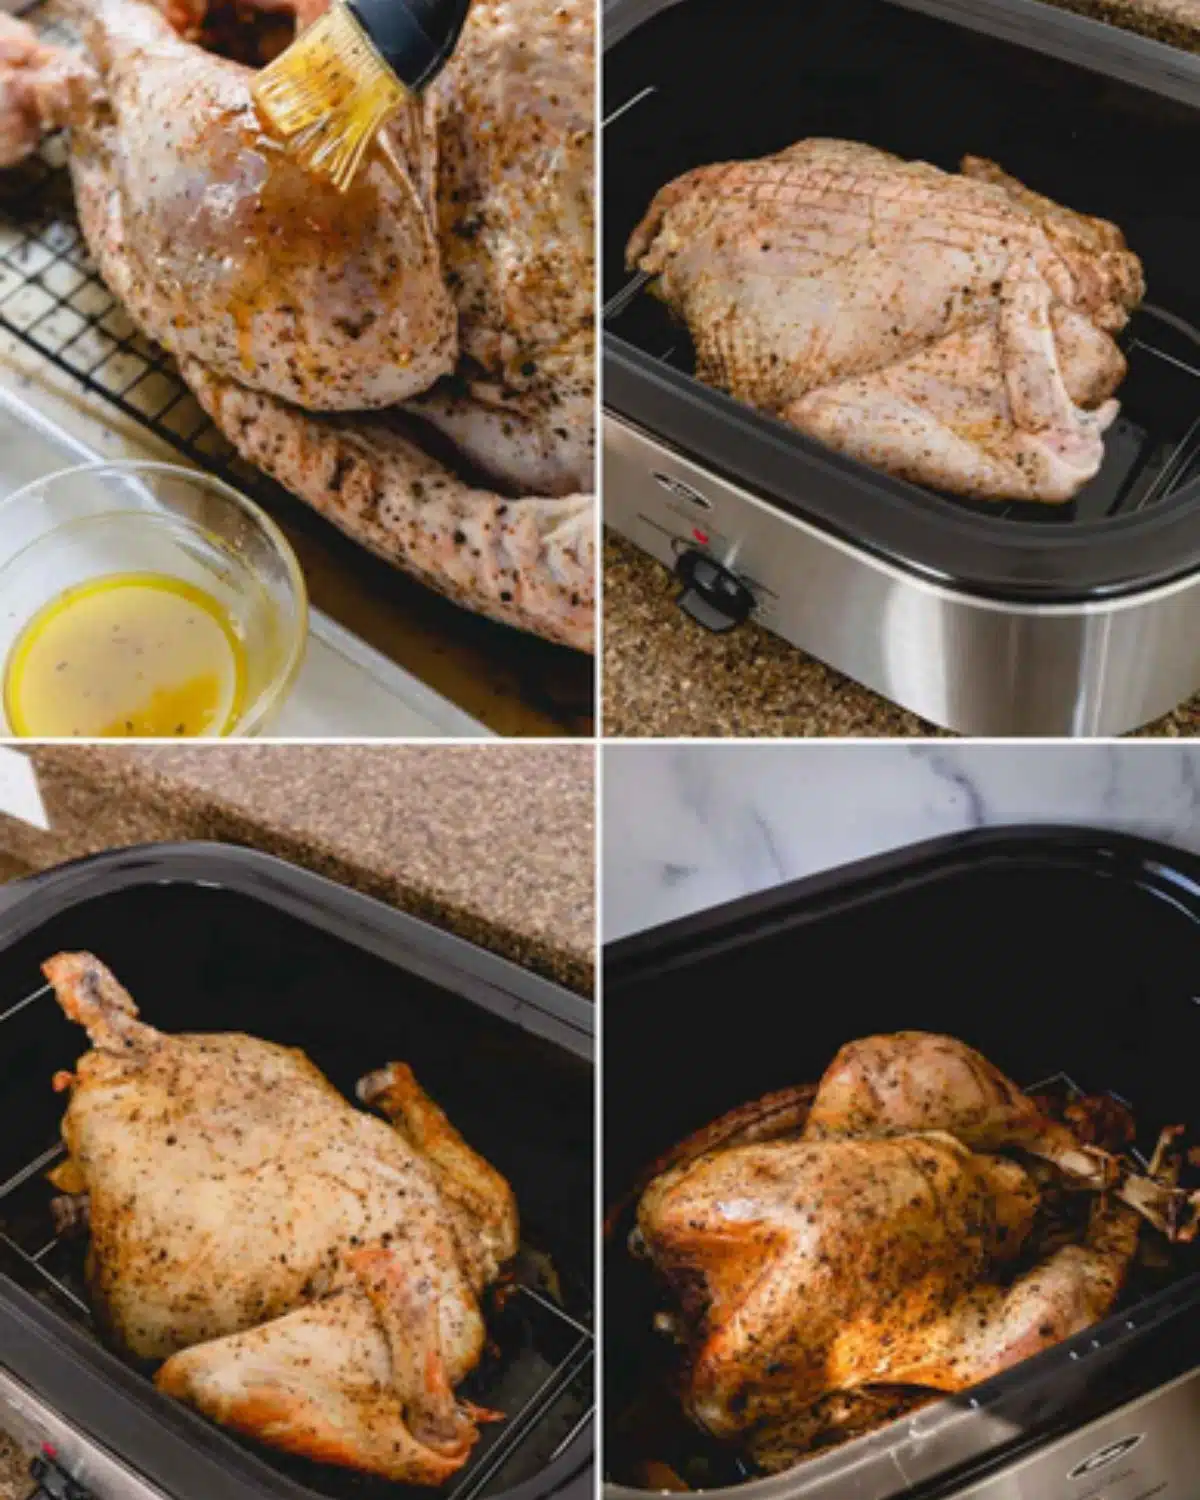
- Preheat the roaster oven to 450°F. This high heat helps the turkey get a good initial start.
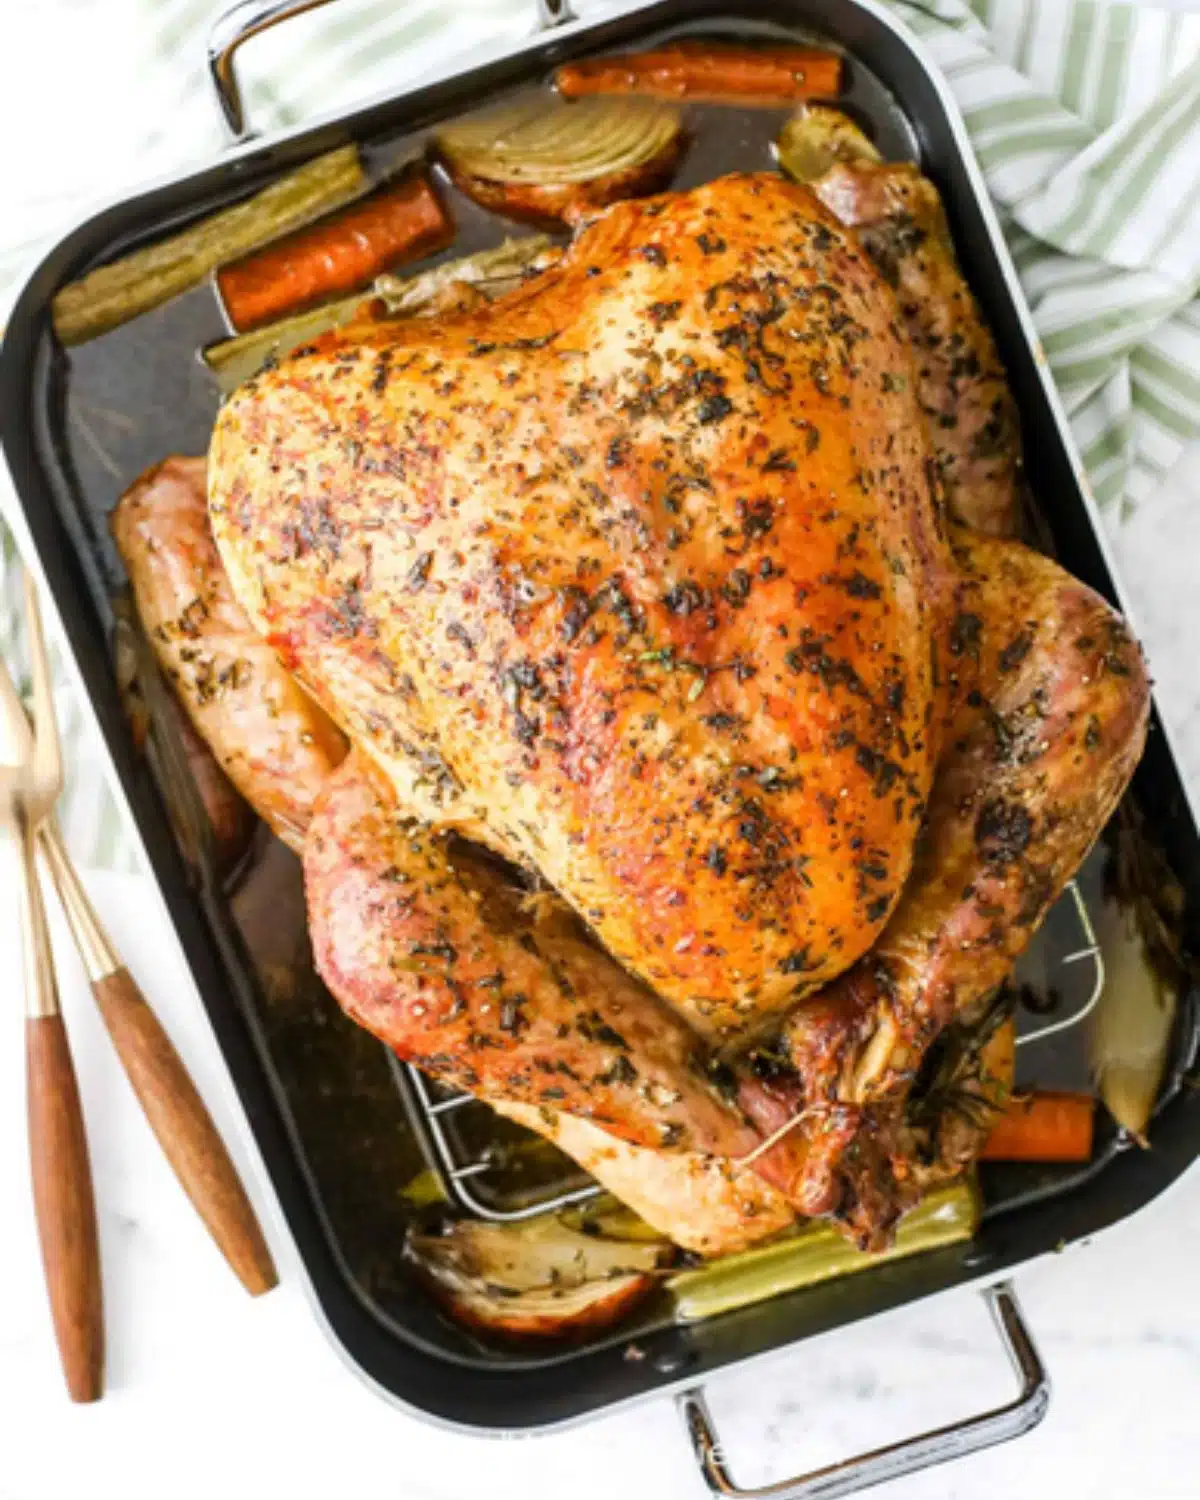
- Pat the turkey dry and season it thoroughly, making sure to get the spices under the skin. From my own experience, I like to mix the butter with the seasonings and rub it all over the turkey. It infuses the meat with flavor, making every bite more delicious! Make sure to coat it evenly for the best results.
- Carefully place the seasoned turkey into the preheated roaster oven.
- Cover the turkey with a lid and cook for 15 minutes at 450°F. This high heat helps lock in moisture and start the cooking process.
- After 15 minutes, lower the temperature to 350°F. This helps ensure the turkey cooks evenly while keeping it moist.
- Cook the turkey until the internal temperature reaches 165°F. I’ve found that the best way to check for doneness is with a meat thermometer, especially when you’re cooking a turkey in a roaster.
- For a 12 to 14-pound, completely thawed turkey, it’ll take about 2 hours to 2 hours 20 minutes with this method. But always go by internal temperature rather than time alone — this is key for getting it just right.
Determining Doneness
Use a meat thermometer to check the internal temperature:
- Thigh: Should reach 175°F.
- Breast: Should reach 165°F.
Insert the thermometer into the thickest part of the thigh without touching the bone. In my experience, these temperatures always result in the perfect turkey!
Cooking Times

Cooking times can vary based on the turkey size and whether it’s stuffed, so here’s a quick guide:
- 8 to 12 pounds: 2¾ to 3 hours
- 12 to 14 pounds: 3 to 3¾ hours
- 14 to 18 pounds: 3¾ to 4¼ hours
- 18 to 20 pounds: 4¼ to 4½ hours
- 20 to 24 pounds: 4½ to 5 hours
But always trust the thermometer over time!
Achieving Crispy Skin
One downside of the roaster is that it doesn’t brown the skin as much as a conventional oven. If you want that crispy, golden skin, here’s what I do:
- Browning Sauce: Brush the turkey with a mix of melted butter, Kitchen Bouquet, and paprika before roasting. This really helps to deepen the color.
- Oven Finish: About 45 minutes before the turkey is done, I like to transfer it to a conventional oven preheated to 375°F to crisp up the skin. I remember the first time I did this, my guests couldn’t stop talking about how the skin was golden and crispy!
Resting and Carving
Once your turkey reaches the right internal temperature:
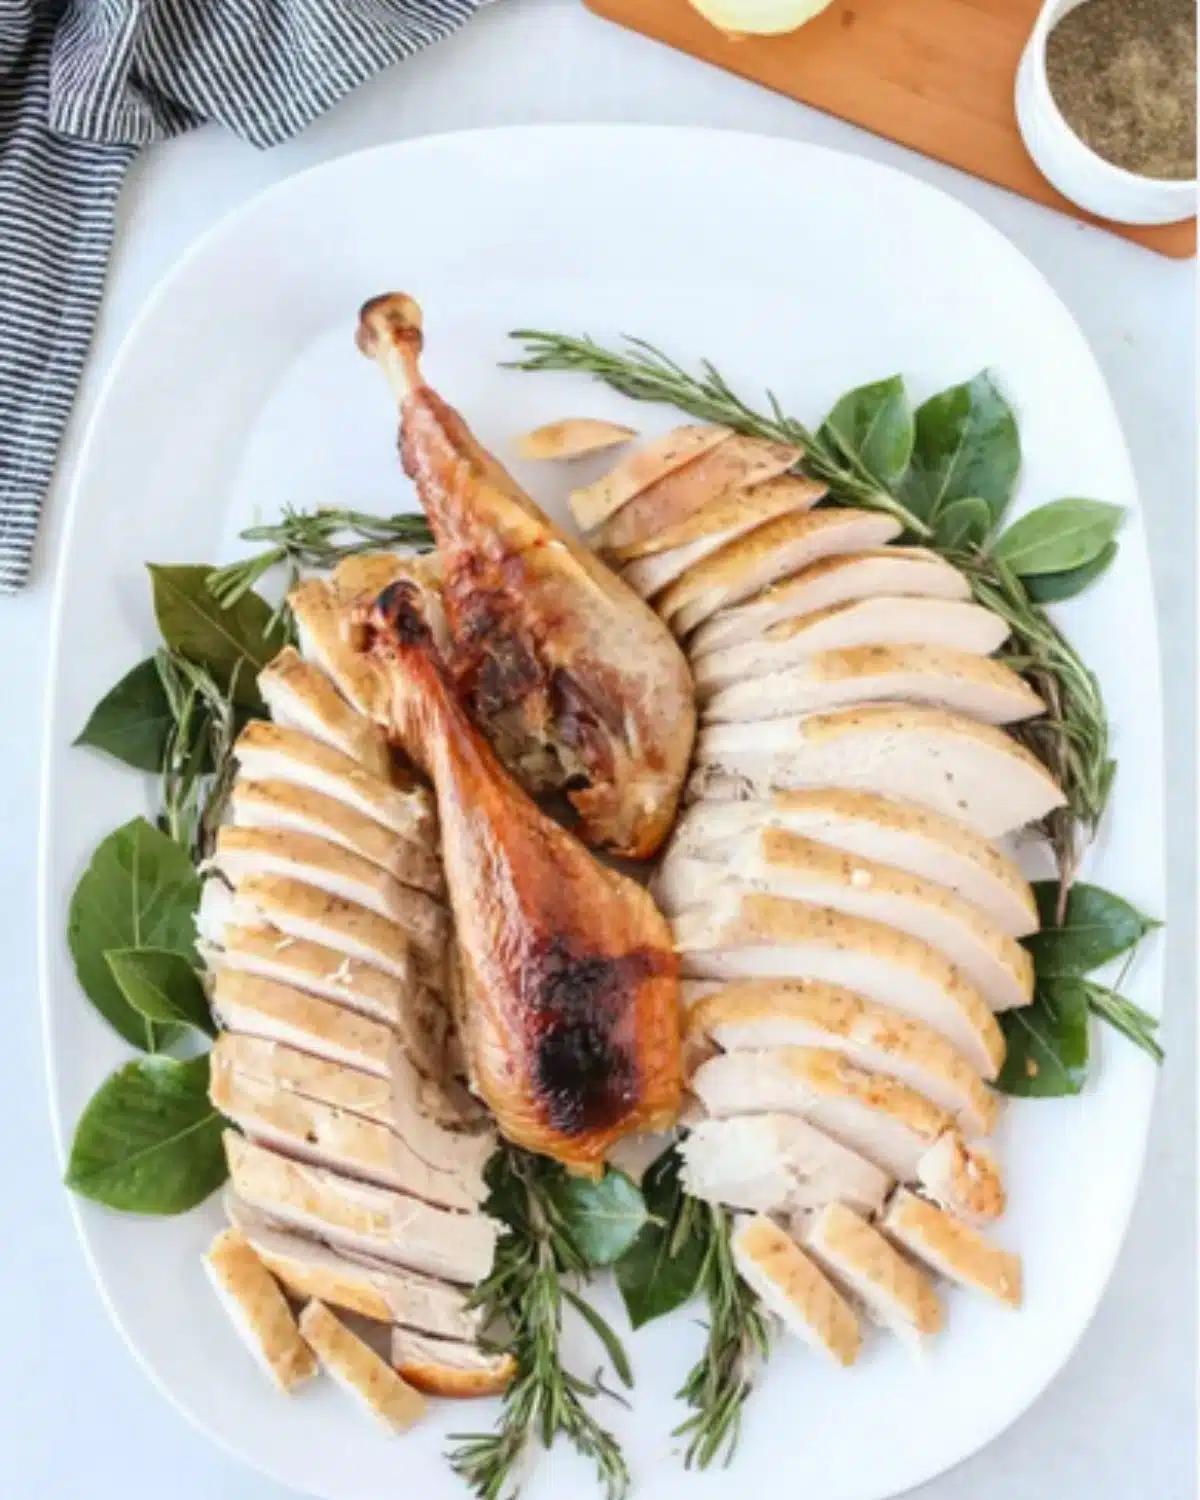
- Resting: Remove it from the roaster, tent it with foil, and let it rest for 15-20 minutes. This step allows the juices to redistribute, so each bite is juicy and tender.
- Carving: I always start by carving the breasts, then move on to the legs and thighs. It’s important to use a sharp knife for clean, easy cuts.
Tips for a Juicy Roast Turkey
- Basting: I don’t always baste, but I’ve found that basting every hour can add even more flavor to the turkey.
- Stuffing: If you’re stuffing the turkey, cook the stuffing separately to ensure everything cooks evenly. Or, if you stuff the turkey, make sure the stuffing reaches 165°F.
- Brining: Brining the turkey beforehand adds moisture and flavor, which is something I swear by after trying it a few times myself!
Safety Precautions
- Hand Washing: Always wash your hands after handling raw poultry. I’ve learned this the hard way!
- Cleaning: Be sure to sanitize surfaces and utensils after contact with raw turkey.
- Storage: Leftovers should be refrigerated within two hours to keep them safe.
I hope this guide gives you the confidence to try cooking your turkey in a roaster oven. It’s been my secret weapon for years, and it never fails to impress. I’d love to hear how it turns out if you give it a go — share your experience with me in the comments below!
Amazon and the Amazon logo are trademarks of Amazon.com, Inc, or its affiliates.
Leave a Reply