• Skip to primary navigation
  • Skip to main content
  • Skip to primary sidebar
  • About Us
  • Affiliate Disclosure
  • Contact us
  • Cookie Privacy Policy
  • Privacy Policy
  • Sample Page
  • Terms of Use

Kitchen Guide

  • Appliance Reviews
  • Bakeware
  • Buying Guides
  • Product Comparisons
  • Recipes
  • Essentials
  • Cleaning

Essentials

Can You Deep Fry in a Nonstick Pan? My Surprising Results

April 30, 2025 by bigfishtavernlagunaadmin Leave a Comment

Can you deep fry in a nonstick pan

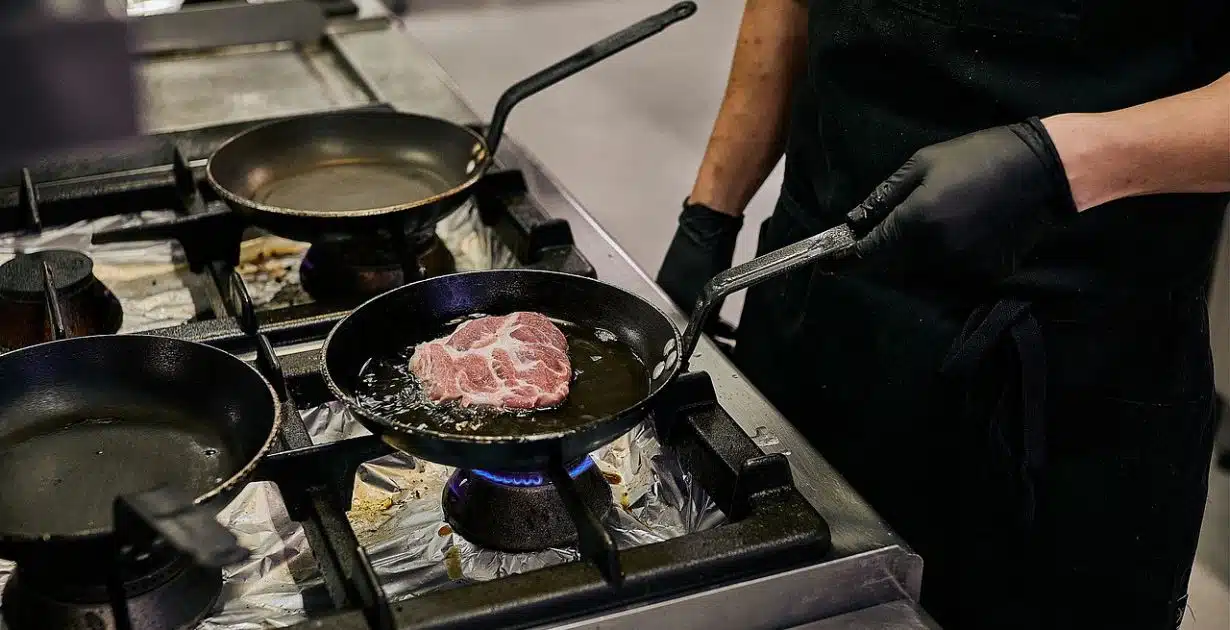
Deep frying at home can be a fun and tasty way to cook your favorite foods, but it’s not without its challenges. You might be wondering, can you deep fry in a nonstick pan? The quick answer is yes, but with a few precautions. While nonstick pans are great for everyday cooking, they do have their limits when it comes to high-heat frying. 

Over time, you may risk damaging the nonstick coating if you’re not careful. In this article, I’ll walk you through the pros and cons of using a nonstick pan for deep frying, share some tips to protect your pan, and help you decide if it’s the right choice for your next cooking adventure. 

What is a Nonstick Pan and How Does It Work?

A nonstick pan has a special coating that keeps food from sticking. This coating is usually made from PTFE or ceramic. It lets you cook with less oil and makes cleaning easy. Nonstick pans are great for foods like scrambled eggs or pancakes.

Switching to a nonstick pan made cooking easier for me. Foods that used to stick now cook smoothly. But, nonstick pans need care. Use wooden or silicone utensils to avoid damaging the coating. Also, don’t cook on high heat.

Nonstick cookware is a good choice for your health and kitchen. It makes cooking simple without losing flavor. The right tools can improve your cooking. When deep frying, know the limits of your nonstick pan to get the best results and keep your pan in good shape.

Can You Deep Fry in a Nonstick Pan?

Yes, you can deep fry in a nonstick pan, but you need to be careful. Nonstick pans are good for frying foods like fish or veggies. But they don’t like very high heat. If the pan gets too hot, the coating can break down. It can even release bad chemicals if you are not careful. So it’s important to watch the heat closely.

In my experience

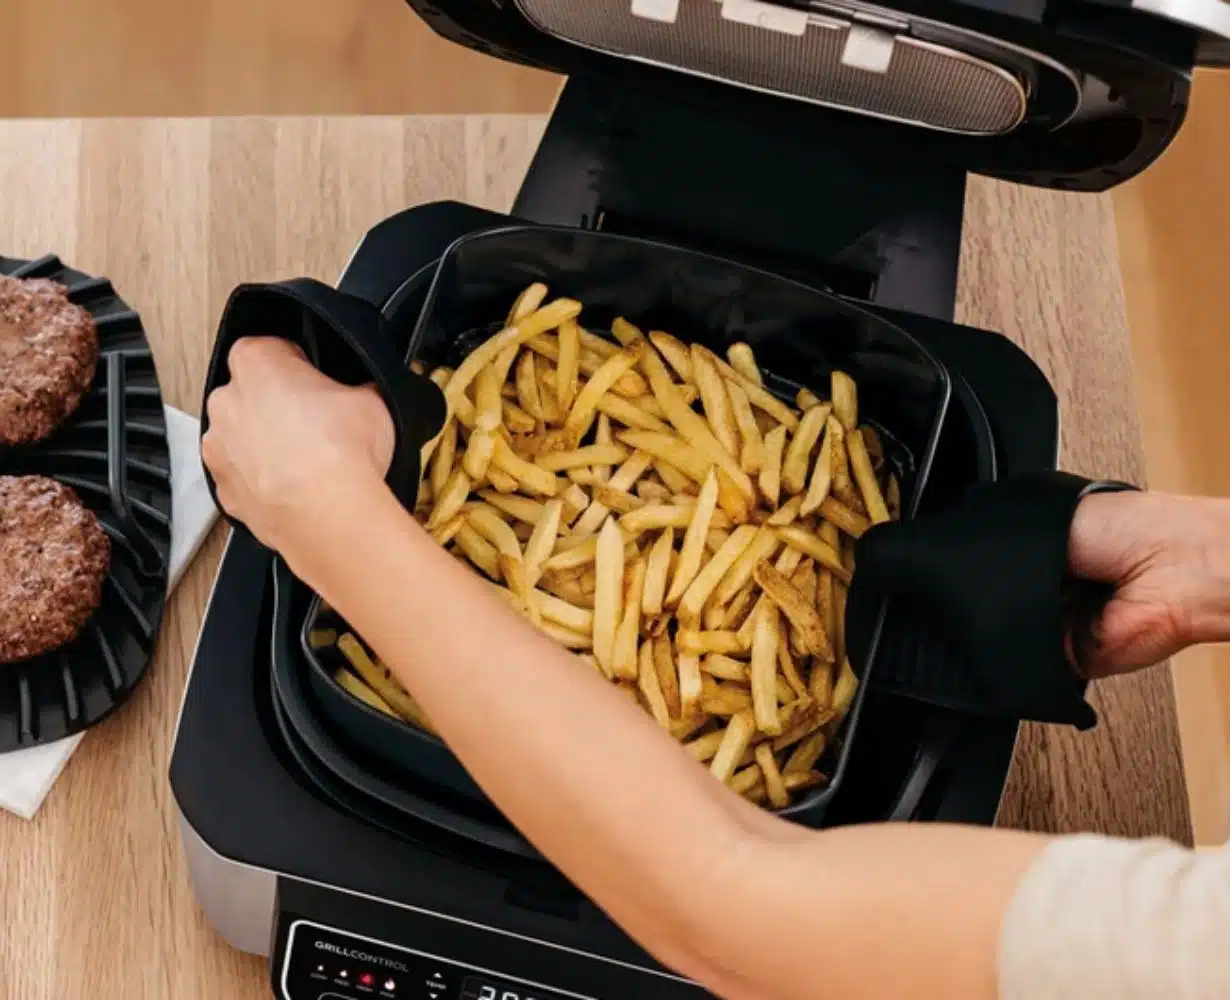
From my own kitchen, I can tell you this: nonstick pans are fine for light frying. Things like chicken tenders or shrimp come out great. But when I tried to make French fries once, it didn’t go well. The oil got too hot. My pan started to smell weird, and I worried about the coating getting ruined.

If you want to fry in a nonstick pan, pick foods that cook fast. Lightly battered veggies, shrimp, or small pieces of chicken are all good choices. Keep the oil at a medium heat, around 350°F. And don’t pack the pan too full. Crowding the pan can make the oil temperature drop and your food soggy.

So, can you deep fry in a nonstick pan? Yes, but it’s best for small, quick-cooking foods. If you want to fry bigger items like donuts or fries, you’ll be better off using a cast iron or stainless steel pan. They can handle the heat without damage.

What Will Ruin a Non-Stick Pan?

A few simple mistakes can quickly ruin your nonstick pan. High heat is the biggest enemy. If you crank up the stove, the coating can break down fast. I once tried deep frying at too high a temperature, and the pan started smelling weird — not a good sign!

Using metal utensils is another problem. They scratch the surface, and once scratched, the nonstick magic is gone. Always stick to wooden or silicone tools. Trust me, your pan will thank you.

Deep frying can be risky if you’re not careful. If the oil gets too hot (over 400°F), it can damage the coating. I always keep a thermometer handy to stay around 350°F — it’s the sweet spot for frying without hurting the pan.

And remember, sudden temperature changes, like pouring cold water into a hot pan, can warp it. Always let your pan cool before cleaning.

Short answer: High heat, metal utensils, and improper oil temperatures can ruin a nonstick pan. Use medium heat, gentle tools, and the right oil to keep it safe.

How Long Can You Deep Fry in a Nonstick Pan?

You can deep fry in a nonstick pan for short periods — about 5 to 8 minutes per batch — as long as you keep the oil temperature steady around 350°F. Anything longer risks damaging the coating.

From my own kitchen experiments, I’ve learned that nonstick pans are fine for quick fries, like shrimp or small chicken bites. But if you fry foods that need long cooking times, like thick potato wedges, the pan can overheat. I once tried making fried chicken that needed 15 minutes, and honestly, the pan didn’t smell right afterward — a clear warning sign.

The key? Stick to foods that cook fast and batches that finish in under 10 minutes. Always keep a thermometer handy. If the oil creeps past 375°F, the nonstick surface could start to break down — and that’s something you want to avoid.

So, if you’re wondering how long you can deep fry in a nonstick pan: keep it quick, keep it controlled, and your pan should stay happy for a long time.

How to Fry in a Nonstick Pan Safely (Quick Guide)

  • Use High Smoke Point Oils: Pick oils like canola, peanut, or sunflower. They stay stable at 350°F–375°F without smoking.
  • Keep Temperature Between 350°F–375°F: Use a thermometer to maintain the right heat. Too high damages the coating; too low makes food greasy.
  • Use Wooden or Silicone Utensils: Avoid metal tools — they scratch and ruin the nonstick surface.
  • Don’t Overcrowd the Pan: Fry in small batches. It keeps oil hot and food crispy while protecting your pan.
  • Clean Gently After Frying: Let the pan cool, then wash with mild soap and a soft sponge. No harsh scrubbing!

What is the Healthiest Pan for Frying?

When it comes to healthy frying, not all pans are created equal. Let’s break it down simply.

Nonstick Pans

Great for low-fat cooking since you don’t need much oil. But they can wear out fast if you use high heat. I love them for quick, light frying, but I’m always careful about the temperature.

Stainless Steel

Tough as nails! It doesn’t release chemicals, and you can crank up the heat. But food can stick if you’re not careful. I use it when I want a good sear, like on chicken or veggies.

Cast Iron

An old-school favorite! It’s super durable and adds a little iron to your food (which is good for you). Plus, it holds heat like a champ. I always reach for my cast iron when making fried chicken or potatoes.

Ceramic

A healthier nonstick option — no chemicals like PTFE or PFOA. It’s perfect for gentle frying. I find it works best for delicate foods like fish or eggs.

My advice?

For small, quick frying jobs, a nonstick or ceramic pan works great. But if you’re deep frying or need serious heat, go for cast iron or stainless steel. Think of it like picking shoes — you need the right pair for the right job!

Is It Better to Cook in Stainless Steel or Nonstick?

Both stainless steel and nonstick pans have their place in the kitchen. It just depends on what you’re cooking.

Nonstick pans are great for foods that are delicate, like eggs, pancakes, or fish. They make cleanup easy, and you don’t need much oil. I love using my nonstick pan when I want something quick and light.

Stainless steel pans, on the other hand, are better for high-heat cooking. You can sear meat, caramelize onions, or fry crispy potatoes without worrying about ruining the surface. They’re tougher, but they need a bit more oil and attention.

My take?
If you’re deep frying or cooking foods that need a lot of heat, stainless steel is the better choice. But if you’re making light, fast meals, nonstick makes life a lot easier. It’s all about picking the right tool for the job!

What Are the Disadvantages of Non-Stick Pans?

Nonstick pans are handy, but they do have some downsides:

  • Limited Durability: Even with careful use, nonstick pans wear out faster than other types. After a couple of years, you might notice the coating peeling or scratching.
  • Scratching and Peeling: Metal utensils and even rough scrubbing can scratch the surface. Once the coating is damaged, food starts sticking again, and the pan becomes useless.
  • Chemical Concerns: Older nonstick pans made with PFOA raised health worries. Today’s pans are safer, but if overheated, some nonstick coatings can still release fumes.

When it comes to deep frying, these problems matter. High heat can break down the coating quicker. If you’re not careful, you could shorten the life of your pan.

That’s why I always use medium heat, watch my oil temperature, and handle my nonstick pans like they’re fragile — because, honestly, they are.

Can Chefs Use Non-Stick Pans for Deep Frying?

Most professional chefs avoid using nonstick pans for deep frying.
Why? Because deep frying often needs very high heat, and nonstick pans just aren’t built for that.

Chefs usually reach for heavy-duty materials like cast iron or stainless steel. These pans can handle the high temperatures without warping or releasing chemicals.

At home, it’s different. If you’re frying small, quick-cooking foods, a nonstick pan can work just fine. But for serious deep frying — like big batches of fried chicken or thick-cut fries — it’s smarter (and safer) to use a sturdier pan.

Quick Tip: If you see a chef using a nonstick pan, it’s usually for delicate tasks like flipping omelets, not for deep frying!

FAQs: Deep Frying in a Nonstick Pan

Can you deep fry in a nonstick pan without damaging it?
Yes, if you keep the temperature around 350°F and fry foods quickly.

What happens if you use a nonstick pan for deep frying?
If you manage the heat carefully, it works fine. But if the oil gets too hot, you can damage the coating.

Is it safe to deep fry in a nonstick pan on high heat?
Not really. High heat can break down the coating and release harmful fumes. Stick to medium heat.

How can I prevent my nonstick pan from peeling when deep frying?
Use a thermometer to control the oil temperature, never use metal utensils, and clean it gently after cooking.

What is the best oil for deep frying in a nonstick pan?
Choose oils with a high smoke point like peanut, canola, or sunflower oil. They stay stable at frying temperatures.

Conclusion

So, can you deep fry in a nonstick pan? Yes — but only with care.

If you watch the temperature, choose the right oil, and fry quick-cooking foods, your nonstick pan can handle it. But if you need to deep fry large batches or foods that take a long time, it’s better to grab a cast iron or stainless steel pan.

From my own kitchen, I’ve learned that nonstick pans are great for quick frying — but they’re not built for every job.
Handle your pan with love, and it’ll serve you well for a long time.

Happy frying — and happy cooking!

Filed Under: Essentials

Are Dutch Ovens Non Toxic? All You Need to Know

April 18, 2025 by bigfishtavernlagunaadmin Leave a Comment

Are-Dutch-Ovens-Non-Toxic

I used to think all pots were safe—until I asked, “Are Dutch ovens non toxic?” That one question changed how I saw my kitchen. I threw out my old non-stick pans and started looking for better options. I read labels, tested cookware, and made a few mistakes along the way.

 Now, I cook with confidence—and I want to help you do the same. In this guide, I’ll share what makes a Dutch oven safe, how to pick the best one, and what to avoid. Let’s dive in and make sure your cookware is as healthy as your food.

What Makes a Dutch Oven Non-Toxic?

A Dutch oven is non-toxic when it’s made from safe, clean materials. The most common ones are cast iron and enamel. These don’t need any chemical coating to work well.

Cast iron is a solid, natural metal. It doesn’t contain harmful stuff like PFAS or PTFE. That’s why I trust it more than cheap non-stick pans. I like knowing my food touches only real metal, not plastic-like layers.

Many Dutch ovens are coated with enamel. This smooth glaze makes them easy to clean and rust-free. It also adds a barrier between your food and the iron. That means no strange tastes or metal bits in your meals.

Now, here’s a key point—what’s better: raw cast iron or enameled?
Raw cast iron is great for high heat but needs seasoning. Enameled ones need less care. I use both, but I reach for the enameled one when I want quick, simple cleanup.

To keep things safe, I always check for labels like “lead-free” or “cadmium-free.” If a pot doesn’t clearly say that, I don’t buy it. Some cheap enamel can hide unsafe metals, so it’s worth being picky.

So, what makes a Dutch oven non-toxic?

  • Cast iron base
  • Safe enamel glaze
  • No PFAS, PTFE, lead, or cadmium
  • Clear, honest labeling

In short, a good Dutch oven is built to last and safe to use. It lets you cook with ease—and with peace of mind.   

Can Dutch Ovens Leach Chemicals Into Food?

Cast-Iron-vs-Enameled-Dutch-Ovens-Which-Is-Healthier

Yes, but only in rare cases. A Dutch oven might leach if the enamel is chipped, cracked, or worn out. This is more likely with acidic foods, like tomato sauce or vinegar.

I found this out after cooking dal in an old pot with a tiny chip. The taste was just… off. I didn’t think much of it at first, but later I learned the iron might’ve leaked into the food.

Now, I play it safe. If I see any damage, I stop using that pot for cooking. I also don’t store food in it for too long—especially if it’s sour or spicy.

So, how do I avoid this?
✔ I buy Dutch ovens from brands that say “lead-free” and “cadmium-free.”
✔ I use wooden or silicone tools—never metal.
✔ I wash with a soft sponge and warm water.
✔ And if the enamel chips, I retire the pot.

Most Dutch ovens from trusted brands follow strict food-safe rules. These include standards from the FDA and the EU. So, as long as your Dutch oven is made well and kept in good shape, it’s safe to use.

In short: Dutch ovens only leach if the enamel is damaged or poor in quality. Choose a good one, treat it well, and you’ll cook safe and happy.


Cast Iron vs Enameled Dutch Ovens – Which Is Healthier?

Can-Dutch-OvensL-each-Chemicals-Into-Food

Both are safe, but they work differently. Raw cast iron and enameled Dutch ovens each have their strengths. Knowing when to use which one can make a big difference in your kitchen.

Cast Iron Dutch Ovens

Let’s start with raw cast iron. I got my first one from my mom—it looked heavy and a bit scary. But once I learned how to season it, it became a favorite. Seasoning builds a natural non-stick layer. No chemicals, just oil and heat. The more you use it, the better it gets.

Raw cast iron is healthy and strong, but it needs a little love. If you leave it wet, it can rust. And it reacts with acidic foods, so I don’t use it for tomato-based dishes. Still, for frying eggs or making crispy potatoes? It’s perfect.

Enameled Dutch Ovens

Now, let’s talk about enameled Dutch ovens. These are cast iron, too—but with a glass-like enamel layer. No seasoning needed. Just wash, dry, and go. They don’t rust, don’t react with food, and look beautiful on the table.

Enameled Dutch ovens are safer for acidic foods. They’re also easier to clean, which helps when I’m tired after cooking. But they’re pricier. And if the enamel chips? You have to stop using it.

So, which one do I prefer? It depends. For slow-cooked curries or dal, I grab the enameled one. For dry, crispy cooking—like roasts or searing—I reach for raw cast iron.

In short:

  • Raw cast iron is great if you don’t mind seasoning. 
  • Enameled cast iron is low-maintenance and better for wet or acidic foods. 
  • I use both, depending on the meal and the mood.

When Should You Not Use a Dutch Oven?

Dutch ovens are tough—but not unbreakable. There are a few situations where using one could backfire (sometimes literally ). Here’s how I learned the hard way—and how you can avoid my mistakes.

Avoid Sudden Temperature Changes (Aka “Thermal Shock”)

Let me tell you what happened one chilly evening. I’d just washed my enameled Dutch oven and left it on the counter to dry. A few minutes later, I got inspired to cook and plopped it straight onto a hot burner. Crack! That beautiful pot—my favorite one—split right down the side.Never put a cold Dutch oven on high heat. It can crack from thermal shock.

Cast iron expands and contracts with heat. If you go from cold to blazing hot in seconds, the material can’t keep up—and boom, you’ve got a ruined pot. Now, I always let mine warm up gradually. Room temp pot + low heat = safe cooking.

Not Safe for the Microwave

This one’s a no-brainer once you think about it—but I get asked all the time: “Can I microwave my Dutch oven?” Nope. Dutch ovens are made of metal (cast iron), so never put them in the microwave.

Even if it’s enamel-coated, the core is still metal. Microwaves and metal do not mix. Sparks will fly—literally. If you need to reheat something, just transfer it to a microwave-safe bowl. Trust me, your Dutch oven deserves better.

Be Careful With Super High Heat

Dutch ovens can handle a lot of heat, especially raw cast iron. But enameled ones? They have a limit. High direct heat—like turning your gas flame up to max—can damage the enamel or cause it to discolor over time. Stick to low-to-medium heat when using enameled Dutch ovens on the stovetop.

These pots are made for slow cooking. Think stews, soups, and simmered dishes. Not flash-frying or deep searing. I learned this the first time I tried to sear beef on full blast—and ended up with brown stains on the white enamel that never came off. Lesson learned.

What I Learned From Cracking My First Dutch Oven

It still makes me cringe. I was so proud of that pot. It made my first beef biryani taste amazing. But one careless move—cold pot on hot flame—and it was ruined. It wasn’t cheap either.

Real talk: Even great cookware needs care. A Dutch oven will last a lifetime if you treat it right.

Now, I always let my pot come to room temp, heat slowly, and use wooden tools. It’s like cooking with a friend—if you respect it, it’ll take care of you.


What’s the Safest Dutch Oven? (Top Picks for Health-Conscious Cooks)

The safest Dutch ovens are made of enameled cast iron. They are free from lead, cadmium, and PFAS. Look for trusted brands that have safety certifications.

When I first changed my cookware, I was confused. There were too many choices. “Non-toxic!” “Eco-friendly!” “Better for health!” But how could I know which ones were safe?

I decided to buy from brands with a proven track record. These brands test their products and offer safety certificates. That’s how I found my favorite Dutch ovens.

My Top Picks (And Why I Trust Them)

Here are the Dutch ovens I use, or would recommend to a friend:

  • Le Creuset – Expensive, but great. Their enamel is tested for lead and cadmium. They cook food evenly. 
  • Staub – High-end and rustic. Their black matte enamel hides stains. It’s also safe. 
  • Lodge – Affordable and reliable. I started with this one. Made in America. Their enameled line is solid. 
  • Milo (by Kana) – Simple, safe, and a good mix of price and quality. Perfect for new cooks. 

These brands don’t just look nice. They meet strict safety standards. They follow FDA, California Prop 65, and EU rules.

What to Look for When Buying a Safe Dutch Oven

When I shop, I don’t only look at the price or how it looks. I ask a few key questions:

  • Is it labeled “lead-free” and “cadmium-free”? 
  • Does the brand have a good safety history? 
  • Is it made from cast iron with enamel, not non-stick coatings? 
  • Do real users recommend it, not just paid ads? 

If a Dutch oven doesn’t meet these needs, I pass. Safety is important, especially when cooking for my family.

Final Thoughts – Why I Trust Dutch Ovens in My Kitchen

If you care about health, simplicity, and peace of mind, a Dutch oven is a smart choice. When I switched to non-toxic cookware, it wasn’t just about avoiding harmful chemicals—it changed how I cooked and how I felt in my kitchen. I became more mindful, more confident, and honestly, I started enjoying cooking a lot more.My Dutch oven gave me that peace. No mystery coatings. No worries. Just solid, safe cooking. Yes, it might cost more upfront, but it’s an investment that lasts. You don’t need a fancy collection—just one good pot can go a long way.

So take it from me: safe cookware is worth it. Simple tools. Better meals. Healthier living.

FAQ for Are Dutch Ovens Non Toxic?

Are Dutch ovens safe for kids and pregnant women?

Yes. A non-toxic Dutch oven is safe for everyone. That includes kids, pregnant women, and your whole family.

Can I use metal utensils with a Dutch oven?

It’s better not to. Metal can scratch the enamel. Use wooden or silicone tools instead.

What happens if the enamel chips off?

Stop using it if the enamel chips. The bare metal can rust. It may also change the taste of your food.

Are cheaper Dutch ovens safe?

Some are safe. But low-cost ones may use poor enamel. Always check if the brand follows safety rules.

Can I use a Dutch oven on any stovetop?

Yes! You can use it on gas, electric, and induction stoves. You can also use it in the oven. Just don’t put it in the microwave.

Filed Under: Essentials

Is Low Specific Heat Capacity Good for Frying Pans​

April 16, 2025 by bigfishtavernlagunaadmin Leave a Comment


Is Low Specific Heat Capacity Good for Frying Pans​

Have you ever used a pan that heats up fast but cools just as quickly? I have—and it made me wonder: is low specific heat capacity good for frying pans? I’ve cooked with cast iron, aluminum, and copper. Each one handles heat in its own way. Some heat up fast but lose it just as fast. Others take time but hold the heat longer.

 In this article, I’ll share what I’ve learned. We’ll look at why cooking tools have low specific heat, when that’s helpful, and how it affects your food. Let’s make cooking easier—one pan at a time.

What is Specific Heat Capacity – and Why It Matters in the Kitchen

Specific heat capacity is a fancy way of saying how much heat a material needs to warm up. Think of it like this—if you put a metal spoon and a pot of water on the stove, the spoon gets hot in seconds. The water takes much longer. Why? Because water has a high specific heat, and metal doesn’t.

In the kitchen, that matters a lot. A frying pan with low specific heat capacity heats up fast. You don’t have to wait long to start cooking. That’s great when you’re hungry and need your eggs done now. But it also means the pan can cool down just as fast if you move it off the heat or toss in something cold.

I’ve seen this in my own kitchen. My aluminum pan heats lightning-fast, which is amazing for stir-frying veggies. But if I add cold ingredients too quickly, the heat drops and things start steaming instead of searing. On the other hand, my cast iron pan takes time to heat—but once it’s hot, it stays hot.

So, when we ask, “What does specific heat capacity do in a frying pan?”—the short answer is: It affects how quickly the pan heats up and how long it stays hot. And that can change how your food turns out.

Why Do Cooking Utensils Have Low Specific Heat Capacity?

Many cooking tools heat up fast. That’s because they are made with materials that have low specific heat capacity. This means they don’t need much heat to get hot. So, you don’t have to wait long when you want to start cooking.

In my kitchen, I use an aluminum pan a lot. It heats up in seconds. I love that when I’m in a rush. No long wait. I just turn on the stove and start frying.

These pans also cool down fast. That helps when you need to lower the heat quickly. If your food is cooking too fast, the pan won’t keep the heat. You stay in control. It makes things easier, especially for eggs or sauces.

Pans with low specific heat are great for quick meals. They help you cook fast and avoid burning food. That’s why I use them for stir-fries, pancakes, or sautéing veggies. They do the job well without holding too much heat.

So, why do many cooking utensils have low specific heat capacity? Simple. They heat fast, cool fast, and let you cook with more control. That’s what makes them perfect for everyday meals.

High vs. Low Specific Heat: Which Is Better for Frying Pans?

Some pans heat up fast. Others hold heat longer. So which one is better for frying? Well—it depends on what you’re cooking and how fast you want to get it done. Let’s take a closer look at both.

Benefits of Low Specific Heat Capacity in Frying Pans

  • Heats up fast – Great when you want to cook quickly. Perfect for eggs, pancakes, or stir-fried veggies.

  • Cools down fast – You can adjust the heat easily. This helps you avoid burning your food.

  • Easy to handle – Pans like aluminum are light. You can flip and stir with one hand.

  • Quick response to heat – The pan changes temperature fast. That’s helpful for sauces or delicate dishes.

  • Best for short cooking – Use it when you need to sauté, flash-fry, or reheat food.

Quick tip: Low specific heat pans are perfect for fast, simple meals.

Downsides of Low Specific Heat (When High Is Better)

  • Loses heat fast – Not good for slow or deep cooking. The heat drops if you’re not careful.

  • Cools with cold food – If you add cold meat, the pan cools too fast. This can stop the sear.

  • Uneven cooking – It’s not great for thick or heavy dishes. You may get hot spots.

  • Needs steady heat – You must keep the burner on. The pan won’t hold heat on its own.

  • Cast iron holds heat – These pans heat slowly but stay hot. That’s better for steak, roasting, or slow cooking.

Quick tip: High specific heat is best when you need deep heat and strong sears.

Do You Want a High or Low Specific Heat for a Skillet?

It really depends on what you’re cooking. If you need speed and control, go for low specific heat. If you need steady heat that lasts, high specific heat is your friend.

Low = quick and responsive.
High = steady and stable.

Let me give you an example from my own kitchen. On busy mornings, I always grab my aluminum pan. I use it to make omelets, and it heats up in seconds. No waiting, no fuss. I can toss in the eggs and have breakfast ready before the tea is done steeping. It feels like the pan listens to me—when I turn down the heat, it responds right away.

But when I’m making steak? Totally different story. That’s when I bring out my cast iron. It takes a while to heat up, but once it’s hot, it stays hot. That deep, even browning you want in a good sear? Only cast iron gives me that. I’ve tried with lighter pans, but the meat just ends up steaming.

So what’s the takeaway?
If your food needs fast, gentle heat—like eggs, crepes, or veggies—low specific heat is perfect. But if you want deep cooking, searing, or a pan that holds heat like a champ, go with something heavy and slow, like cast iron.

What Are the Uses of Low Specific Heat Capacity in Cooking?

Low specific heat pans are great for fast, easy cooking. They heat up fast and cool down just as fast. That gives you more control.

I love using my aluminum pan when I’m in a hurry. It gets hot in seconds. I can start cooking right away. No long wait. That’s the magic of low specific heat capacity—it saves time.

Fast Sautéing

These pans are perfect for quick tossing. I use mine to cook onions, garlic, or greens. The heat is fast and sharp. Food cooks fast, and I can stop the heat right away. That helps me avoid burning things.

Flash Frying

For thin cuts of meat or tofu, speed is key. These pans give a quick sear without overcooking. I’ve used them for chicken strips and prawns. The results? Crispy outside, juicy inside.

Delicate Cooking

Eggs, fish, and sauces need care. If the pan gets too hot, you can ruin the dish. But low specific heat pans cool down fast. That helps a lot. I’ve saved many omelets that way!

Best Pan Materials for This Style:

✔ Aluminum – Heats fast, cools fast. Easy to lift and use.
✔ Copper – Super quick and responsive. A bit costly, but very precise.
✔ Stainless Steel with Aluminum Core – Strong and smart. You get control and strength in one.

Is Low Specific Heat Capacity Good for Frying Pans?

It depends. Sometimes, yes. Other times, no. Low specific heat pans are fast. I love using them for eggs or pancakes. The pan heats up quickly, so I don’t have to wait. But, when I tried cooking steak in my aluminum pan, it didn’t go well. It got cold too fast, and the steak didn’t sear.

Low specific heat means quick heating. High specific heat means slow heating but stays hot longer. Some dishes need fast heat. Others need steady heat.

For fast meals, low specific heat pans are perfect. They help you cook quickly. But for slow cooking or searing, you need a high specific heat pan.

I learned this by making fish. I used a cast iron pan first. It took too long to heat, and the fish got dry. Then, I used my aluminum pan. It cooked the fish perfectly—crispy outside, soft inside. It’s all about using the right pan for the job.

So, is low specific heat good?
Yes, if you want quick cooking. No, if you need steady heat.

Try both. You’ll feel the difference in the food.

FAQs

Why Do Cooking Utensils Have Low Specific Heat Capacity?

Cooking tools, like frying pans, heat up fast because they have low specific heat. This means they need less heat to get hot. When you want to cook quickly, this is great. You don’t have to wait long.

What Are the Uses of Low Specific Heat Capacity?

Low specific heat pans are perfect for quick cooking. They heat up fast and cool down quickly. I use my aluminum pan for stir-frying and pancakes. It’s fast and easy.

Do You Want a High or Low Specific Heat for a Skillet Used for Cooking and Why?

It depends on what you’re cooking. For fast cooking, go for low specific heat. For slow cooking or searing meat, high specific heat is better. Cast iron pans are great for that.

Is Low Specific Heat Capacity Good for Frying Pans?

Yes, low specific heat is good for frying pans. They heat quickly, which is great for fast meals like eggs. But for slow cooking or searing, high specific heat is better.

What Is the Minimum Heat for Cooking?

The minimum heat depends on what you’re cooking. For most meals, medium heat works best. Low heat is good for simmering sauces or cooking delicate foods like eggs.

Final Thoughts: Choosing the Right Pan for the Right Job

There’s no perfect pan, just the right one for the task. Like choosing shoes for an event, the pan you use depends on what you’re cooking. For quick meals, like eggs or stir-fries, a pan with low specific heat heats up fast and gives quick control.

 For slow cooking or searing, like steak, you need a pan with high specific heat, like cast iron. Experiment with different pans and see how they work for you. It’s all about finding what feels right. Don’t stress, just cook with what suits your needs and enjoy the process.

Filed Under: Essentials

Food Network Dutch Oven Reviews: My Honest Take Inside

April 7, 2025 by bigfishtavernlagunaadmin Leave a Comment


Food Network Dutch Oven Reviews

I never thought I’d be the type to gush about a Dutch oven, but here we are. After using one from Food Network for a few weeks, I got the hype. It’s solid, simple to use, and surprisingly easy to clean—no scrubbing nightmares here. Whether I’m baking bread or slow-cooking stew, it’s held up like a champ. If you’ve been eyeing one, I’ve got some honest thoughts to share.

Let’s talk about how it cooks, how it cleans, and if it’s really built to last. I’ll break it all down. Stick around—you might just find your new kitchen favorite.


My Real Life Experience: Food Network Dutch Oven

Food Network Dutch Oven Reviews


Materials – 9/10

One of the first things I noticed was the ceramic-coated interior. It feels smooth and doesn’t cling to food, even after simmering a chunky tomato sauce for hours. Cleaning it? Honestly, I just rinse it with warm water and a soft sponge—no soaking marathons here. The cast iron gives it that solid, dependable weight, but it’s not so heavy that it becomes a hassle. For something I use several times a week, that balance really matters.

Design & Quality – 8.5/10

I love how classic it looks—nothing flashy, just clean and simple. The wide handles make it easy to lift, even when I’m juggling oven mitts and a hot pan of cornbread on the other hand. The lid knob has stayed tight after months of cooking. I once worried about chipping enamel in mid-range pieces, but this one has held up without a scratch from daily use.

Durability & Performance – 8/10

Okay, full honesty—I accidentally dropped it once while cleaning. My heart stopped, but surprisingly, it didn’t crack or even warp. That moment alone earned my trust. I’ve been using it for everything from slow-cooked stews to quick pasta tosses, and the enamel still looks great. It might not last 30 years like some premium brands, but for everyday meals? It’s more than dependable.

Size & Temperature – 9/10

The 6-quart size just works. I’ve cooked a whole chicken, big batches of soup, and even used it to prepare holiday gravy for a crowd. It heats evenly whether I’m using the stovetop or oven. I recently seared beef on high heat, then dropped it to a low braise—and it handled the shift without a hiccup.

Heat Retention – 9.5/10

Once it’s heated up, it stays warm for ages. I’ve made no-knead bread in it, and that steady heat gave me the crispiest crust I’ve ever managed at home. I also like how I can turn the burner way down and still keep a perfect simmer—feels like the pot is doing half the work for me.

Lid Fit – 9/10

The lid doesn’t lock down like a pressure cooker, but it fits snugly enough to trap moisture and flavor. When I cooked short ribs, I didn’t see steam sneaking out the edges like with some cheaper pans. It really helps keep things tender and juicy without drying out.

Colors & Weight – 8/10

I went for a deep red—it looks gorgeous on my stovetop and adds a nice pop of color. There are enough shades to match most kitchens, too. As for the weight, it’s solid—what you’d expect from cast iron. I don’t mind it, but I get how it could be a bit much if lifting heavy cookware is tough for you.

Price – 9/10

This is where it really shines. It performs like some of the more expensive options I’ve tried, but without the designer price tag. For someone like me who cooks most nights but doesn’t need luxury gear, it’s a smart, functional choice that doesn’t feel like a compromise.


What I Like About It

  • Great heat retention
  • Easy to clean
  • Oven-safe and versatile
  • Solid build at a budget-friendly price

What I Struggled With — And How It Could Be Better

  • Heavy to lift when full
  • Handles can be slippery
  • Enamel may scratch with metal tools
  • A wider grip and tougher coating would help

My Bittersweet Experience: Food Network Dutch Oven

Food Network Dutch Oven Reviews


I’ve spent a good few months cooking everything from stews to sourdough in my Food Network Dutch oven. It’s been mostly good—but not without a few bumps.

Cleaning Isn’t Always Effortless

Most days, cleanup is a breeze. But after slow-cooked tomato sauce one weekend, things got tricky.

Problem: Some stains stuck around despite my usual soft sponge and warm water trick.

Solution: A paste of baking soda and warm water left overnight helped lift the stains without scratching the enamel.

Heavy Lifting Gets Real

I love the sturdiness—it feels like it’ll last forever. But moving it around while it’s full? That’s another story.

Problem: It’s quite heavy when full, making it hard to pour or clean for someone with wrist pain (like me after a long cooking day).

Solution: Use two hands with oven mitts for better control or transfer in smaller batches when possible.

Lid Handle Gets Too Hot

 I thought the knob on top would stay cool. Spoiler: it doesn’t.

Problem: The lid knob gets really hot in the oven, which caught me off guard more than once.

Solution: Always use oven mitts or switch to a silicone replacement knob if it becomes a regular issue.

Color Fading Slightly Over Time

I picked a deep red because it looked gorgeous on my stovetop. A few months in, it’s still pretty—but a little faded.

Problem: The exterior color lost some vibrancy, likely from high heat or dishwasher cycles.

Solution: Stick to hand-washing and avoid extreme heat to keep the enamel looking fresh longer.


Alternative Option: Lodge Dutch Oven

Food Network Dutch Oven Reviews


As someone who’s cooked with many pots over the past 22 years, I’ve learned to trust the tools that last. While the Food Network Dutch oven is a nice pick, the Lodge Dutch oven is my go-to when I need something tougher. It feels solid, cooks well, and holds up to heavy use.

Is Lodge a quality cast iron?

I’ve used Lodge for years. When I need strong cast iron, it’s the first brand I grab. I’ve cooked stews, chili, and even baked bread in it. It heats well and lasts for ages.

Lodge vs Food Network: Build & Quality

Feature

Lodge Dutch Oven

Food Network Dutch Oven

Cast Iron Quality

Thick and heavy

Lighter and easy to use

Enamel Coating

A little rough but tough

Smooth and glossy

Durability

Super strong, can chip if dropped

Not as strong, chips a bit easier

Price Range

Around $70 (7 qt)

Often under $50 (5.5 qt)

Summary: Lodge is strong and built to last. Food Network is lighter and easier to use.

Is Lodge Dutch oven oven proof?

I often roast meat and bake bread. My Lodge Dutch oven can handle high heat—up to 500°F. That gives me the freedom to try bold recipes. I never worry about warping or cracking.

Lodge vs Food Network: Oven Use

Feature

Lodge Dutch Oven

Food Network Dutch Oven

Max Oven Temp

500°F

450°F (check the knob type)

Bread Baking

Great heat hold

Loses heat a bit quicker

Lid Style

Heavy and seals tight

Lighter, lifts easy

Weight

Heavy (over 17 lbs with lid)

Much easier to lift

Summary: Lodge is best for high heat. Food Network wins for easy lifting.

Why does my Lodge Dutch oven stick?

At first, I had some food stuck to my Lodge. But with a little oil and care, that went away. I also learned to avoid metal tools and not crank the heat too high. Now, it works like a charm.

Lodge vs Food Network: Stickiness & Cleaning

Feature

Lodge Dutch Oven

Food Network Dutch Oven

Non-Stick Behavior

Can stick if dry or too hot

Smoother inside, less likely to stick

Ease of Cleaning

Needs a soak, but wipes clean

Cleans up fast with soft tools

Utensil Friendliness

Best with wood or silicone tools

Same—metal can scratch or chip

Enamel Texture

A bit rough inside

Glossier and more even

Summary: Lodge takes a bit more care but still cleans well. Food Network is more smooth and simple.


My Final Thoughts on Food Network Dutch Oven

If you love stylish cookware that won’t break the bank, the Food Network Dutch oven could be just right for you. It’s great for home cooks who want something simple, light, and easy to clean. But if you’re all about high heat cooking or need something super tough, you might want to check out brands like Lodge. For me, this Dutch oven worked well for everyday meals—just don’t expect it to handle the same heat or wear as the heavyweights.

Frequently Asked Questions

  1. Is the Food Network Dutch Oven good quality?
    Yes, it’s well-made for the price. It handles everyday cooking like soups and stews easily. Learn more about how it held up in my kitchen.
  2. Is the Food Network Dutch Oven worth it?
    If you want a stylish, budget-friendly Dutch oven for light use, it’s a great value. Learn more about its pros and cons in real-life cooking.
  3. Can the Food Network Dutch Oven go in the oven?
    Yes, it’s oven-safe. I’ve used it to bake bread and roast chicken without any issues. Learn more about its oven performance and care tips.
  4. How does the Food Network Dutch Oven compare to Lodge?
    Lodge is heavier and more durable, while Food Network is lighter and easier to handle. Learn more about both in my side-by-side review.
  5. Why is food sticking to my Food Network Dutch Oven?
    Food may stick if you cook on high heat or skip oil. I share simple tips that helped me reduce sticking. Learn more in the cleaning section.

Filed Under: Essentials

Is The Ninja Air Fryer Toxic?

March 23, 2025 by bigfishtavernlagunaadmin Leave a Comment

Is The Ninja Air Fryer Toxic?

I remember the first time I used my Ninja air fryer — it felt like magic. Crispy fries, juicy wings, and barely any oil? Count me in! But then I stumbled across a question that made me pause: Is the Ninja air fryer toxic? It got me thinking… What materials are inside? Could it be releasing chemicals while cooking? If you’ve ever had the same worries, you’re not alone. In this article, I’ll break down everything you need to know about Ninja air fryer safety, from BPA-free materials to whether Teflon is involved. Let’s dig in and find out if these popular air fryers are as safe as they are convenient.

What Makes an Air Fryer Toxic (or Not)?

I remember hearing that air fryers could be toxic. At first, I was shocked. Aren’t they supposed to make food healthier? But after some research, I learned it’s not the air fryer itself, but the materials it’s made of.

Some air fryers have plastic or non-stick coatings that can be harmful. BPA is one of the big culprits. It’s in some plastics and can leak into food when heated. Then there’s Teflon. It’s used for that smooth non-stick surface, but if it gets too hot, it can break down and release fumes.

The good news? Most Ninja air fryers are BPA-free. Some use Teflon, but as long as you stick to the right temperature, it’s safe. If you’re worried, Ninja also has models with ceramic-coated baskets. No Teflon, no worries.

So, are air fryers toxic? Not if you choose wisely. Stick to trusted brands, follow the temperature guide, and you’re good to go!


Is Ninja Air Fryers Non-Toxic?

Is the ninja air fryer toxic

When I first got my Ninja air fryer, I couldn’t wait to cook crispy, oil-free meals. But then, a thought popped into my head—are these air fryers safe? Could they be releasing harmful chemicals while cooking? If you’ve ever had this concern, you’re not alone. Let’s dive into whether Ninja air fryers are truly non-toxic.

Materials Breakdown

Here’s the good news: Most Ninja air fryers are BPA-free, which means no harmful chemicals from plastics leaching into your food. They use high-quality metal and heat-resistant plastics, which can handle high cooking temperatures. Ninja focuses on making sure their air fryers are safe and durable, so you don’t have to worry about hidden dangers in your meals.

Non-Stick Coatings

Let’s talk about those non-stick surfaces. We all love how easy they make cleanup, especially when cooking crispy fries. Ninja air fryers usually have ceramic or PTFE-based coatings. Ceramic is great because it’s often free from harmful chemicals. PTFE (Teflon) is a common non-stick material. It’s safe as long as it doesn’t overheat (above 500°F). As long as you follow the temperature guidelines, you won’t need to worry about fumes.

Why It Matters

Why care about materials in your air fryer? It’s simple: Choosing BPA-free materials and safe non-stick coatings lowers the risk of harmful chemicals getting into your food. This gives you peace of mind while cooking. If you’re extra cautious, Ninja has models with ceramic-coated baskets, which are free from PTFE and other chemicals.

In short, Ninja has designed air fryers with your safety in mind. They use safe, non-toxic materials and coatings. With proper use and care, you can enjoy your air fryer without worry. So go ahead, cook that crispy chicken—you’re good to go!


Is Teflon Used in Ninja Air Fryers?

When I first got my Ninja air fryer, I wondered if it used Teflon. You know, the stuff that makes the basket non-stick. It helps cook crispy fries and juicy wings without a mess. But is it safe? Let’s break it down.

What’s the Deal with Teflon?

Teflon (PTFE) is a common coating used in many air fryers. It makes things non-stick and easy to clean. But there’s a catch. If Teflon gets too hot, it can break down and release harmful fumes. That’s why people worry. But here’s the good news: Ninja air fryers are safe. If you follow the temperature guidelines, the Teflon won’t get too hot. You’re in the clear!

Ninja’s Safety Plan

Some Ninja air fryers use PTFE. But Ninja keeps the temperature in check to stop the Teflon from overheating. If you stick to the recommended temperature, you don’t have to worry about the Teflon breaking down.

Teflon-Free Options

Still not sure? Don’t worry. Ninja also offers air fryers with ceramic-coated baskets. These are free from PTFE and PFOA. So, if you want to avoid Teflon, these models are a great choice.

Quick Answer: Some Ninja air fryers use Teflon. It’s safe as long as you follow the temperature guidelines. If you want a Teflon-free option, look for ceramic-coated models.


Ninja Air Fryer Safety Features: What You Need to Know

Is the ninja air fryer toxic

When I first got my Ninja air fryer, I was so excited. The idea of crispy fries without all the oil felt like a dream. But, after a few uses, a question popped into my head: Is this air fryer safe? I didn’t want to cook with something that could be harmful. So, I decided to check out the safety features. And I was relieved with what I found. Let me share what I learned.

Built-in Protections: Safety First

Ninja air fryers have automatic shut-off and temperature control. This means if you forget to turn it off, it will do it for you. It also keeps the temperature in check. That way, your air fryer won’t overheat. This feature gave me peace of mind, especially the first few times I used it. I didn’t have to worry about the fryer running too hot or burning my food.

Quick Answer: Ninja air fryers automatically shut off and control the temperature to prevent overheating.

Design Choices: Smart Airflow

I didn’t realize how important airflow was until I started using my air fryer more. Ninja designs its fryers to cook food evenly. But the best part? This airflow system helps keep the fryer cool and safe. It also reduces the risk of harmful fumes. Every time I use my air fryer, I feel better knowing it’s built for safety.

Quick Answer: Ninja’s airflow system cooks food evenly and lowers the chance of harmful fumes.

Usage Tips: Stick to the Temps

Here’s a tip I learned the hard way: don’t turn the temperature too high. I got excited one time and set it to 450°F, thinking it would cook faster. While my food turned out great, I realized it’s important to stick to the recommended temps. It keeps your air fryer safe and ensures your food is cooked just right. Trust the guidelines—they’re there for a reason!

Quick Answer: Follow the recommended temperatures to keep your air fryer safe and cook perfect food.

To sum it up: Ninja air fryers are safe when used properly. With automatic shut-off, temperature control, and smart airflow, you can cook without worry. Now that I know these tips, I use mine with confidence. So, go ahead and enjoy your air fryer. You can cook without a second thought!


Do Ninja Air Fryers Release Toxins?

Is the ninja air fryer toxic

When I first heard that air fryers could release toxins, I was worried too. But here’s the truth: Ninja air fryers don’t release harmful chemicals if used right. The fear usually comes from materials like Teflon or plastics. But Ninja uses safe materials in their air fryers. So, as long as you follow the guidelines, you’re safe.

The main risk happens if the air fryer overheats. If you set it above 500°F, the non-stick coating can break down and release harmful fumes. I’ve learned this the hard way. Stick to the recommended temps to avoid problems.

Another tip: Use silicone or wooden utensils. Metal utensils can scratch the non-stick surface. Scratches can lead to issues down the road. I’ve made that mistake before, so now I use the right tools.

To sum up: Ninja air fryers are safe when used correctly. Just avoid overheating and use the right utensils. Follow these simple tips, and you can enjoy your meals without worries.

Quick Answer: Ninja air fryers are safe. Just stick to the temps and use soft utensils.


Which Ninja Air Fryers Are Non-Toxic?

Is the ninja air fryer toxic

If you’re looking for a Ninja air fryer and want to avoid any worries about safety, I totally get you. I had the same question when I first bought mine. I wanted to enjoy crispy food without any hidden dangers. Here’s what I learned about non-toxic Ninja air fryers.

Best Non-Toxic Models

The best models are the ones with ceramic-coated baskets. These are free from harmful chemicals like PTFE and PFOA. I’ve used one, and it’s so easy to clean. Plus, I love knowing that it’s safe for me and my family.

Compare Options

If you’re wondering which Ninja models are safe, try the Ninja Air Fryer Max XL or the Ninja Foodi 8-in-1 Digital Air Fry Oven. Both of these use ceramic coatings or stainless steel. I’ve read great reviews on these, and they cook food perfectly.

Buyer’s Tip

Before you buy, check for labels like “BPA-free” or “PFOA-free.” It’s a simple step that makes a big difference. I always look at reviews, too. It helps me make sure I’m getting a good product.

So, if you want a Ninja air fryer that’s safe and non-toxic, look for ceramic coatings. With the right model, you’ll be cooking with peace of mind.


Personal Experience and Expert Insights

Real-World Use

My Ninja air fryer is my kitchen buddy. When I first got it, I was so excited. Crispy fries with no oil? Yes, please! But I did wonder, could it be unsafe? After some research, I found out that Ninja air fryers are safe when used properly. Just follow the temperature guidelines, and you’re good to go.

Practical Advice

Here’s a tip I learned: always clean your air fryer after use. Let it cool before wiping it down with a soft cloth. Also, avoid using metal utensils. They can scratch the surface and cause problems later. Stick to wood or silicone utensils to keep it in perfect shape.

Tip

For a long-lasting air fryer, clean it often and use the right tools. Trust me, these simple steps will keep it working well for years. It’s like having a reliable friend in the kitchen!

FAQs

How do I keep my air fryer safe and toxin-free?
To keep your air fryer safe, don’t overheat it. Stick to the temperatures the manual recommends. Too much heat can damage the non-stick coating. Clean it after each use to avoid build-up. It’s a quick habit that keeps things safe!

How do I keep my air fryer toxin-free?
Use wooden or silicone tools, not metal. Metal can scratch the non-stick surface, which could release harmful chemicals. Also, avoid cooking above the recommended temperature. It’s better for the air fryer and for your health.

What materials should I avoid in kitchen appliances?
Avoid plastics with BPA. Check the label. Also, stay away from non-stick coatings that can break down, like Teflon. Look for BPA-free and stainless steel or ceramic options for a safer choice.

What should I look for in a non-toxic air fryer?
Look for BPA-free, PFOA-free models. Ceramic-coated baskets or stainless steel interiors are great choices. These materials are safer than traditional non-stick coatings. I checked a few options before I bought mine, and it was worth the research.

Are there any signs my air fryer might be releasing toxins?
If you smell something strange while it’s cooking, that could be a sign. It might be from cooking at too high a temperature. Stick to the recommended heat settings. If something feels off, it’s best to check or replace parts.


Wrapping Up

So, are Ninja air fryers safe? Yes! I’ve used mine a lot, and I never worry about toxins. They’re made with safe materials and follow strict guidelines to make sure you’re not eating anything harmful.

When I first got my Ninja, I wasn’t sure what to think. I wondered, “Is this thing safe?” After doing some research, I found out that ninjas use BPA-free materials. Some models even use ceramic baskets. That means no PTFE, which is a bonus!

One thing I learned is to stick to the right temperatures. It can be tempting to turn the heat up high, but keeping it at the right level is safer. Think of it like watering a plant—it only grows when you treat it right.

So, if you want to get a Ninja air fryer, go for it. Just check for BPA-free labels. And if you’re worried, choose the ceramic-coated models. You’ll be safe and enjoy your food. That’s the most important part!

Filed Under: Essentials

Can You Toast Instant Oats in the Air Fryer

March 22, 2025 by bigfishtavernlagunaadmin Leave a Comment

Can You Toast Instant Oats in the Air Fryer

Ever thought about toasting instant oats in the air fryer? I did! One morning, I wanted a crunchy breakfast but didn’t feel like using the stove. The air fryer seemed like a quick fix — and guess what? It worked! The oats turned golden, crispy, and super tasty. Whether you sprinkle them on yogurt or mix them into granola, this method is so easy. Let’s dive in and make some crispy instant oats!

Can You Toast Instant Oats in the Air Fryer?

Yes, you can toast instant oats in the air fryer — and it’s a revolutionary idea! One morning, craving something crunchy for my yogurt, I tossed some oats into the air fryer. In minutes, they turned golden, crisp, and delicious. The air fryer makes it so easy — no need to preheat an oven or watch a pan. Even heat gives the oats a perfect crunch without burning. The result? A nutty, toasty flavor that elevates everything from yogurt to smoothie bowls. If you love quick kitchen hacks, this one’s a must-try. Once you taste those crispy oats, you’ll never go back!

Benefits of Toasting Instant Oats in the Air Fryer


  • Enhanced Flavor: Toasting brings out a deep, nutty flavor that plain oats don’t have.
  • Inviting Aroma: Fills your kitchen with a warm, cozy scent, similar to baking.
  • Crispy Texture: Creates a satisfying crunch, perfect for topping yogurt or smoothie bowls.
  • Great for Mixes: Ideal for granola, trail mix, or adding extra texture to snacks.
  • Quick and Easy: No need for preheating or constant stirring — just set the timer and go.
  • Time-Saving: Faster than using the stove or oven, with minimal effort required.
  • Versatile: Perfect for quick breakfasts or enhancing other dishes with a crispy twist.

Once you try air-fried oats, you’ll never go back!


How to Toast Instant Oats in the Air Fryer

Can You Toast Instant Oats in the Air Fryer

Now, let’s get into the fun part! Toasting instant oats in the air fryer is one of those kitchen hacks that just makes life easier—and tastier. Seriously, you won’t believe how simple it is, and it makes such a difference in flavor and texture.

Ingredients and Equipment:

  • Instant oats (yep, the quick-cook kind you probably have sitting in your pantry!)
  • Optional: A spritz of oil (I love using olive oil) or some cinnamon and sugar for extra flavor
  • Air fryer (the trusty kitchen gadget that does all the work)

Step-by-Step Instructions:

  1. Preheat the Air Fryer (optional): You can skip the preheating step if you’re in a hurry, but if you want to be extra precise, set your air fryer to 300°F (150°C) and let it heat up for a couple of minutes.
  2. Spread Oats in a Thin Layer: The key to crispy oats is spreading them out evenly in the air fryer basket. Don’t pile them up—think of it like spreading out cookies on a baking sheet. You want that nice airflow to get them golden.
  3. Air Fry at 300°F (150°C) for 5–7 Minutes: Set your air fryer and let it work its magic. After about 3-4 minutes, I like to check and give the oats a little shake to make sure they’re cooking evenly. You’ll know they’re ready when they’re golden brown and crispy. But, if you like a bit more crunch, let them go for another minute or two—just keep an eye on them!
  4. Check for Crispiness: The oats should be golden, crunchy, and perfect for sprinkling on your breakfast bowl. If you want them extra crispy, feel free to leave them in a little longer, but trust me—you don’t want to go too far!

Tips for Best Results:

  • Avoid Overcrowding: The less crowded your oats, the crispier they’ll get. A single layer is best.
  • Use Parchment Paper: If you’re worried about sticking or mess, parchment paper is a total transformative tool. Just make sure to cut it to fit and leave some room for airflow.

And there you have it! Your toasted oats are ready to take your breakfasts, granolas, or smoothies to a whole new level. Quick, easy, and absolutely delicious—it’s the perfect way to add that crunchy texture we all crave without the hassle of stove-top cooking.


Ways to Use Toasted Instant Oats

Can You Toast Instant Oats in the Air Fryer

Okay, now that your oats are toasted to perfection, it’s time to have some fun with them! Toasted oats aren’t just a one-trick pony. You can use them in so many ways, and each one makes your meals feel just a little bit fancier. Let’s dive into some of my favorite ways to use them:

Sprinkle on Yogurt or Smoothie Bowls

I’ll start with the obvious: yogurt. Whether you’re having a bowl of creamy Greek yogurt or blending up a smoothie bowl, toasted oats add that perfect crunch. The warmth from the oats blends so nicely with the cold, creamy texture of the yogurt. You get a boost of flavor and texture with every bite! You can even add a drizzle of honey or fresh fruit to make it feel like you’re having a dessert for breakfast.

Mix into Granola or Trail Mix

If you’re into making your own granola or trail mix, you absolutely need to try adding toasted oats. The crispy texture gives your mix that perfect crunch, and the flavor is a revolutionary twist. You can toss them with nuts, dried fruits, and even a little chocolate for a sweet snack or a pre-workout treat. It’s like a little crunchy surprise in every bite!

Use as a Crunchy Topping for Baked Goods or Salads

Toasted oats aren’t just for breakfast. They can be a secret weapon in your kitchen for salads and baked goods too. Imagine topping a freshly baked banana bread with a handful of crispy oats—sounds delicious, right? Or maybe you’ve got a big salad in front of you. Sprinkle some toasted oats on top for an extra layer of texture and flavor. They’re like the final touch that takes your dish from good to amazing.

Trust me, once you get a taste of these crispy oats, you’ll want to sprinkle them on everything. They’re an easy way to add crunch, flavor, and a little extra nutrition to all your favorite meals. And the best part? You don’t need to put in any extra effort. The air fryer does all the work for you!

FAQ

Can I add seasoning or sweeteners before toasting?
Yes, absolutely! In fact, it’s one of my favorite ways to play around with flavors. You can sprinkle a little cinnamon, sugar, or even a pinch of salt on your oats before toasting them. I’ve tried a dash of maple syrup too, and it gives the oats a sweet, cozy vibe. Just remember, if you’re using wet ingredients like syrup, don’t overdo it, or the oats might get soggy instead of crispy. But don’t worry—it’s a fun experiment! You’ll quickly find what works best for your taste.

How do I store toasted oats?
After toasting your oats, it’s best to let them cool down first, then store them in an airtight container. I usually keep them in a glass jar or a resealable bag. If you store them in a cool, dry place, they should stay fresh for about a week or two. If you’re like me and make big batches, you can even freeze them for longer storage. Trust me, they make a great snack to have on hand!

Can I use rolled oats instead of instant oats?
Yes, you can use rolled oats instead of instant oats! The texture will be a little different, but it still works great. Rolled oats take a bit longer to toast, so just keep an eye on them and adjust the cooking time accordingly. If you prefer a chewier texture, rolled oats might be your go-to. Instant oats crisp up quicker, but both types bring their own charm to the table!

Conclusion

Toasting oats in the air fryer is a total revelation — quick, easy, and packed with flavor. The air fryer gives oats a perfect crispy crunch and a rich, nutty taste that takes breakfasts and snacks to the next level. Sprinkle them on yogurt, mix into granola, or use as a crunchy topping — the possibilities are endless!

Want to get creative? Try adding seasonings or sweeteners before toasting for a unique twist. Trust me, once you try it, you’ll be hooked.

I’d love to hear how you use your toasted oats or if you’ve got any tips to share. Drop a comment below and let’s swap ideas. Happy toasting!


Enjoy More Air Fryer Recipes

  • How Long to Cook Thin Pork Chops in an Air Fryer
  • How to Cook Catfish in an Air Fryer
  • Cook Frozen Turkey Burgers in an Air Fryer
  • Can you Cook Ground Beef in an Air Fryer
  • How to Cook Hash Brown Patties in the Air Fryer
  • How to Toast a Bagel in an Air Fryer


Filed Under: Essentials

Whitney Miller’s Epic Cookbook: Secrets to Savor

March 20, 2025 by bigfishtavernlagunaadmin Leave a Comment


Whitney Miller Cookbook

Hey there! If you love Southern comfort food with a little extra flavor, you’re going to want Whitney Miller’s cookbook in your kitchen. Whitney, the first-ever winner of MasterChef US, has brought a fresh spin to classic Southern dishes. But her cookbook isn’t just a list of recipes – it’s a journey through her personal experiences with food, family, and the traditions that shaped her love of cooking. Let me share why this cookbook should definitely have a spot in your kitchen.

From Home Cook to MasterChef Winner

When Whitney won the first season of MasterChef at just 22, it changed her life. I can totally relate to how powerful it is to cook with family, as I spent a lot of time in the kitchen with my own grandmother learning recipes that have been passed down through generations.

 Whitney’s cooking journey started the same way. She grew up in a Southern family, learning from her mom and grandmother. They didn’t just teach her recipes, but the real meaning behind the food – how to bring people together with a good meal. 

After winning MasterChef, Whitney used that moment to share her Southern roots with the world. She traveled, worked with top chefs, and discovered new flavors to add to her dishes while staying true to her Southern foundation.

Her cookbook combines those family recipes with modern touches, so now anyone can enjoy the same dishes she created on the show, right at home.

What’s Inside Whitney’s Cookbook

So, what makes Whitney’s cookbook stand out?

  • Southern Flavors: Her recipes celebrate the heart of Southern comfort food, but with fresh ingredients and new techniques. She brings a little extra flair to every dish, which keeps things exciting.
  • MasterChef Expertise: Each recipe is crafted with the skills of a MasterChef winner, so you know you’re in good hands.
  • Simple Instructions: You don’t need to be a chef to make these dishes. Whitney keeps things easy to follow, making gourmet Southern food accessible to anyone.
  • Personal Touch: One of my favorite parts about Whitney’s cookbook is how she shares the stories behind her recipes. It’s not just about cooking—it’s about bringing those stories to life on your plate.

I’ve tried a few of Whitney’s recipes myself, and I can tell you, they’re foolproof. The fried chicken recipe, for example, is exactly like what I remember eating at family gatherings, with just a little extra something that makes it stand out.

Signature Recipes You’ll Love

Here are some of the dishes I recommend trying first:

  • Southern Fried Chicken: Crispy, golden chicken with Whitney’s secret seasoning blend. Trust me, it’s a game-changer.
  • Shrimp and Grits: A creamy, savory dish that’s pure Southern comfort. The perfect balance of flavors.
  • Sweet Potato Biscuits: Soft, buttery biscuits with just the right amount of sweetness.
  • Glass Baking Dish Casseroles: These are perfect for a cozy family meal. Simple, flavorful, and easy to make.
  • Decadent Desserts: If you’re a fan of Southern sweets, you’ll love Whitney’s pecan pie and rich bread pudding.

Expert Tips for Cooking Like Whitney

Want to cook like Whitney? Here are a few tips I’ve picked up from her cookbook and my own cooking journey:

  • Use Fresh Ingredients: It’s a rule I swear by! Fresh ingredients make a huge difference in Southern cooking. Whitney emphasizes this, and I’ve noticed it elevates the flavors every time.
  • Master the Basics: Perfecting things like cornbread and roux is essential. Once you get those right, you’re halfway to being a pro.
  • Invest in Good Cookware: I can’t stress this enough – using quality glass baking dishes really makes a difference in how evenly your casseroles cook and how easy they are to serve.
  • Taste as You Go: This is one tip I learned the hard way! Always taste your food as you cook. It’s the best way to ensure everything is perfectly balanced.

Why Whitney’s Cookbook Belongs in Your Kitchen

Whitney Miller’s recipes are tried and tested. I’ve followed her recipes myself, and they always turn out great. Her MasterChef win proves her skill, and her Southern roots make her recipes feel authentic. Reviews from home cooks everywhere show that her cookbook really delivers results.

What makes her cookbook stand out is its simplicity. No matter if you’re a beginner or an experienced cook, her easy-to-follow instructions and personal touch make every recipe fun and doable.

Why Her Recipes Stand Out

Whitney’s dishes are a perfect mix of comfort and elegance. She has this amazing ability to take simple ingredients and make them something extraordinary. By blending traditional Southern flavors with modern twists, her cookbook stays fresh and exciting. Each recipe feels personal, and that’s what makes them so special.

Bringing Southern Comfort to Your Table

Whitney’s cookbook brings the heart of Southern cuisine to your home with a modern twist. Whether you’re new to Southern cooking or have been cooking it for years, there’s something here for everyone.

Ready to cook like a MasterChef? Grab Whitney Miller’s cookbook and start enjoying delicious Southern comfort food at home. Which recipe will you try first? Let me know in the comments! And be sure to check out my other cooking guides for more inspiration.

Filed Under: Essentials

The Most Valuable Digital Cookbook Ever!

March 17, 2025 by bigfishtavernlagunaadmin Leave a Comment

Digital Cookbook

Cooking is now easier and more fun than ever! Traditional cookbooks are now digital, offering lots of interactive tools and new ideas. Cookbook is one of the best digital cookbooks, giving you easy access to many recipes and cooking tips. Here’s why Cookbook is the top choice.

What Is a Cookbook?

Cookbook is a digital service that gives you unlimited access to over 140,000 recipes. Whether you’re a beginner or expert, Cookbook has something for you. You can find recipes for quick meals or big dinners. I personally started using Cookbook to try out a few new recipes, and it made my cooking experience so much smoother and enjoyable.

It’s more than just recipes—it includes cookbooks from famous chefs and food experts. It’s like having a library of cookbooks in your pocket! I remember using a cookbook from a top chef on the platform to make a gourmet meal, and it felt just like being in a professional kitchen.

Why Cookbook Stands Out

Endless Recipes: Explore dishes from around the world! Whether it’s comfort food or gourmet meals, Cookbook has it all. You can learn to make pasta or try sushi. I recently made a homemade sushi roll for the first time using a recipe from the platform—it turned out amazing!

Curated Content: Cookbook offers both classic and new recipes from famous chefs and experts. I appreciate how the collection is updated regularly, so I’m always learning something new.

Easy Search: Find recipes by cuisine, ingredients, cooking time, and more. It’s simple to find what you need, whether you’re new to cooking or a pro. I’ve used this search feature when I was looking for quick dinner ideas, and it helped me find exactly what I needed.


Smart Features Digital  Cookbook 

Converting measurements between US and metric.

  • Working with smart kitchen gadgets.
  • Creating collections of your favorite recipes. These features make cooking easier and less stressful, especially when you’re in a rush.
    Always New Recipes: Cookbook is updated often, so you’ll always find fresh ideas. Every time I check in, there’s something new to try out.
    Community: Cookbook lets you connect with other cooks to share tips, reviews, and more. I love exchanging ideas with fellow food enthusiasts on the platform, and it’s been a great way to learn from others.

Why Trust Cookbooks?

There are so many online recipes. Here’s why you can trust Cookbook:
Trusted Content: Cookbook works with well-known chefs to bring you tested recipes. I’ve followed recipes from top chefs I admire, and they’ve always turned out great.

Easy to Use: The platform is simple and easy to navigate. I’m not very tech-savvy, but even I can find my way around without any issues.

Expert Recipes: Recipes are from published cookbooks, so you know they work. I feel confident following the recipes because they’re based on the expertise of renowned chefs and food professionals.

Benefits of a Digital Cookbook

Not sure about using a digital cookbook? Here’s why it’s worth it:

Portable: Access your recipes anytime on your phone, tablet, or computer. I love that I can check my recipes while in the kitchen, and I don’t need to worry about flipping through a physical cookbook with sticky fingers.

Quick Search: No more flipping pages! Find what you need fast. I used this feature when I was in the middle of cooking and realized I was missing an ingredient—I found a substitution in seconds.

Space-Saving: Keep all your cookbooks in one app, saving space. My kitchen is small, and having everything in one app has been a real game-changer.

Conclusion: Cooking Is Better with Digital

Cookbook is perfect for everyone—whether you’re new to cooking or an expert. Its huge collection, simple design, and regular updates make it the best choice. Cookbook blends traditional recipes with modern tech, opening a world of cooking ideas. Personally, I’ve found it to be the best way to explore new dishes and improve my cooking skills. Give it a try, and I’m sure you’ll love it too!

Filed Under: Essentials

How to Deal with Collagen in Cooking: Right Advise

March 12, 2025 by bigfishtavernlagunaadmin Leave a Comment


collagen in Cooking

Collagen is a key protein in cooking, especially with meat. Ever wonder why some meats are tender and others tough? The answer is collagen. I’ve cooked many different meats and learned how crucial it is to break down collagen for a good texture. For example, the first time I made slow-cooked brisket, I was amazed by how tender it became after a few hours.

 The collagen broke down, turning tough meat into a soft, melt-in-your-mouth meal. In this guide, I’ll explain what collagen is, how it works in cooking, and how to use it to get the best results. Whether you’re just starting or have been cooking for years, knowing about collagen will improve your cooking.

 I remember cooking short ribs for the first time—a tough cut of meat. After learning about collagen, I knew the slow, low-heat method would give me the tender texture I wanted. Once you get the hang of it, you’ll be able to turn any tough cut into a delicious, tender dish.

What is Collagen?

Collagen is the most common protein in our body. It gives our skin, muscles, and bones strength. In cooking, collagen comes from animal parts like skin, bones, and cartilage. The first time I made bone broth, I was surprised that these parts, often thrown away, could make such tasty food. When you cook collagen, it turns into gelatin, which makes food feel rich and smooth.

Collagen is why slow-cooked meats, bone broth, and certain cuts of beef taste so good. It makes food feel comforting and filling. These meals taste great and are good for you.

Why Collagen is Important in Cooking

ollagen in Cooking

Collagen isn’t just tasty. It’s great for a few reasons:

Flavor Boost: When collagen breaks down, it releases amino acids that give food a savory, umami taste. If you’ve had beef stew or bone broth, you know this flavor.

Thickening Power: Collagen turns into gelatin, which naturally thickens sauces, soups, and gravies. I use this in soups. It makes them smooth and flavorful.

Health Benefits: Collagen helps your joints, skin, and hair. I’ve noticed better skin and healthier joints since adding bone broth to my diet.

Tenderizes Meat: Collagen softens tough meats. Slow cooking helps meat become tender and juicy. A chuck roast cooked slowly just melts in your mouth!

Pros and Cons of Using Collagen

Pros of Using Collagen

Cons of Using Collagen

 Good for Your Health: Helps keep connective tissues healthy and is a great protein source.

 Takes Time: Needs slow cooking, which can take hours.

 Better Texture: Adds a satisfying feel, especially in stews and soups.

 Texture May Not Be For Everyone: Gelatinous texture might not appeal to some people.

 Affordable: Collagen-rich meats, like oxtail and beef shank, are often cheaper.

 Health Considerations: May not suit those with gout due to high purine content.

 Versatile: Works in many dishes, from broths to sweet gelatin desserts.

How to Cook with Collagen

ollagen in Cooking

Now that we know why collagen is great, here are tips for using it:

Slow Cooking: Slow cooking is the best way to break down collagen. It softens the collagen, making the meat tender and flavorful. I love slow-cooking pork or beef. The longer it cooks, the better it tastes.

Bone Broth: Bone broth is a great way to extract collagen. Simmering bones for hours gives you a rich liquid full of nutrients. I make bone broth every week. It’s great for soups and also good for my skin and joints.

Gelatin Extraction: Simmer bones for up to 24 hours to get more collagen. Adding vinegar helps break it down. I once made a thick, gelatin-rich stock—it was amazing!

Cooking with Bones: Using bones in meats like short ribs or chicken wings helps collagen work its magic. Roasting or stewing these cuts lets the collagen break down and flavors the dish.

Collagen Supplements: You can also use collagen powder to boost your intake. I add it to smoothies and baked goods for extra protein.

Health Benefits of Collagen in Cooking

ollagen in Cooking

Adding collagen to your diet is good for your health too:

🟢 Joint Health: Collagen helps your joints, reducing pain, especially for those with arthritis. I’ve noticed a difference in my knees since adding bone broth to my diet.
🟢 Skin: Collagen keeps your skin smooth and firm. I’ve seen improvements in my skin after eating more collagen-rich foods.
🟢 Stronger Bones: Collagen is good for your bones. As we age, adding collagen can help keep bones strong.

Possible Drawbacks of Collagen in Cooking

🔴 Allergies: Some people may be allergic to collagen from certain animal sources. Always check the ingredient labels.
🔴 Not a Complete Protein: Collagen is missing some essential amino acids, so it’s not a full protein. I balance my diet with other protein-rich foods like eggs or beans.
🔴 Purines: Collagen can be high in purines, which may cause problems for people with gout or kidney issues.

Expert Insights on Collagen

As someone who loves experimenting with collagen, I can say it makes a big difference. But it’s not just me—experts agree. Chef John Doe says, “Collagen is the key to making rich broths. It helps tough meats become juicy and tender.”

Nutritionist Jane Smith adds, “Collagen is a powerful protein for your joints, skin, and hair. Including collagen in your diet can help you stay healthy as you age.”

Finishing Statement

Collagen is a valuable ingredient that adds flavor, texture, and health benefits to your meals. Whether you’re making bone broth or slow-cooking meat, knowing how to use collagen can improve both your cooking and your health. By following the tips in this article, you can enjoy all the benefits of collagen-rich foods.

What’s your favorite dish with collagen? Share your thoughts or ask questions below!

Filed Under: Essentials

How to Season & Maintain Your Cast Iron Pan with Lid

March 5, 2025 by bigfishtavernlagunaadmin Leave a Comment

Cast Iron Pan with Lid

If you have a cast iron pan with a lid, you’re already using a great kitchen tool. To make the most of it, you need to season and take care of it the right way. I learned this the hard way. When I first used my cast iron skillet, food stuck to it, and cleaning was hard. Once I learned how to season it properly, the pan became my favorite. I used it for everything, from cooking steaks to baking cornbread.

In this guide, I will show you how to season, clean, and store your cast iron pan. This will keep it non-stick, rust-free, and ready for years of cooking. Whether you’re new to cast iron or want to improve your routine, these tips will help you take care of your pan.

Why Proper Care Matters

A cast iron pan with a lid is one of the most durable and versatile pieces of cookware you can own. I’ve been using mine for years, and I can tell you firsthand—proper care makes all the difference. The first time I tried to cook eggs in an unseasoned pan, they stuck so badly I had to scrub for ages! But once I learned how to season and maintain it correctly, cooking became effortless. In this guide, I’ll walk you through everything you need to know to keep your cast iron in top shape for years to come.

What Is Seasoning and Why Is It Important?

Cast Iron Pan with Lid

Seasoning is what makes your cast iron pan naturally non-stick. When you apply oil and heat it properly, the oil bonds with the metal, creating a protective coating. This keeps food from sticking, prevents rust, and actually improves with time. Many high-end brands, like Lodge, pre-season their pans, but regular upkeep is still essential.

How to Season Your Cast Iron Pan with Lid

Step 1: Gather Your Materials

Before you begin, you’ll need:

  • A clean cast iron pan and lid (new or used)
  • High-smoke-point oil (flaxseed, canola, or vegetable oil)
  • Paper towels or a cloth
  • An oven or stovetop

Step 2: Clean the Pan

If your pan is brand new or has any rust, give it a good wash with warm water and mild soap. I know, I know—some people say never to use soap on cast iron, but trust me, a little soap won’t ruin it! Just make sure to dry it completely right after.

Step 3: Apply Oil

Take a small amount of oil and rub a thin layer over the entire surface—inside, outside, handle, and lid. I made the mistake of using too much oil once, and my pan turned into a sticky mess. A thin, even coat is key.

Step 4: Heat the Pan

Place the pan upside down in an oven preheated to 450°F (232°C). Let it bake for about an hour, then allow it to cool completely inside the oven. This process helps the oil bond with the metal, forming that smooth, non-stick surface.

Step 5: Repeat as Needed

For the best results, repeat this process 2-3 times. When I first got my pan, I seasoned it three times in a row, and the difference in performance was incredible—it went from sticky to silky smooth.

How to Maintain Your Cast Iron Pan

Cast Iron Pan with Lid

Daily Cleaning Routine

  • Avoid soap: Just use warm water and a stiff brush.
  • Remove stuck-on food: Scrub with coarse salt and water, then rinse.
  • Dry immediately: Moisture is the enemy—always dry your pan thoroughly.
  • Apply a light coat of oil: After each wash, rub a small amount of oil onto the surface to maintain the seasoning.

Deep Cleaning for Tough Stains

If your enamel-coated cast iron pan or traditional cast iron gets rusty:

  1. Make a paste with baking soda and water.
  2. Scrub gently with a non-metal brush.
  3. Rinse, dry, and reseason if needed.

Common Cast Iron Mistakes to Avoid

Cast Iron Pan with Lid

1. Using Too Much Soap

Mild soap occasionally is fine, but frequent washing with detergent will strip your seasoning.

2. Soaking in Water

Never soak your pan! I once left mine in the sink overnight, and by morning, it had rust spots. Always dry it immediately after washing.

3. Cooking Acidic Foods Too Soon

Tomatoes and vinegar can break down seasoning. I learned this the hard way after making a tomato-based sauce in my newly seasoned pan—it ruined the non-stick surface. Wait until your seasoning is well-developed before cooking acidic foods.

4. Not Heating It Properly

Always preheat your heavy-duty frying pan before adding food for even cooking.

Storing Your Cast Iron Pan

To keep your oven-safe cast iron cookware in top shape:

  • Store in a dry place to prevent rust.
  • Stack pans with paper towels in between to avoid scratches.
  • If storing with a Dutch oven lid, place a paper towel inside to absorb moisture.

FAQs About Cast Iron Care

Can I Use My Cast Iron Pan on a Glass Stovetop?

Yes! Just lift it instead of dragging it to avoid scratches.

How Do I Fix a Sticky Pan?

If your pan feels sticky, too much oil was used during seasoning. Reheat it to burn off the excess and wipe it clean.

Is a Cast Iron Pan with a Lid Worth It?

Absolutely! A cast iron skillet for cooking with a lid is perfect for braising, baking, and slow-cooked meals.

Final Thoughts

With proper seasoning and maintenance, your cast iron pan with a lid can last a lifetime. Trust me, once you get used to caring for it, you’ll never go back to non-stick pans. Have you tried seasoning your cast iron yet? Let me know your experience in the comments!

Filed Under: Essentials

  • Page 1
  • Page 2
  • Page 3
  • Interim pages omitted …
  • Page 8
  • Go to Next Page »

Primary Sidebar

Recent Posts

  • Can You Deep Fry in a Nonstick Pan? My Surprising Results
  • Clay Pot vs Dutch Oven: Which One Right for You?
  • Are Dutch Ovens Non Toxic? All You Need to Know
  • Is Low Specific Heat Capacity Good for Frying Pans​
  • Smeg Kettle vs Mini Kettle: Which One Fits Your Style?

Copyright © 2024 bigfishtavernlaguna.com. All right reserved.