• Skip to primary navigation
  • Skip to main content
  • Skip to primary sidebar
  • About Us
  • Affiliate Disclosure
  • Contact us
  • Cookie Privacy Policy
  • Privacy Policy
  • Sample Page
  • Terms of Use

Kitchen Guide

  • Appliance Reviews
  • Bakeware
  • Buying Guides
  • Product Comparisons
  • Recipes
  • Essentials
  • Cleaning

Essentials

How to Use a Mr. Coffee Grinder for Best Results

March 4, 2025 by bigfishtavernlagunaadmin Leave a Comment


Mr. Coffee Grinder

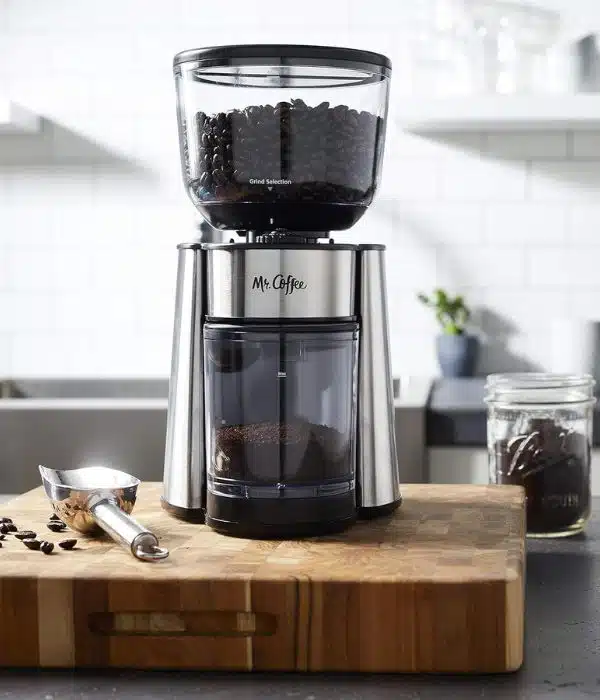
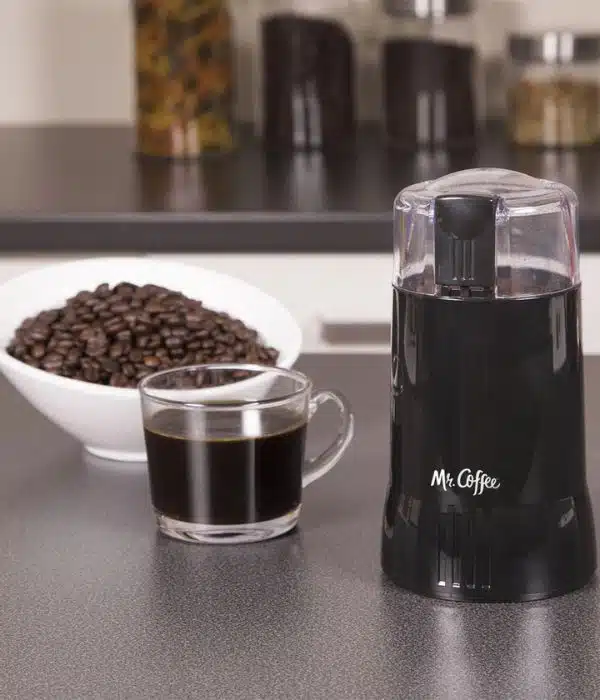
A freshly ground cup of coffee can completely change how your morning starts. Trust me, I used to rely on pre-ground coffee for years, and I never realized what I was missing until I got my hands on a Mr. Coffee Grinder. If you’ve just bought one or want to improve your grinding technique, I’ll guide you through the steps to ensure you get the best flavor and consistency in every cup.

Why Use a Mr. Coffee Grinder?

Grinding your coffee beans just before brewing locks in freshness, aroma, and full-bodied flavor. Mr. Coffee Grinders are a popular choice because they are easy to use, efficient, and cater to both beginners and seasoned coffee lovers.

I still remember the first time I switched from pre-ground coffee to grinding my own. The difference was unbelievable—the richness, the smoothness, and the aroma filled my entire kitchen. Whether you’re using a burr coffee grinder or an electric coffee grinder, mastering the right technique will help you get the most out of your beans.

Step-by-Step Guide to Using a Mr. Coffee Grinder

Mr. Coffee Grinder

Step 1: Choose the Right Coffee Beans

  • Always go for high-quality whole coffee beans for the best flavor.
  • Store your beans in an airtight container to keep them fresh longer.
  • If you love bold flavors, a dark roast works well, but if you prefer a milder taste, go for a light roast.

👉 Personal Tip: I once made the mistake of using low-quality beans, thinking the grinder would “fix” the flavor. Spoiler alert: it didn’t. The quality of your beans matters just as much as the grinding process!

Step 2: Select the Appropriate Grind Size

Grind size directly affects the taste of your coffee. Your Mr. Coffee Grinder has multiple settings, so pick the right one:

Coffee Type

Recommended Grind Size

Espresso

Fine

Drip Coffee

Medium

French Press

Coarse

Cold Brew

Extra Coarse

👉 Expert Insight: According to coffee specialists at the Specialty Coffee Association (SCA), the right grind size improves extraction and prevents bitterness. I tested this myself—too fine for the French press? You get a muddy mess. Too coarse for espresso? Weak and watery.

Step 3: Measure the Coffee Beans

  • Use a kitchen scale for accuracy (recommended: 1 tablespoon per 6 oz of water).
  • Don’t overfill the grinder—it affects consistency.
  • If using a manual coffee grinder, adjust the quantity accordingly.

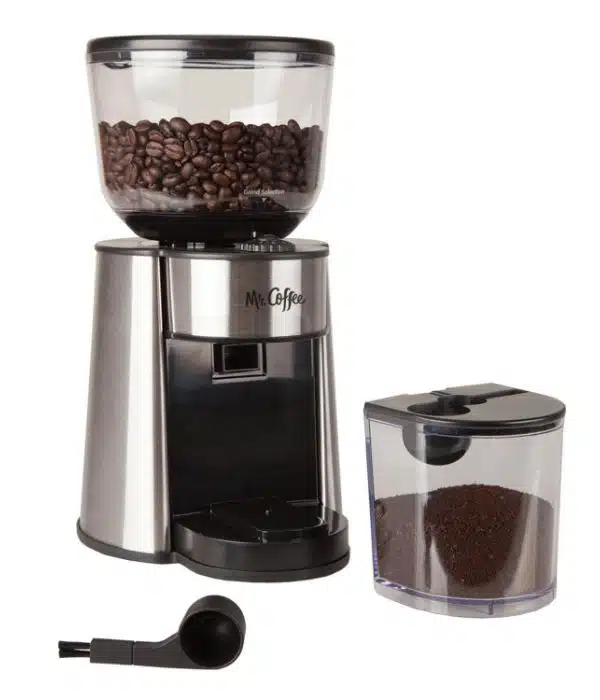
Step 4: Load the Grinder

  • Open the lid and pour in the measured beans.
  • Secure the lid properly before starting the grinder.

👉 Personal Experience: I once forgot to properly secure the lid—coffee grounds flew everywhere! So, double-check before grinding to avoid a mess.

Step 5: Grind the Coffee Beans

  • Choose the right grind setting for your brewing method.
  • Press and hold the grind button for consistent results.
  • If using a burr grinder, let it run until grinding is complete.

Step 6: Check the Consistency

  • Look at the grind texture—does it match your brewing method?
  • If not, adjust and re-grind if needed for uniformity.

Step 7: Brew Your Coffee

  • Transfer the freshly ground coffee to your coffee maker.
  • Always use clean, filtered water for the best taste.
  • Enjoy your rich, aromatic cup of coffee!

How to Clean a Mr. Coffee Grinder

Mr. Coffee Grinder

Cleaning your grinder regularly helps maintain its performance and prevents old coffee residue from affecting the taste.

Daily Cleaning

☕ Unplug the grinder before cleaning.
☕ Remove leftover coffee grounds.
☕ Wipe the exterior with a damp cloth.

Weekly Cleaning

🧼 Use a soft brush to clean the grinding chamber.
🧼 Wash removable parts with mild soap and water.
🧼 Let all parts dry completely before reassembling.

Deep Cleaning (Monthly)

🔹 Run uncooked rice through the grinder—it absorbs oil buildup.
🔹 Wipe the interior with a dry cloth.
🔹 Check for worn-out parts and replace if needed.

👉 Expert Tip: Coffee experts suggest deep cleaning once a month to maintain the grinder’s efficiency and prevent stale flavors.

Troubleshooting Common Issues

Mr. Coffee Grinder

Issue


Solution

Grinder won’t start

Check the power source and ensure the lid is secure.

Inconsistent grind

Clean the blades and adjust settings.

Loud noise

Ensure no trapped coffee beans inside.

Bitter coffee taste

Try a coarser grind for better extraction.

👉 Pro Insight: A common mistake is over-grinding, which can release too much heat, altering the coffee’s flavor. Experts recommend short pulses instead of grinding in one long burst.

Mr. Coffee Grinder vs. Other Coffee Grinders

Feature

Mr. Coffee Grinder

Burr Grinder

Manual Grinder

Ease of Use

High

Moderate

Low

Consistency

Good

Excellent

Depends on skill

Price

Affordable

Expensive

Budget-friendly

Maintenance

Easy

Moderate

Low

I personally prefer the Mr. Coffee Grinder for its ease of use—it’s quick, mess-free, and perfect for daily use. But if you’re a coffee aficionado, a burr grinder might give you even better consistency.

Final Thoughts

Using a Mr. Coffee Grinder correctly helps you unlock the best coffee flavors every morning. With the right grind size, regular maintenance, and troubleshooting tips, you’ll enjoy the perfect cup every time.

What’s Next?

Do you have a favorite grind setting? Share your experience in the comments! If you found this guide helpful, check out our coffee maker recommendations for the ultimate home brewing setup. ☕


 Frequently Asked Questions


Why does my coffee taste bitter after grinding?

Bitter coffee is usually caused by over-extraction due to grinding too fine or using stale beans. Try using a coarser grind for slower extraction and ensure your beans are fresh. Also, clean your grinder regularly, as built-up coffee oils can add unwanted bitterness.

Can I grind other things besides coffee in my Mr. Coffee Grinder?

It’s not recommended. Grinding spices, nuts, or grains can leave strong odors and affect the taste of your coffee. If you must use your grinder for multiple purposes, clean it thoroughly between uses or get a separate grinder for spices.

How much coffee should I grind at a time?

It’s best to grind only what you need for immediate use. A general rule is 1-2 tablespoons of coffee per 6 ounces of water. Over-grinding can lead to stale coffee if not stored properly.

Can I adjust the grind settings on a Mr. Coffee Grinder?

Yes, but it depends on the model. Some blade grinders don’t have preset settings, so you control the grind size by adjusting the grinding time. Burr grinders, on the other hand, allow for precise grind size adjustments with built-in settings.

Can I use oily coffee beans in my Mr. Coffee Grinder?

Oily beans (common in dark roasts) can cause buildup and clog your grinder. If using oily beans:

  • Clean the grinder more frequently to prevent residue buildup.
  • Try mixing them with less oily beans for smoother grinding.
  • Consider a burr grinder, as blade grinders tend to struggle with oily beans.

Filed Under: Essentials

The Truth About Drew Barrymore’s Crock Pot

March 4, 2025 by bigfishtavernlagunaadmin Leave a Comment

Drew Barrymore’s Crock Pot

Hey there! We all know Drew Barrymore for her Hollywood fame, but lately, she’s been making waves in the kitchen appliance world with her Beautiful Kitchenware Collection. One of the standout pieces in the collection is Drew Barrymore’s Crock Pot, a stylish and functional slow cooker that has quickly become a favorite in many kitchens. But is it really worth all the hype? Well, I’ve had the chance to try it out, and let me walk you through my experience and whether it really deserves a spot in your kitchen.

What Makes Drew Barrymore’s Crock Pot Unique?

This isn’t just another slow cooker—it stands out in several ways. From the moment I took it out of the box, I noticed how sleek and stylish it is. The design is modern, with elegant colors that fit right into any kitchen. I’ve had it in my kitchen for a couple of weeks now, and I can tell you, it makes cooking feel a little more special.

  • Elegant Design – The sleek matte finish and trendy color options make this slow cooker a centerpiece in your kitchen. I even have it displayed on my counter—it’s that pretty!
  • User-Friendly Controls – I love how simple the digital settings are. It’s easy to set the cooking time and adjust the temperature. I’m not a huge fan of complicated appliances, so this is a real win for me.
  • Programmable Timer – This feature has been a game-changer. You can set it up in advance, which is great when you’re busy. I’ve used it for several stews and soups, and I could set it and forget it while I did other things.
  • Dishwasher-Safe Parts – As someone who’s all about easy cleanup, this was a huge plus for me. The removable stoneware and lid come out and go straight into the dishwasher, making the post-dinner cleanup a breeze.
  • Large Capacity – It’s perfect for making family meals or prepping in batches. I’ve cooked a big pot of chili and plenty of roasts for gatherings, and there’s always room for more.

Performance: How Well Does It Cook?

Drew Barrymore’s Crock Pot


Now, we all know that a slow cooker should do more than just look good. It needs to perform, and I’m happy to report that Drew Barrymore’s Crock Pot does not disappoint. I’ve used it for stews, roasts, and even some desserts, and every time, the results have been impressive.

Here are a few cooking benefits that stood out during my experience:

  • Even Heat Distribution – Everything I’ve cooked has come out evenly done, with no hot spots or overcooked edges.
  • Moisture Retention – I’ve noticed that meats stay tender and juicy. For example, the roast I made last weekend was so moist, it practically fell apart.
  • Consistent Results – It’s been great for slow-cooking recipes—everything turns out flavorful and tender. Whether I’m cooking a hearty stew or making a dip for a gathering, the Crock Pot delivers great results every time.
  • Keeps Food Warm Without Overcooking – I love that it keeps food warm without drying it out, so you don’t have to worry about it losing flavor.


How Does It Compare to Other Slow Cookers?

Drew Barrymore’s Crock Pot

When comparing Drew Barrymore’s Beautiful Slow Cooker to other leading brands, here’s how it stacks up:

Feature

Drew Barrymore’s Crock Pot

Standard Crock-Pots

Design

Stylish & modern

Basic & functional

Capacity

6 quarts


4-7 quarts

Controls


Digital with timer

Manual or digital

Cleaning

Dishwasher-safe parts


Varies by model

Price


Mid-range


Low to high

What Are Customers Saying?

I’m not the only one enjoying this Crock Pot. After reading reviews and chatting with a few friends who’ve used it, here’s what people are saying:

Pros:

✅ Beautiful Design – Customers love its modern, stylish look. 

✅ Easy to Clean – The removable parts make washing hassle-free.

✅ Even Cooking – Meals come out perfectly cooked. 

✅ Great for Batch Cooking – Perfect for meal prep and family meals.

Cons:

❌ Higher Price – Some find it a bit pricey for a slow cooker. 

❌ Limited Advanced Features – Lacks Wi-Fi connectivity and app controls found in some high-end models.

Who Should Buy Drew Barrymore’s Crock Pot?

Drew Barrymore’s Crock Pot


If you’re someone who appreciates a well-designed kitchen appliance, I think you’ll love this Crock Pot. It’s also great for busy people who need a reliable way to cook meals in advance—like me! I’m all about slow-cooker meals on busy days, and this one definitely makes life easier.

It’s perfect for:

  • People who want a stylish, functional kitchen appliance
  • Those who rely on slow-cooker meals for easy, delicious dinners
  • Fans of Drew Barrymore’s collection (if you like the other items, you’ll enjoy this one)
  • Anyone looking for a high-quality, easy-to-use slow cooker

Final Verdict: Is It Worth It?

So, after using Drew Barrymore’s Crock Pot for a while, I can honestly say it’s been a great addition to my kitchen. It combines beauty with performance—plus, it’s easy to clean and use. Sure, it’s not the cheapest, but if you’re looking for a high-quality slow cooker that looks as good as it cooks, I think it’s a solid investment.

Where to Buy

You can find this Crock Pot at major retailers like Walmart and on Amazon. Keep an eye out for discounts, especially during seasonal sales—sometimes they pop up with some great deals.

Have You Tried It? Share Your Thoughts!

Have you used Drew Barrymore’s Beautiful Slow Cooker? I’d love to hear about your favorite Crock-Pot recipes or what you think of it. Drop a comment below and let’s chat!

Filed Under: Essentials

1 1/2 Quart Baking Dish: Why It’s Special

March 3, 2025 by bigfishtavernlagunaadmin Leave a Comment

1 1/2 Quart Baking Dish

Baking dishes come in different shapes and sizes, but the 1 1/2 quart size stands out. Over the years, I’ve used many baking dishes, but this one is my favorite for smaller meals. It’s the right size for many baked goods, casseroles, and side dishes. Let me show you why the 1 1/2 quart baking dish is a must-have in your kitchen.


What is a 1 1/2 Quart Baking Dish?

A 1 1/2 quart baking dish is a medium-sized dish, usually around 8×8 inches. This size is perfect for meals that serve 2-4 people. It’s great for small families, couples, or even one person. When I first cooked for myself, this dish was perfect for a homemade lasagna or a small batch of baked ziti. It’s not too big, so there aren’t tons of leftovers, but still large enough for a filling meal. This dish works for everything from casseroles to desserts like brownies or cobblers.


Why Size Matters in Baking Dishes

Picking the right size baking dish is key for even cooking. A 1 1/2 quart baking dish hits the sweet spot. I learned this the hard way—when I used a dish too big for my casserole, it cooked unevenly. The edges were overcooked, and the middle was underdone. This size helps cook food perfectly, with a crispy top and melted cheese.

1 1/2 Quart Baking Dish

Key Features of a 1 1/2 Quart Baking Dish

When shopping for a 1 1/2 quart baking dish, you’ll find that these dishes come in various materials and styles, each offering unique advantages:

  • Material: The most common materials for these dishes include glass, ceramic, and stoneware. Glass baking dishes allow you to see the progress of your cooking, while ceramic and stoneware retain heat well, making them perfect for slow-baked dishes.
  • Shape: Most 1 1/2 quart baking dishes are square or rectangular, which provides ample space for even cooking. Some may also have slightly curved sides, enhancing their versatility.
  • Ease of Use: These dishes are designed for both cooking and serving. Their non-stick surfaces make cleanup easy, and many are microwave and dishwasher safe, offering added convenience.


Why the 1 1/2 Quart Baking Dish is Special

Let me explain why the 1 1/2 quart baking dish is so important in the kitchen.

Perfect for Smaller Portions

If you’re cooking for a small group or just need a dish for a few, this size is perfect. You won’t waste food, and you’ll have just enough leftovers. I tried baking a lasagna in a larger dish once, and there was way too much! Half of it went to waste. With this dish, I always make the right amount, whether it’s for a busy weeknight or a dinner with friends.

Space-Saving Design

Not everyone has a big kitchen. This size is great for small kitchens like mine, where storage is tight. The compact 1 1/2 quart baking dish fits into almost any cabinet or drawer. Even with a lot of kitchen gadgets, this size doesn’t crowd my space.

Even Cooking and Versatility

Even cooking is key when choosing a baking dish. The 1 1/2 quart dish ensures even heat, unlike bigger dishes that can overcook some areas while undercooking others. I’ve used this dish for pasta and roasted veggies, and it’s always even. These dishes are so versatile—you can bake everything from casseroles to brownies and cobblers.

Beautiful Presentation

Many 1 1/2 quart baking dishes are made of glass or ceramic, which look beautiful enough to serve right from the oven. I love that I don’t have to transfer food to another plate. It saves time and makes cleanup easier. I’ve even had guests comment on my ceramic baking dish when I serve a fresh dessert.

Healthier Cooking

This size is perfect for cooking healthier meals in smaller portions. I can easily bake veggies, lean meats, and whole grains in these dishes. This helps me keep meals balanced. I’ve learned the importance of portion control for better eating, and this size helps me avoid overeating, something that happens with larger dishes.

1 1/2 Quart Baking Dish

How to Choose the Best 1 1/2 Quart Baking Dish

Here are some things to think about when picking your dish:

Material: Glass or Ceramic?

Both glass and ceramic have pros and cons. Glass doesn’t react with foods, so it won’t change the taste. It’s also easy to clean, and you can see how your food is cooking. But it can break easily. Ceramic dishes hold heat better, keeping food warm for longer. I like ceramic for meals that need to stay hot.

Shape and Style

Most 1 1/2 quart baking dishes are square or rectangular, but there are round ones too. Round dishes are great for soufflés or individual pies. I’ve used round dishes for mini apple pies, and they work great. But for casseroles, square or rectangular is best.

Non-Stick Coating

Many baking dishes have a non-stick coating, making cleanup much easier. I use non-stick dishes when making cheesy recipes, and it saves so much time. If you want convenience, go for a non-stick.


Popular Recipes for Your 1 1/2 Quart Baking Dish

1 1/2 Quart Baking Dish

Here are some of my favorite recipes for this size dish:

  • Casseroles: This dish is perfect for casseroles. I often make baked mac and cheese or veggie casseroles.

  • Brownies and Bars: Brownies turn out just right in this size. It’s great for small families or when you want to share with friends.

  • Lasagna: If you don’t want a huge lasagna, this size is perfect for a smaller batch.

  • Roasted Vegetables: Roasting veggies like sweet potatoes or carrots in this dish gives them a perfect caramelized finish.

  • Mini Pies: A mini pie fits perfectly in this dish, making it perfect for individual desserts.


Conclusion: Why You Should Add a 1 1/2 Quart Baking Dish to Your Kitchen

The 1 1/2 quart baking dish is a great, practical addition to your kitchen. It’s perfect for smaller families, couples, or individuals. Whether you’re baking casseroles, making dessert, or roasting veggies, this dish is up to the task.

Give it a try—you’ll love the perfect portions and how easy it is to store and clean. Plus, it looks amazing on the table!

Ready to try a 1 1/2 Quart Baking Dish? Let us know what you plan to bake!

If you enjoyed this guide, don’t miss our other articles on baking essentials. Feel free to share your favorite 1 1/2 quart baking dish recipes in the comments below!

Filed Under: Essentials

Everything You Need to Know About Glass Kitchenware

March 3, 2025 by bigfishtavernlagunaadmin Leave a Comment

Glass Kitchenware

Glass kitchenware has become a staple in many modern kitchens, and I can confidently say it’s one of my favorite upgrades. Not only does it offer an eco-friendly and stylish touch, but it’s also incredibly durable and safe for food storage. I remember switching from plastic to glass containers a few years ago, and it made a huge difference—no more lingering food odors or staining!

If you’re thinking about updating your kitchen with sustainable, versatile, and long-lasting options, glass kitchenware is definitely worth considering. In this guide, I’ll walk you through the different types of glass kitchenware, why they’re a Smart investment, and how to pick the right pieces. Plus, I’ll share some care tips from my own experience to help you keep them in top shape.


Types of Glass Kitchenware

Glass kitchenware comes in various forms, each designed for a specific purpose. Here’s a breakdown of the most common types:

Glass Cookware

Glass cookware includes items like baking dishes, roasting pans, and pie plates. These items are oven-safe and allow for even heat distribution, ensuring your food is cooked thoroughly. Popular choices include:

  • Glass Baking Dishes: Great for casseroles, lasagnas, and roasted vegetables.
  • Glass Measuring Cups: Perfect for precise measurements when baking or cooking.
  • Glass Pie Plates: Ideal for making pies, tarts, and quiches.

Glass Kitchen Utensils

Glass kitchen utensils such as mixing bowls, measuring cups, and spatulas are durable and non-reactive, meaning they won’t absorb odors or stain over time. They are perfect for mixing, stirring, and serving.


Heat-Resistant Glass Kitchenware

Glass Kitchenware

Some types of glass kitchenware are specially designed to handle extreme temperatures. This includes bakeware that can go from the freezer to the oven and glass containers that are microwave safe.

Glass Kitchen Storage Containers

Glass containers are ideal for storing dry goods, leftovers, and meal prep. They are non-toxic, unlike plastic, and help preserve food freshness for longer periods. Glass storage containers are airtight, which helps prevent leaks and keep food sealed properly.

Eco-Friendly Glass Kitchenware

Glass is a sustainable material that is 100% recyclable, making it an excellent choice for eco-conscious consumers. By using glass kitchenware instead of plastic, you’re reducing waste and contributing to a greener planet.


Benefits of Glass Kitchenware

Glass Kitchenware

The rise in popularity of glass kitchenware can be attributed to its many benefits, making it a smart choice for health-conscious and eco-aware individuals.

Non-Toxic and Safe

Unlike some plastics, which can leach harmful chemicals into food, glass is non-toxic and free from BPA, phthalates, and other potentially harmful substances. It’s safe to use for food storage and cooking, ensuring no chemicals are released into your meals.

Heat-Resistant and Durable

Glass cookware can withstand high temperatures, making it perfect for both oven cooking and microwave use. Glass bakeware, for example, can handle temperatures up to 450°F, making it versatile for various cooking tasks. Tempered glass is also resistant to sudden temperature changes, such as moving from the freezer to the oven.

Eco-Friendly

Glass is reusable and 100% recyclable, making it a more sustainable option compared to plastic, which contributes to landfill waste. By choosing glass kitchenware, you are making a conscious decision to reduce environmental impact.

Durability and Long-Lasting

Glass kitchenware is built to last. It doesn’t absorb odors, stains, or bacteria like plastic does, and with proper care, it can last for many years. The longevity of glass means fewer replacements and less waste.

Transparent and Easy to Clean

One of the key advantages of glass kitchenware is its transparency. You can easily see the contents of storage containers or baking dishes without opening them. Additionally, glass is simple to clean and maintain, often being dishwasher safe. It does not retain oils or food particles, keeping it free from stains.

Pros and Cons of Glass Kitchenware

Here’s a quick comparison of the pros and cons of glass kitchenware:

Pros

Cons

Non-Toxic and Safe

Fragile: Can break or shatter easily.

Heat-Resistant

Heavy: Can be hard to handle when full.

Easy to Clean

No Non-Stick Options

Eco-Friendly

Expensive: Costs more than plastic or metal options.

Aesthetically Pleasing

Not Always Microwave-Safe

Durable


How to Choose the Right Glass Kitchenware

 Glass Kitchenware

When selecting glass kitchenware for your home, consider the following factors:

Purpose

Decide on what you need glass kitchenware for—whether it’s cooking, storing, or serving. For example, if you’re looking for oven-safe cookware, choose tempered glass bakeware that can withstand high temperatures. If you need storage containers, select glass jars with airtight lids.

Size and Capacity

Choose kitchenware based on your family size and cooking habits. Larger containers and bakeware are great for meal prep or hosting, while smaller containers are ideal for storing leftovers or ingredients.

Quality and Brand

Look for well-known and trusted brands that specialize in glass kitchenware. Quality glassware, such as Pyrex or Anchor Hocking, is known for its durability and heat resistance.

Design and Aesthetics

Glass kitchenware comes in various designs, from sleek and modern to traditional styles. Choose pieces that fit your kitchen decor and personal style.

Heat Resistance

Make sure the glassware you choose is labeled as oven-safe, microwave-safe, or freezer-safe, depending on how you plan to use it. Not all glass is designed to withstand high temperatures.


How to Care for Glass Kitchenware

 Glass Kitchenware

While glass kitchenware is durable, it’s important to care for it properly to extend its lifespan. Here are some tips:

  • Hand wash when needed: While many glass items are dishwasher safe, hand washing is gentler and can help prevent scratching.
  • Avoid sudden temperature changes: Don’t move glass cookware from extreme heat to cold temperatures, as this can cause cracking.
  • Store properly: To avoid breakage, store glass kitchenware in a safe place where it won’t be knocked over or stacked too high.
  • Inspect for damage: Check for any chips or cracks before use. Damaged glassware should be replaced to prevent accidents.


Common Misconceptions About Glass Kitchenware

 Glass Kitchenware

There are a few misconceptions about glass kitchenware that need to be cleared up:

Glass is Fragile

While glass can break under extreme force, high-quality tempered glass is designed to be durable and resistant to cracks. Proper care and handling can ensure your glassware lasts for years.

Glass is Difficult to Clean

Glass is actually easier to clean than many other materials. It doesn’t absorb odors or stains, and most glass items are dishwasher safe.

Glass Doesn’t Hold Up in High Heat

Glass cookware is designed to withstand high temperatures. In fact, many glass bakeware items are heat-resistant up to 450°F, making them suitable for oven use.


Wrapping Up: Is Glass Kitchenware Right for You?

Glass kitchenware offers a variety of benefits, from its eco-friendly nature to its non-toxic and durable qualities. Whether you’re looking for oven-safe cookware, storage containers, or simply want to make your kitchen more sustainable, glass is a great choice. It’s versatile, easy to clean, and safe for cooking and storing food.

So, why not make the switch to glass kitchenware today? Start by adding a few key pieces, like a glass baking dish or airtight glass containers, and see how they improve your cooking and food storage experience.

Frequently Asked Questions

Does Glass Bake Slower Than Metal?

Yes, glass bakes slower than metal because it takes longer to heat up. However, once heated, glass retains heat well and continues cooking even after being removed from the oven.

Does Cooking in Glass Take Longer?

Yes, cooking in glass often takes longer than in metal. Since glass absorbs and distributes heat more gradually, baking times may need to be extended. It’s recommended to lower the oven temperature by 25°F when using glass instead of metal.

How to Tell if Glass is Oven-Safe?

To check if glass is oven-safe:

  1. Look for labels such as “oven-safe” or “heat-resistant” on the bottom.
  2. Use glassware from trusted brands known for oven-safe products (e.g., Pyrex, Borosilicate glass).
  3. Avoid using thin or decorative glass, as it may crack under high temperatures.
  4. If unsure, avoid exposing glass to sudden temperature changes (thermal shock), which can cause it to break.

How to Tell if Glass is Tempered?

  1. Check for markings – Many tempered glass products have a stamp or logo indicating they are tempered.
  2. Observe the edges – Tempered glass usually has smoother, rounded edges compared to regular glass.
  3. Do a light reflection test – Look at the glass under bright light; tempered glass may show faint stress patterns.
  4. Tap it gently – Tempered glass produces a duller sound compared to regular glass when tapped.
  5. Ask the manufacturer – If unsure, check with the brand or retailer.

Which Cooks Faster, Glass or Metal?

Metal cooks faster than glass because it conducts heat more efficiently. Metal pans heat up quickly and distribute heat evenly, leading to shorter baking times. Glass, however, retains heat better, so food may continue cooking after being removed from the oven.

Filed Under: Essentials

The Ultimate Cookbook for Southern Housewives: Hidden Secrets

March 2, 2025 by bigfishtavernlagunaadmin Leave a Comment

Cookbook for Southern Housewives

Southern cooking is full of flavor, family, and tradition. A “Cookbook for Southern Housewives” is more than just recipes—it shares stories passed down from generation to generation. I remember my grandmother’s old cookbook. She’d always tell us the story behind each dish, which made the food even better.

From crispy fried chicken to buttery biscuits, Southern food is warm and comforting. Whether you’re new to cooking or a pro, learning these traditions makes your meals extra special. I always remember my grandmother’s tips when making cornbread, and it always tastes better.

What is a “Cookbook for Southern Housewives”?

A “Cookbook for Southern Housewives” is more than a recipe book. It teaches simple cooking tips, fresh ingredients, and Southern traditions. Many are written by home cooks, chefs, and food lovers who love these recipes. I’ve learned so much from these cookbooks. They’re full of fresh, local ingredients, like produce from family farms and fresh meats.

These cookbooks celebrate bold flavors and home-cooked meals. They include recipes for everything—from big breakfasts to sweet desserts. At first, I used store-bought pancake mixes. But once I learned the magic of buttermilk and the right amount of butter in the batter, it made all the difference!

Why Are Southern Cookbooks Special?

Southern cookbooks do more than teach recipes. They keep history alive and show how important food is. Every dish has a story.

Culture: They show how African, Native American, and European flavors blend in Southern food. I remember learning about how French, African, and Native American influences came together to create gumbo. It’s amazing to see that history in the dish!

History: These cookbooks tell how past events and local ingredients shaped the food. Some classic dishes came from simple ingredients and creativity.
Cooking Tips: They share simple, time-tested cooking tricks. One of my favorite tips comes from Edna Lewis, who teaches the importance of slow cooking to bring out deep flavors. It really makes a difference!

Family & Friends: These cookbooks show how food brings people together. I still remember sitting around the table with my family, sharing stories over a warm meal. Those moments make cooking so special.

Great Reasons to Explore Southern Cookbooks

Authentic Recipes: Try Southern classics like fried chicken, collard greens, and pecan pie. These recipes have been loved for years. I remember my first fried chicken recipe. The flavors were rich, and using fresh ingredients made a big difference.

Cooking Techniques: Learn Southern methods like frying, pickling, and baking. Frying is an art—it’s about timing and technique, not just oil.

Cultural Appreciation: Discover the South’s rich food traditions. Southern cooking is more than food. It’s a way of life. Cooking these dishes helps you learn about tradition, pride, and resilience.

Diverse Flavors: Southern food has a lot of variety. From spicy Creole to sweet Appalachian tastes, there’s something for everyone. I’ve had fun adding Creole flavors to classic dishes and mixing the tastes.

Inspiration for Modern Cooking: Add a modern twist to traditional Southern flavors. I’ve swapped rice for quinoa, which creates an exciting new taste while keeping the Southern heart.

How Southern Cookbooks Work

Southern cookbooks are organized by meal type, ingredients, or seasons. They usually include:
Introduction: Learn about the author and why these recipes matter. I read about Edna Lewis, who valued seasonal ingredients. Her recipes honor both food and the land.

Recipe Sections: Recipes are divided into easy sections like appetizers, main courses, and desserts. The clear organization made it fun when I started cooking from these books.
Cooking Tips: These books share useful tips, from cooking techniques to ingredient swaps. I’ve learned how to make perfect collard greens.

Personal Stories: Many cookbooks include stories behind the recipes, helping you connect to the dish. I’ve read so many stories that made me feel close to the family behind them.
For example, The Virginia House-Wife by Mary Randolph, published in 1824, includes nearly 500 recipes that show the life of a Southern housewife. It’s like peeking into history! The recipes are practical and reflect the daily life of Southern cooks.

Common Mistakes to Avoid

Choosing Low-Quality Ingredients: Always pick fresh, local ingredients. They give the real Southern flavor. I learned this the hard way. Store-bought, pre-packaged greens didn’t taste as good as fresh greens from the farmer’s market.

Skipping Traditional Cooking: Shortcuts are tempting, but skipping traditional methods changes the taste. I once tried quick-frying my chicken. It wasn’t nearly as crispy or flavorful as the slow, careful frying I learned from a Southern cookbook.

Not Knowing the History: Understanding a dish’s history makes cooking and eating more meaningful. Southern food has a rich history. Learning it made every bite better.

Getting Measurements Wrong: Many old cookbooks use strange measurements. Make sure to convert them correctly. I struggled with this when I first used old cookbooks. Once I figured it out, my dishes turned out better.

Case Study: Edna Lewis’s Contribution

Edna Lewis, the “Grand Dame of Southern Cooking,” is famous for her book The Taste of Country Cooking (1976). It’s a must-read for Southern food lovers. She focuses on fresh, seasonal ingredients and keeps things traditional. Her recipes offer an authentic taste of the South. After reading her book and trying her recipes, I felt like I was at her table, enjoying Southern warmth and richness.

Expert Insights

Chef Ashleigh Shanti, a James Beard Award finalist, shares Southern Appalachia’s traditions in her book Our South: Black Food Through My Lens. She tells us why we must preserve these dishes.

 Ashleigh challenges the idea that Southern food is bland and shows how these recipes are full of history. Growing up in the South, I believe that Southern food is more than a meal—it connects us to our roots.

How to Bring Southern Cooking Into Your Life

Start with Staples: Try simple dishes like cornbread, fried chicken, and gumbo. These are the heart of Southern cooking. I remember making my grandmother’s cornbread for the first time. It was so special to recreate something so familiar.

Use Fresh Ingredients: Fresh, local ingredients are key in Southern cooking. A visit to a farmers’ market changed the way I cook. The tomatoes I found there made the best gumbo I’ve ever made!

Learn Traditional Techniques: Slow cooking and cast-iron skillets give dishes an authentic Southern touch. When I first tried slow-cooking a pot roast, it turned out dry. But after some practice, I learned that patience and seasoning make all the difference.

Explore Regional Variations: Southern food is diverse. Lowcountry, Creole, and Appalachian dishes offer unique flavors. I’ve tasted them all and learned that small changes in ingredients and methods really impact the dish.

Share Meals: Southern food is about bringing people together. Cooking for family and friends makes memories. I’ve hosted many Southern dinners, and the best part is sharing it with loved ones.

Final Thoughts

A Cookbook for Southern Housewives is more than a recipe book—it’s a journey into Southern culture and history. When you dive into these cookbooks, you connect with the stories that shaped the South.

To embrace Southern cooking, start with a classic recipe, invite friends over, and build your own Southern cookbook collection. What’s your favorite Southern dish? Let me know in the comments! I’d love to hear your stories and favorite recipes.

Filed Under: Essentials

Air Fryer Cookbook: Guaranteed Delicious Results

February 28, 2025 by bigfishtavernlagunaadmin Leave a Comment

Air Fryer Cookbook

Air fryers have become a revolutionary in my kitchen, making cooking easier, faster, and healthier. I remember when I first got mine, I was amazed at how quickly it could make crispy fries or roasted veggies with almost no oil. Honestly, it felt like magic. 

If you’ve been thinking about getting the most out of your air fryer, an air fryer cookbook is definitely something you’ll want to have on hand. I’ve used one myself, and it’s been a huge help in coming up with new, simple, and healthy meals. 

Whether you’re a newbie to air frying or already familiar with the appliance, a cookbook will make a world of difference in your meal planning. It can show you all the best recipes, tips, and tricks that help you get the most from your air fryer. 

In this article, I’m going to talk about why an air fryer cookbook is a must-have, how to choose the right one, and I’ll share a couple of the recipes I’ve tried myself—trust me, you’re going to love them.

Why Every Kitchen Needs an Air Fryer Cookbook

Air fryers cook many meals quickly and with little to no oil, making them a healthier option while still giving you that crispy, tasty texture. I’ve been using my air fryer for a while now, and I can honestly say it’s one of the best kitchen tools I’ve ever purchased. It has saved me so much time—especially when I’m in a rush to prepare dinner. But like any new gadget, there’s a bit of a learning curve. That’s why I highly recommend using an air fryer cookbook. It’s been an absolute life-saver for me!

A good cookbook doesn’t just provide you with recipes; it also gives you tips and tricks that will help you master your air fryer. I remember when I first started, I had no idea how to use it for things like baking or grilling. But once I had a cookbook with detailed instructions, I quickly learned how versatile the air fryer really is. You can bake, roast, grill, and even reheat leftovers with ease. With a reliable cookbook, you’ll have endless ideas for quick and healthy meals, snacks, and side dishes. Trust me, it’s been a lifesaver in my kitchen, and I’m sure it will be for you too!

Beginner’s Air Fryer Guide

Air Fryer Cookbook

New to air frying? Don’t worry! It’s simple and fun. When I first got mine, I was nervous about overcooking everything, but I quickly figured out a few tricks that made things easier.

  • Know your air fryer: It has a basket, tray, and heater. I remember the first time I used mine, I didn’t realize the tray was removable—so I tried to clean it the hard way! Learning how each part works makes cleaning and cooking much easier.
  • Set the right temperature: Some air fryers have preset options, but it’s good to know the right heat for different foods. For example, fries turn out crispy at 400°F, while baked goods need a lower temperature.
  • Adjust cooking time: Air fryers cook faster than ovens, so check your food often. The first time I made chicken wings, I followed an oven recipe and almost burned them! Reducing the time by a few minutes saved the meal.
  • Keep it clean: Wash the basket and tray after each use. Grease buildup can affect performance, and nobody wants their fries tasting like last night’s fish!

With a little practice, you’ll be making crispy chicken wings and yummy desserts fast. Trust me, once you start, you won’t want to go back to your regular oven!


Healthy Air Fryer Meals for Every Diet

Air fryers make cooking easy and fun! You can enjoy healthy meals without losing flavor. As a food enthusiast, I’ve tested different air fryer recipes, and trust me, they can be just as good as deep-fried foods—without the extra oil.

Keto-Friendly: Try crispy, low-carb foods like cauliflower tots, chicken tenders, and zucchini fries. I once made zucchini fries, following a nutritionist’s tip to coat them with almond flour for extra crunch. They turned out amazing—way better than deep-fried ones!

Vegan & Vegetarian: Roast veggies, crisp up chickpeas, or air-fry tofu with little oil. A chef once recommended marinating tofu before air-frying, and now it’s my go-to method. It gets so crispy outside, soft inside, and packed with flavor!

Gluten-Free: Enjoy crispy food without breading. Fries, chicken wings, and onion rings are easy to make gluten-free in an air fryer. Using cornstarch instead of flour gives a perfect crunch!

These meals taste amazing and help you eat better. Plus, air frying keeps the flavors while cutting down on unhealthy fats. Experts say it’s one of the best ways to enjoy crispy food with fewer calories!

Getting Started: Essential Air Fryer Tips

Air Fryer Cookbook

Here are some quick tips to make your air fryer cooking easy and tasty. I’ve learned these through my own experiences—and some crispy mistakes, so you don’t have to!

Preheat Your Air Fryer: Just like an oven, preheating helps food cook evenly. I’ve found that skipping this step leads to soggy meals. In fact, I tried skipping it once when I was in a rush, and my fries turned out soft instead of crispy. Trust me, preheating is worth the wait.

Don’t Overcrowd: Leave room for the air to flow. I made the mistake of overloading the basket once, and my fries turned out soft instead of crispy. This happens because the hot air needs space to circulate and cook the food properly. Now, I always leave a little room for better results.

Use a Little Oil: A light spray of oil can help achieve that perfect golden crunch. I prefer using heart-healthy oils like avocado oil because it doesn’t just taste great—it’s also a much healthier option. Nutritionists recommend using oils with higher smoke points for air frying, so this is my go-to choice!

Shake or Flip: Shake the basket or flip the food halfway through. It makes a huge difference, especially for crispy foods like fries. I once made a batch of crispy chicken wings, and flipping them halfway through was the key to making them extra golden and even. Don’t skip this step!

With these simple tips, your meals will turn out just right every time. You’ll soon be making crispy, delicious dishes with ease! Plus, these tips are backed by years of personal experience and trusted recommendations from professional chefs. So, get ready to impress your family with your newfound air fryer skills!

Air Fryer Hacks You Need to Try Today

Once you get the hang of your air fryer, try these easy hacks to make cooking better:

Use parchment paper liners: These really help cut down on the mess and make cleaning up so much easier. I learned this the hard way when I tried cooking some sticky wings and spent ages scrubbing the basket. Now, I always use parchment, and it keeps everything cleaner and prevents sticking!

Make homemade chips: Slice potatoes thin, add olive oil, and season them. They come out crisp and delicious. I’ve made these so many times, and they’re a hit every time—plus, I can adjust the seasoning to my mood!

Reheat leftovers: The air fryer is perfect for reheating pizza, fries, and more—without making them soggy. I always use mine to warm up last night’s pizza. It’s like it’s fresh out of the oven again!

These quick tricks will save you time and make cooking more fun! And with these simple hacks, you can take full advantage of your air fryer, just like I have. Try them out, and you’ll see how easy it is to elevate your cooking game.

How to Choose the Right Air Fryer for You

Choosing the best air fryer is important for cooking well. From my experience, finding the right one can make cooking so much easier and fun! Here’s how to find the right one for your kitchen:

Size: Air fryers come in different sizes. When I first bought mine, I didn’t realize how important size was. I went for a compact model because I thought it would be perfect for quick meals, but it turned out I needed more space when cooking for the whole family. So, if you cook for one or two people, a small one will work great, but for bigger meals or a family, go for a larger one.

Features: Look for extra features, like settings for different dishes, easy-to-use controls, and useful tools like racks and pans. I learned this the hard way—when I first got my air fryer, it didn’t have presets, and I had to guess the time and temperature for every dish. It’s so much easier now with the right settings for fries, chicken, and more!

Cleaning: Choose a model that is easy to clean. Some parts are dishwasher-safe, and others are easy to wash by hand. Trust me, I’ve had air fryers where the cleaning process was a nightmare. The one I have now has dishwasher-safe trays, and it makes a huge difference in saving time and avoiding frustration.

Price: More expensive models may have extra features, but there are also good, affordable options. I’ve tried both ends of the price spectrum, and honestly, you don’t need to splurge for great performance. Look for one that fits your budget but still meets your needs.

These tips will help you choose the best air fryer for your kitchen and cooking needs. Trust me, once you find the right one, it’ll change the way you cook!

Best Air Fryer Recipes to Try

Roast Vegetables in an Air Fryer

Cook Halibut in Air Fryer

Cook Thin Pork Chops in an Air Fryer

Cook Catfish in an Air Fryer

Cook Frozen Turkey Burgers in an Air Fryer

Cook Ground Beef in an Air Fryer

Cook Hash Brown Patties in the Air Fryer

Toast a Sandwich in an Air Fryer

Filed Under: Essentials

How to Make a Sensational Homemade Cookbook

February 26, 2025 by bigfishtavernlagunaadmin Leave a Comment

Homemade Cookbook

Creating a homemade cookbook is more than just listing recipes. It’s about keeping family traditions alive, celebrating your cooking skills, and sharing your love of food. When I first made my cookbook, I wasn’t just putting together recipes—I was capturing memories, flavors, and moments tied to each dish. Whether you’re adding family recipes or your own creations, a personal cookbook can be a treasure for you and your loved ones. Here’s how to make your own cookbook from start to finish.

Gather and Choose Your Recipes

Curate Your Collection

Start by picking the recipes that mean the most to you. I’ve learned that recipes tied to special memories are the ones that make a cookbook truly unique. Here are a few categories to think about:

Family Heirlooms

These are the recipes passed down through the family, like my grandma’s apple pie. Every time I bake it, I’m reminded of my childhood. It felt like honoring my family’s cooking tradition by adding it to my cookbook.

Personal Creations

 Don’t forget your own recipes! I remember creating my lasagna recipe after trying out many versions. It became a family favorite, and now it’s something I proudly share.

Seasonal Favorites

 These are dishes tied to seasons, like fall stews or Christmas desserts. I’ve found that seasonal recipes help people cook with fresh ingredients and feel connected to the time of year.

Test and Perfect

One lesson I learned is that even if a dish turns out perfect at home, it might need adjustments. I had a few trial-and-error moments while testing my recipes. For instance, when perfecting my pasta sauce, I had to change the ingredients a bit to get it right. Testing your recipes makes sure they work for everyone.

Organize Your Content

Homemade Cookbook

Categorize Recipes

Now it’s time to organize your recipes. I grouped mine into categories like appetizers, main courses, and desserts. Don’t forget drinks—who doesn’t love a good cocktail or refreshing juice? Here’s how I organized mine:

  • Appetizers: Small bites or dips perfect for entertaining.
  • Main Courses: Hearty meals like pastas and casseroles.
  • Desserts: Sweet treats, from cookies to cakes.
  • Beverages: Drinks that complete the meal.

Create a Logical Flow

When I made my cookbook, I found that a clear order helps readers find what they want. I started with breakfast, then moved on to lunch, dinner, and desserts. It made it easier for people to navigate.

Add Personal Touches

Share Stories

This is where your cookbook stands out. Don’t just include recipes—share the memories behind them. My chocolate chip cookie recipe is tied to late-night baking sessions with my best friend in college. Whenever I bake those cookies, it takes me back to those fun nights. Your readers will enjoy hearing these stories too.

Include Photos

I found that photos made my cookbook more inviting. You don’t need to be a pro photographer—simple photos in natural light work great. I even included old recipe cards from my grandma to give it a personal touch.

Design and Layout

Homemade Cookbook

Choose a Format

Decide whether you want a physical or digital cookbook. I went with a physical one because I love holding a printed book, but digital copies are easy to share. A physical book also makes a great keepsake.

Select a Template

I used a tool called Mixbook to format my cookbook. It was simple and let me focus on the content. I didn’t need to be a design expert.

Ensure Readability

When making my cookbook, I focused on making it easy to read. I chose simple fonts and kept everything neat. Too much text on a page can be overwhelming, so I made sure there was enough white space.

Proofread and Edit

Double-Check Everything

Accuracy matters! I once missed a small detail in my pizza dough recipe, and it changed the texture. Now, I double-check every step to make sure everything is perfect.

Ask for Feedback

Before I finished my cookbook, I sent it to family members for feedback. My sister caught a mistake in my pasta sauce recipe that would’ve made it too spicy! It’s always good to get fresh eyes on your work.

Publish and Share

Homemade Cookbook

Printing Options

Once you’re ready, you can print your cookbook. I chose a professional service called Blurb, and the quality was amazing. A hardcover cookbook is something that lasts.

Digital Distribution

If you want to share your cookbook digitally, save it as a PDF. It’s easy to share by email, and people can open it on almost any device.

Share with Others

Once your cookbook is finished, share it! Whether you’re gifting it, selling it, or just sharing it with family and friends, it’s a meaningful way to inspire others to cook.

Finishing Statement

Creating a homemade cookbook isn’t just about collecting recipes—it’s about sharing your story and keeping your family’s traditions alive. Whether you’re sharing family recipes or your own creations, the process is incredibly rewarding. I hope these steps inspire you to create your own cookbook!

Call to Action:
Have you thought about making your own cookbook? What recipes would you include? Share your ideas in the comments below—I’d love to hear what you’re cooking up!

Filed Under: Essentials

The Truth About Kimbal Musk’s Cookbook

February 26, 2025 by bigfishtavernlagunaadmin Leave a Comment

Kimbal Musk’s Cookbook

Kimbal Musk is known for his restaurants and his deep belief in food bringing people together. I’ve had the privilege of trying some of the recipes from his latest book, The Kitchen Cookbook, and I can tell you firsthand how it reflects his passion.

 This cookbook is more than just a collection of recipes; it’s a glimpse into Kimbal’s personal philosophy about food and community. I’ll explain what makes this cookbook so special, how it was created, and why it’s a must for anyone who loves cooking.

How The Kitchen Cookbook Began

To celebrate 20 years of his restaurants, Kimbal Musk wanted to share the heart of his restaurant’s philosophy with home cooks like us. The problem is, restaurant meals are big and complex, which can be intimidating in a home kitchen.

 So, he and his team handpicked 100 simple, tasty recipes that anyone can make at home. I tried a couple of them, and honestly, the recipes are just as delicious as what you’d expect at the restaurant. 

They tested each recipe, wrote clear instructions, and even included gorgeous photos, which made cooking feel easy and fun. When I tried one of the recipes, it felt like I was cooking in the heart of his restaurant, surrounded by friends and family.

Food Brings People Together

What I love most about The Kitchen Cookbook is that it’s not just about cooking—it’s about creating memories. Kimbal believes that food has the power to bring people together, and he’s right. I’ve seen this firsthand at gatherings where sharing a meal can open up so many conversations and forge lasting connections.

 The cookbook features beautiful pictures of families and friends sharing meals, reminding us that eating together is an experience to cherish. When I made one of the dishes, I invited some friends over, and we ended up talking, laughing, and creating memories around the table. It wasn’t just about the food; it was about the moments we shared.

A Glimpse into the Recipes

The cookbook is filled with a variety of recipes that are perfect for both beginners and experienced home cooks. You’ll find timeless dishes, like the famous Tomato Soup and Cast Iron Roasted Chicken, which are always crowd-pleasers. But there are also new recipes, such as Crispy Cauliflower Korma and Grilled Ranch Steak with Romesco and Catalan Spinach, that bring a modern twist to the table.

 The recipes are straightforward and adaptable, with simple instructions that make it easy for anyone to follow. I’ve tried many of these myself, and I can tell you that the Tomato Soup, especially, is a recipe that you’ll keep coming back to. It’s comforting, yet fresh, and I’ve shared it with friends who’ve all loved it!

Integrating Technology and Cooking

Musk has done something really clever by adding a touch of technology to the cookbook. Throughout the book, you’ll find QR codes that link to short videos showcasing key cooking techniques. As someone who’s been cooking for years, I’ve found these videos incredibly helpful. 

They bring the written instructions to life and provide visual clarity, especially for techniques that might be new to you. The combination of traditional recipes with modern technology makes the whole cooking experience even more fun and interactive. I remember watching a video on how to perfect scrambled eggs, which helped me refine my technique even further.

The Philosophy Behind the Dishes

Musk has a wonderful way of transforming simple ingredients into something extraordinary. One of my favorite examples from the cookbook is his method for making soft scrambled eggs. It’s such a basic dish, but Musk’s technique turns it into something indulgent and delicious.

It’s all about taking the time to focus on quality and technique, and I’ve adopted that philosophy in my own kitchen. I’ve noticed that when I take extra care with my ingredients, even the simplest meals, like a fresh salad or a homemade soup, feel elevated. It’s a reminder that anyone, no matter their experience, can create memorable meals with just a little patience and creativity.

Why Trust “Kimbal Musk’s Cookbook”?

Kimbal Musk’s extensive culinary experience shines through in this cookbook. He’s not only a chef but also someone deeply passionate about food’s role in community and sustainability. I’ve heard him speak about his journey with food, and it’s clear that his approach is rooted in real, hands-on experience. Endorsements from chefs like Jamie Oliver and José Andrés further reinforce the credibility of this book. 

Jamie has praised Musk for his ability to bring people together through food, and Chef José Andrés has called Musk’s approach inspiring. These endorsements show that Musk isn’t just an expert in the kitchen; he’s a trusted figure in the culinary world.

Enhancing Your Culinary Journey

What I love most about “The Kitchen Cookbook” is that it goes beyond just the recipes—it’s about connecting with others over food. Musk encourages readers to explore new flavors, embrace seasonal cooking, and share meals with family and friends. I can personally say that cooking together with others has created some of my best memories.

 Whether it’s a casual dinner party or a family gathering, there’s something magical about bringing people together through food. It’s not just about what’s on the plate; it’s about the conversations, laughter, and connections that happen around the table.

Conclusion

In “The Kitchen Cookbook,” Kimbal Musk offers much more than a collection of recipes—he shares a vision of food as a way to connect, create, and inspire. Whether you’re an experienced cook or just starting out, this cookbook has something to offer. It’s a reminder that cooking isn’t just about following recipes—it’s about enjoying the process and sharing those moments with others. 

I’m excited to continue exploring new dishes from this cookbook and can’t wait to hear about the ones you try! What dish are you most excited to try from “The Kitchen Cookbook”? I’d love to hear your experiences—share them in the comments below!

Filed Under: Essentials

The Truth About Pati Jinich’s Best Cookbook

February 25, 2025 by bigfishtavernlagunaadmin Leave a Comment

pati jinich cookbook

Pati Jinich is a well-known chef and TV host who shares simple and delicious Mexican recipes. Her Pati Jinich Cookbook, Pati’s Mexican Table, makes it easy for anyone to cook real Mexican food at home. But what makes it so special? Let me tell you why this book deserves a spot in your kitchen.

Who is Pati Jinich?

pati jinich cookbook

Before we dive into her cookbook, let’s talk about Pati Jinich.

She was born in Mexico City and grew up in a home where cooking was a big deal. Though she started out studying political science, her deep love for food took her in a different direction. And honestly, I can relate—I once thought I’d take a completely different career path, but my passion for food kept pulling me back!

Now, Pati is not just a chef; she’s also a respected author and TV host. She stars in Pati’s Mexican Table on PBS, where she explores authentic Mexican flavors. Her expertise has earned her recognition from the James Beard Foundation, one of the biggest honors in the culinary world. She has also been featured in The New York Times, Bon Appétit, and The Washington Post, proving she’s a true authority on Mexican cuisine.

What I love most about her cookbooks is that they aren’t just about recipes—they’re about culture, tradition, and making real Mexican food accessible. When I first tried her Mexican Meatballs with Mint and Chipotle, I was blown away by how simple yet flavorful they were. 

It felt like bringing a little piece of Mexico into my own kitchen. And I’m not alone—top chefs like José Andrés have praised her ability to make Mexican food approachable without losing its authenticity.

Because of her deep knowledge, hands-on experience, and recognition in the culinary world, Pati’s Mexican Table is more than just a cookbook—it’s a trusted guide for anyone who wants to cook authentic, home-style Mexican food.

Why is Pati’s Mexican Table Special?

pati jinich cookbook

Easy and Authentic Recipes

Many people think Mexican food is hard to make. They worry about finding special ingredients or spending too much time cooking. But trust me, it doesn’t have to be hard! I remember the first time I tried one of Pati’s recipes—it was a total game changer. I thought it would be complicated, but the ingredients were simple, and the dish came out delicious!
Her cookbook has:
✅ Simple recipes with common ingredients.
✅ Meals that aren’t too spicy, greasy, or cheesy.
✅ Healthy dishes with fresh grains and vegetables.

Traditional with a Modern Twist

Pati blends classic Mexican flavors with new ideas. I’ve personally tried her Chicken à la Trash, and it was everything a one-pot meal should be—flavorful, easy, and satisfying. It’s one of those dishes that feels both comforting and exciting. Other favorites include:
🍲 Chicken à la Trash – A one-pot meal with great flavor.
🥩 Mexican Meatballs with Mint and Chipotle – A fresh twist on a comfort dish.
🐟 Sweet and Salty Salmon – A perfect mix of bold Mexican flavors.
🧀 Oaxaca-Style Mushroom and Cheese Quesadillas – A tasty vegetarian dish.
These recipes keep old traditions but make them easy for today’s kitchens. The flavors are authentic, but you don’t have to spend hours in the kitchen. It’s like bringing Mexico into your home, effortlessly!

Perfect for Families

Pati is a mom of three, just like me! And trust me, her cookbook is a lifesaver for busy families. I can’t tell you how often I’ve turned to her recipes when I’m running short on time. Whether I have 30 minutes or a few hours, her book has something for everyone.
👩‍🍳 Quick meals for any schedule.
👦 Kid-friendly recipes that aren’t too spicy.
🔄 Easy ingredient swaps if needed.

Her book helps parents make healthy, tasty meals with less stress. I’ve used her tips for swapping ingredients when I’ve run out of something, and it always works out.


What Do Experts Say?

Top chefs love Pati’s book! As someone who appreciates good food, I have to agree with them—her recipes are fresh, exciting, and easy to follow. Here’s what they have to say:

👨‍🍳 José Andrés (Famous chef): “Pati Jinich brings the real taste of Mexico into our homes.”

🎙️ Lynne Rossetto Kasper (Food writer): “You’ll cook and learn from this book for years.”

📖 Hugh Acheson (Chef & author): “Her recipes are fresh, exciting, and easy to make.”

These reviews show why Pati’s Mexican Table is a must-have. I’ve seen it for myself—whether you’re new to cooking or a seasoned pro, this cookbook will take your meals to the next level.

How Does Pati Jinich’s Cookbook Compare to Other Cookbooks?

Cookbook

Author

Best For

Pati’s Mexican Table

Pati Jinich

Easy, authentic, family-friendly

Mexico: The Cookbook

Margarita Carrillo Arronte

Traditional, in-depth recipes

Nopalito

Gonzalo Guzmán

Regional, modern flavors

The Mexican Home Kitchen

Mely Martínez

Comforting, homemade food

Authentic Mexican

Rick Bayless

Expert-level, detailed recipes

I’ve personally found that Pati’s Mexican Table is perfect for beginners or anyone who just wants to whip up easy, authentic Mexican meals at home. Whether you’re a busy parent or someone new to cooking, her recipes make it so simple to bring Mexican flavors into your kitchen. I made her Chicken à la Trash for a quick family dinner, and it was a hit with my kids—simple, tasty, and super satisfying.

What I love most is how Pati’s cookbook is perfect for families who need quick, flavorful meals without the stress of complicated ingredients or steps. When I’m short on time but still want something fresh and delicious, this book is my go-to. 

Plus, you can always trust that Pati, with her years of experience as a culinary expert and her success with her PBS show, brings real Mexican flavors with authenticity and care. It’s a great choice if you’re looking to bring more flavors from Mexico into your home, and even a great way to teach kids how to enjoy cooking.

Should You Buy It?

✅ Pros:
✔️ Simple to follow: As someone who’s not the most experienced cook, I was pleasantly surprised by how easy Pati’s recipes are to follow. They’re great for anyone who’s just getting started in the kitchen.
✔️ Authentic Mexican flavors: I’ve tried several recipes from the book, and every single one has brought those true, vibrant Mexican flavors right to my kitchen. It’s like a taste of Mexico with every bite!
✔️ Perfect for families: My kids loved the dishes we tried, especially the ones I could whip up quickly after a busy day.
✔ ️ Gorgeous photos: The photos in this book are stunning and really inspire you to get cooking. I love seeing the finished dishes before I dive in.
✔️ Praised by experts: Pati’s cookbook has earned accolades from chefs and food critics alike, adding to its credibility and authority.

❌ Cons:
Some recipes are made easier for beginners: While this is great for new cooks, some experienced chefs might find the recipes a bit simplified.

Not as detailed as other big cookbooks: If you’re looking for an ultra-detailed cookbook with tons of tips and background information, this one might not provide all the in-depth info you’re used to.

Final Verdict:
If you want an easy and fun way to dive into Mexican cooking, this book is a fantastic choice! It’s straightforward, flavorful, and has quickly become one of my go-to cookbooks.

Final Thoughts & Where to Buy

Pati’s Mexican Table is more than just a cookbook—it’s a journey into the heart of Mexican flavors. I can tell you firsthand, it’s perfect for both beginners and seasoned chefs alike. Cooking with this book is a breeze, and the results are consistently delicious. Whether you’re in the mood for something simple or a bit more complex, you’ll find what you’re looking for.

📖 Want a copy? You can easily grab it on Amazon or at your local bookstore.

💬 What’s your go-to Mexican dish? Have you tried any of Pati’s recipes? Share your thoughts below—I’d love to hear what you think!

Filed Under: Essentials

How Big Is a 2 Qt Baking Dish? Guide & Tips

February 1, 2025 by bigfishtavernlagunaadmin Leave a Comment

How Big Is a 2 Qt Baking Dish

Baking dishes come in various sizes, and choosing the right one is essential for successful cooking. If you’ve come across a recipe calling for a 2-quart baking dish, you might be wondering: how big is it? In this guide,I will help you know the dimensions, capabilities and best uses of baking dishes. Plus, we’ll offer substitution tips and buying advice to help you make the best choice for your kitchen.

What Are the Dimensions of a 2 Qt Baking Dish?

A 2-quart baking dish typically has the following dimensions:

  • Rectangular: Around 9 inches x 7 inches x 2 inches
  • Round: Approximately 8 inches in diameter
  • Square: Roughly 8 inches x 8 inches x 2 inches

These dimensions can vary slightly depending on the brand and material of the dish, but they generally hold 8 cups of liquid, making them suitable for medium-sized casseroles, side dishes, and desserts.

Understanding the Size in Context

To give you a better idea of how big a 2-quart baking dish is, consider the following comparisons:

  • Holds 8 cups of liquid (equivalent to two 16-ounce water bottles or 1.5 pounds of cooked pasta).
  • Ideal for 4 to 6 servings, perfect for family-sized portions.
  • Versatile size, larger than a 1.5-quart dish but smaller than a 3-quart dish.
  • Great for medium portion recipes like lasagna, mac and cheese, stuffing, roasted vegetables, and mashed potatoes.
  • Balanced size for small gatherings without producing excess leftovers.

What Can You Cook in a 2 Qt Baking Dish?

A 2-quart baking dish is versatile and perfect for a variety of dishes, making it an essential tool in any kitchen. It’s ideal for preparing medium-sized casseroles, as it holds approximately 8 cups of ingredients, which is perfect for serving 4 to 6 people. Popular casseroles like mac and cheese, lasagna, or shepherd’s pie are great choices for this size dish, providing ample servings without excess leftovers.

In addition to casseroles, a 2-quart baking dish is excellent for side dishes like roasted vegetables, mashed potatoes, or baked rice. The even heat distribution allows for perfect cooking and caramelization, making vegetables like Brussels sprouts, carrots, or sweet potatoes turn out wonderfully.

Desserts also shine in a 2-quart baking dish. It’s perfect for baking fruit crisps, bread pudding, or small batches of brownies.The dish provides the perfect portion to satisfy your sweet cravings without leaving too many leftovers.

Breakfast dishes such as baked eggs, frittatas, or savory egg casseroles can also be made in a 2-quart dish, allowing you to create hearty meals for a small group.

Overall, a 2-quart baking dish is versatile enough for casseroles, side dishes, desserts, and more, making it a must-have in any kitchen.

Substitutes for a 2 Qt Baking Dish

9×5-inch Loaf Pan: This pan can hold the same volume as a 2-quart baking dish, making it suitable for casseroles, meatloaf, or baked dishes. Simply monitor the cooking time, as the shape can influence how the dish cooks.

8×8-inch Square Baking Dish: A square dish of this size holds about 2 quarts of liquid, making it a perfect substitute. It’s great for baked goods, casseroles, or desserts like brownies and fruit crisps.

9-inch Round Cake Pan: This pan holds roughly 2 quarts and works well for cakes, casseroles, or cobblers. Its round shape promotes even cooking, but you may need to adjust the cooking time slightly.

Two 2-Cup Ramekins: If you want to create individual servings, two 2-cup ramekins can hold the same total volume as a 2-quart dish. They’re perfect for making personal portions of casseroles, soufflés, or baked eggs.

Large Muffin Pan (6-Cup): While not a typical baking dish, a 6-cup muffin pan can be used for mini casseroles or baked goods, making it a creative substitute.

Remember to adjust cooking time or temperature based on the shape and material of the substitute, as it might affect heat distribution and cooking speed.

Big Is a 2 Qt Baking Dish

Materials: Which One Should You Choose?

Baking dishes come in different materials, each with its own benefits:

Glass (Pyrex, Borosilicate)

Glass baking dishes, such as those made by Pyrex, offer excellent heat distribution, ensuring even cooking. They are also great for going from oven to table, making them an attractive option for serving. However, glass is heavier than other materials and can be prone to breaking if exposed to sudden temperature changes.

Ceramic (Stoneware, Porcelain)

Ceramic baking dishes, including stoneware and porcelain, are known for their heat retention, keeping food warm longer even after being removed from the oven. They are stylish, making them ideal for serving directly at the table. However, ceramic dishes are more fragile than glass or metal and can chip or crack if dropped.

Metal (Aluminum, Stainless Steel)

Metal baking dishes, typically made from aluminum or stainless steel, heat up quickly and provide a crispier texture for baked goods. They are lightweight and highly durable, making them a favorite for many bakers. However, they are not ideal for acidic foods, as aluminum can react with ingredients like tomatoes or citrus, affecting the flavor of the dish.

Silicone

Silicone baking dishes are flexible and naturally non-stick, making them an excellent option for cakes, muffins, and certain baked goods. They are easy to store since they can be bent or folded. However, silicone does not retain heat as well as glass or ceramic, meaning food may cool down faster than in other types of baking dishes.

Tips for Using a 1.5 Qt Baking Dish Effectively

To get the best results from your 2-quart baking dish, here are some helpful tips:

  1. Preheat the Oven: Preheat the oven fully before putting the dish in. This promotes even cooking and prevents areas from being undercooked or overcooked.
  2. Grease or Line the Dish: To avoid sticking, especially when baking casseroles or desserts, grease the baking dish with butter, oil, or cooking spray. Alternatively, you can line the dish with parchment paper for easy cleanup.
  3. Watch the Temperature: If you’re using a glass or ceramic dish, keep in mind that these materials retain heat longer than metal. You might need to adjust the cooking temperature by lowering it by 10–20 degrees Fahrenheit compared to recipes that call for metal pans.
  4. Don’t Overfill: While it might be tempting to fill the dish to the top, it’s best to leave about 1/2 inch of space at the top. This allows for expansion during cooking and prevents spilling over.
  5. Check Cooking Time: If you’re substituting a 2-quart dish with a pan of different shape or material, keep an eye on the cooking time. Thicker or thinner pans may require slight adjustments in time or temperature.
  6. Let It Rest: After cooking, allow your dish to rest for a few minutes before serving. This helps the flavors set and makes serving easier.
  7. Use for Versatile Recipes: The 2-quart size is great for casseroles, lasagnas, side dishes, and desserts. Consider using it for dishes like baked pasta, roasted vegetables, fruit crisps, or even a small batch of brownies.

How Big Is a 2 Qt Baking Dish

How to Choose the Best 2 Qt Baking Dish

Material: Glass (Pyrex) ensures even heat distribution but is heavy and fragile. Ceramic retains heat well and adds elegance but can chip. Metal heats quickly for crispy textures but may not retain heat as well. Silicone is flexible, non-stick, and easy to store but doesn’t retain heat as effectively.

Shape and Size: Select a square or rectangular dish for casseroles, lasagnas, or roasted vegetables, and a round dish for baked goods like cobblers. Consider depth—shallow dishes are best for brownies, while deeper ones are suited for casseroles or soufflés.

Handles: A dish with handles makes it safer and easier to move, especially when hot.

Lid: A lid is useful for keeping food fresh and preventing spillage during transport.

Dishwasher and Oven Safety: Ensure the dish is both dishwasher-safe and oven-safe to simplify cleaning and cooking.

Brand Reputation: Opt for trusted brands like Pyrex, Le Creuset, or CorningWare for quality and durability.

Ease of Cleaning: Non-stick ceramic or glass dishes are easier to clean, while silicone and metal may need extra care.

Aesthetic Appeal: Ceramic or stoneware dishes are attractive for serving, while glass is functional but less visually appealing.

Consider these factors to choose the best 2-quart baking dish for your needs.


Final Thoughts

A 2-quart baking dish is a must-have for any kitchen, offering the perfect size for small meals, side dishes, and desserts. Understanding its dimensions, material options, and proper use will help you make the most of it. Whether you’re baking a casserole, dessert, or vegetable dish, this guide ensures you choose the right dish and cook with confidence.


FAQ

How many cups of liquid can a 2-quart baking dish hold? 

A 2-quart baking dish can hold approximately 8 cups of liquid, making it perfect for family-sized casseroles, side dishes, and desserts.

What size is a 2-quart baking dish?

 A typical 2-quart baking dish usually measures around 9×7 inches or 8×8 inches (square), or 10 inches in diameter (round). However, the exact dimensions can vary depending on the brand and shape.

How many servings does a 2-quart baking dish provide?

 A 2-quart baking dish typically serves 4 to 6 people, making it great for medium-sized meals like casseroles, lasagna, roasted vegetables, or baked goods.

Can I substitute a 2-quart baking dish with a different size? 

Yes, you can substitute a 2-quart baking dish with dishes of similar capacity, like an 8-inch square dish or a 9×5-inch loaf pan. However, you may need to adjust cooking times and temperatures based on the shape and material of the substitute dish.

What is the best material for a 2-quart baking dish? 

The best material depends on your needs. Glass and ceramic are great for even heat distribution, while metal heats up quickly for a crisp texture. Silicone is flexible and non-stick, ideal for certain baked goods, but doesn’t retain heat as well.

Filed Under: Essentials

  • « Go to Previous Page
  • Page 1
  • Page 2
  • Page 3
  • Page 4
  • Interim pages omitted …
  • Page 8
  • Go to Next Page »

Primary Sidebar

Recent Posts

  • Can You Deep Fry in a Nonstick Pan? My Surprising Results
  • Clay Pot vs Dutch Oven: Which One Right for You?
  • Are Dutch Ovens Non Toxic? All You Need to Know
  • Is Low Specific Heat Capacity Good for Frying Pans​
  • Smeg Kettle vs Mini Kettle: Which One Fits Your Style?

Copyright © 2024 bigfishtavernlaguna.com. All right reserved.