• Skip to primary navigation
  • Skip to main content
  • Skip to primary sidebar
  • About Us
  • Affiliate Disclosure
  • Contact us
  • Cookie Privacy Policy
  • Privacy Policy
  • Sample Page
  • Terms of Use

Kitchen Guide

  • Appliance Reviews
  • Bakeware
  • Buying Guides
  • Product Comparisons
  • Recipes
  • Essentials
  • Cleaning

Essentials

Is a Coffee Vending Machine Profitable? Revenue Insights

October 30, 2024 by bigfishtavernlagunaadmin Leave a Comment

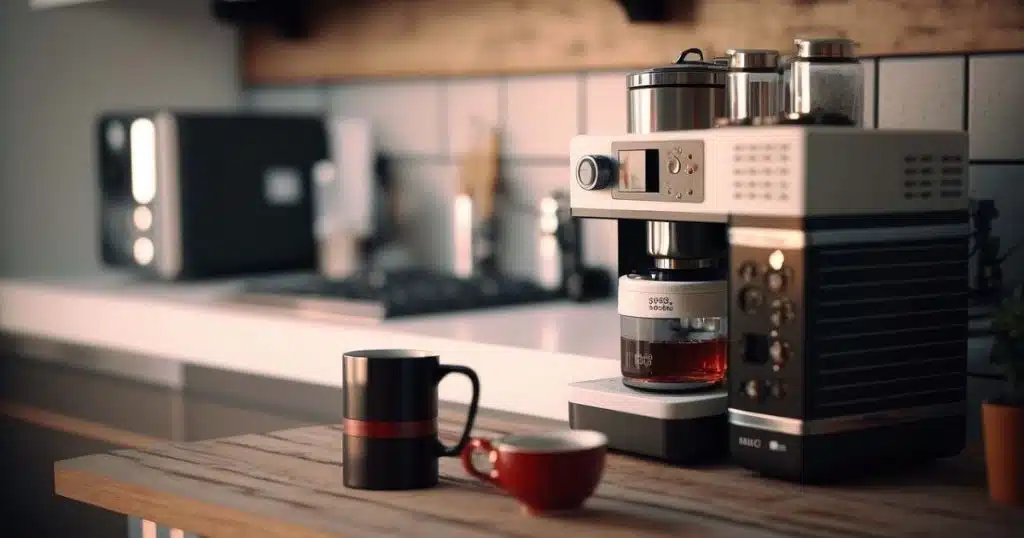
Wondering if a coffee vending machine is profitable? Coffee vending machines can be highly profitable in the right conditions, offering a convenient, automated solution for serving coffee in busy locations like offices, universities, hospitals, and transit hubs. The demand for quick, quality coffee without long wait times makes these machines popular, driving steady sales and income when positioned strategically. Profitability largely depends on factors like machine location, the quality of coffee and customization options, regular maintenance, and efficient management of operational costs.

By ensuring reliable hygiene and maintenance, coffee vending machines can attract repeat customers, delivering a profitable return on investment. Whether you’re a business owner or a facility manager, grasping these essential profitability factors can significantly enhance your returns.

Is a coffee vending machine profitable?

The Market Demand for Coffee Vending Machines

The demand for best coffee vending machines has increased due to their convenience and placement in high-traffic areas like workplaces, universities, and public spaces. These machines address consumer needs for fast and accessible coffee, especially in settings where time and convenience are priorities.

Technological innovations, such as IoT-based machines with remote monitoring and cashless payment options, also contribute to growing demand, as they improve machine maintenance and inventory management, enhancing profitability and customer satisfaction.

The appeal of coffee vending machines is also rising in international markets, reflecting a shift toward automated, tech-driven food services that meet evolving consumer expectations for convenience and quality.

Average Revenue for  Coffee Vending Machine

The average revenue per coffee vending machine can vary widely based on factors such as location, type of machine, coffee quality, pricing, and consumer demand. However, here are some general estimates:

  1. Average Daily Revenue: A coffee vending machine in a high-traffic area can earn between $20 to $40 daily. For lower-traffic areas, this can be around $5 to $15 per day.
  2. Monthly Revenue: Assuming a mid-range daily average of $20, monthly revenue could reach approximately $600 (30 days x $20).
  3. Annual Revenue: For a high-performing machine, this could lead to an annual revenue of $7,000 to $15,000.

These are rough estimates, and actual revenue will depend significantly on foot traffic, price points, and coffee quality.

Factors That Influence Profitability of Coffee Vending Machines

Profitability in coffee vending machines is primarily determined by the following factors: technology integration, strategic placement, product quality and hygiene, and pricing and promotions. Each factor plays a crucial role in driving demand, reducing costs, and ensuring customer satisfaction, which collectively enhance profitability. Here’s a detailed exploration of each:

Technology Integration

Advanced technology greatly impacts profitability by streamlining operations and enhancing customer experience. IoT (Internet of Things) capabilities allow vending machines to monitor inventory, temperature, and machine performance remotely. Such machines can track sales data in real-time, enabling optimized restocking schedules and reducing the chances of machine downtime due to maintenance issues.

Studies show that these IoT-based systems not only lower administrative costs but also provide detailed data analytics to understand sales patterns and peak times, helping operators maximize revenues. Furthermore, options for cashless payments, including mobile wallets and NFC, enhance convenience for consumers, increasing usage and reducing the risks associated with cash handling.

Strategic Placement

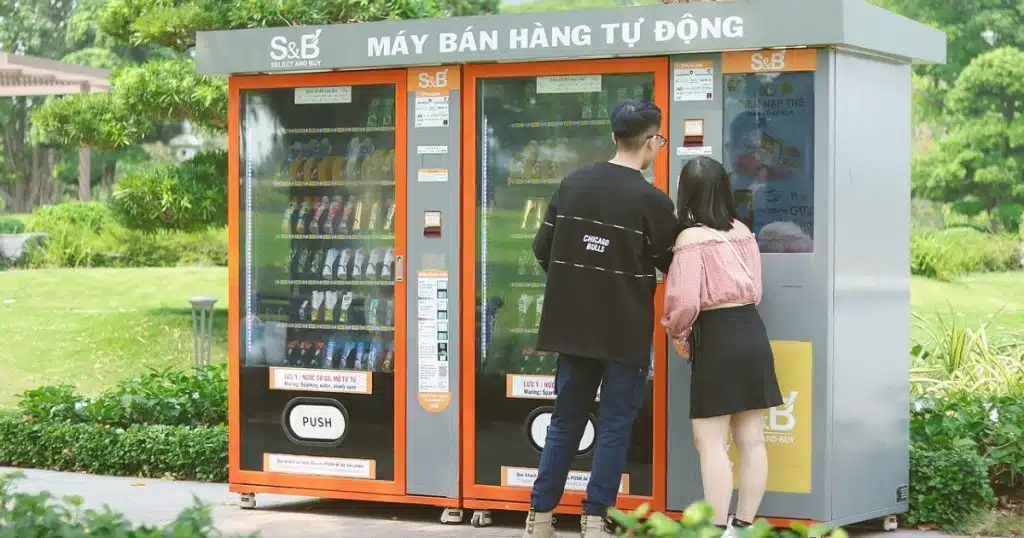
The location of a coffee vending machine significantly influences its profitability. Machines placed in high-traffic areas such as office buildings, hospitals, universities, and transport hubs experience more frequent usage, as consumers in these locations prioritize convenience. For example, coffee vending machines positioned in office or educational settings can attract regular morning and afternoon sales, especially if competitors (like cafes) are distant or expensive.

Additionally, research shows that social and high-engagement settings (such as universities and companies) can enhance the sale of coffee when the machine also promotes eco-friendly or certified products, catering to consumer values and increasing sales.

Product Quality and Hygiene

Ensuring high-quality coffee and strict hygiene is essential to attract repeat customers. Coffee vending machines that maintain consistent quality in taste, freshness, and hygiene appeal more to users. Consumers are more likely to trust machines with visible certifications or those that undergo regular maintenance and cleaning, which mitigates health concerns.

A 2023 study underscored that vending machines need to be carefully maintained and sanitized to avoid microbial contamination, as poor hygiene directly impacts customer satisfaction and long-term sales . Additionally, offering options like dairy alternatives or varying sugar levels can cater to diverse consumer preferences, further boosting customer satisfaction and loyalty.

Pricing and Promotions

Pricing strategies play a significant role in influencing purchasing decisions at vending machines. A competitive price point can encourage users to choose vending machine coffee over nearby cafes. Periodic discounts or promotions can drive higher sales volume, particularly during off-peak times or when new products are introduced.

A study on snack vending machines indicated that price reductions on certain items increased purchases significantly, suggesting that a similar approach for coffee could boost sales without sacrificing overall profitability . Promotions and loyalty rewards (e.g., “buy five, get one free”) can further incentivize frequent use, increasing per-customer revenue. Additionally, promotional signs that highlight price reductions or product benefits can attract attention and encourage impulse purchases.

Operational Efficiency and Technological Integration

Operational efficiency and technological integration are pivotal in maximizing the profitability of coffee vending machines by optimizing performance and reducing costs. Efficient operations mean streamlining tasks like inventory management, maintenance, and refilling, which reduces machine downtime and ensures continuous product availability.

Implementing predictive maintenance protocols allows operators to detect potential issues early, reducing expensive repairs and preventing service disruptions. Optimized routes for restocking personnel also lower labor and transportation costs, helping to create a lean, efficient operation that supports consistent revenue.

Technological integration through IoT, data analytics, and cashless payment options enhances the user experience and operational control.IoT-enabled sensors deliver real-time insights on inventory levels, machine performance, and energy consumption, enabling proactive management.

Data analytics offer insights into customer preferences and peak usage times, enabling operators to tailor product offerings and schedules accordingly. Additionally, cashless payment systems, such as mobile wallets and NFC, improve transaction speed and convenience, attracting more customers and increasing sales frequency.

Together, these elements boost profitability by reducing operational expenses, minimizing downtime, and enhancing customer satisfaction, creating a more reliable, accessible, and customer-friendly coffee vending experience.

Consumer Demand and Market Placement

Consumer demand and strategic market placement are essential to the profitability of coffee vending machines. Demand for coffee remains high, especially in fast-paced environments where people prioritize convenience. By placing coffee vending machines in high-traffic areas like offices, universities, hospitals, and transport hubs, operators can tap into consistent demand, as consumers in these spaces often seek quick, accessible beverage options.

Effective market placement means selecting areas where foot traffic and demand are naturally high, minimizing competition from cafes or other coffee options. Offices and schools, where people take frequent short breaks, are ideal, as vending machines offer a quick caffeine solution without needing a full-service coffee shop.

Furthermore, machines that offer customizable options, such as varying coffee types, flavor shots, and dairy alternatives, align with consumer preferences, increasing satisfaction and repeat usage. This strategic approach to placement and demand ultimately drives sales and boosts machine profitability.

Cost and Hygiene Concerns

The profitability of coffee vending machines is influenced by both cost and hygiene concerns, which affect long-term viability and consumer trust. Initial costs are substantial, as machines require specialized technology to maintain product quality and regular maintenance to stay operational.

Ongoing expenses include frequent cleaning, maintenance, and occasional part replacements, which are essential to prevent microbial contamination—a common issue in vending machines. Studies indicate that inadequate hygiene standards, particularly in milk-based drinks, can lead to contamination on machine surfaces and in dispensed coffee, posing potential health risks .

Moreover, low consumer awareness of hygiene regulations can affect machine use, requiring operators to emphasize cleanliness to maintain profitability. Balancing these costs with strict hygiene practices is crucial for coffee vending machines to remain profitable and reliable.

What Really Makes a Coffee Vending Machine Profitable?

Yes,the profitability of coffee vending machines is largely determined by strategic placement, quality control, and operational efficiency. High-traffic locations, especially in closed environments like offices or universities, boost sales consistency.

Machines offering quality, customizable beverages and reliable hygiene practices tend to see more repeat business, enhancing profitability. Additionally, controlling costs through efficient maintenance, restocking, and energy management is crucial for sustained profits.

Ultimately, a coffee vending machine can be profitable if it combines high-traffic placement, quality offerings, and efficient operations that meet customer preferences and health standards.

Filed Under: Essentials

Is a Coffee Vending Machine Healthy? Essential Facts

October 30, 2024 by bigfishtavernlagunaadmin Leave a Comment

Coffee vending machines offer convenience by providing instant coffee beverages at the touch of a button. While they can be a great pick-me-up in offices, public places, and more, there are legitimate questions about their impact on health. Is a coffee vending machine healthy? Should you be cautious when choosing a cup from one?

In this article, we’ll delve into the pros and cons of coffee vending machines from a health perspective, considering ingredients, quality, and nutritional aspects.

Is a Coffee Vending Machine Healthy?

Is a Coffee Vending Machine Healthy?

Acrylamide levels in coffee from vending machines are comparable to other coffee preparation methods. While exposure to acrylamide is not high enough to pose significant health risks, it is present in small amounts, a concern for long-term exposure.Hygiene and sanitation are critical for coffee vending machines. Improper cleaning and maintenance can lead to microbial contamination, increasing potential health risks.

In general, moderate coffee consumption (including from vending machines) has been associated with various health benefits, such as reduced risk of type 2 diabetes, cardiovascular disease, and some cancers. However, excessive consumption may pose risks, like increased cholesterol or hypertension, especially if the coffee contains added sugars or fats. Other studies suggest that coffee consumption from all sources, including vending machines, generally reduces overall mortality risks when consumed in moderation .

The Health Benefits of Vending Machine Coffee

Coffee from vending machines offers several health benefits similar to those associated with other sources of coffee.

Reduced Type 2 Diabetes Risk: Vending machine coffee contains chlorogenic acids that improve insulin sensitivity, lowering diabetes risk .

Heart Health: Regular intake reduces the risk of heart disease and stroke, especially with 2-4 cups daily.

Liver Protection: Coffee helps lower risks of liver diseases like cirrhosis and NAFLD.

Antioxidant Boost: Rich in polyphenols, it reduces oxidative stress and inflammation.

Improved Alertness: Caffeine enhances mental alertness, memory, and mood.
Longevity Benefits: Moderate consumption is linked to reduced all-cause mortality.

Health Risks with Coffee Vending Machines

While coffee from vending machines can offer some health benefits, there are several risks associated with its consumption.

  • If the machines are not cleaned regularly, there can be various health hazards. Proper maintenance is essential to prevent contamination.
  • High caffeine intake can raise blood pressure and cholesterol. The risk is elevated for those with heart conditions.
  • Excessive coffee consumption may increase the risk of fractures, especially in women.
  • High caffeine intake can be linked to low birth weight and preterm labor. Pregnant women should limit their coffee intake.
  • High caffeine consumption can cause anxiety, insomnia, and palpitations.
  • Moderate intake and regular machine cleaning can minimize these risks.

How Does Vending Machine Coffee Compare to Freshly Brewed Coffee?

[wptb id="1497" not found ]

How to Make Healthier Choices with Vending Machine Coffee

To make healthier choices with vending machine coffee:

Opt for Black Coffee: Skip sugar syrups, creamers, and sweeteners to reduce calories and sugar intake.

Choose Low-Sugar Options: If available, select “low sugar” or “unsweetened” varieties.

Limit Creamers: Use a small amount of milk instead of creamers, which may contain unhealthy trans fats.

Watch Portion Size: Choose smaller cup sizes to manage caffeine intake.

Hydrate: Drink water alongside coffee to stay hydrated and reduce acidity effects.

Check Ingredients: Review labels when possible to make informed decisions about added sugars or additives.

Prioritizing these choices can make vending machine coffee healthier.

How Many Cups of Coffee a Day is Good For the Human Body According to Nutrition Scientists

Nutrition scientists generally recommend 3 to 4 cups of coffee per day for most adults. This amount typically provides up to 400 milligrams of caffeine, which is considered safe and is associated with several health benefits. Regular coffee intake has been connected to a lower risk of Parkinson’s disease, type 2 diabetes, and various cancers.Coffee is also rich in antioxidants that help safeguard cells against damage.

In summary, most evidence suggests that 3 to 4 cups of coffee daily may offer health benefits without increasing the risk of adverse effects for most adults.

Filed Under: Essentials

Can Coffee Machines Make Tea?

October 24, 2024 by bigfishtavernlagunaadmin Leave a Comment

Can coffee machines make tea? The short answer is yes, but the process and results vary depending on the type of coffee machine. This article explores how different coffee machines, including drip makers, single-serve models like Keurig, and French presses, can brew tea. We also dive into the differences between coffee and tea brewing mechanisms, the best practices for making high-quality tea with each method, and tips for cleaning and optimizing your machine. Additionally, we’ll compare alternatives like electric kettles and tea infusers for those seeking a more tailored brewing experience.

Can Coffee Machines Make Tea​?

Can Coffee Machines Really Make Tea?

Yes, coffee machines can be used to make tea, but the results vary depending on the type of machine. Drip coffee makers can brew tea by replacing coffee grounds with loose tea leaves or tea bags, making it a convenient option for larger quantities. 

Single-serve machines like Keurig can use tea pods or refillable pods with loose tea for a quick cup. However, temperature control may be limited, which can impact the flavor of delicate teas like green or white tea. While not ideal for all types, coffee machines offer a practical way to brew tea with some adjustments for optimal taste.

What are the Differences in Brewing Mechanisms Between Coffee and Tea Machines?

The brewing mechanisms of coffee and tea machines differ significantly due to the unique requirements of each beverage. Coffee machines, such as drip coffee makers, espresso machines, and single-serve brewers, use high temperatures and pressure to extract flavors from finely ground coffee beans. Drip coffee makers heat water to around 90-96°C (194-205°F) and let it flow through a filter containing ground coffee. Espresso machines use even higher pressure to force hot water through compacted coffee grounds, resulting in a concentrated brew.

Tea machines, on the other hand, are designed to handle a wider range of temperatures and steeping times, tailored to the specific type of tea being brewed. Delicate teas like green and white teas require lower temperatures (around 70-80°C or 158-176°F), while black teas and herbal infusions often need hotter water, similar to coffee. Instead of using pressure, tea machines focus on controlling steeping time, allowing tea leaves to infuse in water, which can be crucial for extracting the right balance of flavors without bitterness.

While coffee machines prioritize high-temperature water flow and pressure, tea machines emphasize temperature precision and steeping duration to match the varied needs of different teas, creating a more tailored brewing experience.

Can Single-Serve Coffee Makers Effectively Brew High-Quality Tea?

Single-serve coffee makers can brew tea, but achieving high-quality results depends on the specific machine and type of tea. These machines, like Keurig or Nespresso, offer convenience by using pre-packaged tea pods or refillable pods with loose tea leaves.

Can Coffee Machines Make Tea​?

However, their effectiveness in brewing high-quality tea is limited by their fixed water temperature and lack of steeping control. For delicate teas, such as green or white tea, the water temperature in single-serve coffee makers may be too high, leading to bitterness. Meanwhile, black and herbal teas, which require hotter water, fare better in these machines.

The rapid brewing process often lacks the time needed for the full flavor extraction that traditional steeping methods provide. While single-serve coffee makers can produce an acceptable cup of tea for those seeking quick preparation, they may not match the depth of flavor and nuance achieved through more specialized tea brewing methods.

How Does the Design of Tea Machines Differ From Coffee Machines?

The design of tea machines differs from coffee machines mainly in their focus on temperature control and steeping time. Tea machines are designed to brew various types of tea, each requiring specific water temperatures and steeping durations. For example, green and white teas need lower temperatures (70-80°C or 158-176°F) and shorter steeping times to avoid bitterness, while black teas need higher temperatures. Tea machines often feature adjustable temperature settings and timers to ensure the optimal brew for different tea varieties.

In contrast, coffee machines are designed to extract flavor quickly using high-pressure water flow, especially in espresso machines, or a consistent high-temperature flow in drip coffee makers (90-96°C or 194-205°F). This process suits coffee, which needs rapid extraction from finely ground beans. Coffee machines prioritize pressure and flow rate for consistent strength, while tea machines focus more on achieving precision in steeping for flavor and aroma.

How Does Water Temperature Affect Tea Quality?

When using coffee machines to brew tea, understanding water temperature is essential to ensure the quality of your tea. Coffee machines are typically designed to heat water to high temperatures suitable for brewing coffee, usually around 200°F (93°C). However, different types of tea require specific water temperatures for optimal flavor extraction:

  • Green and White Teas: These teas are delicate and should be brewed with water between 150°F to 185°F (65°C to 85°C). Coffee machines might overheat the water, leading to a bitter or astringent taste in these teas.
  • Oolong Teas: These need slightly hotter water, around 185°F to 205°F (85°C to 96°C). A coffee machine with adjustable temperature settings could be suitable for oolong.
  • Black Teas and Herbal Infusions: These robust varieties can handle boiling water at 212°F (100°C), which aligns more closely with a standard coffee machine’s capabilities.

Step-by-Step Guide: How to Brew Tea with a Coffee Machine

Brewing tea with a coffee machine is a convenient way to enjoy a warm cup of tea without the need for specialized equipment. Whether you have a drip coffee maker, a single-serve machine like a Keurig, or a French press, each can be adapted to brew tea effectively. Here’s how to do it.

Can Coffee Machines Make Tea​?

Brewing Tea with a Drip Coffee Maker

What You’ll Need: Loose tea leaves or tea bags, fresh water, coffee filter.

  • Clean the Coffee Maker: Run a cycle with water only to remove any coffee residue, ensuring a pure tea flavor.
  • Prepare the Tea: Place loose tea leaves or tea bags into the coffee filter. Use 1 teaspoon of tea or 1 tea bag per cup of water, adjusting for desired strength.
  • Fill the Water Reservoir: Add fresh, cold water to the reservoir, using the appropriate amount for the number of cups.Filtered water can elevate the taste.
  • Start the Brew Cycle: Turn on the coffee maker, allowing hot water to flow through the tea and extract its flavors.
  • Serve the Tea: Pour the brewed tea into your cup and add milk, lemon, or sweeteners as desired.
  • Clean Up: Rinse out the carafe and filter holder to prevent tea residue from affecting future brews.

Brewing Tea with a Single-Serve Coffee Maker (e.g., Keurig)

What You’ll Need: Tea pod or refillable pod, loose tea leaves or tea bag, fresh water.

  • Prepare the Pod: Use a refillable pod filled with loose tea or a pre-packaged tea pod.
  • Fill the Water Reservoir: Add fresh water to the reservoir. For better results, use filtered water.
  • Insert the Pod:Insert the pod into the machine’s brewing chamber.
  • Select Brew Size: Choose a smaller cup size for stronger tea or a larger size for a lighter brew.
  • Start the Brew: Press the brew button, allowing hot water to infuse through the pod.
  • Remove the Pod and Serve: Carefully take out the pod and enjoy your tea hot or iced.
  • Clean the Machine: Wipe spills and rinse the pod holder for the next use.

Brewing Tea with a French Press

What You’ll Need: Loose tea leaves or tea bags, hot water, French press.

  • Add Tea to the French Press: Use 1 teaspoon of loose tea or a tea bag per cup.
  • Boil Water Separately: Heat water to the appropriate temperature: 70-80°C for green tea, 90-95°C for black or herbal tea.
  • Pour Water Over the Tea: Add hot water to the French press, covering the tea leaves.
  • Steep the Tea: Let it steep for 3-5 minutes.
  • Press the Plunger: Slowly press down to separate the tea leaves.
  • Serve and Enjoy: Pour into a cup and add any preferred flavors.

Tips for Best Results

  • Clean Thoroughly: Avoid cross-contamination of flavors by cleaning the machine after each use.
  • Adjust for Strength: Adjust the tea-to-water ratio to achieve a stronger or milder brew.
  • Use Fresh, Filtered Water: This ensures a cleaner, better-tasting tea.

Alternatives to Using a Coffee Maker for Tea

While coffee machines can be used to make tea, there are other methods that may yield better results:

Electric Kettle with Temperature Control: Ideal for green and white teas that require lower water temperatures.

Traditional Teapot: Provides a more authentic tea brewing experience with the ability to steep tea leaves directly.

Tea Infusers: Great for single cups, enabling you to steep loose leaves directly in your cup without needing a machine.

Final Thoughts

While coffee machines aren’t specifically designed for brewing tea, they can be a convenient option for tea lovers looking for a quick solution. Drip coffee makers, single-serve machines, and even French presses can brew a satisfying cup of tea if used correctly. By following the right steps and understanding the limitations, you can make the most of your coffee maker and enjoy a variety of beverages at home.

This article offers a thorough guide on using coffee machines for tea, with practical advice, step-by-step instructions, and comparisons of different machine types. It’s designed to help readers explore new possibilities with their coffee machines while making the process simple and enjoyable.

A common question can coffee machines make tea​, answer is yes, but

Coffee machines overheat water, so brewing green tea in a coffee machine can make it bitter.

Filed Under: Essentials

3/8 vs 1/2 Inch Engineered Hardwood Flooring: Pros and Cons

October 16, 2024 by bigfishtavernlagunaadmin Leave a Comment

Engineered hardwood flooring has become a popular choice for homeowners seeking a durable, beautiful, and versatile flooring option. However, when it comes to choosing between 3/8-inch and 1/2-inch engineered hardwood, the decision can be a bit confusing. In this article, we’ll break down the key differences, pros, and cons of both thicknesses to help you make an informed choice. By the end of this guide, you’ll have a clearer understanding of which option suits your home’s needs, style, and budget.

3/8 vs 1/2 inch engineered hardwood flooring

What is Engineered Hardwood?

Engineered hardwood flooring is a multi-layered wood product designed to offer the appearance of real hardwood while improving on some of the drawbacks of traditional solid wood floors. Engineered hardwood is built differently from solid hardwood. Instead of being made from a single piece of wood like solid hardwood, it is composed of several layers. The top layer is a hardwood veneer, while the core is typically composed of plywood or high-density fiberboard (HDF).

These layers are pressed together under high pressure, resulting in a plank that offers greater dimensional stability. As a result, engineered hardwood is more resistant to warping and moisture damage than solid hardwood. When comparing engineered wood floor thickness, the differences can affect how the floor handles temperature changes and humidity. The top layer of engineered hardwood is genuine hardwood, meaning it retains the same natural beauty and charm as traditional hardwood, while the underlying layers provide durability and strength.

The Importance of Thickness in Engineered Hardwood

When selecting engineered hardwood, thickness plays a significant role in the floor’s overall performance and longevity. The thickness of engineered hardwood typically refers to the overall plank thickness, but it also includes the thickness of the wear layer—the topmost layer of hardwood that can be sanded and refinished over time.

3/8 vs 1/2 inch engineered hardwood flooring

Thicker engineered hardwood is more durable and can be refinished multiple times, which extends its lifespan. The durability of thin vs. thick hardwood floors can significantly impact their suitability for different areas of the home. Thinner planks, while more affordable and easier to install, offer less durability and limited refinishing options. For example, 3/8-inch and 1/2-inch engineered hardwood planks are commonly chosen for residential installations, but each has its own advantages depending on the application.

Key Differences Between 3/8-inch and 1/2-inch Engineered Hardwood

[wptb id="1382" not found ]

Pros and Cons of 3/8-inch vs 1/2-inch Engineered Hardwood

3/8-inch Engineered Hardwood

Pros

  • Cost-effective
  • Easier to install, making it suitable for DIY projects
  • Lighter weight, which simplifies transportation and handling
  • Compatible with radiant heating systems due to its thinner profile
  • 3/8 inch wood flooring installation options typically include floating and glue-down methods, making it ideal for DIY enthusiasts.

Cons

  • Limited refinishing options
  • Less durable in high-traffic areas
  • May require additional soundproofing
  • Not as stable on uneven subfloors

1/2-inch Engineered Hardwood

Pros:

  • Increased durability and resistance to wear and tear
  • Can be refinished multiple times
  • Better sound insulation
  • Suitable for uneven or high-moisture subfloors
  • Adds a more luxurious feel underfoot
  • 1/2 inch hardwood floor longevity makes it a better investment for high-traffic areas, especially where you may need to refinish the floors multiple times.

Cons

  • Costlier than 3/8-inch alternatives
  • Heavier and more difficult to install, often necessitating professional assistance
  • Could raise floor height, potentially causing problems in rooms with low ceilings.

Factors to Consider When Choosing Between 3/8 inch and 1/2 in

When selecting between 3/8-inch and 1/2-inch engineered hardwood flooring, there are several factors you should evaluate to ensure the best fit for your home and needs.

3/8 vs 1/2 inch engineered hardwood flooring

Durability

Thickness plays a significant role in how durable your flooring will be. A 1/2-inch plank is more robust and better suited for high-traffic areas, such as living rooms or hallways, where foot traffic and furniture movement can cause wear and tear. On the other hand, 3/8-inch engineered hardwood is suitable for low-traffic areas like bedrooms, where durability isn’t as much of a concern.

Budget

Generally, 3/8-inch engineered hardwood is more affordable than 1/2-inch planks. If you’re working with a tight budget or need to cover a large area, the thinner option might be more cost-effective. However, investing in the best engineered hardwood for high-traffic areas can save you money on future repairs and refinishing. Investing in 1/2-inch flooring could save money over time because of its longer lifespan and the ability to refinish it.

Subfloor Conditions

The condition of your subfloor is another crucial consideration. Thicker 1/2-inch planks provide more stability on uneven or moisture-prone subfloors, whereas 3/8-inch planks perform well on smooth, dry subfloors.

Room Size

The size of the room can also impact your choice. In larger rooms, 1/2-inch planks tend to offer a more substantial, luxurious look, while thinner planks like 3/8-inch can help create a more open, airy feel in smaller spaces.

Refinishing

If you plan on refinishing your floors in the future, 1/2-inch planks offer more opportunities for sanding and refinishing due to their thicker wear layer, whereas 3/8-inch planks are limited in this regard. The wear layer thickness in engineered wood floors is a critical factor that influences how many times you can sand and refinish the surface.

By carefully considering these factors, you can select the right thickness for your engineered hardwood flooring based on your specific requirements.

Ideal Uses for 3/8-inch vs. 1/2-inch Engineered Hardwood

3/8-inch Engineered Hardwood

  • Suitable for homes with radiant heating systems, as its thinner profile transfers heat more efficiently.
  • Ideal for spaces where height restrictions are a concern, such as basements with low ceilings.
  • 1/2-inch Engineered Hardwood:

1/2-inch Engineered Hardwood

  • Perfect for high-traffic areas like living rooms, kitchens, and entryways.
  • Excellent for rooms where soundproofing is important, such as upstairs bedrooms or playrooms.
  • Suitable for areas with uneven or moisture-prone subfloors, as the thicker core provides better stability and moisture resistance.

Installation Methods for 3/8 Inch and 1/2 Inch Flooring

3/8 vs 1/2 inch engineered hardwood flooring

Both 3/8-inch and 1/2-inch engineered hardwood flooring offer versatile installation options.Here are the most frequently used methods:

  • Floating Installation: This method is commonly used with 3/8-inch flooring.The planks lock together and “float” over the subfloor, making it one of the easiest choices for DIY installation.
  • Glue-Down Installation: Suitable for both thicknesses, glue-down installation secures the planks to the subfloor with adhesive. This approach requires more effort but delivers a durable and long-lasting outcome.
  • Nail-Down Installation: Most commonly used with 1/2-inch engineered hardwood, this method involves nailing the planks to a wooden subfloor. It offers a highly stable floor but usually requires professional installation.

Common Applications for Each Flooring Thickness

  • 3/8-inch Engineered Hardwood: Works well in bedrooms, home offices, and basements where foot traffic is lighter and there’s less risk of wear and tear.
  • 1/2-inch Engineered Hardwood: Best suited for living rooms, hallways, and high-traffic areas where durability and stability are more important. It’s also ideal for upper floors in multi-level homes where soundproofing is needed.

Which Should You Choose—3/8-inch or 1/2-inch Engineered Hardwood?

Ultimately, the decision between 3/8-inch and 1/2-inch engineered hardwood flooring comes down to your individual requirements. If you’re considering the long-term value, thicker flooring may offer a better return on investment. If you’re working within a tighter budget or installing flooring in a low-traffic area, 3/8-inch planks might be the most suitable option.

Filed Under: Essentials

Can You Use a Wet Dry Vacuum on Carpet: A Detailed Guide

October 10, 2024 by bigfishtavernlagunaadmin Leave a Comment

A wet-dry vacuum is a versatile tool that can clean both dry and wet messes from a variety of surfaces, including carpets. You may have used various cleaning machines and solutions to clean your carpets, but now you are thinking, Can You Use a Wet Dry Vacuum on Carpet?, the answer is yes! These vacuums are a powerful solution for homeowners looking to maintain clean carpets, particularly in areas prone to spills or dirt accumulation.

In this article we will discuss the pros and cons of using a wet dry vacuum and its various efficiency. Let’s get started

Can You Use a Wet Dry Vacuum on Carpet

How Does a Wet Dry Vacuum Work?

A wet-dry vacuum works by using a motor to create strong suction, which pulls in both liquids and solid debris. Inside the vacuum, there are separate compartments for dry and wet materials. When in dry mode, the vacuum collects dust, dirt, and other dry materials in a filter bag or canister. When switched to wet mode, it vacuums up liquids, which are stored in a separate tank.

Most wet-dry vacuums come with multiple attachments like brushes and floor nozzles. These tools help customize the vacuum for different surfaces, such as hard floors, carpets, or upholstery. Having both wet and dry cleaning capabilities, these vacuums are considered even more suitable for carpets.

Benefits of Using a Wet Dry Vacuum on Carpet

Using a wet-dry vacuum on carpet offers several benefits. It’s an all-in-one cleaning machine that can tackle various types of messes. Here are some of the key benefits:

Dual Cleaning Capability

One of the standout features of a wet-dry vacuum is its ability to handle both liquid and solid debris. Whether you’re cleaning up after a pet accident or vacuuming regular dust, this machine can do it all.

Powerful Suction

Wet-dry vacuums typically have stronger suction compared to standard vacuums. This makes them highly effective for pulling out dirt, dust, and allergens that are trapped deep within carpet fibers.

Effective Stain Removal

If you accidentally spill something on your carpet, a wet-dry vacuum can help extract liquids quickly before they sleep deeper into the fibers. By using the vacuum in wet mode, you can combine it with a cleaning solution to lift and remove stains efficiently.

Cost-Efficient and Time-Saving

Unlike some carpet cleaners that leave carpets damp for extended periods, a wet-dry vacuum extracts most of the moisture, helping carpets dry faster. This is particularly helpful in preventing the growth of mold and mildew.

Quicker Drying Times

By using one machine for both dry and wet cleaning, you eliminate the need to buy multiple specialized tools for different messes.This saves both money and storage space.

Can You Use a Wet dry Vacuum on Carpet

Yes, you can use a wet-dry vacuum on carpet, and it can be quite effective. Wet-dry vacuums are versatile and can handle both wet spills and dry debris. Here’s how they can be used on carpet.

Dry Cleaning: A wet-dry vacuum can be used to suck-up dirt, dust, and debris off the carpet, just like any ordinary vacuum cleaner. It goes well for most debris that often remains hard to be dealt with by smaller conventional vacuums.

Wet Cleaning (Spills or Carpet Cleaning): For instance, if you just spilled a drink or there is any sort of liquid solution on your carpet you can use the wet-dry vacuum to remove the moisture which eliminates cases of water damage and mold growth. You can also use it after washing your carpet with shampoo so that you remove excess water, speeding up the drying process.

Deep Cleaning: Certain kinds of wet-dry vacuums include a shampooing option or may be utilized with carpet washing options. You apply the cleaning solution, you scrub it to the carpet and lastly, use the wet-dry vacuum to suck the water and dirt from the carpet.

Be sure to follow the manufacturer’s instructions. If using on a thick carpet, check if the suction power of this vacuum is enough to remove the dirt.

Dealing with Stains: Can a Wet Dry Vacuum Help?

Yes, a wet-dry vacuum can be a great tool for tackling carpet stains. Here’s how:

  • Pre-Treatment: For tough stains like wine, coffee, or pet messes, apply a stain-removing solution and let it sit for a few minutes.
  • Extraction: Utilize the wet-dry vacuum to remove both the cleaning solution and dirt. Its powerful suction will efficiently lift the stain from the carpet fibers, ensuring it doesn’t set.
  • Repeat if Necessary: For particularly stubborn stains, you may need to repeat the process multiple times to fully eliminate them.

Wet Dry Vacuum vs. Carpet Cleaner: Which Is Better?

When deciding between a carpet cleaner and a wet-dry vacuum, it’s important to consider your cleaning requirements. Carpet cleaners are specifically designed for deep cleaning carpets, using a combination of water, detergent, and suction to tackle tough stains and embedded dirt. They are highly effective but generally more expensive and focused solely on carpeted surfaces.

In contrast, wet-dry vacuums offer greater versatility. These machines can handle both wet spills and dry debris, making them ideal for a variety of surfaces, not just carpets. Wet-dry vacs are typically more affordable and useful for everyday messes across different floor types.

Ultimately, the choice comes down to your specific flooring needs. If you require deep carpet cleaning, opt for a carpet cleaner. For broader cleaning tasks, a wet-dry vacuum is a better fit.

How Often Should You Use a Wet Dry Vacuum on Carpet?

The frequency of vacuuming your rugs and carpets depends on several factors, including:

Foot traffic: High-traffic areas should be vacuumed more often, ideally 2-3 times per week.Vacuuming low-traffic areas once a week is sufficient.

Pets: If you have pets, daily vacuuming is recommended to remove pet hair and dander.

When Not to Use a Wet Dry Vacuum on Carpet

While wet dry vacuums are versatile, However, there are certain situations when a wet-dry vacuum should not be used. Unless directed by the manufacturer, Do not use a wet-dry vacuum on carpets made of natural fibers. This leads to mold and mildew growth beneath the surface.

Also these vacuums are not designed for deep carpet cleaning or removing set-in stains, as they lack the necessary agitation and heat treatment functions. Using them on delicate or antique carpets is also discouraged, as the strong suction can damage fragile fibers. Always opt for a vacuum cleaner specifically intended for carpets, or consider professional cleaning services for optimal care and maintenance of your carpeted floors.

Why Wet Dry Vacuums Are Ideal for Pet Owners with Carpeted Homes

Pet owners can greatly benefit from utilizing a wet-dry vacuum on carpets. Here’s why:

  • Pet Hair Removal: The robust suction capability of a wet-dry vacuum excels at pulling out pet hair that’s deeply entrenched in carpet fibers, Which makes cleaning easier.
  • Pet Hair Removal: Whether it’s sucking up spills or pet accidents, wet-dry vacuums are adept at removing liquids and dirt from carpets quickly and effectively.
  • Odor Reduction: By sucking up spills and pet accidents before they soak in, a wet-dry vacuum can help reduce lingering odors in your home.

Maintenance Tips for Using a Wet Dry Vacuum on Carpets

Here are some tips for using a wet/dry vacuum on carpet:

  • Use the right attachments. 
  • Keep the vacuum’s airflow clear.
  • Use extraction to spot clean.
  • If you’re transitioning from wet to dry, empty and clean the tank to avoid getting your carpet wet.

Wrapping Up

A wet-dry vacuum is a highly versatile and effective tool for cleaning carpets. From quick cleanups to tackling tough stains, this vacuum is perfect for those who need a reliable, multi-purpose cleaner. Whether you’re dealing with everyday dirt or unexpected spills, a wet-dry vacuum can be your go-to solution for maintaining clean, fresh carpets.

.

Filed Under: Essentials

Multi-Surface vs. All-Purpose Cleaners: Which Is Best?

October 8, 2024 by bigfishtavernlagunaadmin Leave a Comment

In cleaning the house, we are often confused by the variety of products available. The thought of which is better and which works more comes to mind. Top contenders include multi-surface and all-purpose cleaners. Although we think the two products are similar in function, but no, there are many differences between these two products.

In this article, we will help you understand the key differences between these two products, their functionality, and which one is better for your home. Lets begin

Multi-Surface vs. All-Purpose Cleaners

What is a All-purpose cleaner?

A multi-surface cleaner is a cleaner that is meant to clean a wide range of surfaces without harming the surface or the cleaner. These cleaners are formulated to work on delicate materials, including:

  • Glass and mirrors
  • Hardboard and fiberboard, some covered with a layer of paper, as well as a select set of uncoated woods
  • Stainless steel
  • Marble and granite
  • Ceramic and porcelain
Multi-Surface vs. All-Purpose Cleaners

Multi-surface cleaners can be mild so they are unlikely to leave streaks on items that are shiny such as glass, or harm material such as natural stone. They are perfect for cleaning several segments of your house so that you do not have to switch between products.

What is an Multipurpose cleaner?

An all-purpose cleaner, as its name suggests, Specially designed to clean dirt from different areas of the house. This cleaner is particularly well known for its effectiveness.It helps remove dirt, grease, and grime from commonly used surfaces like:

  • Kitchen countertops (laminate, granite, or marble)
  • Bathroom tiles and sinks
  • Wood furniture
  • Plastic and metal outdoor furniture
Multi-Surface vs. All-Purpose Cleaners

However, all-purpose cleaners can sometimes be too harsh for certain surfaces, especially those that are more sensitive to chemicals, like stainless steel or glass. For these surfaces, you may need a specialized product to avoid damage or streaks.

Key Differences Chart Between Multi-Surface and All-Purpose Cleaners

When choosing between multi-surface and all-purpose cleaners, it’s important to understand the key differences in their formulation, use, and effectiveness on various surfaces. Here’s a breakdown of the main distinctions:

[wptb id="1288" not found ]

This chart should help users choose the right cleaner based on their needs!

Multi-Surface vs. All-Purpose Cleaners When should you use which?

Choosing between multi-surface and all-purpose cleaners comes down to the specific surfaces you are cleaning and the type of dirt or grime you need to remove. Here’s a quick guide to help you decide:

When to Use Multi-Surface Cleaners

The cleaning power of multipurpose cleaners is very high. So this cleaner can also effectively remove dirt from the hard surface of ovens, stovetops and bathroom tiles.

When to Use All-Purpose Cleaners

All purpose cleaners are suitable for cleaning glass items in the home such as glass windows, mirrors, furniture glass. Also stainless steel equipment, electronics skin can be cleaned with the help of all purpose cleaners with very gentle touch. This will keep your beautiful items sparkling like new.

Tip: If you’re unsure whether a product is safe for a specific surface, always check the label or test it on a small, inconspicuous area first.

Are The Two Cleaners Equally Effective?

Both multi-surface and all-purpose cleaners are effective in their own right, but their strength depends on the type of cleaning job at hand. For example:

all-purpose cleaners are incredibly effective at cleaning a wide variety of delicate surfaces, such as glass, mirrors, and stainless steel. They excel at leaving streak-free finishes and preventing damage to sensitive materials.

multi-surface cleaners are better suited for tackling tougher messes and dirt. Their stronger chemical composition can break down grime and grease more effectively, especially in the kitchen or bathroom.

In summary, they are equally effective, but only when used on the appropriate surfaces. Using them incorrectly, such as applying an all-purpose cleaner on delicate surfaces, may lead to less desirable results.

Can You Use Both Cleaners in Your Home?

Yes, both cleaners can be used for your cleaning needs. But you need to be sure where to use which cleaner. Read product instructions to reduce risk. This will save you both time and money. all-purpose cleaners are great for delicate surfaces like wood, glass, and stainless steel, offering a gentler cleaning solution that won’t cause damage. On the other hand, multi-surface cleaners are excellent for tougher jobs, like cleaning countertops, floors, and areas prone to grime or grease.

Finishing Statement

You may need both Multi-Surface and all purpose. Because the effectiveness of the two cleaners is different. You must know which cleaner you should use on which surface. This will keep your stuff risk free and shiny. This way you can enjoy the effectiveness of both cleaners with proper use.

Frequently Asked Questions

Can I use Multipurpose cleaners on glass?

While some Multipurpose cleaners claim to work on glass, many can leave streaks or a cloudy finish. For the best results, use an all-purpose cleaner that is designed for streak-free cleaning on glass and mirrors.

Are all-purpose cleaners safe for marble countertops?

Yes, most all-purpose cleaners are formulated to be gentle on natural stone surfaces like marble and granite. Always read the product label to confirm it’s safe for use on stone surfaces.

Can an all-purpose cleaner disinfect surfaces?

Some all-purpose cleaners contain disinfecting properties, but not all do. If you’re looking for a cleaner that kills germs and bacteria, make sure the product is labeled as a disinfectant or use a separate disinfecting cleaner.

Is it safe to use a All-purpose cleaners  on electronic devices?

Some multi-surface cleaners are gentle enough to use on electronic screens. However, it’s important to ensure the cleaner is safe for electronics and to apply it to a cloth rather than spraying directly on the device.

Do Multipurpose cleaners work on stainless steel?

Multipurpose cleaners can sometimes leave streaks or smudges on stainless steel surfaces. It’s best to use a All-purpose cleaners specifically designed for stainless steel to achieve a streak-free shine.

Filed Under: Essentials

How Many Watts Is a Vacuum Cleaner?

September 23, 2024 by bigfishtavernlagunaadmin Leave a Comment

Vacuum cleaners are indispensable appliances in each home as they help to clean the place and remove dirt. However, while buying a vacuum cleaner, many users wonder, ‘How many watts does a vacuum cleaner have?’ In fact, it is quite important to know about watts for the functioning of the appliance. Well, in this article, you will learn all matters regarding vacuum cleaner wattage, its correlation to the efficiency of a vacuum cleaner, plus many other crucial factors to look for before choosing a particular vacuum cleaner for your home, commercial building, or office.

How Many Watts Is a Vacuum Cleaner?

What Is Vacuum Cleaner Wattage?

Before going down to the details of the watts of a given vacuum cleaner, it is good to know what it means in the case of electrical appliances. A watt (W) is a name of the power which shows the speed when energy is consumed. In case of vacuum cleaners, the wattage is the electric power used to turn the motor on the cleaner.

A vacuum cleaner’s wattage rating tells consumers how much energy is required by the cleaner but it does not necessarily inform them about the cleaner’s suction ability or cleaning effectiveness. There weak points lie in the fact that the higher wattage the vacuum consumes electricity for cleaning but it doesn’t necessarily have improved cleaning ability.

Average Wattage of Different Types of Vacuum Cleaners

Vacuum cleaners come in various types, each with different power ratings. Below are the typical wattage ranges for the most common vacuum cleaner types:

[wptb id="1215" not found ]

This chart highlights the typical wattage range for different types of vacuum cleaners, helping users compare power consumption and choose the right model based on their cleaning needs.

Should More Wattage of the Vacuum Cleaner Mean More Efficiency and Power?

Some of them include; Wattage: It is still widely believed that any vacuum cleaner with more wattage will do a better job. Although wattage indicates how much power is consumed by the motor, it does not make it a better cleaner and with more suction power.

Several other factors contribute to a vacuum cleaner’s efficiency:Several other factors contribute to a vacuum cleaner’s efficiency:

Airflow: Airflow refers to the amount of air that is able to flow through the vacuum cleaner per second and it is measured in liters per second flows into a vacuum cleaner, the better its abilities in picking up the debris and dust are.

Suction Power: This is expressed in terms of watts or pascals to specify the force by which the vacuum sucks the dirt in its chamber.

Filter Efficiency: Today’s vacuums have filters such as HEPA (High-Efficiency Particulate Air), which has a large contribution to the cleaning procedure in which fine particles are captured.
Nozzle Design: It is thus important to evaluate the design of the vacuum nozzle for it determines the ability of the vacuum cleaner to pick up dirt on various surface types.

Power Consumption of Vacuum Cleaners and Electricity Costs

When you try to answer the question, “how many watts is a vacuum cleaner?” you are actually trying to determine which one consumes how much energy. Another advantage of knowing how much electricity is consumed by your vacuum is inasmuch as you will be able to assess the costs.

For example, there is a vacuum cleaner that has a power rating of 1200 watts.

 If you use it for one hour, it will use one. Itcosts 2 kilowatt-hours (kWh) of electricity. The cost of running this vacuum cleaner is deemed to be an Electricity Cost in accordance with the region. For example, if electricity = $ 0. 13 per kWh, if you power your vacuum for an hour, then the cost will be $0. 16.

Here’s a simple formula to calculate the electricity cost of your vacuum: Thus:Power in kilowatt hour × Time in hours × Unit cost per kilowatt hour = Total cost of electrical powerThus, Power in kilowatt hour × Time × Unit cost per kilowatt hour = Total cost of electrical power

From a long-term perspective, getting an energy efficient vacuum cleaner with less wattage would mean less money spent on electricity bills and the same cleaning would be achieved.

Energy Efficiency Labels: What Do They Mean?

In this case, when purchasing a vacuum cleaner, check for the energy star or the EU energy ratings. These labels make it easier for the customers to compare the energy efficiency of various models of vacuum cleaners. This is usually done on a scale making ‘A’ the most efficient when it comes to energy consumption.

However in the European Union through a regulation which seeks to limit energy consumption; vacuums are limited to a maximum power of nine hundred watts. The purpose of this rule is to make consumers avoid using their old inefficient vacuums and at the same time the manufacturers are forced to come up with efficient powerful vacuums.

How to Choose the Right Wattage for Your Needs

When choosing a vacuum cleaner, consider the following factors to ensure you get the right wattage for your needs:When choosing a vacuum cleaner, consider the following factors to ensure you get the right wattage for your needs:

  1. Floor Type: If your house contains most of the carpets you might require a powerful vacuum cleaner, preferably one that has Wattage of 1000-1500 watts for reciprocation of the duty of cleaning the deep carpet fibers. For those with hard floorings, this means the wattage shouldn’t be very high (about 500- 1000 watts).
  2. Household Size: The largest expenditure is accounted for by households having pets or children and that is why they need to use vacuums possessing higher suction power which corresponds to the higher wattage. On the other hand, if the home or apartment is small in size it can do with a vacuum that has a low wattage.
  3. Usage Frequency: The electric costs can also govern the decision because, if one decides to vacuum more frequently then he should prefer going for a vacuum cleaner that has lesser wattage.
  4. Additional Features: Additional functions such as motorized brush rolls, special filters, and various modes will need greater energy. It should also be thought about if these features are really important and if the consumption of more energy is warranted.

Comparing Suction Power and Wattage

Suction power and wattages are two terms that most people end up using interchangeably but in most cases, they refer to two different things when it comes to the vacuum cleaner. Suction power or rated power expressed either in Watts or air watt is the actual power to pull in the dust or dirt. Wattage on the other hand refers to the total amount of electrical power that must be used by the vacuum.

Sometimes, wattage which is a measure of power can be misleading; a vacuum cleaner that has a very high wattage could have a powerful motor yet the design may be inefficient thus the suction power is low. Thus, consumers should pay more attention to the aspects such as suction, air flow, and filtration capability more than simply the wattage of the required vacuum cleaner.

Cordless vs. Corded Vacuum Cleaners: Wattage Differences

Another factor for decision-making is between corded and cordless vacuum cleaner. Cordless models, of course, are generally lower in wattage and range from 100-400 watts because of this constraint. However, they cannot clean as well as corded vacuums which are electrical, and are plugged into an outlet, thus they draw power (up to 2000 watts and above).

If you desire more heap vacuum suction that is useful when vacuuming a thick carpet or large area then a corded vacuum with high watts may be more appropriate for you. Nonetheless, if portability and absence of a cord are important for you, then a cordless vacuum with lesser Watts will be more appropriate.

Impact of Wattage on Noise Levels

Another criterion that can be used is noise production of a specific vacuum cleaner. In general, it is evident that vacuums with a high wattage are louder because of the strength of the motor. Those who want a quiet vacuum should target models with low wattage or those that are labeled as quiet operation models. Today’s vacuum cleaners for homes with even high wattage come with soundproof mechanisms.

Conclusion: How Many Watts Should Your Vacuum Cleaner Be?

However, wattage, as far as vacuum cleaners are concerned, does not require blanket acceptance of any particular wattage. The amount of watts that the vacuum cleaner should have varies with the cleaning required, size of the house, type of floor, and the costs of electricity that the individual is willing to incur.

In summary:

  • Standard vacuum cleaners with a power ranging from 500 to 1000 watts are sufficient for small apartments or homes where mostly hard floors are used.
  • Animal lovers and homeowners with thick carbohydrates floors may necessitate stronger vacuum cleaner models with wattage of 1, 000 to 1, 500 watts.
  • Cordless vacuums even though they possess low wattage allow easy use and rugged carriage hence are suitable for spot cleaning.

Please don’t get confused by wattage, it is but one factor that determines efficiency of the vacuum cleaner. It is important to also note that suction power, airflow, and the ability of the filter to capture allergens are key determinants of the best vacuum cleaner to use for cleaning your house.

Frequently Asked Questions

Is high wattage equivalent to good suction power?

In fact, a new vacuum with a higher wattage uses more electricity than one with a lower wattage but it does not mean it is effective in its suctioning abilities. Other aspects such as design, airstream, and methods of filtering also impact the level of cleaning achieved.

What is the average wattage of a vacuum cleaner?

The power usage of vacuum cleaners is rather moderate; it oscillates around 600-1200 watts in the case of the upright models, and 1200-2000 watts in the case of the canister vacuums. Stick and the robot vacuums consume less power ranging from 30-600W depending on the specific model.

How can I estimate the cost of running a vacuum cleaner?

The cost depends on the wattage of the vacuum cleaner used and the amount of time it is used. For instance, it will cost about $0.16 to use a 1200-watt vacuum for one hour if $0.13 per kilowatt hour is spent on electricity.

Filed Under: Essentials

How Long Will Dehydrated Food Last in Vacuum Sealed Bags

September 17, 2024 by bigfishtavernlagunaadmin Leave a Comment

Dehydrated food in vacuum-sealed bags can last up to 10 years. Proper storage conditions are essential for maximum shelf life.

How Long Will Dehydrated Food Last in Vacuum Sealed Bags

Dehydrating food removes moisture, which prevents the growth of bacteria and mold. This preservation method extends the shelf life of various foods, making it ideal for long-term storage. Vacuum sealing further enhances this by removing air, which slows down oxidation and spoilage.

For those looking to build an emergency food supply or reduce food waste, vacuum-sealed dehydrated foods offer a practical solution. Optimal storage conditions include a cool, dark, and dry environment. By following these guidelines, you can ensure that your dehydrated food remains safe and nutritious for years. This method is both cost-effective and efficient for long-term food storage needs.

Benefits Of Dehydrated Food

Dehydrated food offers many benefits that make it a great choice. It is lightweight, long-lasting, and easy to store. It also retains most of its nutrients, making it a healthy option. Let’s dive deeper into the benefits of dehydrated food.

Nutritional Value

Dehydrated food keeps most of its nutritional value. Vitamins and minerals stay intact during the drying process. This means your snacks are still healthy and tasty.

Here is a table to show the nutritional value of some common dehydrated foods:

[wptb id="1174" not found ]

Convenience

Dehydrated food is very convenient. It is lightweight, making it easy to carry. This is perfect for hiking, camping, and travel. There is no need for refrigeration, so it saves space in your fridge.

  • Easy to pack
  • No refrigeration needed
  • Long shelf life

Dehydrated food also saves time. You do not need to wash, peel, or chop. Just open the bag and eat. This makes it ideal for busy days or emergency situations.

How Long Will Dehydrated Food Last in Vacuum Sealed Bags

How Long Will Dehydrated Food Last in Vacuum Sealed Bags?

Dehydrated food is an excellent option for long-term storage due to its reduced moisture content, which significantly slows down spoilage. When vacuum sealed, the shelf life of dehydrated foods increases dramatically, as the absence of oxygen inhibits the growth of bacteria, mold, and yeast.

On average, dehydrated food stored in vacuum-sealed bags can last between 5 to 10 years depending on the type of food and storage conditions. Some foods, like vegetables and fruits, may last around 5 years, while items such as dehydrated meats or grains can potentially last up to 10 years or more when stored in a cool, dark place. The key factors that affect the longevity are the type of food, storage temperature, and humidity levels.

For maximum shelf life, it’s essential to keep the vacuum-sealed bags in a dry, temperature-stable environment, ideally below 70°F. Additionally, including oxygen absorbers in the packaging can further extend the lifespan of dehydrated foods, ensuring they remain fresh and nutrient-rich for years to come.

Shelf Life Of Dehydrated Food

Dehydrated food is a great way to extend the life of your favorite foods. It reduces the water content, making it less prone to spoilage. But how long does it last when stored in vacuum-sealed bags? Let’s dive into the factors that influence its longevity and the typical duration you can expect.

Factors Influencing Longevity

  • Quality of Dehydration: Properly dehydrated food lasts longer. Ensure all moisture is removed.
  • Storage Conditions: Store in a cool, dark place. High temperatures shorten shelf life.
  • Vacuum Seal Quality: A good seal keeps air and moisture out. Double-check seals for leaks.
  • Type of Food: Different foods have different shelf lives. Fruits and vegetables vary.
  • Packaging Material: Use high-quality, food-grade vacuum bags. They provide better protection.

Typical Duration

The typical duration for dehydrated food in vacuum-sealed bags varies. Here’s a quick overview:

[wptb id="1175" not found ]

Remember, these are just estimates. Proper storage and high-quality materials extend shelf life. Always check food before consuming. Look for signs of spoilage like off-odors or discoloration.

Impact Of Vacuum Sealing

Vacuum sealing is a technique that can significantly extend the shelf life of dehydrated food. It removes air from the storage bag, creating an airtight seal. This process helps in preserving the food’s quality and flavor.

How Long Will Dehydrated Food Last in Vacuum Sealed Bags

Extended Shelf Life

Vacuum sealing can extend the shelf life of dehydrated food by several years. Without air, the growth of bacteria, mold, and yeast is inhibited. This keeps the food safe to eat for longer periods.

[wptb id="1176" not found ]

Protection Against Contaminants

Vacuum sealing provides excellent protection against contaminants like dust and insects. The airtight seal prevents any external elements from entering the bag. This keeps the food clean and safe.

  • Prevents moisture from entering the bag.
  • Blocks oxygen, which can spoil food.
  • Keeps out pests and insects.

This protective barrier helps in maintaining the food’s nutritional value and taste. It ensures that the dehydrated food remains fresh for consumption.

Storage Conditions

Dehydrated food lasts longer in vacuum-sealed bags under the right storage conditions. These conditions play a crucial role in maintaining food quality and safety. Below are the most important factors to consider.

Temperature Control

Temperature significantly affects the shelf life of dehydrated food. Store vacuum-sealed bags in a cool environment. Ideally, keep them at or below 60°F (16°C). Higher temperatures can speed up the degradation process.

Avoid storing the bags near heat sources like ovens or heaters. Fluctuating temperatures can cause condensation. This can lead to mold and spoilage.

[wptb id="1177" not found ]

Light And Humidity

Light and humidity are also critical factors. Store the vacuum-sealed bags in a dark place. Light can degrade the food quality and cause nutrient loss.

Use a pantry, closet, or opaque storage bins. These options keep the light out. Humidity is another enemy. Keep the storage area dry. Moisture can penetrate even vacuum-sealed bags over time.

Use desiccant packs to absorb excess moisture. This helps extend shelf life. Ensure the storage area has good ventilation. Poor ventilation can lead to humidity buildup.

  • Store in a dark place
  • Keep the area dry
  • Use desiccant packs
  • Ensure good ventilation

By following these storage conditions, you can maximize the shelf life of dehydrated food in vacuum-sealed bags.

Signs Of Spoilage

Even the best vacuum-sealed bags can’t keep food fresh forever. It’s important to know the signs of spoilage in dehydrated food. Identifying these signs early can prevent foodborne illness. Look, smell, and feel your food before eating.

Visual Indicators

Check for changes in color and texture. Spoiled food often has dark spots or mold. Look for any moisture inside the bag. Moisture means the seal may be broken. Inspect the bag for any punctures or leaks.

[wptb id="1178" not found ]

Smell And Texture

Smell the food after opening the bag. Spoiled food often has a bad odor. Fresh dehydrated food should smell neutral or like the original food. Feel the texture with clean hands. Dehydrated food should be crisp or dry. If it feels soft or sticky, it may be spoiled.

  • Odor: Bad smell indicates spoilage.
  • Texture: Should be crisp, not soft or sticky.

Best Practices For Storage

Storing dehydrated food in vacuum-sealed bags is great for long-term use. Follow these best practices to ensure your food stays fresh and lasts as long as possible.

Proper Sealing Techniques

Using the right sealing techniques is crucial. Ensure the bags are completely airtight. Here’s a step-by-step guide:

  1. Use a vacuum sealer to remove all air.
  2. Double-check the seal for any leaks.
  3. Label the bags with the date and contents.

Proper sealing prevents moisture and air from entering. This helps keep the food safe and fresh.

Ideal Storage Locations

The location where you store your vacuum-sealed bags impacts shelf life. Consider these ideal storage spots:

  • Cool and Dark Places: Store in a pantry or cupboard away from sunlight.
  • Consistent Temperatures: Avoid places with temperature fluctuations like garages or attics.
  • Low Humidity: High humidity can compromise the vacuum seal.

Keeping your dehydrated food in the right environment is key. Protect it from light, heat, and moisture.

Faqs On Dehydrated Food

Dehydrated food offers a convenient way to store meals long-term. Many people have questions about its shelf life, especially when vacuum-sealed. Here, we answer some frequently asked questions on this topic to help you make the most of your dehydrated food storage.

Common Concerns

Many wonder how long dehydrated food lasts. Vacuum-sealed bags extend shelf life significantly. Here are common concerns:

  • How long will it last? Dehydrated food in vacuum-sealed bags can last 2-5 years.
  • Does vacuum sealing make a difference? Yes, it keeps out air and moisture, preserving the food.
  • Can I store it anywhere? Store in a cool, dark place for best results.

Expert Tips

Experts suggest specific tips to maximize the shelf life of dehydrated food:

  1. Use Mylar bags with oxygen absorbers to extend shelf life further.
  2. Label each bag with the date of dehydration and contents.
  3. Check the seal periodically to ensure it remains intact.

Here’s a quick reference table:

[wptb id="1179" not found ]

Following these tips ensures your dehydrated food stays fresh and ready to eat.

Ending Thought

Dehydrated food stored in vacuum-sealed bags can last for years. Proper storage conditions are essential. Keep them in a cool, dark place. Regularly check for signs of moisture or damage. This method ensures long-term food preservation, making it a reliable option for emergencies and outdoor adventures.

Filed Under: Essentials

Why are Vacuums So Loud: Causes and Solutions

September 16, 2024 by bigfishtavernlagunaadmin Leave a Comment

Vacuums are loud due to their powerful motors and airflow dynamics. The noise is a byproduct of air being forcefully sucked in and pushed through the vacuum’s system.

Why are Vacuums So Loud?

Understanding why vacuums produce such a high level of noise requires a brief look at their design and function. These household helpers rely on electric motors to create suction, which is essential for picking up dirt and debris. As the motor operates, it generates noise through both mechanical action and the movement of air.

The sound intensity can vary depending on the vacuum’s construction, including the design of its motor, the materials used, and how well it’s insulated against noise. With the right knowledge, choosing a quieter vacuum becomes easier, enhancing the cleaning experience without the excessive noise.

Vacuums So Loud: What Says Science

Ever wonder why vacuums are so loud? It’s all about the science behind them. Vacuums create noise through air movement and motor function. Let’s dive into the science of vacuum noise and understand the ‘Decibel Drama’.

Sound Waves And Suction: A Symphony Of Science

Vacuum cleaners are noisy for a reason. They use air to clean. Air moves fast in a vacuum. This makes sound waves. These sound waves make the loud noise you hear.

Key factors influencing the sound:

  • Air speed
  • Machine design
  • Filters and nozzles

The design of the vacuum affects the sound. Tight air paths can make the noise louder. Different filters and nozzles change the sound too. It’s like music instruments. Each part changes the sound.

Motor Matters: Heart Of The Hubbub

The motor is the heart of a vacuum. It makes the vacuum work. But it also makes noise. The motor spins very fast. This creates a loud hum.

Motor specs that matter:

  • Motor size
  • Motor speed
  • Motor type

Bigger motors can mean louder noise. Faster motors increase the sound. Different motor types have different sounds. Some are quieter than others.

The motor’s parts can also add noise. Things like brushes and bearings. When these parts wear out, they get louder.

Historical Perspective: Evolution Of Vacuum Volume

The roar of a vacuum cleaner is a sound many recognize. Over time, vacuum cleaner noise has evolved significantly. In this section, we’ll explore the journey from the first vacuum cleaners to the powerful machines of today, understanding how and why they generate so much noise.

From Humble Beginnings To High Decibels

The earliest vacuum cleaners were simple and mechanical. They were much quieter than today’s models. Early hand-pumped models in the 19th century produced minimal noise. However, as technology improved, vacuum cleaners became electric and more powerful.

Electric motors increased suction but also noise levels. By the mid-20th century, vacuums were common in homes but were quite loud. The increase in decibels was due to more robust engines designed to provide better cleaning efficiency.

Technological Tinkering: The Quest For Quiet

Manufacturers soon recognized the need for quieter vacuums. They began to innovate and tinker with designs. Engineers worked on sound insulation and motor refinements to reduce the din. Brushless motors and improved airflow paths helped decrease volume.

  • Enhanced filters reduced noise without sacrificing suction.
  • New materials absorbed sound better.
  • Design changes in fan blades made operation quieter.

Today, we have vacuums that are both efficient and relatively quiet. The quest for a silent vacuum continues, with innovations in every new model.

Components Causing Chaos: Anatomy Of A Noisy Vacuum

Let’s dive into the Components Causing Chaos: Anatomy of a Noisy Vacuum. Ever wonder why vacuums are so loud? The answer lies within. Two main parts often lead the charge in creating that familiar vacuum roar. Understanding these can help us better grasp the noise issue.

The Fan Fiasco: Spinning Into Sound

The heart of any vacuum is its fan. This fan does a crucial job. It sucks in air (and dirt) from one side and pushes it out the other. But this action is not silent. The fan’s blades cut through the air, creating sound. The faster they spin, the louder the sound. Here’s a simple breakdown:

  • Blade design – Some blades are noisier than others.
  • Speed – Faster spins equal more noise.
  • Material – Certain materials can amplify sound.

Airflow Agitation: The Turbulence Trigger

Air moving is never completely silent. In vacuums, air travels fast. It goes through narrow spaces, around corners, and past obstacles. This journey causes turbulence. Turbulence is chaotic air movement. It’s like water rapids but in the air. This chaos creates noise. Key points include:

  • Air speed – Faster air means more turbulence.
  • Path shape – Sharp turns increase noise.
  • Obstacles – Blockages can cause louder turbulence.

Design Dynamics: How Structure Influences Sound

The loudness of a vacuum cleaner often comes down to its design dynamics. How a vacuum is built can greatly influence the sounds it makes. Let’s explore how structure plays a crucial role in the noise level of vacuums.

Compact Conundrum: Size Versus Silence

Smaller vacuums might seem like they should be quieter. This isn’t always true. Their compact design can actually make them louder. Here’s why:

  • Tight spaces in small vacuums cause air to move faster, creating more noise.
  • Smaller parts often work harder to provide the same cleaning power as bigger ones, leading to extra sounds.

Designers face a challenge: making a vacuum both small and quiet. This balancing act is tough but not impossible with innovative designs.

Material Matters: Sound Absorption In Design

The materials used in a vacuum’s design also affect its noise level. Some materials can absorb sound better than others. Let’s see how:

[wptb id="1152" not found ]

Vacuums designed with sound-absorbing materials like rubber can be quieter. These materials help reduce the noise that escapes into the air around us.

The Impact Of A Loud Vacuum On Health And Home

The roar of a vacuum cleaner is a common household sound. Yet, few consider the effects of this noise on our health and homes. Loud vacuums can disrupt peace and pose health risks. Understanding these impacts is crucial for well-being.

Hearing Hazards: Long-term Loudness

Loud vacuums can harm our ears. Prolonged exposure to high-decibel noise damages hearing over time. Below are key points on how loud vacuums affect hearing:

  • Noise above 70 decibels can lead to hearing loss.
  • Most vacuums operate at 70 to 80 decibels.
  • Consistent use without ear protection is risky.

It’s essential to limit time spent around loud vacuums. Using ear protection can help preserve hearing health.

Domestic Disturbance: The Vacuum’s Roar And Family Life

The noise from vacuums can disrupt family activities. Loud sounds interrupt conversations and leisure time. They can also cause stress and tension within the home. Here’s how a vacuum’s noise can affect family life:

[wptb id="1153" not found ]

Choosing quieter times for vacuuming can help maintain a calm home environment.

Quieting The Beast: Innovations In Noise Reduction

Vacuum cleaners are essential in keeping our homes clean. But their loud noise can be a problem. Luckily, new technologies are making vacuums quieter. Let’s explore these cool changes.

Silent Suction: Breakthroughs In Vacuum Technology

Vacuums are getting smarter and quieter. Engineers have created new motors that make less noise. They also use better designs to reduce sound. Some vacuums now have insulation that absorbs sound. Others have special nozzles that lower noise. Here’s what’s new in quiet vacuum tech:

  • Advanced Brushless Motors: Less noise, more power.
  • Sound Insulation: Traps noise inside the vacuum.
  • Improved Airflow: Less noise as air moves through.
  • Noise-Reducing Nozzles: Clean quietly with smart design.

Do-it-yourself Decibel Drop: Tips For A Quieter Clean

You can make your vacuum quieter too. Try these simple tips:

  1. Check the Filter: A clean filter lets air flow smoothly.
  2. Tighten Loose Parts: This stops extra rattling sounds.
  3. Use on Low: Lower settings make less noise.
  4. Add Mats: Put a mat under the vacuum to muffle sound.

With these tips, your vacuuming can be a peaceful task. Enjoy a cleaner home without the loud noise!

Future Of Cleaning: The Quest For The Quiet Vacuum

Imagine a home where vacuums hum softly. The loud, ear-piercing noise of traditional vacuum cleaners is a common annoyance. The quest for a quiet vacuum is not just a dream. It’s a challenge that manufacturers are tackling head-on. With technology advancing, the loud noise of vacuums could soon be history. Let’s explore what the future holds for whisper-quiet cleaning devices.

Prospects In Product Development: What’s Next?

Product developers are on a mission. They aim to create vacuums that are both powerful and peaceful. Research focuses on efficient motors that make less noise. They also work on designs that reduce sound. Insulation techniques are getting better. Sound dampening materials are in use more often. Here are some key focus areas:

  • Brushless Motors: These motors are quieter and have a longer life.
  • Improved Airflow: Smoother airflow reduces turbulence and noise.
  • Sound Insulation: New materials help to muffle the motor’s roar.

Noiseless Nirvana: Imagining The Ideal Vacuum

The ideal vacuum is a reality in the making. It blends high performance with low noise. The vision is clear: a vacuum that cleans effectively without disturbing peace. Noiseless nirvana means more than just a quiet motor. It means a complete design that respects our need for calm. Here’s what the ideal vacuum features:

[wptb id="1154" not found ]

Quiet vacuums are not a distant dream. They are on the horizon. Get ready for a future where cleaning doesn’t mean noise.

Finishing Statement

Understanding the reasons behind the loudness of vacuums can guide us toward quieter cleaning experiences. Manufacturers are constantly innovating to reduce noise without sacrificing power. Embracing these advancements could lead to more peaceful home environments. Remember, the right vacuum can blend efficiency with tranquility.

Choose wisely for a less noisy future.

Filed Under: Essentials

Why is My Vacuum Smoking? Right Causes & Solutions

September 16, 2024 by bigfishtavernlagunaadmin Leave a Comment

A vacuum smoking usually means a clogged filter or a damaged motor. Both issues need immediate attention to prevent hazards.

Vacuums are essential for maintaining clean homes, but they can sometimes malfunction. A smoking vacuum is a serious issue that shouldn’t be ignored. This problem often arises due to a clogged filter or a damaged motor. Regular maintenance and timely troubleshooting can prevent such incidents.

Ignoring the smoke can lead to more severe damage or even fire hazards. Understanding the root causes helps in taking prompt action. Always ensure your vacuum is in good condition to avoid such issues. Proper care not only extends the vacuum’s lifespan but also ensures a safe and clean environment.

Why is My Vacuum Smoking?

Common Causes Of Vacuum Smoking

Is your vacuum cleaner smoking? There are many reasons why this could happen. Knowing the common causes can help you fix the problem quickly. Below, we explore some of these common causes.

Overheating Issues

One common cause of a smoking vacuum cleaner is overheating. Vacuums can overheat for several reasons:

  • Running the vacuum for too long
  • A blocked hose
  • A full dust bag

When the vacuum overheats, it can cause the motor to smoke. This can be dangerous. Always check the vacuum’s manual for the recommended running time. Take breaks if needed.

Blocked Filters

Another reason for a smoking vacuum is blocked filters. The filters trap dust and dirt. Over time, these filters can get clogged:

  • HEPA filters
  • Foam filters
  • Fabric filters

Blocked filters make the motor work harder. This can lead to overheating and smoking. Cleaning or replacing the filters regularly can prevent this. Check your vacuum’s manual for instructions on how to clean the filters.

Broken Brush Roller

Begin by checking for a broken brush roller, as a malfunctioning roller can lead to excessive friction and overheating, resulting in smoke. If the brush roller appears intact, proceed to examine the vacuum’s air filter. A clogged or dirty filter can impede proper airflow, causing the motor to overheat and emit smoke.

Burning Smell From The Motor

A burning smell from your vacuum can be alarming. This often means a problem with the motor. Understanding the cause helps you fix it quickly. Below, we explore common reasons for this issue.

Motor Malfunctions

The motor is the heart of your vacuum. If it malfunctions, you might notice a burning smell. Common signs include strange noises and reduced suction power. Here are a few reasons why this happens:

  • Overheating: If the motor gets too hot, it can emit a burning smell. Ensure proper airflow to avoid overheating.
  • Electrical Issues: Faulty wiring or short circuits can cause the motor to burn.

Always check these components to ensure your vacuum operates smoothly.

Worn-out Motor Brushes

Motor brushes play a crucial role in the function of your vacuum. Over time, they wear out and can cause a burning smell. Signs of worn-out brushes include:

  1. Sparks: Visible sparks near the motor.
  2. Noise: Grinding or screeching sounds.
  3. Performance: Decreased efficiency and power.

Replacing the brushes can often resolve these issues.

Electrical Problems

Your vacuum cleaner smoking can be alarming. One common reason could be electrical problems. Electrical issues can cause serious damage to your vacuum. Addressing these problems promptly is crucial. Let’s explore two main electrical issues: frayed wires and faulty connections.

Frayed Wires

Frayed wires are a common cause of electrical problems. Over time, wires can wear out. Pets might chew on them. Moving the vacuum around can also damage the wires.

Signs of frayed wires include:

  • Visible wire damage
  • Exposed copper strands
  • Sparks or smoke

Frayed wires can create a short circuit. This can lead to smoking and even fire. Regularly check the power cord. Replace it if you see any damage.

Faulty Connections

Faulty connections can also cause your vacuum to smoke. Loose or damaged connections can disrupt the electrical flow. This can result in overheating and smoke.

Look for these signs:

  • Intermittent power loss
  • Loose plugs
  • Burn marks on connectors

To fix faulty connections, ensure all plugs are secure. Inspect the connectors for any damage. Replace any faulty parts immediately.

Here’s a quick table summarizing the issues:

[wptb id="1138" not found ]

Addressing these electrical problems can prevent smoking and extend your vacuum’s life.

Clogged Hose Or Attachments

One common reason for your vacuum smoking is a clogged hose or attachments. When debris blocks the airflow, the motor can overheat. This may lead to smoke and a burning smell. Addressing these clogs promptly is crucial.

Debris Build-up

Debris build-up often happens gradually. Tiny particles accumulate inside the hose or attachments. Over time, they form larger blockages. Regular vacuum maintenance can help prevent this issue.

Use these tips to check for debris build-up:

  • Inspect the hose for visible obstructions.
  • Detach attachments and look inside them.
  • Shine a flashlight through the hose to spot blockages.

If you find any debris, remove it immediately. This can save your vacuum from damage.

Obstruction Removal

Removing obstructions is a simple process. Follow these steps to clear your vacuum hose and attachments:

  1. Turn off and unplug the vacuum.
  2. Detach the hose and attachments.
  3. Use a long stick or wire to push out blockages.
  4. Rinse the hose with water if necessary.
  5. Let all parts dry completely before reassembling.

For stubborn clogs, try using a vacuum attachment cleaning tool. These tools are designed to reach and remove debris effectively.

[wptb id="1139" not found ]

Taking these steps will help keep your vacuum running smoothly. Regular maintenance prevents clogs and extends the life of your vacuum.

Belt Issues

Experiencing a smoking vacuum can be alarming. One of the common causes is belt issues. Vacuum belts play a crucial role in the machine’s performance. They can encounter problems that lead to smoking. Let’s explore the potential belt issues in detail.

Slipping Belt

A slipping belt can cause your vacuum to smoke. This happens if the belt loses its grip on the vacuum’s brush roll. The friction from the slipping belt generates heat. This heat can produce smoke. To fix this, you can try the following steps:

  • Turn off and unplug the vacuum.
  • Inspect the belt for wear and tear.
  • Replace the belt if it appears loose or damaged.

Ensure the new belt fits snugly. This will prevent further slipping and smoking.

Broken Belt

A broken belt is another culprit behind a smoking vacuum. A broken belt disrupts the normal function of the vacuum. It can cause the motor to overheat. This overheating can lead to smoke. Follow these steps to address a broken belt:

  1. Turn off and unplug the vacuum.
  2. Remove the vacuum’s bottom plate.
  3. Locate and remove the broken belt.
  4. Install a new belt according to the manufacturer’s instructions.

Regularly check your vacuum belts. This helps prevent unexpected breaks and smoking issues.

[wptb id="1140" not found ]

Overfilled Dust Bag Or Bin

If you notice your vacuum smoking, it can be alarming. One common reason is an overfilled dust bag or bin. When the bag or bin is full, the vacuum struggles to work efficiently. This can cause the motor to overheat, leading to smoke. It’s essential to keep your vacuum’s dust bag or bin clean to prevent this issue.

Emptying The Bag

Emptying the dust bag regularly is crucial for your vacuum’s health. Follow these steps to ensure it’s done correctly:

  1. Turn off and unplug the vacuum.
  2. Locate the dust bag compartment.
  3. Remove the bag carefully to avoid spilling dust.
  4. Dispose of the bag if it’s disposable.
  5. If reusable, empty the contents into a trash bin.

Make sure to check the bag frequently. A full bag can restrict airflow, causing the motor to overheat. This can lead to smoking and potential damage.

Cleaning The Bin

For vacuums with a dust bin, cleaning it is essential. Follow these steps to maintain a clean bin:

  1. Turn off and unplug the vacuum.
  2. Detach the dust bin from the vacuum.
  3. Empty the contents into a trash bin.
  4. Rinse the bin with water if it’s washable.
  5. Let it dry completely before reattaching.

A clean dust bin ensures your vacuum works efficiently. It prevents the motor from overheating and smoking.

By regularly emptying the dust bag or cleaning the bin, you can avoid the issue of a smoking vacuum. Always keep an eye on the fill level to maintain your vacuum’s performance.

Improper Maintenance

Improper maintenance is a common cause of vacuum smoking. If your vacuum smokes, it may be due to poor upkeep. Regular maintenance can prevent these issues.

Regular Cleaning

Regular cleaning is vital for your vacuum’s health. Dust and debris can clog the system. Clean the filters and brushes often. Empty the dust bag or bin regularly. A full dust bag can lead to overheating.

  • Clean filters every month.
  • Empty the dust bin after each use.
  • Check and clean the brush roll weekly.

Component Checks

Check all components of your vacuum routinely. Ensure the motor is working well. Look for signs of wear and tear. Damaged parts can cause smoking.

[wptb id="1141" not found ]

Replace worn-out parts immediately. This can prevent bigger issues. Keep your vacuum clean and in good condition. This will ensure it runs smoothly and safely.

Preventive Measures

Preventing your vacuum from smoking is crucial. Regular care and maintenance can make a big difference. Here are some essential preventive measures to follow.

Routine Inspections

Regularly check your vacuum for blockages. Ensure the filters are clean. Inspect the brush roll for tangled hair or debris. A routine inspection can help spot potential problems early. Replace worn-out parts promptly. Use a checklist to keep track of your inspections:

  • Check filters
  • Inspect brush roll
  • Look for blockages
  • Replace worn-out parts

Professional Servicing

Sometimes, professional servicing is necessary. A technician can perform a thorough check. They can clean parts you can’t reach. They can also replace complex components. Regular professional servicing ensures your vacuum runs smoothly. Consider these benefits of professional servicing:

[wptb id="1142" not found ]

Frequently Asked Questions

Why Is My Vacuum Producing Smoke?

The vacuum motor may be overheating or there’s a clog in the hose or filter.

Can A Clogged Filter Cause Vacuum Smoke?

Yes, a clogged filter can restrict airflow, causing the motor to overheat and produce smoke.

Is It Safe To Use A Smoking Vacuum?

No, using a smoking vacuum can be hazardous. Turn it off immediately and inspect for issues.

How Do I Fix A Smoking Vacuum?

Check for clogs, clean or replace filters, and ensure the motor isn’t overheating or damaged.

Could A Faulty Motor Cause Vacuum Smoke?

Yes, a faulty motor can overheat and produce smoke, indicating a need for repair or replacement.

Ending Thought

A smoking vacuum can indicate serious issues. Regular maintenance and proper usage are key to preventing problems. Always check for clogs, clean filters, and inspect the motor. Addressing these concerns promptly ensures your vacuum runs efficiently. Protect your investment and enjoy a cleaner home by keeping your vacuum in top condition.

Filed Under: Essentials

  • « Go to Previous Page
  • Page 1
  • Page 2
  • Page 3
  • Page 4
  • Page 5
  • Page 6
  • Interim pages omitted …
  • Page 8
  • Go to Next Page »

Primary Sidebar

Recent Posts

  • Can You Deep Fry in a Nonstick Pan? My Surprising Results
  • Clay Pot vs Dutch Oven: Which One Right for You?
  • Are Dutch Ovens Non Toxic? All You Need to Know
  • Is Low Specific Heat Capacity Good for Frying Pans​
  • Smeg Kettle vs Mini Kettle: Which One Fits Your Style?

Copyright © 2024 bigfishtavernlaguna.com. All right reserved.