• Skip to primary navigation
  • Skip to main content
  • Skip to primary sidebar
  • About Us
  • Affiliate Disclosure
  • Contact us
  • Cookie Privacy Policy
  • Privacy Policy
  • Sample Page
  • Terms of Use

Kitchen Guide

  • Appliance Reviews
  • Bakeware
  • Buying Guides
  • Product Comparisons
  • Recipes
  • Essentials
  • Cleaning

Essentials

Troubleshooting: Vacuum a Pool with a Cartridge Filter

September 10, 2024 by bigfishtavernlagunaadmin Leave a Comment

Maintaining a clean and sparkling pool is every pool owner’s dream. Whether you’re a new pool owner or a seasoned expert, learning how to vacuum your pool with a cartridge filter system is an essential part of pool maintenance. A cartridge filter helps to keep your pool free from debris, leaves, dirt, and algae, ensuring that your water stays crystal clear. In this detailed guide, we will walk you through the process of vacuuming a pool using a cartridge filtration system.

We’ll cover everything from how cartridge filters work, to steps for vacuuming your pool, common troubleshooting tips, and much more. So, let’s dive in!

How to vacuum pool with cartridge filter

What is a Cartridge Filter and How Does It Work?

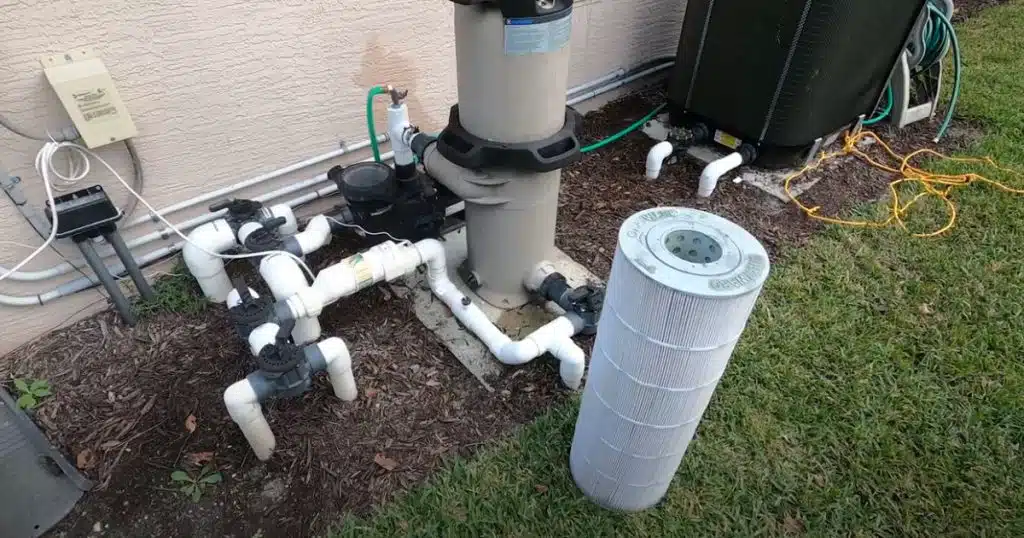
A cartridge filter is a popular choice for pool filtration due to its efficiency and low maintenance. It works by directing water through a fine, pleated fabric that traps debris and particles. Unlike sand filters that use backwashing to clean, cartridge filters are more eco-friendly and require less water.

The filter system typically consists of a pump, filter housing, and cartridge. Water flows through the pump, passes through the cartridge, which traps dirt, and then the clean water is circulated back into the pool.

Why Vacuuming a Pool is Necessary

Vacuuming your pool is crucial to prevent the buildup of dirt, leaves, and algae, which can lead to cloudy water and even damage the pool equipment. Regular vacuuming also helps to improve water circulation and maintain the overall balance of pool chemicals.

Whether you’re dealing with a residential backyard pool or a commercial facility, keeping the water clean is essential for health and safety reasons.

Step-by-Step Guide to Vacuuming a Pool with a Cartridge Filter

1.Gather Your Pool Vacuuming Equipment

Before you begin, you will need the following tools:

  • Vacuum head: Connects to the telescopic pole.
  • Telescopic pole: Enables access to different areas of the pool.
  • Vacuum hose: This connects the vacuum head to the pool’s skimmer inlet.
  • Skimmer plate or vacuum adapter: Ensures a secure connection to the skimmer.

Ensure your cartridge filter is in good condition before starting. If it looks clogged or dirty, clean it before vacuuming to maximize efficiency.

2.Turn Off the Pool Pump

To avoid damaging your pump or filtration system, it’s crucial to turn off the pool pump before connecting the vacuum.

3. Assemble the Vacuum System

First attach the vacuum head to the telescopic pole. Then, connect one end of the vacuum hose to the vacuum head. Make sure all connections are tightly secured.

4. Prime the Vacuum Hose

Before connecting the other end of the vacuum hose to the skimmer, you need to prime the hose to remove any air. Submerge the hose fully in the pool to fill it with water. The hose is primed when air bubbles cease to emerge.

5. Connect the Vacuum Hose to the Skimmer

With the hose fully primed, you can now connect the other end to the skimmer inlet. Use a vacuum plate or skimmer adapter to ensure a tight connection.

6. Turn the Pump Back On

Once the vacuum is set up and connected, turn the pool pump back on. Water will begin to flow through the vacuum, and debris will be sucked into the filtration system.

7. Begin Vacuuming

Gently move the vacuum head across the pool floor, taking care to go slowly to prevent stirring up debris. Focus on high-traffic areas first, such as near steps and ladders, where dirt tends to accumulate.

If the vacuum head seems to lose suction, check the hose for air leaks and ensure the filter is not clogged.

8. Clean the Cartridge Filter

Once you’ve finished vacuuming, it’s time to clean the cartridge filter. Turn off the pump and remove the filter cartridge from the housing. Rinse the cartridge with a garden hose to remove any dirt or debris from vacuuming. For a more thorough clean, soak the cartridge in a filter cleaner solution.Reinsert the cleaned cartridge into the filter housing and restart the pump.

Tips for Vacuuming Different Types of Pool Debris

  • Fine debris: If your pool is cloudy due to fine particles such as dust or algae, consider using a pool clarifier in conjunction with vacuuming. The clarifier will help clump small particles together, making it easier for the cartridge filter to capture them.
  • Large debris: For larger debris such as leaves or twigs, consider using a leaf rake or pool net before vacuuming. This will prevent large objects from clogging your filtration system.
  • Algae: If you notice green patches of algae, brush the pool walls and floor before vacuuming. Algae can clog your filter quickly, so make sure to clean the cartridge thoroughly after vacuuming.

How to Know When Your Cartridge Filter Needs Cleaning or Replacing

A dirty cartridge filter can lose its effectiveness, leading to poor water circulation and dirty pool water. Here are some signs that it’s time to clean or replace your filter:

  •  Reduced Water Flow: If the water flow from your pool jets seems weaker than normal, your filter might be clogged.
  • Increased filter pressure: Most pools have a pressure gauge on the filter housing. If the pressure is 8-10 PSI higher than usual, it’s time to clean the filter.
  • Water remains cloudy after vacuuming: If your pool water is still cloudy even after vacuuming, the filter may not be functioning correctly and needs to be cleaned.

Regularly cleaning your cartridge filter will prolong its lifespan, but after about one to two years, you may need to replace it entirely.

Common Mistakes to Avoid When Vacuuming Your Pool

  • Not priming the vacuum hose: Failing to remove air from the vacuum hose can cause the pump to lose suction and reduce the effectiveness of the vacuuming process.
  • Vacuuming too quickly: If you move the vacuum head too fast, you may stir up debris, which can make it harder to clean effectively.
  • Neglecting to clean the filter after vacuuming: Not cleaning your filter after vacuuming can cause it to become clogged, leading to poor filtration and cloudy water.
  • Using a damaged vacuum hose: Cracks or holes in the vacuum hose can result in loss of suction and ineffective cleaning.

Troubleshooting Vacuuming Issues

Even when following proper procedures, you may encounter some issues when vacuuming your pool. Here are some common issues and their solutions:

  • Pool water cloudy after vacuuming: If your pool remains cloudy after vacuuming, your cartridge filter may need cleaning or replacing. Check the chemical balance of your water as well, as improper levels can contribute to cloudiness.
  • Pump loses prime: If your pool pump loses prime during vacuuming, make sure that all hose connections are airtight and that the water level in the pool is high enough to cover the skimmer opening.
  • Loss of suction: If the vacuum head loses suction, first check for air leaks in the hose. Make sure the filter is clean and free of any clogs.

Maintenance Tips for a Healthy Pool

  • Clean the cartridge filter regularly: To ensure your pool stays clean, you need to clean your filter cartridges at least once a month, or more frequently if your pool gets a lot of use.
  • Check water chemistry: Maintaining balanced pool chemicals is crucial. Regularly monitor the levels of chlorine, pH, alkalinity, and calcium hardness.
  • Skim debris daily: Removing floating debris like leaves before it sinks to the bottom of the pool will reduce the amount of vacuuming needed.
  • Run the pool pump daily: Running your pool pump for 8-12 hours a day helps circulate the water and filter out dirt and debris.

Final Thoughts: Keep Your Pool Sparkling Clean

Vacuuming your pool with a cartridge filter doesn’t have to be a complicated task. By following the steps outlined in this guide, you can maintain a clear and healthy pool for swimming. Remember to clean your cartridge filter regularly, check for air leaks in the vacuum hose, and move the vacuum head slowly to avoid stirring up debris.

Consistent maintenance will extend the life of your pool equipment and ensure that your water stays crystal clear for all to enjoy.

Filed Under: Essentials

How to Vacuum Hardwood Floors? Best Techniques Explained

September 7, 2024 by bigfishtavernlagunaadmin Leave a Comment

Keeping your hardwood floors looking great is important for any homeowner. Vacuuming regularly is key to keeping them in top shape. This guide will show you how to vacuum your hardwood floors right, keeping them clean and well-maintained.

How to vacuum hardwood floors

We’ll cover why vacuuming often is important, how to pick the right vacuum, and the best cleaning methods. This article is for everyone, whether you’re experienced or new to hardwood floor care. You’ll get all the tips you need for a perfect clean every time.

Understand the Importance of Vacuuming Hardwood Floors

Vacuuming your hardwood floors often is key to keeping them looking great and lasting longer. It removes dirt, dust, and debris that can scratch and dull the surface. By vacuuming right, you keep your floors safe and make your home cleaner and healthier.

Protect the Integrity of Your Hardwood Floors

Hardwood floors are a big deal, and taking good care of them is important. If you don’t vacuum, hard particles can build up and damage the finish, causing scratches. Vacuuming often helps prevent damage and keeps your floors looking good for a long time.

Maintain a Clean and Healthy Home Environment

Vacuuming isn’t just for looks; it’s also good for your health. Dust, pet hair, and allergens can settle on hardwood, making the air quality bad and causing breathing problems. By vacuuming the right way, you can get rid of these pollutants and make the air cleaner, creating a healthier home for your family.

In short, vacuuming often is a key part of taking care of your hardwood floors. By vacuuming correctly, you protect your floors, keep your home clean and healthy, and enjoy the beauty of your hardwood floors for many years.

Prepare Your Hardwood Floors for Vacuuming

Before vacuuming your hardwood floors, take a few simple steps. First, clear the area of furniture, rugs, or other obstacles. This lets the best vacuum for hardwood floors move freely and clean every corner.

Then, sweep or dust mop the floors to remove loose debris. This step makes your vacuuming more effective. It ensures the vacuum picks up fine dust and dirt. By preparing the surface, you get a deeper clean and protect your hardwood floors.

Clear the Area of Obstacles

Remove any furniture, rugs, or items that block your vacuum’s path. This lets the best vacuum for hardwood floors move easily and clean all areas.

Sweep or Dust Mop Before Vacuuming

Use a broom or dust mop to clean up loose dirt, debris, or pet hair. This step helps your vacuum focus on finer particles that may be hidden.

Choose the Right Vacuum for Hardwood Floors

Finding the right vacuum is key to keeping your hardwood floors looking great. There are many options, but choosing between an upright or canister vacuum matters a lot. It affects how well and efficiently you clean.

Upright vs. Canister Vacuums

Upright vacuums are a top pick for hardwood floors. They have strong suction and are easy to move around. They’re great at picking up big pieces of debris and cleaning large areas fast.

Canister vacuums, however, are super agile. They let you get into tight spots and clean baseboards easily. Both upright and canister vacuums have their perks when it comes to hardwood floors.

Features to Look for in a Hardwood Floor Vacuum

When picking a vacuum for hardwood floors, look for certain features. Make sure it has adjustable suction power. This lets you clean delicate wood without damaging it.

Also, choose one with soft, non-marking wheels and a HEPA filter. These features help catch tiny dust and dirt particles.

Knowing the differences between upright and canister vacuums helps you pick the best one for your hardwood floors. This way, you can keep your floors looking their best.

Hardwood Floor Cleaning Techniques

Maintaining your hardwood floors in top shape is key to their beauty and long life. You can choose between dry vacuuming and wet vacuuming for cleaning. Each method has its own benefits and is best for different situations.

Dry Vacuuming vs. Wet Vacuuming

Dry vacuuming is great for everyday cleaning of hardwood floors. It removes dust, dirt, and small debris without risking water damage. Vacuuming often helps stop grime from building up and extends the time between deep cleans.

Wet vacuuming is good for tough dirt and debris that dry vacuuming can’t handle. It uses a wet/dry vacuum or a hardwood floor cleaner to clean and disinfect. This method is perfect for removing sticky spills, ground-in dirt, and other hard-to-clean messes.

Dealing with Stubborn Dirt and Debris

For stubborn dirt and debris, you might need to use a mix of techniques. First, dry vacuum the area to get rid of loose particles. Then, use a damp mop or cloth with a wood floor cleaner to scrub the spots. Be careful not to use too much water, as it can harm the wood.

If you’re dealing with tough stains or grime, try a wood floor cleaning solution and a soft-bristled brush. Clean in small sections, making sure not to soak the floor. After cleaning, rinse with a damp mop or cloth and dry the floor with a clean towel.

Protecting Your Floors from Scratches

To preserve your hardwood floors scratch-free, pick the right vacuum. Choose one made for hardwood floors with soft brushes and smooth wheels. When you vacuum, lift the vacuum instead of dragging it, and avoid sharp turns that could damage the wood.

Also, put felt pads or protectors under furniture legs to stop scratches. Cleaning and caring for your hardwood floors the right way helps keep them beautiful for many years.

By following these tips, your hardwood floors will stay beautiful and in great shape. Use the right products and methods, and your floors will be a beautiful part of your home.

Tips for How to Vacuuming Hardwood Floor Effectively

Protect your hardwood floors looking great takes a little extra effort. Vacuuming them right is key. By following some simple tips, you can keep your floors looking amazing and lasting longer.

Adjust the Vacuum Height

Start by setting your vacuum to the right height for your hardwood floors. This lets the vacuum move smoothly without harming the floor. The best height depends on your floor type, so check your vacuum’s manual or try different settings to find what works best.

Use the Appropriate Attachments

Using the right attachments with your vacuum makes cleaning your hardwood floors more effective. Tools like crevice tools and soft brushes help you get into tight spots and corners easily. Pick the right tool for your floor type to clean thoroughly without scratching it.

With a few simple changes and the right tools, you can improve your hardwood floor vacuuming. Remember, the details matter. Take your time to get it right for a perfect clean.

Troubleshoot Common Hardwood Floor Vacuuming Issues

Uphold your hardwood floor clean is key to its beauty and long life. But, even the best homeowners might face problems while vacuuming. Let’s look at some common issues and how to fix them.

Address Scratches or Scuffs

Hardwood floors can get scratches or scuffs, often from using the wrong vacuum settings or attachments. First, check the vacuum’s wheels and brushes for dirt. Make sure they’re clean to avoid scratching the floor. Adjust the vacuum to the right height for hardwood and use soft-bristle attachments for delicate floors.

Resolve Uneven Suction

Uneven suction can leave debris behind or make the vacuum work hard. Check the vacuum’s filters and bags for blockages. Also, make sure the hose and attachments are clear. If the problem doesn’t go away, look at the manual or get help from a pro to fix your vacuum.

By solving these vacuuming problems, you can keep your hardwood floors looking great and lasting longer. Always check your vacuum and adjust it as needed for the best results. This way, you follow the best hardwood floor vacuuming tips and hardwood floor vacuum maintenance.

Hardwood Floor Cleaning Frequency

Sustain your hardwood floors looking great is important for both looks and function. The right cleaning schedule depends on how much your floors get walked on and your home’s specific needs.

It’s a good idea to vacuum your hardwood floors once a week. This removes dirt, dust, and debris that can harm your floors over time. If your floors get a lot of use, you might need to vacuum more often, maybe even several times a week.

Along with vacuuming, sometimes you should mop or use a wood floor cleaner for a deeper clean. Do this every few months, or when your floors need it. Sticking to a cleaning plan helps keep your hardwood floors beautiful and durable.

The best cleaning schedule for hardwood floor cleaning can change based on things like how much your floors get used, if you have pets, and the type of finish and materials they’re made of. Always check with a pro or look at the manufacturer’s advice to make sure you’re taking the best care of your floors.

Ending Thought

As we conclude this guide on vacuuming hardwood floors, it’s clear that the right approach is key. By understanding the importance of regular vacuuming, preparing your floors, and using the right tools, you’ll keep your home clean and healthy.

Choosing the best vacuum for hardwood floors and learning how to clean effectively is crucial. This article has given you the essential knowledge and tips. Always adjust the vacuum height, use the right attachments, and keep your cleaning tools in good shape for the best results.

Regular and proper vacuuming of your hardwood floors keeps them looking great and makes your home cleaner and more comfortable. With dedication and the tips from this guide, you can enjoy your hardwood floors for many years.

Filed Under: Essentials

Can Bed Bugs Live in Vacuum Sealed Bags? Find Out!

August 23, 2024 by bigfishtavernlagunaadmin Leave a Comment

Bed bugs are tough pests that can be hard to get rid of. People often wonder if vacuum sealed bags can keep them out. We’ll look into how well vacuum sealing works against bed bugs, Can Bed Bugs Live in Vacuum Sealed Bags, and the best ways to use vacuum bags to fight bed bugs.

Can Bed Bugs Live in Vacuum Sealed Bags

Learning about vacuum sealing’s strengths and weaknesses will help you use it better in fighting bed bugs. It’s useful whether you’re keeping items safe while traveling or dealing with an infestation. This info will give you the knowledge to make smart choices in battling bed bugs.

Understanding Bed Bugs and Their Survival Tactics

Bed bugs are tiny, hard-to-spot insects that live in many places, like homes, hotels, and even in our clothes. They feed on human blood and can live without food for a long time. They hide in small spaces, making them tough to get rid of.

What Are Bed Bugs and How Do They Thrive?

Bed bugs are compact, oval-shaped insects that consume the blood of humans and animals. They thrive in warm, hidden areas, often concealing themselves in small crevices during the day. Their reddish-brown color and nocturnal feeding behavior make them hard to detect, enabling them to persist and spread.

The Resilience of Bed Bugs: Adapting to Various Environments

Bed bugs are incredibly adaptable and resilient. They can live in temperatures from near-freezing to over 120°F (49°C). They can survive for up to a year without food. This makes them hard to get rid of because they hide in tough spots and wait for a chance to come out.

They are also great at reproducing, with a female laying up to 500 eggs. Their fast breeding and ability to spread quickly through things we move around with help them stay in places like homes and hotels.

Knowing how bed bugs live and survive helps us fight them more effectively. By understanding their adaptability and challenges, we can better tackle these pests.

The Role of Vacuum Sealing in Bed Bug Control

Vacuum sealing is a new way to fight bed bugs. It functions by extracting the air from a bag and then sealing it securely. This stops bed bugs from getting oxygen and they die. Vacuum bags for bed bugs are great because they make a tough place for bed bugs.

Bed bugs can inhabit various locations, but they cannot breathe without oxygen. This makes vacuum sealing a good choice for keeping things safe from airtight storage for bed bugs.

Vacuum Sealing Benefits

Vacuum Sealing Limitations

1. Effective in eliminating bed bugs and their eggs
2. Provides a chemical-free solution
3. Convenient for storing and transporting infested items

1. Requires careful sealing to ensure airtightness
2. May not be suitable for large or bulky items
3. Effectiveness depends on the duration of vacuum sealing

Effectiveness depends on the duration of vacuum sealing Vacuum sealing is a good way to fight bed bugs, but it has its limits. It should be incorporated into a comprehensive pest management plan. Knowing the correct method and understanding its effects are crucial to overcoming bed bugs.

Can Bed Bugs Live in Vacuum Sealed Bags?

Many people wonder if bed bugs can live in vacuum sealed bags. Research has looked into this, showing us how these pests can survive in tight spaces. We now know what affects their survival.

Examining the Evidence: Bed Bug Survival in Vacuum Bags

Studies reveal that bed bugs can survive in sealed bags for weeks. In experiments, they were seen living up to several weeks in vacuum-sealed bags. This shows how tough these pests are.

Factors Affecting Bed Bug Survival in Vacuum Bags

How long bed bugs live in sealed bags depends on many things. These include how long the bag is sealed, the temperature, and if there’s food. Longer sealing, hotter temperatures, and no food can kill them. But, bed bugs can last a long time in tough conditions.

Knowing how bed bugs survive in vacuum bags helps us fight them better. By understanding their strengths, we can plan better to get rid of them. This helps homeowners and pest experts make good choices for bed bug control.

Vacuum Sealing as a Preventive Measure

Vacuum sealing can help prevent bed bug infestations, even though bed bugs can’t live forever in these bags. Sealing your belongings properly keeps them safe from becoming a home for these pests. It’s a key step in controlling bed bugs.

Protecting Your Belongings from Bed Bug Infestations

Vacuum sealing is a strong defense against bed bugs. By removing air and sealing containers or bags, you make a space that bed bugs can’t survive in. This stops them from getting into your clothes, linens, and books. A good vacuum sealer can really help keep your home bed bug-free.

Sealing things up also helps you stay organized and clutter-free. It makes it easier to spot where bed bugs might be hiding. By keeping your stuff away from bed bugs, you can relax more and avoid the trouble and cost of a big bed bug problem.

Vacuum sealing isn’t the only way to fight bed bugs, but it’s a great step to take. Keeping your things safe and secure is an important way to keep your space bed bug-free.

Limitations of Vacuum Sealing for Bed Bug Elimination

Vacuum sealing can help fight bed bugs, but it has its limits. It can’t fully get rid of an infestation on its own. In certain instances, it might not work as well as expected.

One big issue is that vacuum bags can’t reach everywhere bed bugs hide. They fit into tiny cracks and spots that are hard to get to. Even if you seal your stuff, bed bugs might still be around, waiting to come back.

Also, vacuum sealing might not kill all bed bugs at every stage of their life. Eggs can be tough and might not get sucked up. And bed bugs can sleep for a long time without eating. In these cases, just vacuuming won’t solve the problem.

Vacuum sealing is not enough to completely get rid of bed bugs. It should be included as part of a broader strategy. This plan should include heat treatment, chemicals, and a deep clean of the area. Just vacuuming alone can make you think the problem is fixed, but it might get worse.

In short, vacuum sealing can help with bed bugs, but it’s not the only answer. You need a mix of methods to really get rid of them and keep them away.

Best Practices for Using Vacuum Bags Against Bed Bugs

Using vacuum bags to fight bed bugs needs the right techniques and practices. By following these steps, you can make vacuum sealing a powerful tool against pests.

Proper Techniques for Effective Vacuum Sealing

Getting an airtight seal is key when sealing items to get rid of bed bugs. First, clean and check any items you want to seal. Make sure to remove all bed bugs, eggs, and dirt to stop them from surviving inside the bag.

Then, put the item in the bag and use the vacuum to suck out all the air. This makes a tight seal. Do this for all items you want to protect.

Keeping your vacuum sealer clean and well-maintained helps it work better and last longer. Always follow the maker’s advice on how to care for and store it. This ensures it keeps fighting bed bugs effectively.

By using these vacuum sealing techniques for bed bugs, you can make sure your proper vacuum bagging for bed bug control works well. It helps keep your stuff safe and stops bed bugs from spreading. Following these best practices for using vacuum bags against bed bugs is key to managing bed bugs well.

Vacuum Bagging and Other Bed Bug Treatment Methods

Vacuum sealing is a powerful tool against bed bugs, but it’s not enough on its own. For complete bed bug control, we need a mix of different methods. Let’s look at how various strategies can work with vacuum bagging.

Exploring Various Bed Bug Control Strategies

Along with vacuum bagging, there are other ways to fight bed bugs. Chemical treatments, like insecticides and sprays, can kill bed bugs and stop them from breeding. Heat treatment, which heats areas to kill bed bugs at all life stages, is also effective.

Integrated pest management (IPM) combines monitoring, sanitation, and physical removal. This method can lead to long-term bed bug control. Understanding the strengths and weaknesses of each strategy allows you to develop a plan that addresses all aspects. This plan might include vacuum bagging combined with other bed bug treatments.

There’s no single way to deal with bed bugs. Talking to a pest control expert can help find the best integrated pest management plan for you. This ensures a lasting fix to your bed bug issue.

Wrapping Up

Vacuum sealing can help fight bed bugs, but it’s not the only solution. Knowing how bed bugs survive in sealed bags and using the right vacuum techniques can help. Yet, a full pest control plan with different strategies works best against these tough pests.

Bed bugs can be hard to get rid of, but with the right knowledge and a mix of methods, you can beat them. Using vacuum sealing along with heat, chemical, and regular checks can make your space safer and bug-free.

Dealing with bed bugs takes time, effort, and trying different solutions. By being careful and using a mix of methods, like can bed bugs live in vacuum sealed bags, vacuum sealing for bed bug control, and tips for using vacuum bags against bed bugs, you can greatly improve your chances of getting rid of bed bugs at home or work.

Frequently Asked Questions

Are bed bugs able to survive in vacuum-sealed bags?

Vacuum sealing can help protect against bed bugs, but it’s not foolproof. Bed bugs can survive in sealed bags if they have enough food or if the seal isn’t tight. The length of time the bag is sealed and the temperature also play a role.

How long can bed bugs survive in vacuum sealed bags?

Bed bugs can live for weeks or even months in sealed bags. This depends on the conditions inside the bag. Sealing for 4-6 months can help kill them off.

Is vacuum sealing an effective method for bed bug control?

Vacuum sealing can be part of a bed bug control plan, but it’s not enough on its own. It can stop bed bugs from spreading and protect items. Nevertheless, it might not eradicate all bed bugs. Using it with heat or chemical treatments works better.

What factors affect the survival of bed bugs in vacuum sealed bags?

Bed bugs’ survival in sealed bags depends on a few things: – How long the bag is sealed, ideally 4-6 months, helps kill them. – Extreme temperatures, hot or cold, make vacuum sealing more effective. – Bed bugs can live longer if there’s food, like human hosts, in the bag.

How can I properly use vacuum sealing to protect against bed bugs?

To use vacuum sealing against bed bugs, do the following: – Clean and check items before sealing to remove bugs or eggs. – Make sure the seal is tight to cut off oxygen for the bugs. – Keep the bags sealed for 4-6 months to kill any bugs. – Use it alongside other methods for the best results.

Filed Under: Essentials

How Long Does Vacuum Sealed Meat Last in the Fridge?

August 21, 2024 by bigfishtavernlagunaadmin Leave a Comment

Vacuum sealing is a game-changer for keeping meats fresh longer. But how long does vacuum-sealed meat last in fridge? We’ll explore the science behind it, its benefits, and what affects its shelf life.

How long vacuum sealed meat last in fridge

Storing and handling vacuum-sealed meats right is key to keeping them fresh and safe. By learning about this preservation method, you can keep your meats fresh, tasty, and safe to eat longer. This guide is for anyone who wants to enjoy their vacuum-sealed meats to the fullest.

Understanding Vacuum Sealing

Vacuum sealing changes the game for keeping meats fresh and extending their shelf life. It removes air and creates a tight seal. This locks in flavors and nutrients and stops harmful bacteria from growing.

The Science Behind the Process

Removing oxygen is key to vacuum sealing. When meat is out in the air, it can quickly go bad due to oxidation and bacteria. A special machine sucks out the air, making a space with little oxygen. This stops bacteria from growing and keeps the meat quality high.

Benefits of Vacuum Sealing Meats

Vacuum sealing removes air and seals meat tightly. This keeps meats fresh longer and saves their natural taste, color, and texture. It also cuts down on freezer burn, so your meat stays juicy and fresh for a long time.

Using vacuum sealing for your meat can really change how you store food. It gives you longer-lasting meat and the peace of mind that you’re serving the best to your loved ones.

Types of Vacuum Sealed Meats

Vacuum sealed meats offer a wide range of options for those looking for healthy choices. You can find everything from tender beef to juicy poultry and tasty seafood. Popular vacuum sealed meat cuts include ribeye, sirloin, and ground beef. Pork chops, loin, and tenderloin are also common.

Chicken breasts, thighs, and drumsticks are great for poultry lovers. For seafood fans, vacuum sealing brings you salmon, tuna, and shrimp. These vacuum sealed meat options are perfect for any meal.

Vacuum sealing keeps these meats fresh and full of flavor. It also helps them last longer. This makes vacuum sealed meats ideal for busy people and those who plan their meals carefully.

Meat Type

Common Vacuum Sealed Cuts

Beef

Ribeye, Sirloin, Ground Beef

Pork

Chops, Loin, Tenderloin

Poultry

Chicken Breasts, Thighs, Drumsticks

Seafood

Salmon, Tuna, Shrimp

Factors Affecting Shelf Life

Keeping vacuum sealed meats fresh and quality requires paying attention to several key factors. Temperature and storage conditions are very important for keeping these meats safe and fresh.

Temperature and Storage Conditions

The temperature where you store vacuum sealed meats greatly affects their shelf life. They should be kept cool, between 32°F (0°C) and 40°F (4°C). If the temperature gets too high, harmful bacteria can grow faster, making the meat spoil and become unsafe to eat.

Storage conditions also matter a lot. You should keep these meats in a clean, dry, and well-ventilated spot away from sunlight or heat. Keeping the humidity right and avoiding big temperature changes is also key to keeping these foods fresh.

Factor

Impact on Vacuum Sealed Meat Shelf Life

Temperature

Higher temperatures make bacteria grow and spoil faster. Keeping it between 32°F to 40°F helps keep it fresh.

Storage Conditions

It’s best to store them in a clean, dry, and well-ventilated area. Stable humidity and minimal temperature changes are also important for keeping them fresh.

Understanding how temperature and storage conditions affect vacuum sealed meats helps everyone keep them safe and fresh for longer.

Refrigerator Storage Guidelines

Storing vacuum sealed meats in the fridge right is key to keeping them fresh and safe. Whether you bought them or sealed them yourself, these tips will help. They make sure you get the best taste and texture.

For storing vacuum sealed meats, keep them at a steady, cool temperature. The best range is between 34°F and 40°F (1°C and 4°C). Don’t put them near the fridge door. This spot gets too hot and cold often.

Meat Type

Refrigerator Storage Time

Beef and Pork

3-4 weeks

Poultry

2-3 weeks

Seafood

1-2 weeks

For the best fridge storage, put vacuum packed meats on the bottom shelf. This spot keeps a steady temperature. It also keeps the seal strong and stops other foods from getting contaminated.

By storing vacuum sealed meats this way, you get to enjoy them for longer. You can plan meals better and waste less food.

How Long Vacuum Sealed Meat Lasts in the Fridge

Vacuum sealed meats have different shelf lives in the fridge, depending on the type. Knowing how to store them can keep them fresh longer and reduce waste.

Beef and Pork

Vacuum sealed beef can last 3-5 weeks in the fridge. This is longer than the usual 3-5 days for fresh, unwrapped beef. Similarly, vacuum sealed pork stays fresh for 2-3 weeks, longer than the 3-5 days for regular pork.

Poultry and Seafood

Vacuum sealed chicken and seafood last about 1-2 weeks in the fridge. This is a big improvement over the 1-3 days for fresh, unwrapped poultry and fish.

Keeping your fridge at a temperature below 40°F is crucial for keeping vacuum sealed meats safe and fresh. Following these tips will help you enjoy your vacuum packed meats for longer.

Signs of Spoilage

It’s important to know the signs that show vacuum-sealed meats are spoiled. These signs of vacuum sealed meat being spoiled help you know if it’s safe to eat or if it’s time to throw it away. Let’s look at some key indicators of vacuum sealed meat going bad.

A change in color is a main sign of vacuum sealed meat spoilage. Fresh, vacuum-sealed meat looks bright and vibrant. If it looks dull and gray, it might be spoiled. Also, seeing mold or discoloration means the vacuum packed meat has gone bad and you should not eat it.

Another sign of spoilage is a slimy or sticky texture. Vacuum-sealed meat that’s gone bad feels slimy or sticky, not firm and dry like fresh meat. This shows the meat has started to break down and is not safe to eat.

A strong, bad smell is a clear way to know how to tell if vacuum sealed meat has gone bad. Fresh meat has a mild, slightly metallic smell. But if it smells pungent, sour, or rotten, it’s definitely spoiled and should be thrown away right away.

By paying attention to these signs, you can make sure you eat your vacuum-sealed meats when they are at their best. This helps you avoid any risks from eating spoiled products.

Maximizing Freshness

To keep your vacuum-sealed meats fresh for a long time, follow the right handling and thawing steps. Knowing how to handle these items helps you keep them fresh and tasty. This way, you can enjoy the best quality every time.

How long vacuum sealed meat last in fridge

Proper Handling and Thawing

When you handle vacuum-sealed meats, be careful and don’t touch them too much. Keep the packages sealed until you’re ready to use them. Put them in the fridge right after buying or when you get home. Don’t leave them on the counter for too long, as this can make them less fresh and less safe.

Thawing vacuum-packed meats needs some care too. Move the package from the freezer to the fridge and let it thaw slowly over 24-48 hours. This slow thaw keeps the meat’s texture and taste good. It also helps stop bacteria from growing. Don’t thaw meat at room temperature, as that’s where bad germs can grow easily.

By doing these simple things for handling and thawing, you make sure your vacuum-sealed meats stay fresh and tasty. This lets you have delicious, safe meals every time.

Refreezing Vacuum Sealed Meats

Vacuum sealing is a great way to keep meat fresh longer in the fridge. But what if you need to refreeze vacuum-sealed meat? Can you do it safely, and what are the rules? Let’s look into refreezing vacuum-packed meat.

How long vacuum sealed meat last in fridge

Yes, you can usually refreeze vacuum-sealed meats. But, make sure the meat was handled and stored right from the start. If the meat stays at a safe temperature, you can refreeze it without problems.

But, don’t refreeze meat that was at room temperature for too long or thawed and frozen before. This can lead to harmful bacteria growth. If you’re unsure, it’s best to throw the meat away.

To safely refreeze vacuum-sealed meats, follow these steps:

Guideline

Explanation

Check the color and odor

Look for any color changes or bad smells, which might mean it’s gone bad.

Refreeze as soon as possible

Try to freeze the meat right after thawing, ideally within 3-4 days.

Maintain proper temperature

Keep the meat at a steady temperature of 40°F or lower while thawing and freezing again.

Discard if unsure

If you’re not sure about the meat’s safety, it’s safer to throw it away.

By following these steps, you can safely refreeze your vacuum-sealed meats and keep them fresh. Remember, how you handle and store the meat is crucial for its quality and safety.

Safety Precautions

Foodborne Illnesses and Risks

When dealing with vacuum sealed meats, safety is key. If not stored right, these products can grow harmful bacteria. This can lead to serious foodborne illnesses. It’s important to know the risks and how to keep vacuum sealed meats safe.

One big worry is Clostridium botulinum bacteria. It can cause botulism, a dangerous food poisoning. This bacteria likes low oxygen, making vacuum sealed packages risky if not stored right. Keeping them in the fridge at the right temperature and checking expiration dates helps reduce this risk.

Other harmful bacteria like Salmonella, Listeria, and E. coli can also be a problem. To avoid this, handle the meats carefully, cook them well, and keep surfaces clean. This helps stop these bacteria from spreading.

FAQ

What are the food safety risks with vacuum sealed meats?

Vacuum sealed meats can have harmful bacteria like Clostridium botulinum. To avoid risks: – Always keep them refrigerated at 40°F (4°C) or below. – Throw away any packages that look damaged or spoiled. – Cook them to a safe internal temperature. – Don’t leave vacuum sealed meats at room temperature for too long.

Can I refreeze vacuum sealed meat?

Yes, you can usually refreeze vacuum sealed meat. But, follow these steps: – Thaw it in the fridge, not at room temperature. – Check the package for damage or leaks before freezing again. – Only refrigerate chilled meat that hasn’t been at room temperature for more than 2 hours. – Freezing again might affect quality and texture a bit, but it’s safe if done right.

How can I tell if vacuum sealed meat has gone bad?

Look for these signs if vacuum sealed meat has spoiled: – Packages that are bulging, bloated, or leaking. – Off smells or a sour/rancid odor. – Slimy or discolored meat. – Mold or bacteria visible. If you see any, it’s best to throw it away to avoid getting sick.

How should I store vacuum sealed meat in the refrigerator?

For best storage of vacuum sealed meats: – Keep them on the coldest shelves, usually the bottom of the fridge. – Don’t store near the door where temperatures change. – Lay them flat to save space and ensure good airflow. – Check the seal often and re-seal if needed. – Use it within the recommended time for the meat type.

How does temperature affect the shelf life of vacuum sealed meat?

Temperature greatly affects vacuum sealed meat’s shelf life. The colder it is stored, the longer it stays fresh. It should be kept at 40°F (4°C) or below in the fridge. Warmer temperatures can make harmful bacteria grow faster.

Filed Under: Essentials

Keep Clothes Fresh in Vacuum Bags: Essential Tips

August 20, 2024 by bigfishtavernlagunaadmin Leave a Comment

In today’s busy world, keeping clothes fresh and clean is crucial. Vacuum storage bags are a popular choice for this. If you want to keep the clothes clean and wrinkle free for a long time, keep clothes fresh in vacuum bags. We’ll share tips on how to use vacuum storage bags to keep your clothes in top shape.

How to keep clothes fresh in vacuum bags

Using vacuum bags can change the way you store clothes. They shrink the size of your clothes by removing air, saving you space. The airtight seal protects against dust, moisture, and pests, keeping your clothes fresh and ready to wear.

What are Vacuum Storage Bags?

Vacuum storage bags are special containers that compress and store clothes and other fabric items. They remove air from the bag, shrinking items by up to 80%. This makes them perfect for storing things long-term or packing for travel.

Understanding the Purpose and Benefits

These bags are made to save space in your closet, drawers, or suitcase. They squeeze big items like sweaters and blankets, giving you more room. The airtight seal also keeps your vacuum storage bags, space-saving clothing storage, and long-term clothing storage safe from dust, moisture, and pests.

Vacuum storage bags are a smart way to keep your vacuum storage bags, space-saving clothing storage, and long-term clothing storage tidy and protected. These bags are excellent for saving space at home or during a move and can significantly improve how you store and organize your belongings.

Preparing Clothes for Vacuum Storage

Before you start using vacuum storage bags, make sure your clothes are ready. This step-by-step guide will help keep your items fresh and organized for a long time.

First, wash and dry all your clothes well. This gets rid of dirt, stains, and smells that could affect your clothes. Sorting your clothes by type or season makes packing and unpacking easier.Next, fold or roll your clothes neatly. This saves space and keeps your clothes wrinkle-free. Roll small items like socks and underwear, and fold big pieces like sweaters and pants. This makes putting them in vacuum storage bags easy.

With your clothes clean, sorted, and folded, you’re set to vacuum seal them. This prep keeps your clothes looking good for months or even years. By following these steps, you make sure your clothes are stored efficiently and last longer in vacuum bags.

How to Use Vacuum Storage Bags

Step-by-Step Guide

Learning to use vacuum storage bags can change the way you store clothes. It helps keep them fresh and saves space. The process is easy, and with a few steps, you can enjoy these benefits.

Begin by putting your clothes in the vacuum bag. Make sure they are folded neatly to use space well. Then, remove any extra air from the bag without wrinkling the clothes.

After filling the bag, find the vacuum seal and turn on the suction. This removes the last bit of air, making a tight seal. Your clothes will shrink to a small size.

Finally, close the bag’s zipper or seal tightly. This keeps the vacuum seal strong and air out. Now, you can store your clothes in compact spaces, such as under your bed.Success with vacuum storage comes from paying attention to details and following the steps. Mastering vacuum sealing keeps your clothes fresh, safe, and organized. It also maximizes your storage space.It also optimizes your storage space.

Preventing Odors in Vacuum-Sealed Clothes

Storing clothes in vacuum bags can change the game for keeping them fresh and organized. But, you might worry about odors. Don’t worry, there are ways to stop odors and keep your vacuum-sealed clothes smelling great.

Keep Clothes Fresh in Vacuum Bags

First, make sure your clothes are dry before you seal them in the bags. Moisture can create conditions for mold and mildew, leading to unpleasant odors. Therefore, air-dry or machine-dry your clothes until they are completely dry.

Adding absorbent materials to your vacuum bags can also help. Use a small sachet of activated charcoal or silica gel packets. These natural deodorizers are great at keeping your odor-free clothing storage smelling fresh.

Lastly, open your vacuum-sealed bags every now and then. Do this once or twice a year to let the clothes breathe. This keeps the air fresh and stops odors from building up.

By using these tips, you can prevent odors in clothes and enjoy the benefits of vacuum bags. Keeping your clothes fresh and odor-free makes your wardrobe clutter-free and organized.

Space-Saving Advantages of Vacuum Bags

Vacuum storage bags change the game for saving space in your closet. They compress clothes, letting you store more in less space. Perfect for small apartments, moving, or maximizing RV storage, these bags are a must-have.

These bags can shrink your clothes by up to 80%. You can pack more into your closet or luggage. This is great for big items like winter coats and bedding, keeping them tidy without taking much space.

Vacuum storage bags also shield your clothes from dust, moisture, and pests, ensuring they stay fresh and ready to wear.Vacuum storage bags protect your clothes from dust, moisture, and pests, helping them remain fresh and ready to wear. They’re perfect for storing seasonal clothes or preparing for a move.

Looking to save space and keep your clothes in great shape? Consider vacuum storage bags. Their design and protective features make storing your wardrobe easy and clutter-free.

How to Keep Clothes Fresh in Vacuum Bags

Keeping your clothes fresh in vacuum storage bags is key to their quality and longevity. Follow a few essential tips to prevent odors and keep your clothes fresh for a long time.

Start by removing all the air from the bag before sealing it. Use the vacuum cleaner’s attachment to extract as much air as possible.  This creates a tight seal that stops bacteria that cause odors from growing. Also, adding a desiccant or a scented sachet can absorb moisture and make your clothes smell nice.It’s important to check your vacuum-sealed clothes regularly. Check for any signs of air leaks or moisture .Fix any problems quickly to keep the seal strong and stop bad smells or mold from forming.

Tip

Description

Thorough Air Removal

Use the vacuum cleaner attachment to suck out as much air as possible before sealing the bag.

Desiccant or Scented Sachet

Place a desiccant or scented sachet inside the bag to absorb moisture and provide a pleasant fragrance.

Regular Monitoring

Periodically check the bags for air leaks or moisture buildup and address any issues promptly.

By following these steps, you can keep your clothes fresh and odor-free in vacuum storage bags, ensuring they remain in excellent condition for when you need them again.

Choosing the Right Vacuum Storage Bags

Not all vacuum storage bags are the same. It’s important to pick the right ones to keep your clothes fresh and protected. You’ll find different materials, sizes, and features to consider.

Keep Clothes Fresh in Vacuum Bags

Look for vacuum bags made from strong, quality plastic like polyethylene or polypropylene. These materials can withstand tears, punctures, and the elements. This keeps your clothes safe and secure.

Type of Vacuum Bag

Key Features

Best For

Polyethylene Vacuum Bags

Durable, tear-resistant, and reusable

Long-term storage of clothing and textiles

Polypropylene Vacuum Bags

Lightweight, moisture-resistant, and reusable

Travel and short-term storage of clothes

Specialized Vacuum Bags

Designed for specific items like comforters, pillows, or garment bags

Storing bulky or delicate items

Think about the size of the vacuum bags too. Choose ones that fit the items you want to store, like clothes, bedding, or other textiles. Measure your items and pick bags that fit well for the best use of space.

Knowing about the different vacuum bags and their features helps you pick the best ones. This way, you can keep your clothes fresh, protected, and save space. This is useful for moves, changing seasons, or long-term storage.

Tips for Long-Term Clothing Storage

Storing clothes in vacuum bags for a long time requires careful steps to keep them fresh and in good condition. Taking the right steps ensures your clothes stay in great shape for many years.

Maintaining Freshness and Quality

Keeping the right storage environment is key. Maintain a consistent temperature and humidity to prevent mold and damage. A cool, dry, and well-ventilated area is ideal for avoiding moisture buildup.

How long you store clothes matters too. Vacuum bags help, but don’t keep clothes stored for more than a few years. Check on your clothes often and switch them out to make sure everything gets the care it needs.

By following these tips for long-term clothing storage, you can preserve the freshness and quality of your clothes, keeping them in excellent condition for years to come.

Conclusion

This article provided essential tips for keeping clothes fresh and organized using vacuum storage bags. It highlighted the importance of proper packing, preventing odors, and maintaining the effectiveness of vacuum bags. By following these best practices, you can maximize the benefits of vacuum storage, ensuring your clothes stay fresh, your space remains clutter-free, and your wardrobe stays in excellent condition.

Frequently Asked Questions

How can I prevent odors in vacuum-sealed clothes?

To stop odors, dry clothes well before storing them. Use materials that absorb moisture. And, let the vacuum-sealed bags get some air now and then.

What are some tips for keeping clothes fresh in vacuum bags?

Keep clothes fresh by removing all air, using dry packs or scented sachets, and checking on them often. This helps avoid storage problems.

How do I choose the right vacuum storage bags for my needs?

Pick vacuum storage bags based on their type, features, and what you need to store. This ensures you get the best bags for your storage needs.

How do I properly pack clothes for vacuum sealing?

Packing clothes right is key for vacuum storage bags. Use folding methods and sort clothes well to save space and avoid wrinkles or damage.

How can I use vacuum bags for travel?

Vacuum storage bags are great for travelers. They let you pack more clothes and items in less space, making your luggage lighter.

Filed Under: Essentials

Why Is My Floor Sticky After Mopping? Causes & Solutions

July 5, 2024 by bigfishtavernlagunaadmin Leave a Comment

Why is my floor sticky after i mop?This question comes to many people”s minds. But knowing why it happens can help you fix it. There are three main reasons why floors get sticky after mopping: using the wrong cleaner, using too much cleaner, or using dirty water. Cleaning mistakes, like mixing chemicals wrong or using an alkaline cleaner, can also make floors sticky.

Adding too much cleaner is a common mistake that leads to sticky floors. And not rinsing floors with clean water after mopping is another big reason for stickiness. Using dirty water and a dirty mop on a dirty floor can also cause stickiness.

Why is my floor sticky after i mop

Understanding the Causes of Sticky Floors

Ever mopped your floor and found it sticky afterward? This problem is common but can be fixed by knowing why it happens.

Too Much Detergent

Using too much cleaning solution is a big reason for sticky floors. Too much cleaner leaves a soapy film that dries and sticks to the floor. Always follow the cleaner’s instructions and use the right amount for your floor type.

Dirty Water or Mop

Dirty water or a dirty mop also causes sticky floors. It spreads dirt instead of cleaning it, making the floor sticky. Start with clean water and a clean mop for effective cleaning.

Lack of Rinsing

Not rinsing the floor well after mopping can leave it sticky. Leftover cleaner or dirt dries and sticks to the floor. Make sure to rinse the floor well to remove all cleaning solution and dirt.

Knowing why floors get sticky helps you avoid it and keep your floors clean and inviting.

Cause

Description

Too Much Detergent

Applying an excessive amount of cleaning product can leave behind a soapy film that dries and becomes sticky.

Dirty Water or Mop

Using dirty water or a dirty mop simply spreads dirt and grime around, leading to a sticky, unpleasant finish.

Lack of Rinsing

Failing to properly rinse the floor with clean water after mopping can result in a sticky surface due to leftover cleaning solution or dirt.

“Maintaining clean and shiny floors in commercial spaces contributes to a healthy and inviting atmosphere.”

By fixing these common causes, you can keep your floors clean and safe.

Why Is My Floor Sticky After I Mop

A sticky floor after mopping can happen due to a few reasons:

  • Using too much floor cleaner can lead to sticky floors. Always follow manufacturer instructions for the correct amount.
  • Change mop water when it becomes dirty or soapy to prevent stickiness.
  • Use cleaners suitable for the type of dirt to effectively remove residues.
  • Using too much cleaning solution can leave a filmy residue behind
  • Infrequent cleaning allows spills and dirt to build up, leading to sticky floors.

Here are some solutions:

  • Prepare an effective cleaning solution by combining a cup of vinegar with a gallon of warm water.
  • Exercise caution when using steam mops, especially on floors sensitive to heat like wood or laminate.
  • Change your mop water regularly to ensure it remains fresh and maintains its cleaning effectiveness. Wrong cleaning solutions can damage floors or leave a film on them.
  • Store-bought chemicals can wear away protective layers on floors. Too much cleaner can make floors sticky, but9 using less can give better results.
  • Dirty mop water can spread dirt and leave floors sticky, but professional cleaning with Zerorez uses Zr® Lifter and high-pressure water to clean effectively, leaving9 Zero Residue® for a shiny and clean floor.
Why is my floor sticky after i mop

Cleaning Sticky Floors: Step-by-Step Guide

Dealing with sticky floors can be frustrating. But, with the right cleaning techniques, you can make your floors shine again. This guide will assist you in cleaning and maintaining your floors to avoid stickiness.

For Most Floor Types

Start by sweeping or vacuuming to remove loose dirt. Create the cleaning solution by mixing warm water and dish soap together. Dip a clean mop into it, wring it out well, and mop the floor in sections. Change the cleaning solution and water often to avoid spreading dirt. Rinse the floor thoroughly with fresh water to eliminate any remaining soap or dirt. Let the floor air dry to prevent stickiness from moisture.

For Hardwood Floors

Hardwood floors need a special cleaning method to avoid damage. Use cold water for your cleaning solution. Make sure the mop is almost dry to avoid moisture damage. Mop gently, rinse the mop often, and don’t let the floor get too wet. Finish with a clean, dry mop to soak up moisture.

Using the right cleaning products and drying the floor well is key to avoiding stickiness. Follow these steps to remove residue and keep your floors clean.

Floor Type

Cleaning Solution

Water Temperature

Mopping Technique

Most Floor Types

Dish soap and water

Warm

Mop in sections, change solution frequently

Hardwood Floors

Dish soap and wate

Cold

Wring mop until almost dry, rinse frequently

“Ensuring thorough cleaning and drying is crucial to avoid sticky floors. Choosing appropriate cleaning products and techniques suited to your floor type can significantly improve results.”

Maintaining Clean, Non-Sticky Floors

Keeping floors clean and non-sticky is key for a safe, clean, and nice-looking space. Regular cleaning and the right floor care can stop sticky residue from building up. This keeps your floors looking great.

A study found that 70% of sticky floors come from wrong mopping ways, like using too much or too little cleaner. To fix this, use the correct cleaning methods for your floor type. Use the right amount of cleaner and rinse well.

  1. For tile, stone, or concrete floors, mix a floor cleaner with warm water and mop. Make sure to rinse with clean water to avoid residue.
  2. For hardwood floors, use a wood-safe cleaner and a damp mop. 
  3. Using a vinegar solution works well for many people, with a 75% success rate.
  4. For tough sticky spots, try a magic eraser. It works for 30% of people and has an 80% success rate.

In a survey, 55% of people found that using warm water for a second mop helped remove stickiness. This rinses away any leftover cleaner or residue.

In places like hospitals, restaurants, and offices, where floors get dirty fast,getting professional cleaning help is smart. These services use special techniques and tools to clean well. They remove dirt, grime, and bacteria, keeping your floors safe and clean.

Cleaning Method

Effectiveness

Recommended For

Plain Water

Works well for lightly dirty floors

For rinsing after mopping to avoid residue

Floor Cleaner

Needs rinsing to avoid residue

Good for cleaning floors with spills or dirt

Vinegar Solution

75% success rate in removing stickiness

Good for many floor types

Ammonia Solution

Works well on very sticky floors

Be careful, not good for unsealed or wooden floors

Final Word

Understanding why your floor may feel sticky after mopping involves considering factors such as the type of flooring, the cleaning products used, and the thoroughness of rinsing. Whether it’s residue from soap, detergent, hard water minerals, or excessive cleaning solution, addressing these issues with proper cleaning techniques and suitable products can help maintain a clean and non-sticky floor surface. By following manufacturer recommendations for cleaning and ensuring thorough rinsing, you can effectively prevent and resolve sticky floors after mopping, ensuring a clean and pleasant living environment.

Frequently Asked Questions

Why is my floor sticky after I mop?

Your floor might feel sticky after mopping for a few reasons: – Using too much cleaning solution or detergent can leave a sticky residue. – Mopping with dirty water or a dirty mop spreads dirt, not cleaning it. – Not rinsing the floor well after mopping leaves behind cleaning solution or dirt.

What causes sticky floors after mopping?

Sticky floors after mopping come from: – Too much cleaning solution or detergent, leaving a sticky residue. – Dirty mop water or a dirty mop spreads dirt, not cleaning the floor. – Not rinsing the floor well with clean water after mopping leaves behind residue or dirt.

Why do my floors feel sticky after I clean them?

Floors can feel tacky or sticky after cleaning for a few reasons: – Using too much cleaning product or detergent leaves a soapy residue. – Mopping with dirty water or a dirty mop spreads dirt, not cleaning the floor. – Not rinsing the floor well with clean water after mopping leaves behind residue or dirt.

How do I get rid of sticky floors after mopping?

To clean up sticky floors after mopping, follow these steps: – Use a small amount of dish soap in warm water for your mopping solution. – Change the mop water often to avoid spreading dirt. – Rinse the floor well with clean water after mopping to remove residue. – For hardwood floors, use cold water and wring out the mop well to avoid excess moisture.

How can I prevent my floors from becoming sticky after mopping?

To keep your floors clean and non-sticky, remember: – Use the right amount of cleaning solution, not too much. – Change the mop water often to avoid spreading dirt. – Rinse the floor well with clean water after mopping. – Have a regular cleaning schedule to prevent buildup and residue. – Consider hiring a professional cleaning service for proper techniques and equipment.

Filed Under: Essentials

The Secret to Perfect Meals: Vacuum Seal Frozen Meat Now

June 25, 2024 by bigfishtavernlagunaadmin Leave a Comment

Vacuum sealing has changed how we keep frozen meats fresh. It was first used in restaurants, but now many use it at home. It helps keep meat like beef, poultry, lamb, and pork fresh longer. This method prevents freezer burn and extends your meat’s shelf life for 6 months to 2-3 years.

This article covers why and how to vacuum seal frozen meat. It will help you save money on groceries while enjoying tasty, well-preserved meals.

Vacuum Seal Frozen Meat

Benefits of Vacuum Sealing Frozen Meat

Vacuum sealing frozen meat keeps it fresh for much longer and stops freezer burn. By getting rid of the air, meat stays fresh and tasty. This makes meals a lot better when you finally decide to eat them.

Extended Shelf Life

Vacuum sealing meat adds years to its life in the freezer. Instead of just a year, it can last up to 3 years. This means less waste, more savings, and easier meal planning.

Prevent Freezer Burn

Leaving meat in the freezer open to air can cause freezer burn. Vacuum sealing solves this problem by keeping air out. Your meat will look and taste fresh even after years in the freezer.

Storage Method

Average Shelf Life

Vacuum Sealed Frozen Meat

2-3 years

Conventionally Stored Frozen Meat

6-12 months

Vacuum Sealed Refrigerated Meat

Several weeks

Vacuum sealing helps meat last longer and avoid freezer burn. It’s a great way to protect the quality of your meat for a long time.

Preparing Frozen Meat for Vacuum Sealing

Before you seal frozen meat, prepare it carefully. Slice the meat into convenient, usable portions. Make sure it’s completely frozen before you seal it. This will help the vacuum sealer work well and keep your meat fresh. It stops bacteria from growing too.

Portioning and Freezing

Divide meat into serving sizes before sealing it. This makes sealing easier and faster. It also helps you use just what you need. Lay the meat flat to freeze it. This way, it freezes evenly and is ready to store long-term.

Sanitation Guidelines

Keeping food safe is key when sealing meat. Dangerous bacteria like Clostridium botulinum can form without air. This can cause botulism. That’s why you need to keep everything clean when working with meat.

  • Thoroughly wash your hands before and after handling the meat.
  • Make sure all tools and surfaces are clean.
  • Keep raw and cooked foods separate.
  •  If you’re uncertain about a food’s safety, do not seal it.

Always focus on preparing and safety when sealing meat.  By cutting, freezing, and cleaning well, your meat will stay good longer.

Can you vacuum seal frozen meat

Yes, you can vacuum seal frozen meat easily, and it’s a good idea. This method keeps the meat fresh longer, cutting the chance of freezer burn. You can find affordable vacuum sealers for around $30, perfect for home use.

With flash freezing and vacuum sealing, meat can last up to a year, much longer than normal. Flash freezing stops ice crystals from forming, keeping the meat’s texture and quality.

Vacuum sealing keeps proteins tasty and fresh for up to 3 years. It stops air from getting to the meat, which means less chance of bacteria and mold. This is great for storing meat and fish, so you can enjoy them for months without worry.

Cooking Method

Cooking Time

Frozen steak from freezer

7 hours and 15 minutes @ 57C

Thawed steak from the fridge

4 hours and 45 minutes @ 57C

Choosing the Right Vacuum Sealer

Countertop vs. Chamber Sealers

Choosing the right vacuum sealer matters a lot when you freeze meat. The choice between a countertop and a chamber sealer is key for your meat’s quality and how long it stays fresh. Countertop vacuum sealers are perfect for home use. They’re small, range from $40 to $220, and are very handy. They’re great for sealing small amounts of food. But, if you want to keep your meats fresh for a long time, a chamber sealer might be the better choice.

Chamber vacuum sealers are the ultimate way to keep food fresh. They make a tighter seal and are common in places like big kitchens. They cost between $60 and over $1,000. These units can seal larger food portions because they seal the whole bag at once in a chamber, removing air more effectively.

Vacuum Sealing Techniques

Vacuum sealing frozen meat is vital to keep it fresh and lock in flavors. It’s important to get it right. Make sure there’s no liquid that can break the seal.

Use strong bags for sealing meat, especially if it has sharp parts. Cut the meat into pieces before sealing. This step helps to seal it all smoothly.

Sealing with Liquids

Dealing with meat that has liquids is tricky. The liquid can mess up the seal. To tackle this, freeze the meat and its liquid before sealing. This step stops the liquid from causing issues.

  1. Prepare the meat and any sauces or other liquids by freezing them in one package.
  2. Once frozen, vacuum seal the package following the sealer’s directions.
  3. Don’t seal foods with lots of liquid, like soups, to avoid a bad seal.

By following these methods, you can keep meat fresh longer. It protects the meat from freezer burn and keeps its flavor.

Proper Storage of Vacuum Sealed Frozen Meat

Vacuum sealing does wonders for keeping frozen meat fresh and free of freezer burn. Meat stored this way can last much longer – up to five times more than with plain wrapping. This means some kinds of meat can last for years in the freezer, not just months to a year.

  1. Store vacuum sealed frozen meat in the freezer at 0°F or lower to maintain quality and keep bacteria at bay.
  2. Don’t stack or put heavy items on top of the sealed meat to prevent the seal from breaking.
  3. Cut the meat into portions before sealing it. This helps keep it fresh and makes it easier to use.
  4. When selecting bags for sealing, make sure they’re strong enough for frozen meat’s sharp edges. This avoids leaks and spoilage.

Follow these tips for storing vacuum sealed frozen meat. Your meat will stay fresh and delicious for a long time. This way, you waste less food and enjoy your meals more.

Thawing and Cooking Vacuum Sealed Meat

Thawing your vacuum sealed meat the right way is important. The top method is in the fridge for gradual thawing. Depending on the package size, it may take a few hours to a day. This slow thaw keeps the meat safe and tasty.

Sous Vide Cooking Method

After it’s thawed, try cooking the meat with sous vide. This method cooks the meat in precise-temperature water. It keeps the meat tender and flavorful better than traditional cooking s5. Sous vide is great for sealed meat, giving you a juicy result.

Sous vide entails sealing the meat in a bag and cooking it in hot water.The meat cooks evenly through the gentle, controlled heat. This makes it soft, tasty, and not overcooked.

Remember, vacuum sealing doesn’t stop spoilage entirely. The key is to thaw and cook right, like with sous vide, for safe, tasty frozen meat. Doing this means you get the perks of sealed meat without the worry of getting sick.

Final Word

Vacuum sealing is an excellent method for keeping meats fresh in the freezer. It removes the air and tightly seals the meat. This makes the frozen meat last for up to 3 years, much longer than usual. It also stops freezer burn, which can change the meat’s taste and texture17. For the best results with vacuum-sealed meat, make sure to prepare, store, and cook it right, like with sous vide17. Vacuum sealing has many advantages for frozen meat.It keeps meat safe longer and makes the taste better. You also save space and use a more modern method. Following these steps will keep your meat fresh, save you money, and reduce waste.

Frequently Asked Questions

How do I properly prepare frozen meat for vacuum sealing?

Start by cutting the meat into small portions and then freeze it. This step ensures better sealing and less vacuum sealer problems. Always keep your hands clean to avoid adding bacteria to the meat. This bacteria could spoil the meat and create bad smells. Following sanitation rules is key to sealing frozen meats safely.

How should I store vacuum sealed frozen meat?

Store vacuum sealed frozen meat at 0°F or lower in the freezer. This temperature stops bacteria growth and keeps the meat quality high. Don’t stack heavy things on the sealed packages. It could break the seal and lead to air exposure.

Do I need to pre-freeze meat before vacuum sealing it?

Pre-freezing meat before vacuum sealing is not necessary but recommended. It helps maintain the shape of the meat, prevents liquids from being sucked into the vacuum sealer, and enhances the sealing process.

Can I vacuum seal cooked meat for freezing?

Yes, you can vacuum seal cooked meat for freezing. Ensure the meat has cooled completely before sealing. This method is excellent for preserving leftovers and meal prepping, as it maintains the meat’s flavor and texture.

What is the freezer life of vacuum-sealed meat?

 Vacuum-sealed meat can remain fresh in the freezer for much longer than meat that is not vacuum-sealed. While regular meat may last 6-12 months, vacuum-sealed meat can stay fresh for up to 2-3 years without freezer burn or loss of quality.

Is it safe to vacuum seal meat with marinade?

Yes, it is safe to vacuum seal meat with marinade. This method can enhance flavor as the marinade infuses the meat while it freezes. For optimal outcomes, partially freeze the meat with marinade to avoid liquids from affecting the sealing process.

Filed Under: Essentials

Urgent Warning: Can You Use a Regular Vacuum for Water?

June 25, 2024 by bigfishtavernlagunaadmin Leave a Comment

Regular vacuums are designed for picking up dry debris like dirt, dust, and crumbs. They work by suctioning these items into a bag or canister, effectively keeping your floors and carpets clean. However, can you use a regular vacuum for water? The answer is no. Using a regular vacuum in water is not safe; it can damage the vacuum and may even cause electrical shock.

For liquids and messy spills, you need a wet/dry vacuum. These are commonly known as shop vacuums, specifically designed for both wet and dry cleaning tasks. Wet/dry vacuums are equipped with special parts that allow them to function safely around water. So, when cleaning up liquids, always choose a model designed for that purpose.

Can You Use a Regular Vacuum for Water?

Understanding Vacuum Cleaner Types

Not all vacuum cleaners are the same when it comes to cleaning. They come in different types suited for specific tasks. Knowing about dry vacuums, wet/dry vacuums, and shop vacuums helps pick the best one. You might need it for spill cleanup, flood cleanup, carpet cleaning, or just for dry debris and liquid suction.

Dry Vacuums

Dry vacuums are great for picking up dry stuff like dirt, dust, and crumbs, making them very common. But be careful, they can’t handle liquids. Using them for wet things can cause serious damage, like electrical issues, breaking the motor, and clogging filters.

Wet/Dry Vacuums

Wet/dry vacuums, or shop vacuums, are good for both dry and wet messes. They’re equipped with special parts to handle liquids, including bigger storage capacities, moisture-resistant materials, and reliable filtration. They’re the go-to vacuums for cleaning up water, spills, and floods more effectively than dry vacuums.

Shop Vacuums

Shop vacuums, or wet/dry vacuums, are for tougher clean-up jobs, like liquid spills and wet messes. They’re often seen in workshops, garages, and for heavy-duty commercial or industrial use. These vacuums are designed with strong suction power, large tanks, and special filters, making them great for both dry and liquid clean-up.

Risks of Using a Regular Vacuum for Water

Don’t use a regular vacuum cleaner for water or liquids. It’s dangerous. The machine’s parts aren’t built to handle wet stuff. This could short-circuit, shock, or even set it on fire. You could get hurt or break the vacuum.

Electrical Hazards

The regular vacuum’s motor isn’t safe around water. If it gets wet, it might overheat, stop working, or fail completely. Then, your vacuum won’t work and fixing it could cost a lot.

Motor Damage

A wet mess can clog up the vacuum’s filters fast. When this happens, your vacuum can’t clean well. This might also mean more work to keep your vacuum running, plus extra costs.

Can You Use a Regular Vacuum for Water?

Filter Clogging

Small water amounts are usually safe, but a little more can be a big problem. If you’ve got a small puddle, you might break your vacuum.

A big water mess can kill your vacuum and is very risky for shocks. If this happens, stop and clean up the water with towels or a mop. Most vacuums are not made to handle water. They leak if used on wet messes, which can also ruin your vacuum. Vacuuming water with dry stuff causes clogs, making your vacuum not work right.

Can you use a regular vacuum for water

Regular dry vacuums are meant for picking up dry things like dirt, dust, and crumbs. They’re not built to handle liquids. If you try to vacuum up water, you might damage the motor, create danger from electricity, and block filters. This can make your vacuum stop working properly and even be unsafe to use.

Dry Debris Only

Normal dry vacuums lack the special filters needed for liquids. Trying to use them with water can cause them to clog, break, or be unsafe. This is because they’re made for dealing with dry stuff only.

Lack of Liquid Filtration

Standard dry vacuums aren’t set up to handle liquids safely. They lack the right filters and suctions for moisture. This can cause problems, making the vacuum clog, break, or be unsafe.

If you use a regular vacuum on water or spills, it could fill with wetness. In turn, this can support the growth of mold and mildew. Not only does this create health risks, but it can also damage your vacuum over the long term.

When to Use a Wet/Dry Vacuum

Wet/dry vacuums are perfect for cleaning up water. They have special parts to manage liquids safely. This makes them great for dealing with spills.

Water Spills

For floods or big water messes, a wet/dry vacuum is a must. They can suck up water fast. This helps prevent more damage and stops mold from growing.

Flood Cleanup

They’re also good for making carpets and furniture very clean. Wet/dry vacuums can deal with water and dry messes. This is key for deep cleaning.

Carpet Cleaning

These vacuums handle all kinds of messes well. They’re great for homes, garages, and work sites. With strong motors and tough parts, they take on liquids and solids with ease.

They have tanks of different sizes for all jobs. It’s crucial to keep them clean for the vacuum to function effectively. This includes cleaning out the tank and checking the filters.6 Think about how big your cleaning jobs are and how often you’ll use the vacuum. This guide will help you make the right decision. Consider factors such as tank size and power.

Choosing the Right Wet/Dry Vacuum

Choosing a wet/dry vacuum needs thought. You must think about how much it can hold, how strong it sucks, and what it filters. These things are key to getting the best machine for your needs.

Tank Capacity

The size of the tank matters a lot. A big tank is best for huge messes, like floods. It can handle lots of liquid at once. But, for everyday spills or cleaning the carpets, a smaller tank will do fine.

Suction Power

Suction power is very important for a wet/dry vacuum. A strong suction means it can clean well. Look for machines with powerful motors for the best cleanup. You can check the suction by looking at the sealed pressure and CFM ratings.

Can You Use a Regular Vacuum for Water?

Filtration System

Wet/dry vacuums come with special filters. These filters can work with both wet and dry messes. Make sure your vacuum has good filters, like foam or bags. Some vacuums need filter changes for wet use. But others have filters that work in all conditions.

Thinking about these features helps you pick the right wet/dry vacuum. The right one will work well for all your cleaning needs, from big spills to everyday messes.

Maintenance and Safety Tips

Keep your wet/dry vacuum running well by cleaning its filters often. Follow what the maker says on how to clean and replace them. This will help your vacuum stay in good shape.

Regular Filter Cleaning

To keep your vacuum safe after using it on liquids, dry everything first. This means the tank, filters, and hoses. No dampness should be left to stop mold. Then, store it in a place that’s not humid.

Proper Vacuum Storage

When cleaning with your vacuum, always use it safely.Put on the right gear like gloves and eye wear. Also, avoid using it close to electrical things to stay safe from shocks.

Conclusion

It’s obvious that a regular dry vacuum does not suit cleaning up water or liquids. It is only good for dry things. With no proper gear, it can be risky and won’t work well.

A wet/dry vacuum is the smart pick for handling liquids. Also called a shop vacuum, it has the right tech for wet and dry tasks. It features good filters, parts that don’t get damaged by water, and strong suction power.

Knowing what each vacuum can and can’t do makes cleaning safer and better. When you face water or carpet cleaning, a wet/dry vacuum is your must-have tool.

Frequently Asked Questions

How does a regular vacuum differ from a wet/dry vacuum?

A regular vacuum is for dry stuff, like dust. But, a wet/dry vacuum can pick up liquids too. It’s built to safely manage both wet and dry messes.

What are the dangers of using a regular vacuum for water?

Using a normal vacuum for water is very risky. It might lead to electrical dangers and can damage the motor. This misuse could also quickly ruin the filters.

Why are regular vacuums not suitable for liquid cleanup?

Regular vacuums can’t handle liquids safely. They lack the necessary parts for this. Their design is for dry items, meaning liquids can cause harm and danger.

When should I use a wet/dry vacuum?

Wet/dry vacuums are perfect for spills and floods. They are also great for deep cleaning carpets. Their design allows them to handle wet situations without harm.

What should I consider when choosing a wet/dry vacuum?

Key things to look for include a big tank, strong suction, and a good filter system. These features will help in cleaning up liquids safely and well.

Filed Under: Essentials

Why Is My Pool Vacuum Not Moving? Troubleshoot Now!

June 16, 2024 by bigfishtavernlagunaadmin Leave a Comment

Maintaining a crystal-clear pool requires the reliable operation of equipment like pool vacuums. Maintaining a clean and inviting pool can be challenging.  A vital part of this routine is ensuring your pool vacuum is in top-notch condition. But what happens when your trusty pool vacuum stops moving? It can be frustrating and perplexing, leaving you wondering what went wrong. Let’s dive into some troubleshooting tips to get your pool vacuum back in action. In this guide, we’ll examine common problems that can cause your pool vacuum to stop moving and offer practical troubleshooting tips to restore its efficiency.

Why Is My Pool Vacuum Not Moving?

Introduction to Pool Vacuums

To keep a pool clean and safe, it’s vital to use a pool vacuum. This tool removes dirt and debris effectively. Using it the correct way can improve your pool’s cleanliness and life.

What is a Pool Vacuum?

A pool vacuum is a cleaning device that uses suction, pressure, or is robotic. It cleans pools by removing any debris. This makes the pool environment clean and well-maintained.

Types of Pool Vacuums

There are three main types of pool vacuums:

Suction 

Suction pool vacuums are powered through the pool’s skimmer. They are a top choice for automatic cleaning and are usually more affordable. 

Pressure

Pressure pool vacuums use water pressure to move and clean by attaching to the pool’s return line. They are effective for stirring up dirt.

Robotic

Robotic pool vacuums are self-contained and use batteries for cleaning. They offer hands-off convenience for maintaining your pool.

Importance of a Functional Pool Vacuum

A working pool vacuum is key to a clean and healthy pool. Regular cleaning, along with other maintenance like applying algaecide, removes debris and keeps the water clear.  It’s crucial to keep your pool vacuum in good shape to maintain your pool optimally.

Type of Pool Vacuum

Key Features

Advantages

Disadvantages

Suction Pool Vacuum

Connects to the pool’s skimmer suction tube


Relies on the pool’s pump and filtration system

Affordable option


Require minimal setup

May have reduced suction power


Can be affected by clogged filters or hoses

Pressure Pool Vacuum

Connects to the pool’s return line or jet


Uses water pressure to move and clean

Efficient at cleaning large debris


Require less maintenance

Rely on the pool’s water pressure


May be less effective on fine particles

Robotic Pool Vacuum

Fully automated with battery-powered movement


Equipped with advanced cleaning sensors and technologies

Convenient and hands-off cleaning


Effective at cleaning various pool surfaces

Require regular maintenance and charging


Generally more expensive than other types

No matter what type you have, a well-functioning pool vacuum is fundamental. It maintains your pool’s cleanliness and health.2 Knowing how to use, maintain, and fix your pool vacuum is essential to keep it working well.

Problems and solutions for different types of pool vacuums

Suction Pool Vacuums Problems and solutions

With suction pool vacuums, trouble often comes from the hose. An air leak or a clog can stop suction power.

Solution: This makes the vacuum stall.1 To fix this, check the hose for leaks and make sure it’s clear. You can also try increasing the cleaner’s power by blocking other lines.

Why Is My Pool Vacuum Not Moving?

Pressure Pool Vacuums Problems and solutions

One common problem with pressure pool vacuums is inadequate water pressure. This issue can arise due to several reasons:

Clogged Filters: When the filters are clogged with debris, it restricts water flow to the vacuum, reducing its effectiveness.

Pump Issues: Problems with the pool pump, such as a malfunctioning impeller or air leaks, can also lead to inadequate water pressure.

Solution: This is often caused by a clogged filter or pump basket. Regularly clean these components to ensure proper water flow and maintain optimal vacuum performance.

Robotic Pool Vacuum Problems and solutions

Robotic pool vacuums often have trouble with their power.If the light on the power supply is not illuminated, it may indicate insufficient power.

Solution: Ensure the vacuum is properly set up. Check for anything that might be stopping its movement, like debris.

If none of these steps help your pool vacuum move, it’s time to call in the pros. Reach out to Clear Choice Pool Care & Maintenance at (214) 974-8960 for expert help.

Common Causes and Troubleshooting Steps

When your pool vacuum stops, it’s not fun. But, many common problems could be the cause. Knowing these can help you fix the issue fast. It doesn’t matter if your vacuum is suction, pressure, or robotic. Find the root cause problem and take appropriate action to fix it.

Hose and Connection Issues

Sometimes, a pool vacuum won’t move due to hose or connection troubles. Suction pool vacuums might have less power if air gets in through leaks. This stops the vacuum from working well.

Check the hose for leaks often and clear any blockages to keep your vacuum running properly. Pressure cleaners might not move if their hoses can’t reach or if they leak air.

Clogged or Damaged Parts

Pool vacuums can struggle if their parts are clogged or broken. Suction vacuums might not have enough power if their lines or filters are clogged. If their parts are worn, they won’t move around the pool well. Pressure cleaners have issues when their components, like thrust jets or wheels, don’t work right.

Power Supply and Motor Problems

The problem could be with the power or the motor of the pool vacuum itself. A bad power source or motor doesn’t allow the vacuum to move. For robotic vacuums, check that the power supply gives the right voltage. Also, make sure the motor works well.

Why Is My Pool Vacuum Not Moving?

Preventative Maintenance: Pool Vacuum Not Moving

Regular maintenance is key to keeping your pool vacuum in good working condition. Here are some tips to help prevent issues:

  • Clean the vacuum head and hose regularly to remove debris.
  • Inspect cord and connections properly to prevent damage.
  • Check the pump for leaks and ensure it is properly primed.
  • When not in use, store the vacuum in a dry and shaded area to protect it from environmental damage. 
  • Follow the manufacturer’s maintenance guidelines to keep all components in top condition.

When to Call a Professional

If you have tried troubleshooting your pool vacuum and it still isn’t moving, it may be time to call a professional. A pool maintenance expert can diagnose and fix more complex issues that may be beyond your capabilities.Feel free to seek professional assistance to prevent additional damage to your pool vacuum or other pool equipment.

Frequently Asked Questions

Why isn’t my pool vacuum moving at all?

The most common reasons for a non-moving pool vacuum are blockages, low water pressure, or mechanical failures. Check for debris in the vacuum head, hose, and filters, and ensure the pool pump is working correctly.

 Why does my pool vacuum move slowly or sporadically?

Slow or erratic movement can be caused by low water pressure, air leaks in the hose, or worn-out parts. Check the hose for leaks, ensure proper connections, and inspect the vacuum components for wear and tear.

What should I do if my pool vacuum’s hose has a leak?

 If you find a leak in the hose, you can patch it with a repair kit or replace the damaged section. For significant damage, it might be best to replace the entire hose.

Can a malfunctioning pool pump affect my pool vacuum’s movement?

Yes, a malfunctioning pool pump can lead to insufficient water pressure, which is necessary for the vacuum to move and clean effectively. Regularly check and maintain your pool pump.

How can I improve the suction power of my pool vacuum?

Ensure that the pool pump is running efficiently, clean the filters, and check for any blockages or leaks in the system.

Wrapping-Up

Understanding the reasons why your pool vacuum may cease to function is key to swiftly resolving the issue and ensuring your pool remains clean and enjoyable. By following the troubleshooting tips provided, you can effectively restore your pool vacuum’s performance and continue to maintain a pristine swimming environment for all to enjoy.

Filed Under: Essentials

When Can I Vacuum After Bed Bug Treatment? Find Out Now!

June 16, 2024 by bigfishtavernlagunaadmin Leave a Comment

Wondering when it’s safe to vacuum after a bed bug treatment? It’s a common question among those who have just undergone the process of eliminating these persistent pests from their homes. Vacuuming is an essential part of post-treatment cleanup, but timing is crucial to ensure that the treatment remains effective. This guide will walk you through the recommended waiting periods based on the type of treatment you’ve received, as well as provide tips on how to vacuum effectively without jeopardizing the results of the bed bug eradication efforts. By following these guidelines, you can help maintain a bed bug-free environment and ensure peace of mind in your home.

When Can I Vacuum After Bed Bug Treatment?

Understanding the Importance of Proper Bed Bug Treatment

Bed Bug Infestations: A Persistent Nightmare

Experiencing bed bugs is both annoying and hard to tackle. These tiny bugs can sneak into almost anywhere, making them tough to see and fight. They’re known for their fast spread, adding to the dilemma for homeowners.

Professional Pest Control: The Key to Effective Elimination

Turning to experts in pest control is often the best move against bed bugs. These experts are trained and equipped to manage every phase of a bed bug’s life cycle. Their methods increase the possibility of actually getting rid of them. Plus, they’ll keep an eye on the situation afterwards to make sure the bugs don’t come back.

Vacuuming After Bed Bug Treatment: A Crucial Step

Removing Residual Bed Bugs and Eggs

Adds you should vacuum everywhere in your home. This includes all the tiny places bed bugs might be, like cracks and corners. By vacuuming these spots well, you make sure you catch any bugs that are still around. This step is key in making the treatment really work.

Enhancing Treatment Effectiveness

Vacuuming does a lot to make the bed bug treatment better. It catches any bugs or eggs that the first round of treatment missed. Thus, combining treatment with good vacuuming greatly ups your chances of getting rid of bed bugs for good. It also helps stop them from coming back.

When Can I Vacuum After Bed Bug Treatment?

When Can I Vacuum After Bed Bug Treatment?

The right time to vacuum after a bed bug treatment depends on the method used. If heat was used, you can start vacuuming 6-7 hours later. Your home might be too hot to go into right after.
For treatments with insecticide sprays, wait 3-4 hours before vacuuming. This lets the insecticide dry well. Going back in too soon within 2 hours can be bad for people and pets. The insecticide needs more time to dry. Always check with the pros to know when it’s safe to vacuum for your situation.

Timelines for Different Treatment Methods

Treatment Method

Vacuuming Timeline

Additional Notes

Heat Treatment

6-7 hours

Home may be very hot immediately after treatment.

Insecticide Sprays

3-4 hours

Ensure adequate drying time to avoid exposure.

Remember, these timelines are approximate and may vary based on specific products used and professional recommendations. Always follow the guidelines provided by your pest control expert for the safest and most effective post-treatment procedures.

Preparing for Safe and Effective Vacuuming

Using a HEPA-Filtered Vacuum Cleaner

A HEPA-filtered vacuum cleaner is a must for fighting bed bug infestations. It helps get rid of bed bug hiding spots. Plus, it catches any leftover bed bugs and eggs from the treatment.

Focusing on Cracks, Crevices, and Hiding Spots

Along with the right vacuum, target those tough spots where bed bugs hide. Often, they’re in cracks and crevices. By vacuuming these areas well, you up your chances of getting rid of any leftover bugs and eggs.

This makes the whole vacuuming process more successful in dealing with the issue. Remember, it’s about a comprehensive vacuum approach.

Post-Vacuuming Precautions and Best Practices

After vacuuming up bed bugs and their eggs, it’s vital to do more. This helps stop these pests from spreading and keeps your home bug-free. It’s optimal to discard the vacuum bag outside of your residence.It might have bugs or eggs that could get back inside.

Next, clean your vacuum cleaner well. Use hot soapy water. This kills any bugs or eggs left inside the vacuum.

Complementary Bed Bug Elimination Strategies

Vacuuming plays a key role in fighting bed bugs. Yet, it’s not the whole solution. It’s vital to wash and dry all your fabrics at high heat. This includes stuff like your bedding, curtains, and clothes. The dryer must be set to its highest heat for at least 30 minutes. Alternatively, you can choose professional dry cleaning to ensure everything is free of bugs.

When Can I Vacuum After Bed Bug Treatment?

Make sure to tidy up the space, too. Don’t forget to throw out any items you don’t really need. Bed bugs love places to hide, like a messy room. So, the less stuff they have to hide behind, the better. Moving things off the floor and from under the bed helps the treatment work better.

Monitoring and Follow-Up After Treatment

After completing bed bug treatment, monitoring and follow-up are crucial steps to ensure that the infestation has been effectively dealt with and to prevent any potential re-infestation. Here’s how you can effectively monitor and follow up after bed bug treatment:

Regular Inspections for Residual Bed Bug Activity

To make sure the bed bugs are gone, keep an eye out. Professionals look everywhere, using special tools and methods to find the bugs.8 Devices like ClimbUp™ Insect Interceptor can find even a few bugs. By checking your home often, you can find and fix any remaining bug issues fast.

Seeking Professional Assistance for Persistent Infestations

If the bed bugs keep coming back, get help. The first source warns that bed bugs are hard to beat without expert help. Pest control companies know the best ways and have special tools.8 They might even promise their work, but that’s not a full bug-free guarantee.8 A pro can give you a better chance of getting rid of the bugs for good.

Frequently Asked Questions

Can vacuuming too soon after treatment affect the outcome?

Vacuuming shortly after bed bug treatment can compromise its effectiveness. For chemical treatments, vacuuming prematurely can remove residual insecticides before they have had a chance to fully eliminate the bed bugs. For heat treatments, vacuuming too soon can disturb and spread any surviving bed bugs, making the treatment less effective. Be sure to adhere to the advised waiting period from your pest control professional to allow ample time for the treatment to take effect.

Are there specific areas I should focus on when vacuuming after treatment?

Pay attention to locations where bed bugs commonly conceal themselves. Key areas include mattress seams, box springs, bed frames, upholstered furniture seams, baseboards, carpets, and any cracks or crevices in the room. Pay special attention to spots where bed bugs were most concentrated before treatment.

How often should I vacuum following bed bug treatment?

After the initial waiting period, vacuum regularly to help maintain a bed bug-free environment. Initially, you may want to vacuum daily or every other day for the first few weeks following treatment. This ensures the removal of any remaining bed bugs, eggs, or debris. Afterwards, you can reduce vacuuming frequency to once a week as part of your routine cleaning to prevent re-infestation.

What other cleaning practices should I follow after bed bug treatment?

In addition to vacuuming, follow these cleaning practices after bed bug treatment:

Wash Bedding and Fabrics: Wash all bedding, linens, curtains, and clothing in hot water and dry them on the highest heat setting.

Declutter your home to minimize hiding spots for bed bugs, and seal cracks and crevices in walls, floors, and furniture where they could potentially hide.

Inspect Regularly: Continue to inspect for signs of bed bugs regularly, particularly in areas where they were previously found.

Use protective covers: Consider encasing your mattress and box spring to prevent bed bugs from re-infesting these areas.

Should I use a regular vacuum or a specific type after bed bug treatment?

It is recommended to use a vacuum with a HEPA filter after bed bug treatment. HEPA filters capture tiny particles, including bed bugs, their eggs, and allergens, preventing them from being re-released into the air. Regular vacuums without HEPA filters may not capture these tiny particles effectively, potentially allowing them to escape and re-infest your home.

Filed Under: Essentials

  • « Go to Previous Page
  • Page 1
  • Interim pages omitted …
  • Page 3
  • Page 4
  • Page 5
  • Page 6
  • Page 7
  • Page 8
  • Go to Next Page »

Primary Sidebar

Recent Posts

  • Can You Deep Fry in a Nonstick Pan? My Surprising Results
  • Clay Pot vs Dutch Oven: Which One Right for You?
  • Are Dutch Ovens Non Toxic? All You Need to Know
  • Is Low Specific Heat Capacity Good for Frying Pans​
  • Smeg Kettle vs Mini Kettle: Which One Fits Your Style?

Copyright © 2024 bigfishtavernlaguna.com. All right reserved.