• Skip to primary navigation
  • Skip to main content
  • Skip to primary sidebar
  • About Us
  • Affiliate Disclosure
  • Contact us
  • Cookie Privacy Policy
  • Privacy Policy
  • Sample Page
  • Terms of Use

Kitchen Guide

  • Appliance Reviews
  • Bakeware
  • Buying Guides
  • Product Comparisons
  • Recipes
  • Essentials
  • Cleaning

Essentials

How does a chamber vacuum sealer work?

February 20, 2024 by bigfishtavernlagunaadmin Leave a Comment

Have you ever wondered how some foods stay fresh for a long time? It’s like magic. Well, not really! One secret behind keeping food fresh is something called a chamber vacuum sealer. It sounds fancy, but it’s pretty simple. Let’s dive in and explore how this clever device works its magic to keep our food fresh for longer.

How does a chamber vacuum sealer work?

The Vacuum Sealing Process Explained
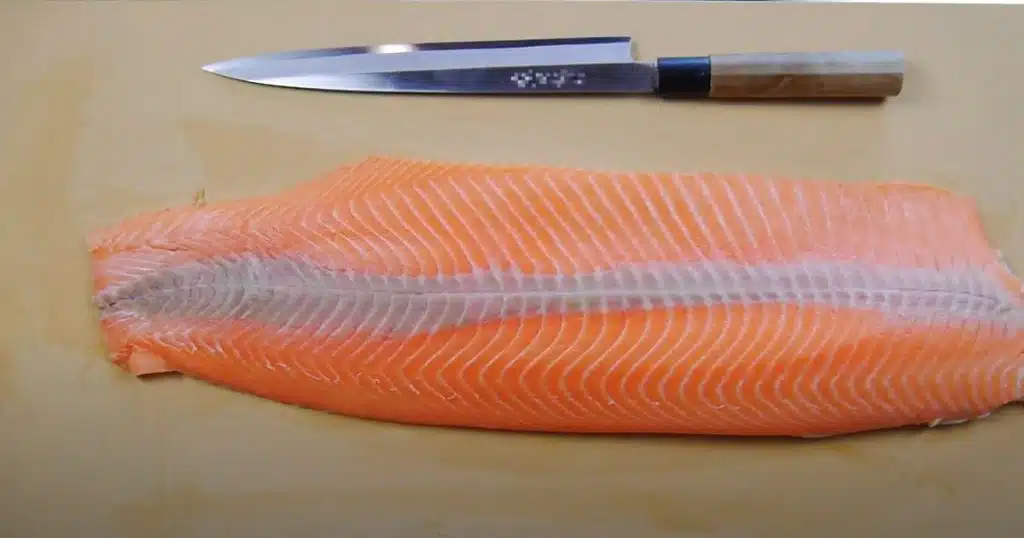
Preparing the Food

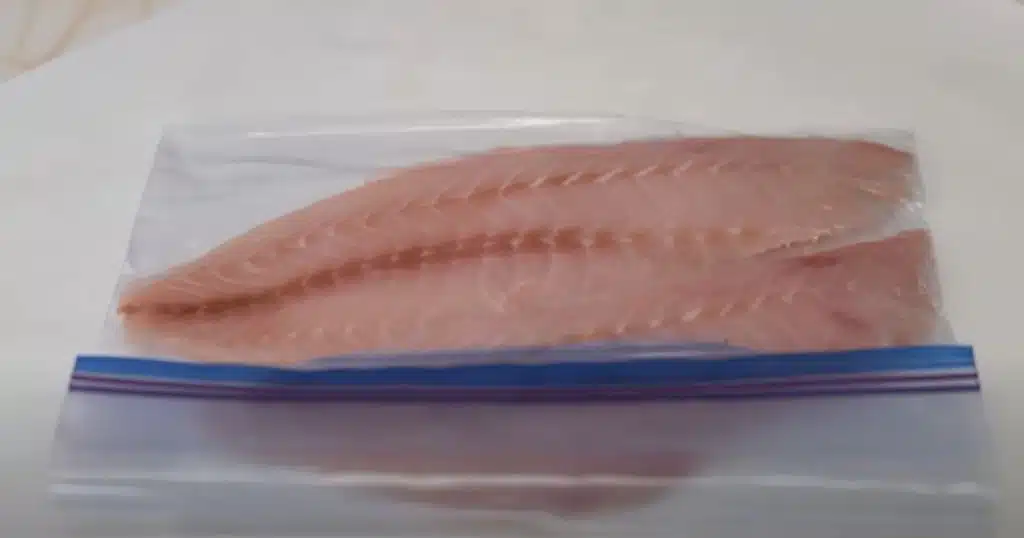
Before we start sealing the food, we need to get it ready. This means putting the food inside a unique bag. This bag is made to work with the chamber vacuum sealer. We want to ensure the bag is sealed tight so no air can enter. This helps keep our food fresh for a long time. Once the food is in the bag, we’re ready to move on to the next step.
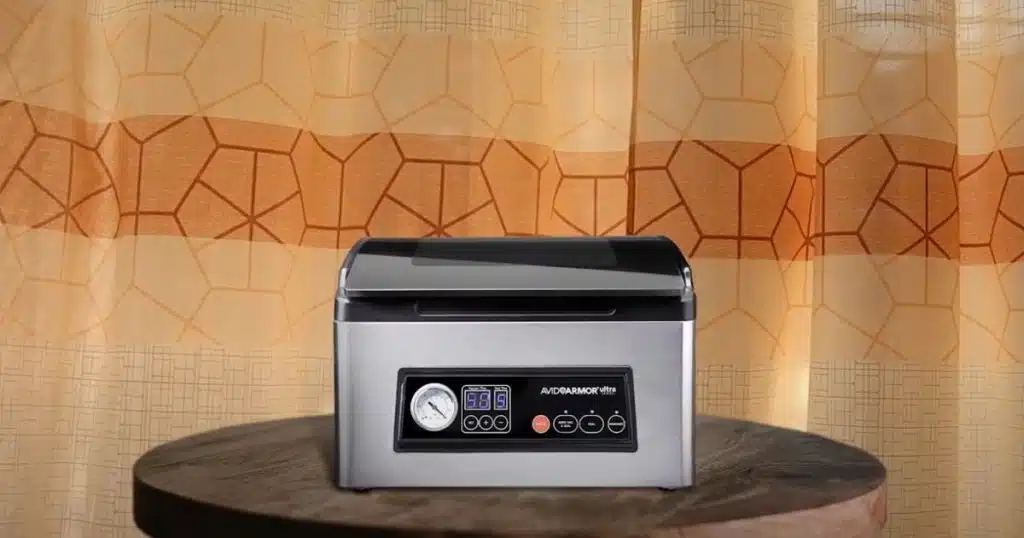
Closing the Lid

Once the food is sealed in the unique bag, you need to close the lid of the chamber vacuum sealer. It would help if you ensured the lid closed well; this is a special place where the magic happens. Closing the lid protects everything inside. Closing the lid is an essential step before starting to seal the food. You are one step closer to keeping food fresh for longer.

Removing Air

Now that our lid is closed tight, it’s time to start the magic! The chamber vacuum sealer begins to remove the air from inside. It’s like a giant vacuum cleaner, sucking out all the air. As the air goes away, something extraordinary happens. The space inside the bag and the machine becomes empty of air. This helps our food stay fresh for longer. 

Sealing the Bag

Once the air is all gone, it’s time to seal the bag shut! The chamber vacuum sealer uses heat to seal the bag tightly. It’s like closing a zipper on a jacket but with heat instead of teeth! This step is super important because it keeps the air out. No air means our food stays fresh for much longer. So, when the bag is sealed, our food is safe and snug inside, ready to visit fresh until we’re prepared to enjoy it. Packing the bag is like giving our food a warm hug, keeping it fresh and tasty!

Restoring Pressure

After sealing the bag, the chamber vacuum sealer does something interesting. It brings back the pressure inside the machine to normal levels. Restoring the pressure helps keep our food safe and cozy inside the bag. It’s like making sure everything is just right before we’re done. So, with the pressure restored, our food is all set to stay fresh and tasty for a long time. Ready to be enjoyed whenever we’re hungry!

What’s the difference between a chamber vacuum sealer and an edge sealer?

Chamber Sealers

Chamber sealers work by sealing the entire bag in a special chamber. They remove the air from both inside the bag and the chamber itself. This helps keep the food fresher for more extended periods. Chamber sealers are great for sealing many bags at once, making them handy for businesses or prominent families.

How does a chamber vacuum sealer work?

Edge Sealers

On the other hand, Edge sealers only seal the edges of the bag. They don’t remove the air from inside the bag or the machine. While they are simpler and more affordable, they might not keep food as fresh for as long as chamber sealers do.

How does a chamber vacuum sealer work?

Chamber sealers vs. edge sealers

Chamber Pouches

Chamber pouches are unique bags designed to work with chamber vacuum sealers. These bags are placed inside the sealer’s chamber before sealing. The machine removes air both from inside the bag and the chamber itself. This method helps keep food fresher for more extended periods. Chamber pouches are great for simultaneously sealing large quantities of food, making them ideal for businesses or prominent families.

 Edge Sealer Bags

Edge sealer bags, also known as external or out-of-chamber bags, are simpler and more affordable. These bags are sealed by placing the open edge under the sealing bar of the vacuum sealer. However, unlike chamber pouches, edge sealer bags only remove air inside the bag, not from the sealer machine itself. While they’re convenient for home use and smaller quantities of food, they might not keep food fresh for as long as chamber pouches do.

Wrapping Up

A chamber vacuum sealer is like a magic machine for keeping food fresh. It works by taking out all the air from around the food and sealing it up tight. This stops bacteria from growing and keeps the food fresh for much longer. Using a chamber vacuum sealer is brilliant for anyone who wants to save food and money.

Filed Under: Essentials

Easy Ways to Freeze Fish Without a Vacuum Sealer Safely

February 18, 2024 by bigfishtavernlagunaadmin Leave a Comment

Keeping your fish fresh and tasty is key, even if you don’t have a vacuum sealer. Luckily, there are simple ways to freeze fish without a vacuum sealer. These methods help keep your seafood fresh for longer. We’ll show you how to freeze fish at home and preserve fish freshness easily.

Freeze Fish Without a Vacuum Sealer

Key Takeaways

  • Discover effective methods for freezing fish at home without a vacuum sealer
  • Learn how to preserve fish freshness and extend the shelf life of your frozen seafood
  • Explore cost-effective and easy-to-implement fish freezing techniques
  • Understand the importance of proper fish freezing and the benefits of frozen fish
  • Gain tips for maximizing freezer space and thawing frozen fish correctly

Understanding the Importance of Proper Fish Freezing

Keeping fish fresh and of high quality is key. Freezing fish right is crucial for this. It helps keep seafood fresh, locks in flavor, and makes it available all year. Knowing how to freeze fish helps keep your catch or buy fresh and tasty food.

Why Freezing Fish Matters

Freezing fish preserves its freshness and prevents spoilage. Without freezing, fish can lose its taste, texture, and nutrients fast. Freezing lets you enjoy fish at its best long after catching or buying it.

Benefits of Frozen Fish

Freezing fish has many benefits. It makes fish last longer, so you can enjoy your seafood favorites even when they’re out of season. It keeps the fish’s natural taste and nutrients, making it healthier. Plus, frozen fish is easy to store and thaw when you want to eat it.

Learning how to freeze fish properly protects your seafood investment. It ensures your meals are delicious and of the highest quality. Mastering fish freezing is a skill that improves your cooking and seafood enjoyment.

Freeze Fish Without a Vacuum Sealer: Preparing Fish for Freezing

Before freezing your fish, you need to prepare them properly. This includes a few key steps to keep your fish tasting great and fresh. Let’s explore the best ways to freeze your catch.

Freeze Fish Without a Vacuum Sealer

Start by cleaning and filleting the fish. Remove the skin, bones, and organs. This makes the fish easier to work with and prevents freezer burn. Then, divide the fish into individual portions. This makes thawing and using the fish easier, without thawing everything at once.

For storing fish without a vacuum sealer, wrapping it right is crucial. Use freezer-safe bags, airtight containers, or heavy-duty foil or parchment paper. The aim is to keep air and moisture out, which can cause freezer burn and bad flavors.

Preparation Step

Importance

Clean and Fillet

Removes skin, bones, and organs to prevent spoilage and freezer burn

Portion into Serving Sizes

Allows for easy thawing and use of fish as needed

Wrap Tightly

Creates a barrier against air and moisture to preserve quality

Preparing your fish before freezing is key to enjoying delicious seafood for months. You can freeze your catch without a vacuum sealer by following these simple steps.

The Simplest Method: Freezer Bags

Freezing fish without a vacuum sealer is easy with heavy-duty freezer bags. This method is great for keeping your fresh catch or store-bought fish fresh. It’s a simple way to store your fish for later.

Selecting the Right Freezer Bags

Choosing the right freezer bags is key when freezing fish. Choose thick, freezer-safe bags specifically designed for storing food. Don’t use regular plastic bags as they might not keep the fish fresh.

Removing Air from Freezer Bags

To maintain your fish’s freshness, remove as much air as possible from the bags. Use a straw or a vacuum pump to suck out the air. Or, slowly put the bag underwater to push the air out. Then, seal the bag well to keep the freshness in.Follow these steps to freeze your fish without a vacuum sealer. Your fish will stay fresh and tasty for months.

Wrapping Fish in Foil or Parchment Paper

Looking for a method to freeze fish without using a vacuum sealer? Wrapping it in foil or parchment paper is a great option. This method helps keep the fish fresh and prevents freezer burn.

To wrap fish in foil or parchment paper, make sure to seal it tightly. This keeps air out, which can make the fish go bad. By following a few easy steps, your fish will stay fresh and tasty without a vacuum sealer.

Foil Wrapping

Parchment Paper Wrapping

1 .Cut heavy-duty foil larger than the fish.
2. Place the fish in the center.
3. Fold and crimp the foil edges tightly.
4. Seal to prevent air exposure.
5. Label with date and contents.

1. Cut parchment paper larger than the fish.
2. Position the fish in the center.
3. Fold and seal the edges securely.
4. Secure the edges tightly.
5. Mark with date and contents.

This wrapping method allows you to freeze fish without a vacuum sealer and is an effective way to keep your fish fresh for later use. Just remember to label and rotate your frozen fish for the best quality and taste.

Freeze Fish Without a Vacuum Sealer

Using Airtight Containers for Fish Freezing

Freezing fish without a vacuum sealer? Airtight containers can change the game. They’re a great way to keep your frozen seafood fresh. They also stop freezer burn from happening.

Choosing the Right Containers

Choosing the right containers is key for freezing fish. Go for rigid, airtight plastic or glass containers made for food storage. Don’t use regular plastic containers or bags because they might not seal well.Look for containers with tight-fitting lids for a secure seal. This keeps your fish fresh and prevents freezer burn. Ensure that the containers are sized correctly for the amount of fish you’re freezing.

Preventing Freezer Burn

Freezer burn can be a problem when you freeze fish without a vacuum sealer. But you can reduce its effects. Remove as much air as you can before putting the fish in containers. Use a straw or press the lid down hard to get rid of the air.

Also, fill the containers all the way to the top. This reduces air exposure and keeps your fish fresh. By doing these simple things, you can store your fish in the freezer without losing its quality.

Freezing Fish with Brine or Milk

Keeping your frozen fish fresh and tasty is key to enjoying seafood dishes. Freezing fish in a brine or milk solution is a great way to prevent freezer burn and keep moisture in. This fish freezing technique helps extend the shelf life of frozen fish and keeps it maximally fresh when you thaw it later.

Putting fish in a saltwater brine or milk before freezing creates a barrier against air. This keeps the fish’s natural taste and texture. The brine or milk also locks in the fish’s juices, making your frozen fish stay moist and tender for a long time.

Method

Benefits

Brine Freezing

Prevents freezer burn
Maintains moisture and texture
Extends the shelf life of frozen fish

Milk Freezing

Protects against oxidation
Preserves the natural flavor of fish
Ensures a smooth, velvety texture

To freeze fish with brine or milk, just put the clean, ready fish in the solution, making sure they’re fully covered. Let them soak for 15-30 minutes before freezing. The brine or milk will protect the fish, keeping it fresh and preventing freezer burn.

Using these innovative freezing methods, you can freeze fish the best way and maximize its freshness and shelf life. Whether you’re saving a big catch or buying your favorite fish, freezing with brine and milk is a great way to freeze fish without losing quality.

Maximizing Freezer Space for Fish Storage

Proper organization and space use in the freezer can help you store more fish and keep it fresh longer. This section will show you how to use your freezer space well and store fish without a vacuum sealer efficiently.

Flat Freezing Techniques

Flat freezing is a great way to save space in your freezer. Spread the fish fillets or portions in a single layer on a baking sheet or tray. This makes thin, flat packages that stack well and use less vertical space.

This method lets you store more fish and freeze and thaw it faster. To do this, arrange the fish in a single layer on a clean, flat surface, like a baking sheet with parchment paper. Once it’s frozen solid, take the fish off the sheet and stack the flat packages in your freezer. This keeps the fish’s shape and texture while saving space.

Flat Freezing Advantages

Traditional Freezing Drawbacks

Maximizes freezer space

Bulky, irregular shapes take up more space

Facilitates faster freezing and thawing

Slower freezing can lead to quality loss

Maintains fish shape and texture

Uneven thawing can compromise texture

Using flat freezing for fish storage without vacuum sealer and home freezing fish makes your freezer more organized and efficient. It helps keep your seafood fresh and easy to get to for a longer time.

Creative Recipes for Frozen Fish

Freezing fish lets you explore new flavors and dishes. It’s great for quick meals or impressing guests. These recipes will spark your creativity in the kitchen.

Try a simple fish taco with frozen fish like cod or tilapia. Coat it with batter and fry or bake it. Then, put it in tortillas with slaw, avocado, and lime crema. For a bigger meal, bake a frozen salmon fillet with roasted veggies and quinoa.For a treat, make a creamy seafood chowder. Start with sautéed onions, celery, and garlic. Then, add potatoes, milk or cream, and your frozen fish, like halibut or shrimp. Allow it to simmer until it’s fully cooked and ready to eat.

Recipe

Ingredients

Preparation Time

Baked Frozen Salmon with Roasted Veggies

– Frozen salmon fillet

– Assorted vegetables (e.g., broccoli, carrots, Brussels sprouts)

– Olive oil

– Salt and pepper

45 minutes

Crispy Fish Tacos

– Frozen white fish (e.g., cod, tilapia)

– Tortillas

– Shredded cabbage

– Avocado

– Lime crema

30 minutes

Creamy Seafood Chowder

– Frozen fish (e.g., halibut, shrimp)

– Onion, celery, garlic

– Potatoes

– Milk or cream

– Salt and pepper

60 minutes

Use these recipes to enjoy tasty meals and keep your seafood fresh. Try different flavors and cooking ways to use your frozen fish.

Final Thought

We’ve explored how to freeze fish without a vacuum sealer using freezer bags, foil, or airtight containers. These methods help preserve the freshness of your fish and extend its shelf life without the need for specialized equipment. This guide provides you with practical techniques to keep your seafood ready and tasty for long-term storage. Properly freezing fish ensures you can enjoy your catch for a longer time and have delicious seafood whenever you need it.

Frequently Asked Questions

What are some easy methods for freezing fish without a vacuum sealer?

Freezing fish without a vacuum sealer is easy with methods like using heavy-duty freezer bags, wrapping in foil or parchment paper, and airtight containers. These methods help keep the fish fresh and prevent freezer burn.

How can I prepare fish for successful freezing?

Before freezing, clean and portion the fish properly. Remove bones or skin. Package the fish to minimize air exposure and prevent freezer burn.

What are the benefits of freezing fish?

Freezing fish extends its shelf life and keeps its flavor and nutrients. It makes fresh fish available all year. With the right techniques, you can enjoy the same quality as fresh fish.

How can I maximize my freezer space for storing frozen fish?

Try flat freezing and organize your fish to save space in your freezer. Proper labeling and keeping an eye on the temperature are also key to keeping your frozen fish fresh.

What are the benefits of freezing fish in a brine or milk solution?

Freezing fish in a brine or milk solution keeps it moist and prevents freezer burn. This method is great for preserving the fish’s quality and texture over time.

Filed Under: Essentials

Attach Pool Vacuum Hose to Skimmer: Quick & Easy Steps

February 16, 2024 by bigfishtavernlagunaadmin Leave a Comment

A clean and well-maintained pool is a source of joy for many homeowners. A crucial aspect of pool maintenance is ensuring proper circulation and filtration of water, which involves using a pool vacuum system. Attaching the pool vacuum hose to the skimmer is a fundamental step. Let’s delve into the steps required to accomplish this task effectively.

How to attach  pool vacuum hose to skimmer?-Easy Guide

How to attach pool vacuum hose to skimmer?

To keep your pool sparkling and pristine, mastering the art of vacuuming is essential. A key step in this process is attaching your pool vacuum hose to the skimmer, ensuring effective debris removal. Here’s a concise guide to help you achieve seamless results.

  • Before starting, collect your pool vacuum head, telescopic pole, and vacuum hose. Ensure you have easy access to your pool’s skimmer.
  • Connect the vacuum head to the telescopic pole, ensuring a secure attachment. Follow manufacturer instructions to prevent leaks and ensure maximum efficiency.
  • Submerge the entire hose in your pool to fill it with water and remove air. This step prepares the hose for effective suction.
  • Open the skimmer lid, locate the suction port, and connect the primed end of the hose. Insert it firmly to ensure a solid connection.
  • Use any available clamps or retainers to secure the hose. Start your pool pump and check for suction by feeling the pull through the vacuum head.
  • With everything in place, begin vacuuming your pool. Move the vacuum head systematically to cover the entire surface, ensuring a thorough clean.

This straightforward routine will keep your pool spotless and ready for enjoyment!

Importance of connecting pool vacuum hose to skimmer

Connecting your pool vacuum hose to the skimmer is more than just a basic task—it’s essential for efficient, effortless pool maintenance. Here’s why:

  1. Enhanced Cleaning Efficiency: The vacuum-skimmer link provides strong suction, sweeping away debris and algae with each pass, leaving a sparkling pool floor.
  2. Debris Control: With this connection, surface and submerged debris are efficiently managed, keeping your pool clean and inviting.
  3. Improved Water Quality: The vacuum and skimmer work together to filter out impurities, ensuring clear, balanced water.
  4. Protects Pool Equipment: Proper connection reduces strain on your pump and filtration system, extending their lifespan and minimizing repair needs.
  5. Streamlined Maintenance: This setup simplifies cleaning, making pool care quicker and more enjoyable.

In short, connecting the vacuum hose to the skimmer creates a harmonious system that upholds the beauty and health of your pool with ease.

Locate the skimmer on the side of the pool

Locating the skimmer is crucial for maintaining a clean and healthy swimming environment. Let’s dive into where you can typically find this essential pool component.

Firstly, the skimmer is usually positioned on the side of the pool, adjacent to the water’s surface. It’s designed to draw in water, capturing debris such as leaves, insects, and other floating particles before they sink to the bottom.

How to attach  pool vacuum hose to skimmer?

To locate the skimmer, start by walking around the perimeter of your pool. Most skimmers are built into the pool wall, typically near one of the corners. You’ll notice a rectangular or square opening with a lid or cover.

Once you’ve identified the skimmer, lift the lid or cover to reveal the basket inside. This basket collects the debris pulled in by the skimmer. Remember to clean it regularly to ensure optimal performance.

Additionally, some pools may have multiple skimmers distributed along the sides to enhance efficiency, especially in larger pools.

Identify the basket inside and the hose connection point

Most skimmers are built into the pool wall, typically near one of the corners. Skimmer usually has a basket inside. The basket filters, trapping leaves, debris, and other contaminants before reaching the pump and filtration system. It’s usually a removable container, making it easy to clean and maintain for optimal performance.

The hose connection point is often near the skimmer, typically on the pool wall or nearby equipment. It’s designed to allow easy access for connecting and disconnecting cleaning devices, ensuring efficient circulation and filtration of water.

To locate the hose connection point, look for a fitting or inlet protruding from the pool wall or connected to the filtration system. It may have a threaded collar or locking mechanism to secure the hose during operation.

By familiarizing yourself with the basket inside the skimmer and the hose connection point, you can streamline your pool cleaning routine and maintain sparkling, crystal-clear water all season long.

Attach one end of the vacuum hose to the vacuum head

First, gather your equipment, including a vacuum hose and a compatible vacuum head. Ensure both components are in good condition, free from damage or wear. Position the vacuum head at the pool’s edge within reach of the area you wish to clean.

Next, submerge the vacuum hose entirely in the pool water to fill it and expel any trapped air bubbles. Once prepared, slide one end of the vacuum hose onto the fitting or connection point on the underside of the vacuum head. Ensure the connection is secure to prevent any leaks or loss of suction during cleaning.

How to attach pool vacuum hose to skimmer?

After attaching the hose, gently tug on it to confirm the connection is tight and unlikely to come loose during operation. Test the suction power by turning on the pool pump and observing the vacuum head for proper function. Once satisfied, slowly maneuver the vacuum head across the pool floor, focusing on debris or dirt buildup areas.

By following these simple steps, you can effectively attach one end of the vacuum hose to the vacuum head, ensuring efficient cleaning and maintenance of your pool for endless enjoyment.

The other end attach to the skimmer connection point

Attaching the other end of the vacuum hose to the skimmer connection point is crucial in maintaining a clean and healthy swimming pool. After securing one end of the hose to the vacuum head:

  • Locate the skimmer on the side of your pool.
  • Insert the exposed end of the vacuum hose into the skimmer’s suction port, ensuring a snug fit.
  • Apply gentle pressure and twist the hose clockwise to lock it into place securely.

Once the hose is attached, turn on the pool pump to activate the suction. Monitor the hose for any air bubbles, which may indicate a loose connection. Adjust the hose as needed to ensure proper sealing. With the hose securely attached to the vacuum head and the skimmer, you can effectively clean debris from your pool, maintaining pristine water quality for a refreshing swim.

FAQs: How to connect pool vacuum hose to skimmer

Is connecting a pool vacuum hose to the skimmer essential?

Proper connection ensures efficient cleaning by effectively utilizing the pool’s filtration system. It prevents debris accumulation, promotes water circulation, and enhances overall maintenance.

What is the process for attaching the vacuum hose to the skimmer?

Slide one end of the vacuum hose onto the vacuum head securely. Then, insert the exposed end of the hose into the skimmer’s suction port, applying gentle pressure and twisting clockwise for a tight seal.

How do I test if the connection is secure?

Turn on the pool pump to activate suction and monitor for any air bubbles in the hose, indicating a potential leak. Adjust the hose if necessary to ensure proper sealing.

What benefits can I expect from properly connecting the vacuum hose to the skimmer?

You can enjoy a cleaner pool with reduced debris, improved water circulation, and cost-effective maintenance, leading to a more enjoyable swimming experience.

What should I do if I encounter difficulties during the connection process?

If you need any help with the connection, consult the user manual for your pool equipment or seek assistance from a professional pool maintenance service.

Conclusion

Following the simple steps outlined in this guide, you can ensure efficient cleaning, optimal suction, and a sparkling clean pool for endless enjoyment. Remember to prioritize proper equipment maintenance and regular cleaning to keep your pool in top condition year-round. With a little effort and attention to detail, you’ll create a relaxing oasis where you can unwind and escape the stresses of everyday life. So dive in, confidently connect your vacuum hose, and make a splash with a beautifully maintained pool.

Filed Under: Essentials

  • « Go to Previous Page
  • Page 1
  • Interim pages omitted …
  • Page 6
  • Page 7
  • Page 8

Primary Sidebar

Recent Posts

  • Can You Deep Fry in a Nonstick Pan? My Surprising Results
  • Clay Pot vs Dutch Oven: Which One Right for You?
  • Are Dutch Ovens Non Toxic? All You Need to Know
  • Is Low Specific Heat Capacity Good for Frying Pans​
  • Smeg Kettle vs Mini Kettle: Which One Fits Your Style?

Copyright © 2024 bigfishtavernlaguna.com. All right reserved.