• Skip to primary navigation
  • Skip to main content
  • Skip to primary sidebar
  • About Us
  • Affiliate Disclosure
  • Contact us
  • Cookie Privacy Policy
  • Privacy Policy
  • Sample Page
  • Terms of Use

Kitchen Guide

  • Appliance Reviews
  • Bakeware
  • Buying Guides
  • Product Comparisons
  • Recipes
  • Essentials
  • Cleaning

Product Comparisons

Caraway vs Made In: Which Cookware Is Worth It?

March 28, 2025 by bigfishtavernlagunaadmin Leave a Comment

Caraway vs Made In

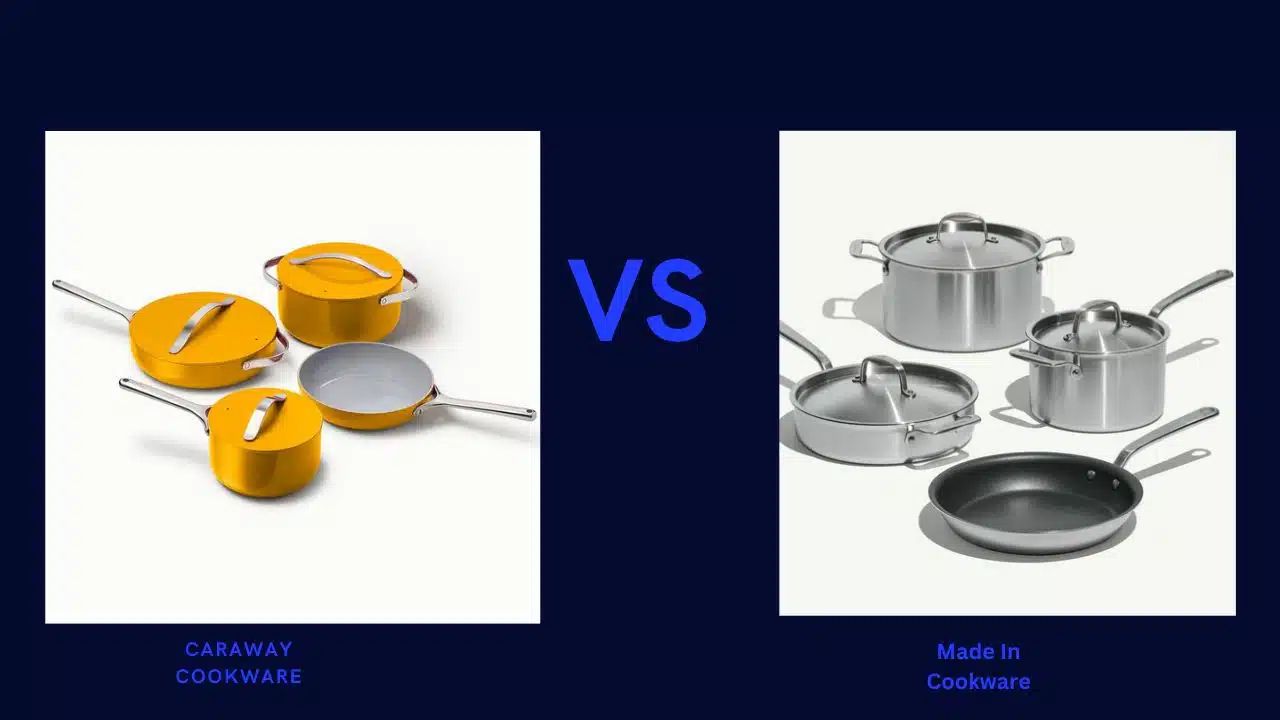
Choosing the right cookware can feel overwhelming, especially with so many options. If you’re stuck between Caraway vs Made In, I’ve been there too. Both brands offer high-quality pots and pans, but they shine in different ways.

 I’ve spent years testing cookware, and I know what really matters in a busy kitchen. From non-stick performance to safety, I’ll break down the key differences to help you decide.

 Whether you want sleek design or pro-level durability, I’ve got insights to share. Let’s dive in and find out which cookware is the best fit for your cooking style.

Caraway Cookware Overview

Caraway vs Made In

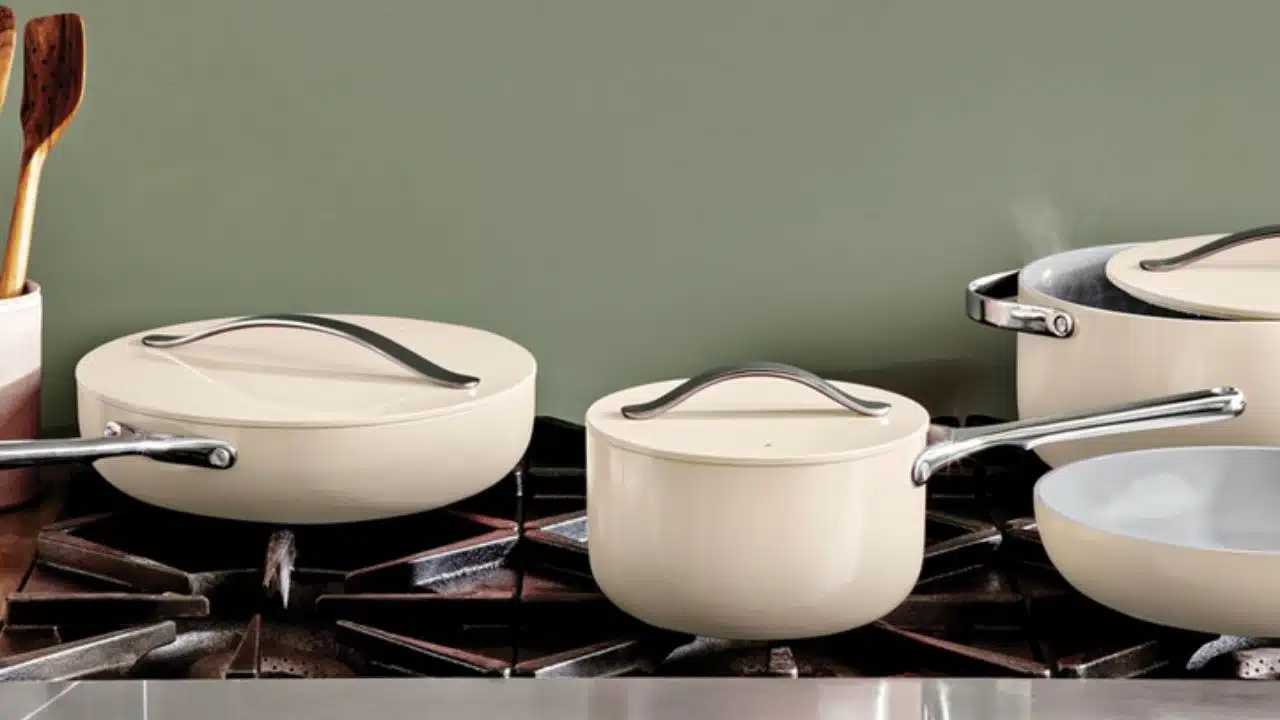
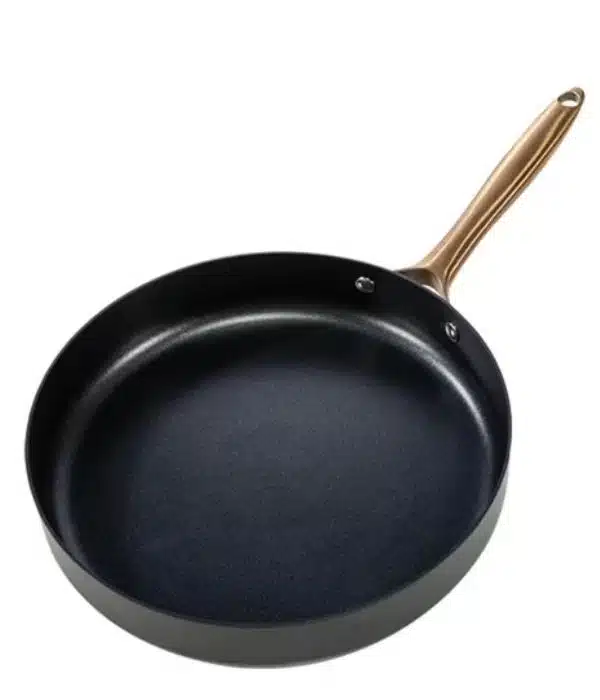
I’ve been using Caraway cookware for over two years, and it has changed how I cook. The brand makes modern, healthy cookware with stylish designs and safe materials. What I love most is how easy it is to use and how nice it looks. The non-stick surface works great. 

Food slides off, and cleanup is quick. The pans are made from ceramic-coated aluminum, so they are strong but light. They are also free from harmful chemicals like PTFE and PFOA, making cooking safer. The sleek design adds a touch of style to my kitchen. The even heat means my food cooks perfectly every time. 

Pros of Caraway

✅ Easy to clean: The non-stick surface makes cleanup a breeze.
✅ Eco-friendly: Safe materials that are good for the environment.
✅ Attractive design: Neutral colors that fit any kitchen style.
✅ Heat control: Works well on both low and high heat.

Cons of Caraway

❌ Weight: It’s lighter than expected, which may feel less sturdy for heavy-duty use.
❌ Handles: They can get warm after long cooking times.
❌ Storage space: It’s a bit bulky, making storage in a small kitchen tricky.

Even with these small issues, I still love it. It’s still my go-to cookware.

My Personal Experience

Caraway vs Made In

I’ve been using Caraway cookware for over a year, and it has completely changed my cooking routine. From quick breakfasts to elaborate dinners, it consistently delivers. Here’s my take on its design, performance, and build quality.

Design

From the moment I unboxed it, I knew Caraway was different. The sleek colors, smooth ceramic finish, and ergonomic handles feel premium. Unlike bulky cookware, these pieces look elegant and modern. Plus, the storage organizers make it easy to keep my kitchen tidy.

Performance

Cooking with Caraway is effortless. The nonstick surface means I don’t need much oil, making meals healthier. Heat spreads evenly, so no more burned spots in the middle while the edges stay raw. It’s perfect for delicate foods like crepes or flaky fish. Plus, cleaning up is a breeze—just a quick wipe, and it’s spotless.

Build Quality

Despite being lightweight, Caraway cookware feels solid and well-made. The ceramic coating has held up well with proper care, and the sturdy construction reassures me it’ll last for years. While it’s not meant for heavy-duty searing, it excels in everyday cooking. It’s cookware that truly makes cooking more enjoyable.


Why Caraway Is a Top Choice for Health-Conscious Cooks

Caraway cookware is perfect for safe, healthy cooking with its non-toxic, eco-friendly design.

  • Non-Toxic Coating: Free from PTFE, PFOA, and heavy metals.
  • Low-Oil Cooking: Nonstick surface reduces the need for oil.
  • No Harmful Fumes: Safe at high heat without toxic emissions.
  • Sustainable Choice: Eco-friendly production with fewer chemicals.
  • Easy Cleanup: Wipes clean with minimal effort.


Made In Cookware Overview

Caraway vs Made In


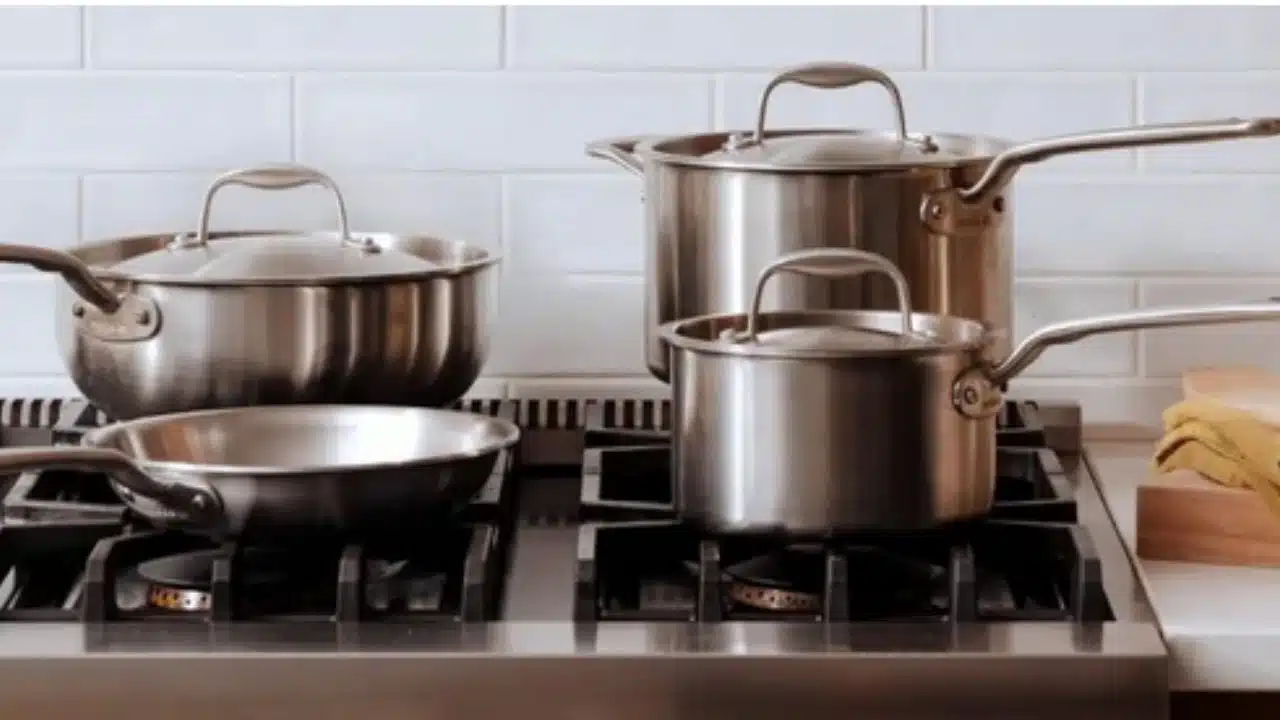
Made In cookware stands out for its premium quality and exceptional performance. It’s a brand that combines craftsmanship with modern design to deliver top-notch cooking experiences. I’ve been using Made In cookware for quite some time now, and the consistency and quality are unmatched.

 From searing steaks to making delicate sauces, this cookware has truly elevated my kitchen game. It’s durable, versatile, and incredibly reliable, making it a go-to for anyone who loves to cook.

Pros of Made In

✅ Durable – Built to last, especially the stainless steel pieces.

✅ Even Heat Distribution – Cooks evenly with no hot spots.

✅ Sleek Design – Modern, stylish, and functional.

✅ Oven Safe – Works from stovetop to oven.

✅ Versatile – Suitable for all stovetops, including induction.


Cons of Made In

❌ Price – Higher investment, but worth the quality.

❌ Weight – Can be heavy, though it feels professional.

❌ Requires Care – Needs maintenance to stay in top condition.


My Personal Experience

Caraway vs Made In

I’ve been using Made In cookware for over two years now, and it has completely transformed my cooking. It’s reliable, sturdy, and has made everything from quick meals to intricate dishes easier. Investing in this cookware was a decision I don’t regret—it has truly elevated my kitchen experience.

Design

Made In’s cookware has a modern, sleek design that’s both functional and stylish. The handles are ergonomic, making it easy to grip, and the polished finish adds a professional touch to my kitchen. I’m always impressed by how well-designed and easy to use it is.

Performance

The performance is where Made In really stands out. The even heat distribution makes a huge difference, whether I’m cooking delicate dishes or searing meat. I’ve used it for everything from quick stir-fries to slow-braising, and it handles all of it with ease. It’s one of the few cookware brands I can rely on for consistent results.
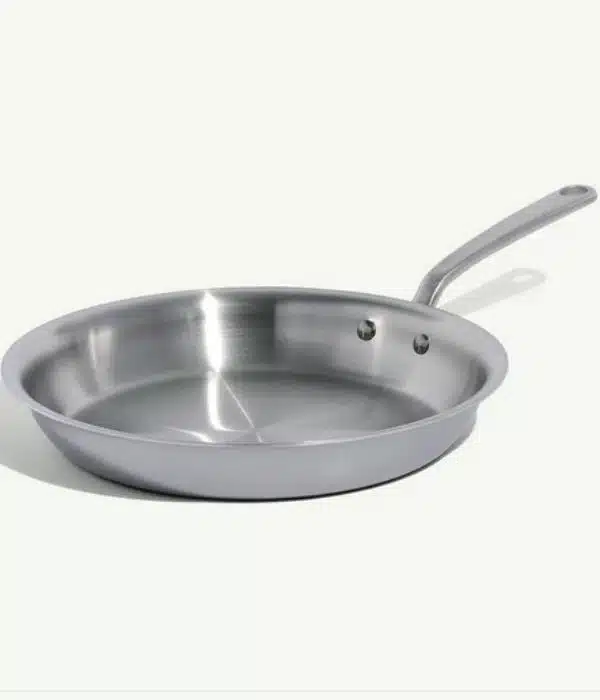
Build Quality

The build quality is excellent. Made In cookware is solid and durable, and it feels like it’s built to last. The stainless steel pieces heat up quickly and maintain heat well. I’ve also noticed that the carbon steel skillets develop a beautiful patina over time, which adds character and makes them even better with use.


Why Made In Is the Choice for Serious Cooks

Made In cookware is built for those who love precision and performance in the kitchen.

  • Pro-Grade Materials: Stainless steel and carbon steel for top durability.
  • Superior Heat Control: Even heating with no hot spots.
  • Versatile Cooking: Works on all stovetops, including induction.
  • Oven & Broiler Safe: Handles high temperatures with ease.
  • Long-Lasting Quality: Built to withstand years of heavy use.

Caraway vs Made In – Detailed Comparison

I’ve spent some time testing both Caraway and Made In cookware to understand their differences and strengths. Both brands offer high-quality products, but they shine in different areas. Let’s dive into the comparison across key categories to help you decide which one is the best fit for your kitchen.

Material & Non-Stick Performance: Caraway vs Made In

Caraway offers eco-friendly ceramic-coated non-stick cookware, while Made In provides durable stainless steel and non-stick options with strong performance.

Feature

Caraway

Made In

Coating

Ceramic, non-toxic, PTFE & PFOA-free

PTFE & PFOA-free non-stick & stainless steel

Non-stick performance

Excellent non-stick properties

Great non-stick, but needs more care

Durability

Ceramic can wear with time

Stainless steel is long-lasting, non-stick needs maintenance

Rating

  • Caraway: 8/10
  • Made In: 9/10


Cooking Performance: Caraway vs Made In

Caraway is best for low-heat cooking like sautéing, while Made In excels in high-heat tasks like searing and browning.

Feature

Caraway

Made In

Non-stick properties

Easy cooking, minimal oil required

Effective non-stick, needs careful temperature control

Searing ability

Not ideal for high heat

Excellent for searing, browning meats

Cooking versatility

Best for low to medium heat cooking

High versatility for all heat levels

Rating

  • Caraway: 7/10
  • Made In: 9/10

Heat Tolerance: Caraway vs Made In

Caraway handles up to 550°F, ideal for medium heat, while Made In withstands up to 800°F, perfect for high-heat cooking.

Feature

Caraway

Made In

Max heat tolerance

550°F

800°F

Suitability for high heat

Not suitable for high-heat cooking

Great for high-heat cooking (searing, broiling)

Oven safety

Yes, up to 550°F

Yes, up to 800°F

Rating

  • Caraway: 7/10
  • Made In: 9/10

Compatibility: Caraway vs Made In

Both brands work on all stovetops, but Made In is more versatile, handling higher temperatures, while Caraway’s ceramic coating is sensitive to rapid temperature changes.

Feature

Caraway

Made In

Works on all stovetops

Yes

Yes

Induction compatibility

Yes

Yes

Oven-safe

Yes, up to 550°F

Yes, up to 800°F

Rating

  • Caraway: 8/10
  • Made In: 9/10

Design & Aesthetics: Caraway vs Made In

Caraway offers modern, vibrant designs, perfect for aesthetic appeal, while Made In focuses on classic, professional-style cookware for a traditional look.

Feature

Caraway


Made In

Style & color options

Available in modern, vibrant colors

Classic, professional-style look

Handle design

Comfortable handles with ergonomic design

Durable and well-designed for heavy-duty use

Overall aesthetic appeal

High aesthetic appeal

Timeless, professional appeal

Rating

  • Caraway: 9/10
  • Made In: 8/10

Price & Value: Caraway vs Made In

Caraway is a premium, eco-friendly option, offering value in safety and design, while Made In is more affordable, providing durable, high-quality cookware.

Feature

Caraway

Made In

Price range

Premium pricing

Mid-range pricing

Longevity

Long-lasting but coating may wear

Extremely durable, especially stainless steel

Overall value

High value for health-conscious buyers

Excellent value for quality and versatility

Rating

  • Caraway: 8/10
  • Made In: 9/10

Brand Reputation & Reviews: Caraway vs Made In

Caraway is praised for its eco-friendly, stylish cookware, popular with health-conscious cooks, while Made In is favored by chefs for its durability and performance. Both brands have strong reviews but appeal to different audiences.

Feature

Caraway

Made In

Brand reputation

Well-known for eco-friendly cookware

Trusted for professional-grade cookware

Customer reviews

Great feedback on safety and design

Highly praised for performance and durability

Rating

  • Caraway: 8/10
  • Made In: 9/10

Final Thoughts: Caraway vs Made In

If you prioritize health-conscious cooking and love the aesthetic of vibrant cookware, Caraway might be the way to go. However, if you’re looking for durable, professional-grade cookware that can handle high-heat cooking, Made In is a versatile and budget-friendly choice. Both brands have their strengths, so it really depends on your specific cooking needs and preferences.


Additional Considerations

I have been using both Caraway and Made In cookware for a while, and each has its strengths. Here’s what to keep in mind before choosing one.

Maintenance

Caraway’s ceramic nonstick is easy to clean, but you should handle it gently. If you use it too roughly, the surface can wear down. Made In’s stainless steel and carbon steel need seasoning to stay in great shape. Over time, they may develop a patina, which looks nice but needs some care.

Storage

Caraway cookware comes with storage organizers to keep things neat. Made In doesn’t include these, so you will need extra storage space. This can be a concern if your kitchen is tight on space.

Eco-Friendliness

Caraway is focused on being eco-friendly. Their cookware has non-toxic coatings, which is great for the environment. Made In cookware is built to last and is designed for heavy use, so it’s all about durability and performance.

Versatility

Caraway is great for low to medium heat cooking. It’s perfect for tasks like sautéing and simmering. Made In cookware handles high heat and is good for frying, searing, and baking.

Cooking Style

If you want cookware that’s easy to clean and maintain, Caraway is a great choice. It’s made for cooks who want simplicity. But if you enjoy trying new cooking techniques and don’t mind some upkeep, Made In gives you more options. It’s great for cooks who want flexibility.

FAQ

Is Made In CeramiC clad safe?

Yes, Made In’s CeramiCa cookware is safe. It is free from harmful chemicals like PFOA and lead. But it does contain PTFE (Teflon), so it’s not fully PFAS-free like Caraway. As long as you keep the heat below 500°F and avoid overheating, it stays safe and lasts a long time.

Is Made In a good cookware brand?

Yes, Made In is a trusted cookware brand. Home cooks and professional chefs love it. The brand offers stainless steel, carbon steel, and nonstick cookware. It heats evenly, lasts long, and works well. Many compare it to high-end brands, but it costs less.

Is Caraway really toxic-free?

Yes, Caraway cookware is 100% free from toxins. It has no PTFE (Teflon), no PFOA, and no heavy metals like lead or cadmium. Instead, it uses a ceramic nonstick coating, which is a safer choice than regular nonstick pans.

What is comparable to Caraway?

If you want cookware similar to Caraway, check out these brands:

  • GreenPan – Another PTFE-free, eco-friendly ceramic nonstick option.
  • Our Place Always Pan – Stylish, ceramic-coated, and multi-use.
  • Xtrema – 100% ceramic, with no metals or coatings.
  • HexClad – A mix of stainless steel and nonstick, but it has PTFE.

Do chefs use Made In cookware?

Yes! Many chefs use Made In cookware, especially stainless steel and carbon steel pans. These pans work in top restaurants because they are strong, heat up fast, and cook food evenly. Made In is known for high-quality materials and long-lasting durability.


Filed Under: Product Comparisons, Uncategorized

Bosch Dishwashers 800 vs 900: Which One Fits Your Needs?

March 26, 2025 by bigfishtavernlagunaadmin Leave a Comment

Bosch Dishwashers 800 vs 900

Bosch dishwashers are known for their reliability and great features. I’ve been using one for years, and it always gets my dishes clean with no trouble. If you’re comparing the Bosch Dishwashers 800 vs 900, you may wonder which one offers the best value.

Both models clean well, but there are key differences in technology, price, and performance. I switched from the 800 to the 900, and while both are excellent, the 900 is quieter and has more flexible racks.

 Whether you’re looking for a long-lasting dishwasher or want better drying, both models have something for you. Let’s compare them side by side and see which one fits your kitchen. I’ll share my experience to help you decide which is best for you.

Bosch Dishwashers 800 Review

Bosch Dishwashers 800 vs 900

I’ve been using the Bosch 800 Series dishwasher for over two years, and it has truly transformed how I manage my kitchen chores. Here’s my honest review of its features and performance.

What I Like

I’ve used the Bosch 800 Series dishwasher for a while now, and it’s made my life easier. Here’s what I love about it:

  • Dries Everything Perfectly: The CrystalDry technology leaves dishes dry, even plastic ones. No more hand-drying!
  • Super Quiet: It runs at just 42 decibels. Sometimes I forget it’s on.
  • Easy to Load: The adjustable racks fit everything — big pots, delicate glasses, and utensils.
  • Smart Features: I can start it from my phone. It’s a lifesaver on busy days.
  • No Water Spots: The water softening system keeps glasses shiny and spotless.

What Could Be Better

No product is perfect, and the Bosch 800 has a few minor downsides:

  • Takes Its Time: Some cycles are long, but the dishes come out super clean.
  • Pricey: It’s a bit expensive, but the quality makes it worth it.
  • App Learning Curve: The app took a little getting used to, but now I love it.

My Personal Experience

I’ve been using the Bosch 800 Series for a couple of years now, and it has really transformed how I do dishes. The performance, ease of use, and quality of cleaning make it one of the best dishwashers I’ve owned.

Design

The design of the Bosch 800 is sleek and modern, which fits perfectly in my kitchen. It’s not bulky and doesn’t take up too much space. The simple yet elegant look is complemented by a solid build. What I love most is that it’s easy to clean, even around the edges. No more worrying about food particles getting stuck in hard-to-reach spots.

Performance

The Bosch 800 performs exceptionally well in cleaning dishes, no matter the load. Whether I’m washing a full load of heavy pots or a delicate load of glassware, everything comes out spotless. The washing cycles are thorough, and the drying process, thanks to the CrystalDry technology, leaves everything completely dry and ready to use.

Build Quality

The build quality of the Bosch 800 is top-notch. The materials feel sturdy, and it’s clear that this is a long-lasting product. I’ve had it for a couple of years, and it still runs like new. There’s no noticeable wear or tear, which is something I really appreciate. Bosch really focuses on durability, and it shows in the quality of this machine.


Bosch Dishwashers  900 Review

Bosch Dishwashers 800 vs 900

I have been testing the Bosch 900 Series for several months now, and it has been an absolute game-changer in my kitchen. Here’s a breakdown of why this dishwasher stands out.

What I Like

Here’s what I love about the Bosch 900 Series:

  • CrystalDry Technology: My dishes, even plastic ones, come out dry. No more towel drying!

  • Quiet Operation: It runs at just 40 decibels. It’s so quiet I forget it’s on.

  • Adjustable Racks: The racks and third rack are super helpful. I can fit everything, from wine glasses to large pots.

  • Smart App: I can control the dishwasher from my phone, even when I’m not home.

  • Water Softener: It leaves my dishes spotless with no water spots.

What Could Be Better

While it’s a great dishwasher, here are a few things that could improve:

  • Longer Cycles: Some cycles take longer, but they clean deeply. It’s worth the wait.

  • Price: It’s a bit pricey, but it’s built to last and works well.

  • App Learning Curve: The app took some time to get used to, but now it’s easy and helpful.

My Personal Experience

I’ve been using Bosch dishwashers for over two years, and I can honestly say they’ve transformed the way I do dishes. With the Bosch 900 model, I’ve noticed a big difference in the quality of the wash and the ease of use. Here’s how it’s worked for me:

Design

The design of the Bosch 900 is sleek and modern, fitting perfectly into my kitchen without taking up too much space. The racks are incredibly well-thought-out, making it easy to load even large pots and pans. One feature that stands out is the VarioDrawer Pro – this third rack is genius! I can fit smaller items like coffee mugs and utensils, which used to clutter the lower racks. This clever design makes a huge difference in saving time and space.

Performance

The Bosch 900 delivers exceptional performance every time. It cleans dishes thoroughly, and I rarely need to run a second cycle. Even though some cycles take longer, I’ve found that the extra time results in sparkling clean dishes. It handles everything from delicate glassware to greasy pots with ease. The dishwasher’s ability to adjust water pressure and temperature for each load ensures that all my dishes get cleaned effectively.

Build Quality

The build quality of the Bosch 900 is top-notch. It feels solid and durable, with smooth-running racks and a well-sealed door. I’ve been using this dishwasher for over two years, and it’s still working as well as the day I bought it. The materials used are high-quality, and it shows in how it performs. Even with frequent use, I’ve had no issues with wear and tear. It’s an investment that I feel confident will last for many more years.

Bosch Dishwashers 800 vs 900 – Detailed Comparison

Bosch Dishwashers 800 vs 900

I’ve been testing out two of Bosch’s most popular dishwasher lines: the 800 and 900 series. Both of these models offer exceptional features, but they do have some differences that can affect which one is the best fit for you. Let’s dive into the key aspects of both series and compare them in detail.

Drying Performance: Bosch Dishwashers 800 vs 900

Both the 800 and 900 series Bosch dishwashers are known for their excellent drying capabilities. However, the 900 series brings an extra level of efficiency with its CrystalDry technology, ensuring dishes come out completely dry, even plastic ones, which the 800 series may struggle with at times.

Feature

Bosch 800 Series

Bosch 900 Series

Drying Technology

AutoAir & CrystalDry

CrystalDry (Enhanced)

Drying Performance

Good for most loads

Excellent, especially for plastics

Rating:

  • Bosch 800 Series: 8/10

  • Bosch 900 Series: 9/10

Water Softening System: Bosch Dishwashers 800 vs 900

Water softening is crucial for homes with hard water. While both the Bosch 800 and 900 series offer water softening systems, the 900 series goes a step further with a more advanced and effective softener that helps prevent mineral buildup, keeping your dishes cleaner over time.

Feature

Bosch 800 Series

Bosch 900 Series

Water Softener

Yes

Yes (More Advanced)

Effectiveness

Good

Excellent for hard water areas

Rating:

  • Bosch 800 Series: 7/10

  • Bosch 900 Series: 9/10

Customization and Racks: Bosch Dishwashers 800 vs 900

When it comes to customization, both dishwashers offer flexible rack systems. The 900 series introduces VarioDrawer Pro, an upgraded version of the third rack in the 800 series, offering more space and improved organization for smaller items and utensils.

Feature

Bosch 800 Series

Bosch 900 Series

Racks

Flexible, 3rd rack available

VarioDrawer Pro, more space

Customization

Great for standard needs

Excellent for complex dishware

Rating:

  • Bosch 800 Series: 8/10

  • Bosch 900 Series: 9/10

Smart Connectivity: Bosch Dishwashers 800 vs 900

Both the 800 and 900 series come with Home Connect technology, allowing you to control and monitor your dishwasher remotely. The 900 series, however, features additional smart functions for more convenience, such as notifications and cycle monitoring, making it a bit more intuitive.

Feature

Bosch 800 Series

Bosch 900 Series

Smart Connectivity

Home Connect, basic features

Home Connect, advanced features

Control via Phone

Yes

Yes, with more control options

Rating:

  • Bosch 800 Series: 8/10

  • Bosch 900 Series: 9/10

Installation and Longevity: Bosch Dishwashers 800 vs 900

The installation process is similar for both models, but due to the premium components in the 900 series, it’s expected to last longer with fewer maintenance issues. Both dishwashers are well-built, but the 900 series is the more robust option.

Feature

Bosch 800 Series

Bosch 900 Series

Installation

Standard installation

Requires careful handling

Longevity

Long-lasting, reliable

Premium, longer-lasting

Rating:

  • Bosch 800 Series: 8/10

  • Bosch 900 Series: 9/10

Noise Level: Bosch Dishwashers 800 vs 900

Both dishwashers are extremely quiet, with noise levels well below the average for dishwashers in this range. The 900 series, however, is slightly quieter, making it a great choice for open-concept kitchens where noise is a concern.

Feature

Bosch 800 Series

Bosch 900 Series

Noise Level

42 dB

39 dB

Quiet Operation

Very quiet

Ultra-quiet

Rating:

  • Bosch 800 Series: 9/10

  • Bosch 900 Series: 10/10

Cost-Effectiveness: Bosch Dishwashers 800 vs 900

While the Bosch 900 series offers more advanced features, it also comes with a higher price tag. The 800 series provides great performance at a more affordable price, making it the better choice for those on a budget.

Feature

Bosch 800 Series

Bosch 900 Series

Price

More affordable

Premium price

Value for Money

Great value

Premium features for higher price

Rating:

  • Bosch 800 Series: 9/10

  • Bosch 900 Series: 7/10

Tips for Best Use

  • Choose the Right Cycle: Use Eco for saving energy and Speed60 for quick washes.

  • Improve Drying: Turn on Extra Dry (800) or CrystalDry (900) for better drying.

  • Keep the Filter Clean: Clean the filter often to maintain performance.

  • Adjust Racks: Use adjustable racks in the 900 series for larger items.

  • Use Rinse Aid: Add rinse aid to avoid spots and improve drying, especially with hard water.

My Final Thoughts

Both the Bosch 800 and 900 series dishwashers offer excellent performance, with the 900 series being a more premium option featuring enhanced drying, better water softening, and additional smart connectivity. The Bosch 800 series remains an excellent choice for those seeking a balance of performance and affordability. The decision ultimately depends on your budget and what features are most important to you.

Remember, both models are known for their durability and reliability, offering a long-lasting solution for your kitchen.

FAQ

1. What is the most common problem with Bosch dishwashers?

The most common issues with Bosch dishwashers are clogged filters, drainage problems, or water not heating properly. Regular maintenance, such as cleaning the filter and checking hoses, can usually resolve these issues.

2. Do Bosch dishwashers last long?

 Yes, Bosch dishwashers are known for their durability and can last 10+ years with proper care.

3. Why is Bosch’s dishwasher cycle so long?

 Bosch dishwashers are designed to offer efficient cleaning with longer cycles, especially in eco modes. These extended cycles help save water and energy while ensuring a thorough clean, especially for delicate dishes.

4. Does a dishwasher use a lot of electricity?

 Dishwashers, including Bosch models, generally use a moderate amount of electricity. However, energy-efficient models like Bosch are designed to minimize electricity consumption, especially when using eco settings. The energy usage depends on the cycle chosen.

5. What is the best dishwasher cleaner?

 The best dishwasher cleaner is one that effectively removes grease, lime, and mineral buildup. Brands like Affresh, Finish, and Lemi Shine are popular choices.

Filed Under: Product Comparisons

8 Qt vs 10 Qt Ninja Foodi: Unveiling the Best

March 25, 2025 by bigfishtavernlagunaadmin Leave a Comment

8 qt vs 10 qt Ninja Foodi

When it comes to choosing the right air fryer, it’s hard to go wrong with the Ninja Foodi models. But if you’re stuck between the 8qt vs 10 qt Ninja Foodi air fryer, you’re probably wondering which one fits your kitchen and cooking style best. I’ve spent a lot of time testing both, and I can tell you, the decision isn’t always clear-cut.

Whether you’re a single person cooking quick meals or a busy family preparing bigger portions, I’ll break down everything you need to know. By the end of this, you’ll know exactly which Ninja Foodi air fryer is right for you. Let’s dive in!

8qt Ninja Foodi Air Fryers Review

I’ve been using the 8qt Ninja Foodi air fryer for over a year, and it has completely changed the way I cook. It saves time, makes healthy meals easier, and has earned a permanent spot in my kitchen.

8 qt vs 10 qt Ninja Foodi

What I Like

When I first got my hands on the 8qt Ninja Foodi air fryer, I was genuinely impressed by how much easier it made cooking. Here are a few things I love about it:

  • Dual Baskets: Cook two dishes at once — fries in one, chicken in the other — for quicker meals. 
  • Large Capacity: The 8-quart size is perfect for family meals, no need for multiple batches. 
  • Multiple Functions: Air fry, roast, bake, dehydrate, and reheat — all in one appliance. 
  • Easy Cleanup: Dishwasher-safe baskets and a quick wipe-down make cleaning simple. 
  • Even Cooking: Heats up to 450°F, delivering crispy, evenly-cooked food with no need to flip.

What Could Be Better

Even though I love this air fryer, there are a couple of things that could be improved. But honestly, these are minor and don’t take away from the overall experience.

  • Takes Up Space: A bit bulky, so it may not suit smaller kitchens. 
  • Learning Curve: Takes time to master all the functions, but becomes easy with practice. 
  • Slight Noise: Runs with a fan-like sound — not too loud, but noticeable.

My Personal Experience

I’ve been using the 8qt Ninja Foodi air fryer for over a year now, and it has become a staple in my kitchen. From quick snacks to full meals, it saves me so much time while keeping everything delicious. Let me break down what makes it stand out.

8 qt vs 10 qt Ninja Foodi

Design

When I first unboxed it, the sleek stainless steel finish immediately caught my eye. It looks modern and blends well with my other appliances. The digital controls are intuitive, making it easy to set the temperature and timer with just a few taps. Plus, the dual baskets don’t add as much bulk as I feared. It fits neatly on my counter, and I love how organized my cooking space feels.

Performance

Performance-wise, this air fryer is a powerhouse. The dual-zone feature is a dream. I can sync both baskets to finish cooking at the same time, even if I’m using different functions. Whether I’m crisping up wings or roasting veggies, everything cooks evenly and quickly. It takes the guesswork out of meal prep and makes cooking feel effortless.

Build Quality

You can tell Ninja put a lot of thought into the build quality. The baskets feel sturdy, and the stainless steel body adds a premium touch. After months of use, the baskets still slide in and out smoothly, and the buttons respond perfectly. It doesn’t feel flimsy or cheap in any way, which makes me confident it will last for years.

10 qt Ninja Foodi Air Fryers Review

I’ve been using the Ninja Food I 10 qt air fryer for months now, and it’s become a kitchen essential. From quick weeknight dinners to weekend feasts, it never lets me down.

8 qt vs 10 qt Ninja Foodi

What I Like

The Ninja Food I 10 qt air fryer has made my kitchen life so much easier. Here are the things I love about it:

  • Large Capacity: Perfect for big meals — fits a whole chicken or a large batch of fries. 
  • DualZone Technology: Cooks two dishes at once with different settings, saving time. 
  • Crispy Results: Delivers a perfect crunch with little oil. 
  • Easy to Clean: Non-stick, dishwasher-safe baskets make cleanup a breeze. 
  • User-Friendly Controls: Simple digital display for easy mode switching.

What Could Be Better

While I love this air fryer, a few things could be improved. But they’re not deal-breakers, just little things that could make it even better:

  • Takes Up Space: Its large size needs ample counter space. 
  • Learning Curve: Takes a few tries to master all the settings. 
  • Noise Level: Makes some noise while running, similar to a microwave.

My Personal Experience

I’ve been using the Ninja Food I 10 qt air fryer for a while now, and it has quickly become one of my favorite kitchen appliances. It’s reliable, versatile, and makes cooking fun and stress-free. Here’s what stood out for me:

8 qt vs 10 qt Ninja Foodi

Design

The sleek, modern design fits nicely into my kitchen. The digital display is bright and easy to read, and the two baskets make it feel like I have a mini-oven right on my counter. Plus, the handles stay cool to the touch, which adds a nice safety feature.

Performance

What impressed me the most is how consistently it cooks. Whether it’s roasting veggies, crisping up chicken, or reheating leftovers, the results are always spot on. The DualZone technology is a lifesaver when I want to cook two different foods at the same time without juggling multiple appliances.

Build Quality

It feels solid and well-made. The baskets slide in and out smoothly, and the non-stick coating has held up well even with regular use. You can tell this is a quality product built to last, which gives me peace of mind.

In short, the Ninja Food I 10 qt air fryer has transformed the way I cook. It saves me time, reduces the need for oil, and makes every meal feel like a treat. If you’re considering an air fryer, this one is definitely worth a look!

8qt vs 10 qt ninja foodi air fryer: Details Comparison

I’ve been testing out the 8 qt and 10 qt Ninja Foodi Air Fryers, and the results are quite interesting. These air fryers come with different features, cooking capacities, and price points that could be game-changers for your kitchen. Let’s break it all down so you can make the best decision for your needs.

General info: 8qt vs 10 qt Ninja Foodi Air Fryer

The 8 qt and 10 qt Ninja Foodi Air Fryers offer impressive cooking power. The main difference lies in the size and how much food you can prepare at once. While both models provide excellent results, they cater to different family sizes and cooking styles.

Feature

8 qt Ninja Foodi Air Fryer

10 qt Ninja Foodi Air Fryer

Size (Capacity)

8 Quarts

10 Quarts

Weight

Lighter

Heavier

Ideal for

Small to Medium Families

Larger Families/Groups

Rating:

  • 8 qt: 8/10 
  • 10 qt: 9/10

Features: 8 qt vs 10 qt Ninja Foodi Air Fryer

Both models boast impressive cooking functions like air frying, baking, and roasting, but the 10 qt model has more advanced features like dual baskets for multi-tasking cooking.

Feature

8 qt Ninja Foodi Air Fryer

10 qt Ninja Foodi Air Fryer

Multi-cooking Functions

6-in-1

9-in-1

Dual Baskets

No

Yes

LCD Display

Yes

Yes

Rating:

  • 8 qt: 8/10 
  • 10 qt: 9/10

Design: 8qt vs 10 qt Ninja Foodi Air Fryer

The design of these two air fryers is sleek and modern, with a compact footprint for easy countertop storage. The 10 qt model is larger and bulkier, so it takes up more space but offers more cooking options.

Feature

8 qt Ninja Foodi Air Fryer

10 qt Ninja Foodi Air Fryer

Size & Dimensions

Compact

Larger, Bulkier

Color Options

Black

Black/Gray

Build Quality

Strong

Strong

Rating:

  • 8 qt: 8/10

  • 10 qt: 7/10

Price comparison: 8 qt vs 10 qt Ninja Foodi Air Fryer

While the 10 qt model offers more space and features, it comes at a higher price point. If you’re budget-conscious, the 8 qt version is more affordable while still delivering great performance.

Feature

8 qt Ninja Foodi Air Fryer

10 qt Ninja Foodi Air Fryer

Price Range

More Affordable

Higher Price

Value for Money

Good

Better (for larger families)

Rating:

  • 8 qt: 9/10

  • 10 qt: 8/10

User reviews: 8qt vs 10 qt Ninja Foodi Air Fryer

Both models receive positive reviews for their ease of use, quick cooking, and versatility. However, the 10 qt version stands out for larger families who appreciate the extra cooking capacity and advanced features.

Feature

8 qt Ninja Foodi Air Fryer

10 qt Ninja Foodi Air Fryer

Overall Rating

4.6/5

4.8/5

Common Complaints

Smaller capacity

Bulky, takes up more space

Rating:

  • 8 qt: 8/10

  • 10 qt: 9/10

Cooking Capacity & Family Size: 8qt vs 10 qt Ninja Foodi Air Fryer

The 8 qt model is perfect for smaller families or individuals who don’t need to cook large batches. The 10 qt model is better for bigger families or anyone who entertains often.

Feature

8 qt Ninja Foodi Air Fryer

10 qt Ninja Foodi Air Fryer

Cooking Capacity

Enough for 3-5 servings

Enough for 5-8 servings

Ideal Family Size

Small to Medium Families

Large Families

Rating:

  • 8 qt: 8/10

  • 10 qt: 9/10

Cooking Speed & Efficiency: 8qt vs 10 qt Ninja Foodi Air Fryer

Both air fryers are efficient, but the larger size of the 10 qt model means it may take a bit longer to preheat and cook. However, the increased capacity helps you cook more at once.

Feature

8 qt Ninja Foodi Air Fryer

10 qt Ninja Foodi Air Fryer

Preheat Time

Quick

Slightly longer

Cooking Time

Efficient

Efficient (but longer)

Rating:

  • 8 qt: 9/10

  • 10 qt: 8/10

Versatility & Functions: 8 qt vs 10 qt Ninja Foodi Air Fryer

The 10 qt model is more versatile, offering more cooking options like the dual basket feature, which is a game-changer for multi-tasking in the kitchen.

Feature

8 qt Ninja Foodi Air Fryer

10 qt Ninja Foodi Air Fryer

Functions


6-in-1

9-in-1

Dual Basket Functionality

No

Yes

Rating:

  • 8 qt: 7/10

  • 10 qt: 9/10

Kitchen Space & Storage: 8qt vs 10 qt Ninja Foodi Air Fryer

The 8 qt version is more compact and easier to store, while the 10 qt model is larger and requires more kitchen space, making it less ideal for those with limited counter space.

Feature

8 qt Ninja Foodi Air Fryer

10 qt Ninja Foodi Air Fryer

Storage Space Required

Less


More

Countertop Space

Smaller footprint

Larger footprint

Rating:

  • 8 qt: 9/10

  • 10 qt: 7/10

Both models offer excellent performance, but the choice ultimately depends on your cooking needs, kitchen space, and budget. If you’re cooking for a large family or enjoy hosting guests, the 10 qt model is ideal. However, if you prefer a compact air fryer with just the right amount of capacity, the 8 qt is a great choice.

FAQ

1. What’s the difference between the 8qt and 10 qt Ninja Foodi air fryer?
The 8qt is ideal for smaller families or quick meals, while the 10 qt offers more space, perfect for larger families or meal prepping.

2. Is the Ninja 8qt air fryer dishwasher safe?

Yes, the 8qt Ninja Foodi air fryer is dishwasher safe. Both baskets and other parts are easy to clean, making it convenient for everyday use. Learn more about cleaning here.

3. Who makes the Ninja Foodi air fryer?
Ninja Foodi air fryers are made by SharkNinja, a trusted brand known for its high-quality kitchen appliances. They focus on creating easy-to-use, efficient tools for the modern home.

4. Is the Ninja Dual air fryer 8 qt any good?
Yes, it’s great for cooking multiple items at once with different settings, offering versatility and speed.

 5. What are the negatives of the Ninja air fryer?
It takes up counter space and can be a bit noisy, but its performance makes up for these minor drawbacks.


Filed Under: Product Comparisons

Copper vs Stainless Steel Tea Kettle: Comparison

October 29, 2024 by bigfishtavernlagunaadmin Leave a Comment

A great tea kettle doesn’t just boil water; it should be durable, efficient, and maybe even beautiful enough to leave on display. Copper and stainless steel are both popular choices for tea kettles, each with a dedicated following. But choosing between these two often sparks debate. Some swear by the quick-boiling magic of a real copper tea kettle, while others champion the durability and sleek look of an all-stainless steel tea kettle electric. In this article, we’ll dive deep into the debate of copper vs. stainless steel tea kettles, covering everything from design aesthetics to heating efficiency and maintenance needs. By the end, you’ll have everything you need to select the perfect tea kettle for your home.

Copper vs. Stainless Steel Tea Kettles

Why Does Material Matter?

The material of a tea kettle impacts much more than just appearance. It affects how quickly your water boils, how long it stays hot, and even the flavor of the water. Below, we’ll explore the main attributes of both copper and stainless steel kettles, from aesthetics to performance, heat conductivity, and safety.

Heat Conductivity

One of the first things to consider in a tea kettle is how efficiently it heats water.

Copper: Copper is a superstar when it comes to heat conductivity. It heats up fast and evenly, which means your water will boil quickly, saving you time and energy. This feature makes copper a favorite among many tea enthusiasts who want a quick, efficient boil. However, keep in mind that copper also loses heat faster than stainless steel. Once off the heat, it cools down more quickly.

Stainless Steel: Stainless steel heats up more slowly than copper but retains heat longer, making it a great option if you like your water to stay hot for a while. This is particularly useful if you tend to get distracted or prefer to enjoy multiple cups without needing to reheat. Although it may take a bit longer to reach a boil, stainless steel is a reliable, steady choice.

Verdict: If speed is your top priority, a copper kettle will suit you best. However, if you prefer water to stay hot for a while, stainless steel might be the better option.

Durability and Maintenance

When it comes to kitchen investments, durability is key. Here’s how copper and stainless steel measure up.

Copper: Copper kettles, especially vintage models, are highly durable but require some maintenance. Copper naturally tarnishes over time, so they often need polishing to maintain their shine. Some copper kettles come with a protective coating to help reduce tarnishing, but others will need regular upkeep. If you enjoy maintaining your kitchenware, a vintage copper tea kettle may be an aesthetic and functional joy.

Stainless Steel: Stainless steel is celebrated for its durability and easy maintenance. Unlike copper, it resists tarnishing and rust, so it requires very little upkeep. Just a simple wipe-down after each use, and it’s good to go. This makes stainless steel kettles a favorite for busy individuals who want reliable performance without the extra effort.

Verdict: Stainless steel wins in terms of durability and ease of maintenance. If you love the look of copper but don’t want the extra work, a stainless steel kettle might suit you better.

Flavor Impact

Surprisingly, the material of your kettle can subtly influence the flavor of your tea.

Copper: Copper may add a metallic taste to water, especially if the interior isn’t lined. That’s why most modern copper kettles have a stainless steel or tin lining to prevent copper from leaching into the water. The lining protects the flavor integrity of your tea and ensures safety. Still, some tea lovers find that copper kettles add a certain depth of flavor, while others find it distracting.

Stainless Steel: Stainless steel kettles don’t interact with water, so they leave no metallic taste. For those who want the purest, most neutral flavor, stainless steel is a great choice. This is especially important if you enjoy lighter teas, like white or green tea, where subtle flavors shine.

Verdict: For the purest taste, stainless steel is often the better choice, while copper might add a slight metallic undertone if it’s unlined.

Aesthetic Appeal

Let’s be real—kettles are more than just practical; they can be beautiful too.

Copper: Copper kettles are known for their warm, vintage appeal. They bring a touch of classic charm to any kitchen and make a statement even when not in use. If your kitchen decor leans towards rustic, classic, or farmhouse styles, a copper kettle will fit right in.

Stainless Steel: Sleek and modern, stainless steel has a minimalist look that works well in contemporary kitchens.It’s versatile and suits a range of kitchen styles, from industrial to modern chic.

Verdict: Copper wins for a timeless, classic aesthetic, while stainless steel is perfect for modern, minimalist kitchens.

Safety and Health Considerations

When it comes to safety, both copper and stainless steel kettles have pros and cons to consider.

Copper: Pure copper is not food-safe for extended use due to the risk of leaching, especially in acidic environments.Nowadays, the majority of copper kettles are lined with stainless steel or tin to prevent this. However, make sure any copper kettle you purchase is lined if you plan to use it daily.

Stainless Steel: Stainless steel is considered one of the safest materials for cookware, as it doesn’t react with water or release harmful chemicals. An all-stainless steel tea kettle electric option offers additional convenience and safety, often coming with automatic shut-off and boil-dry protection.

Verdict: For daily use, stainless steel is often the safer and more practical choice.

Environmental Impact and Longevity

Thinking sustainably? Here’s how each material stacks up.

Copper: Copper is a more environmentally friendly material in terms of recycling. Old or damaged copper kettles can be recycled, making copper a sustainable choice if you’re willing to invest in its upkeep. Vintage copper tea kettles, in particular, can last for decades if well cared for.

Stainless Steel: Stainless steel kettles are also highly durable and recyclable, but they tend to last longer without maintenance. High-quality stainless steel options are usually an excellent investment, as they require little to no care and will stand up to years of daily use.

Verdict: Both materials are sustainable, but copper may edge out stainless steel due to its recyclability and timeless appeal, particularly in vintage models.

Popular Options: Electric vs. Stovetop

Electric kettles are now popular for their quick heating and convenience. If you’re comparing electric kettles, you’ll mostly find stainless steel models, as copper is less commonly used in electric designs.

Stainless Steel Electric Kettles: An all stainless steel tea kettle electric option offers modern convenience. It’s easy to use, heats water quickly, and often includes safety features like auto shut-off. They’re especially handy for busy mornings or offices.

Copper Kettles: Copper electric kettles are rare and generally stovetop-based. For those who enjoy the traditional boiling experience and don’t mind waiting a bit longer, a real copper tea kettle can add charm and ritual to making tea.

Verdict: For those who prioritize convenience, an electric stainless steel kettle is the winner.

Exploring Alternative Options: Borosilicate Glass Kettles

While copper and stainless steel are popular, borosilicate glass tea kettles are gaining traction among tea lovers. Known for being crystal-clear, durable, and resistant to extreme temperatures, these glass kettles offer an aesthetic appeal and allow you to see the water boil. They’re non-reactive, ensuring pure taste, but are more fragile than metal options, making them best for those who prioritize form and function equally.

Copper vs. Stainless Steel Tea Kettles: Which Kettle is Right for You?

In the end, the choice between copper and stainless steel tea kettles is all about what suits your lifestyle, aesthetic, and how much you’re willing to invest in maintenance. Copper offers fast heating, vintage charm, and a unique aging process, though it requires more care. Stainless steel is durable, low-maintenance, and versatile, especially with the option for electric models.

 And for those who want something different, a borosilicate glass kettle provides a clean, pure aesthetic that’s hard to beat. When choosing your kettle, consider your tea routine, kitchen style, and personal preferences.

Filed Under: Product Comparisons

Fench Press vs. Drip Coffee Maker: Comparison Guide

October 23, 2024 by bigfishtavernlagunaadmin Leave a Comment

The world of coffee brewing offers a variety of methods, but two of the most popular are the French Press vs the Drip Coffee Maker. Each of these brewing methods has its own charm and distinct flavor profile, appealing to different preferences and lifestyles. In this article, we’ll delve into the unique characteristics of each, comparing their flavor, convenience, cost, and maintenance to help you decide which method suits your coffee needs best.

French Press vs. Drip Coffee Maker

What is a French Press?

Another popular name is press pot or plunger pot, which is a manual device for brewing coffee. It features a cylindrical container made of glass or stainless steel, along with a plunger equipped with a metal or mesh filter. Coarsely ground coffee is steeped in hot water, and the plunger is pressed down to filter out the grounds, resulting in a rich, full-bodied coffee.

Fench Press Pros and Cons

Pros:

  • Rich, full-bodied flavor
  • No need for filters or electricity
  • Easy to control brew strength
  • Simple design, easy to clean

Cons:

  • Can leave sediment in the coffee
  • Requires more manual effort (timing, pressing)
  • Coffee cools quickly without insulation

What is a Drip Coffee Maker?

A drip coffee maker is a type of automatic coffee brewing machine that works by heating water in a reservoir and gradually pouring it over ground coffee placed in a filter. The hot water extracts flavors as it flows through the grounds, and the brewed coffee drips into a carafe or pot positioned below. This method produces a smooth and consistent cup of coffee, making it a popular choice for everyday brewing.

Drip Coffee Maker Pros and Cons

Pros:

  • Convenient and automatic
  • Makes large quantities at once
  • Consistent brewing temperature
  • Keeps coffee warm with a hot plate

Cons:

  • Less control over brew strength
  • Requires filters and electricity
  • Coffee may taste weaker or more diluted

Flavor Profile: Richness vs. Cleanliness

French Press vs. Drip Coffee Maker

French Press: Renowned for creating a rich, full-bodied cup of coffee, the French Press preserves more of the coffee’s natural oils in the brew. Unlike methods that use paper filters, such as drip machines, the French Press uses a metal mesh filter. This helps the coffee retain its natural oils, leading to a bold and robust flavor. It’s ideal for those who enjoy a more intense and complex coffee experience, where each cup is rich with aromatic notes.

Drip Coffee Maker: Drip machines produce a cleaner, lighter cup of coffee, making them a favorite among those who prefer a more balanced and smooth taste. The paper filters used in drip coffee makers trap most of the oils and fine grounds, which can reduce bitterness. This method brings out the subtle flavors in coffee, making it ideal for those who enjoy exploring the delicate profiles of different beans. It’s perfect for everyday coffee drinkers who want a reliable and mellow brew.

Brewing Control: Precision vs. Artistry

French Press as an Art Form: Coffee experts often describe the French Press as a method that allows for more control and personalization. Tim Wendelboe, a renowned Norwegian coffee roaster, suggests that the French Press is perfect for those who appreciate the craft of making coffee. By adjusting variables like grind size, water temperature,

 and steeping time, users can tweak the process to match their taste preferences. The lack of a filter to remove coffee oils also means that the end result is more sensitive to changes in brewing technique, giving experienced brewers room to explore different flavor profiles.

Drip Coffee Maker for Consistent Results: Experts like Scott Rao, an author and consultant in the coffee industry, point out that consistency is key in a good brew, and the drip coffee maker delivers just that. Automatic machines are designed to replicate the same brewing process with each use, making them ideal for beginners or anyone who wants a no-fuss brewing experience. For those who value the reliability of pressing a button and getting a consistent cup every time, drip coffee machines are hard to beat. This consistency also makes them a favorite among cafes looking to serve large numbers of customers with minimal variation between cups.

Convenience: Time and Effort

French Press vs. Drip Coffee Maker

French Press: A French Press requires a bit more effort and attention during the brewing process. Heat the water separately, then pour it over the coffee grounds. Allow it to steep for roughly four minutes before pressing the plunger down. This hands-on method is great for those who enjoy the ritual of making coffee and have a little more time to dedicate to their morning cup. It’s also a convenient option for travel, making it ideal for camping or on-the-go use.

Drip Coffee Maker: The drip coffee maker wins in terms of convenience. Just add water and coffee grounds, hit a button, and let the machine handle the rest. It’s ideal for those who are short on time in the mornings and want to make multiple cups at once. Numerous models are equipped with programmable timers, so you can wake up to a freshly brewed pot of coffee. It’s a time-saver for families or households where more than one person enjoys coffee in the morning.

Cost: Initial Investment and Long-Term Savings

French Press: Generally, French Presses are more affordable than drip coffee makers. A quality French Press can cost between $20 to $60, depending on the brand and materials. Since it doesn’t require electricity or paper filters, the ongoing costs are minimal. All you need is fresh coffee beans, making it a cost-effective choice over time.

Drip Coffee Maker: The initial investment in a drip coffee maker can range from $30 for basic models to over $200 for high-end, programmable versions. Additionally, there’s an ongoing cost for paper filters (if your model doesn’t use a reusable filter). However, for those who value convenience and often need to brew multiple cups, this investment can be well worth it. It’s a great choice for those who want a hassle-free brewing process without compromising on the ability to brew for a crowd.

The Experience: Ritual vs. Routine

French Press: For many, using a French Press is more than just making coffee—it’s a ritual. The process of measuring, steeping, and pressing can be a meditative experience, allowing you to appreciate the craftsmanship behind a great cup. It’s perfect for those who see their morning coffee as a cherished moment rather than a quick fix.

Drip Coffee Maker: On the other hand, the drip coffee maker is all about routine. It integrates effortlessly into hectic mornings, enabling you to brew coffee while you handle your morning activities. It’s ideal for those who want their coffee as part of an efficient, streamlined routine without needing to think about the brewing process.

Maintenance: Cleaning and Care

French Press vs. Drip Coffee Maker

French Press: Cleaning a French Press involves separating the plunger, rinsing out the grounds, and washing the parts by hand. Some parts may be dishwasher-safe, but it’s important to keep the filter mesh clean to prevent the buildup of coffee oils. While it’s not difficult, it does require a bit more attention to detail compared to an automatic machine.

Drip Coffee Maker: Cleaning a drip coffee maker is relatively easy, especially if it comes with removable parts. The carafe, filter basket, and lid can often be cleaned in a dishwasher. Regular descaling is needed to prevent mineral buildup, especially if you use hard water. This is a simple process, but it’s important to maintain the machine for optimal performance. Overall, a drip coffee maker requires less daily effort in terms of cleaning but may need occasional deeper maintenance.

Alternative Brewing Techniques to Expand Your Coffee Repertoire

For many coffee lovers, the journey of brewing coffee at home doesn’t end with a traditional drip coffee maker or French press. Expanding your coffee repertoire with alternative brewing techniques can unlock new flavors, aromas, and experiences. Whether you’re a beginner or a seasoned enthusiast, exploring these methods can bring a fresh perspective to your daily cup of coffee. Here are some unique brewing techniques to try.

AeroPress: A Versatile Powerhouse

The AeroPress has become a favorite among coffee lovers due to its versatility and its ability to brew a rich, concentrated cup of coffee. Using a plunger and a paper or metal filter, the AeroPress allows you to experiment with different brewing times, grind sizes, and even inverted methods. It’s ideal for those who enjoy experimenting and are looking for a portable brewing solution. The result is a smooth cup with a balance between strength and clarity, similar to an espresso but with less bitterness.

Espresso Machines: The Classic Favorite

Espresso machines remain a classic choice for coffee lovers seeking a rich, concentrated brew. By forcing hot water through finely ground coffee at high pressure, these machines produce a robust shot of espresso that serves as the foundation for various coffee drinks like lattes and cappuccinos. While they may require more investment and learning, mastering an espresso machine can elevate your coffee-making skills and provide the satisfaction of crafting café-quality beverages at home.

Cold Brew: Smooth and Refreshing

Cold brew is ideal for those who prefer a less acidic, smoother coffee experience. By steeping coarsely ground coffee in cold water for 12-24 hours, this method extracts a rich flavor without the bitterness often associated with hot brewing. It’s a great option for hot weather, offering a refreshing and caffeinated pick-me-up. Plus, the concentrate can be stored in the fridge for up to two weeks, making it a convenient choice for busy schedules.

Siphon Coffee: A Visual Spectacle

For those who appreciate a bit of theater in their coffee routine, the siphon or vacuum pot is a unique choice. Using heat to create a vacuum, this method brews coffee through a combination of immersion and filtration. The process is as fascinating to watch as it is to taste, yielding a clean, complex cup that highlights delicate flavors. Siphon brewing is ideal for showcasing high-quality, single-origin beans.

Expert Opinions on French Press vs. Drip Coffee Maker

French Press vs. Drip Coffee Maker

John Allen, Coffee Blogger: “The French Press offers a deeper, richer flavor because it allows oils and small coffee particles into the cup, perfect for those who enjoy a bold, full-bodied taste. It’s ideal for experimenting with different beans and grinds.”

Samantha Perez, Barista: “Drip coffee makers provide consistency and ease, especially for people who need a quick, fuss-free brew. They produce a cleaner cup, which is great for highlighting the more delicate flavors of lighter roasts.”

James Hoffmann, Coffee Expert: “The French Press requires more attention to detail and allows for a more immersive coffee-making experience, while a drip coffee maker excels in efficiency, making it perfect for those who prioritize convenience without compromising too much on taste.”

Lisa Carter, Home Coffee Enthusiast: “I love using my French Press for weekend mornings when I can take my time, but my drip coffee maker is my go-to during busy weekdays.”

A Choice Beyond Taste

Choosing between a French Press and a Drip Coffee Maker goes beyond just flavor; it’s about aligning with a lifestyle and values that resonate with you. The French Press appeals to those who cherish the ritual, value sustainability, and enjoy experimenting with their coffee. It’s a method that allows you to connect with the process and savor every sip.

The Drip Coffee Maker, however, is perfect for those who value speed, consistency, and the ability to brew for a group. It fits seamlessly into a fast-paced lifestyle, offering a reliable cup with minimal effort. It’s a practical choice for families and offices where convenience and quantity matter.

In the end, your choice might come down to what you want from your coffee experience—whether it’s a mindful morning ritual or a quick, dependable brew to fuel your day. Either way, both methods offer their own unique way of turning coffee beans into the perfect cup.

French Press vs. Drip Coffee Maker: Friends presses are more affordable than deep coffee makers and require no filters.

Filed Under: Product Comparisons

Vinyl Plank Flooring Glue Down vs Floating: Comparison Guide

October 21, 2024 by bigfishtavernlagunaadmin Leave a Comment

When choosing vinyl plank flooring, one of the most critical decisions is selecting between glue-down vs floating installation methods.  Glue-down vinyl plank flooring offers a durable and secure solution, particularly suited for high-traffic and moisture-prone areas, while floating vinyl plank flooring is a more user-friendly, versatile option ideal for DIY projects and residential applications.

This article provides an in-depth comparison of these two flooring types, covering aspects such as installation, stability, underlayment requirements, and best use cases to guide you in making an informed decision.

Vinyl Plank Flooring Glue Down vs Floating

Floating Vinyl Plank Flooring

Floating vinyl plank flooring, also known as click-lock vinyl flooring, is designed to “float” over the subfloor without the use of adhesives. The planks fit together seamlessly, forming a secure surface that does not attach to the subfloor.

How It Works

  • Subfloor Preparation: While it doesn’t require a perfectly smooth subfloor, it’s best to start with a clean and even surface.
  • Click-Lock Mechanism: The planks feature grooves and tongues that snap together, creating a tight fit. This makes the installation quicker and more straightforward than the glue-down method.
  • Floating Structure: The floor “floats” above the subfloor, allowing for natural expansion and contraction as temperatures and humidity levels change.

Glue Down Vinyl Plank Flooring

Glue-down vinyl plank flooring is a type of resilient flooring that is installed by adhering each plank directly to the subfloor using a specialized adhesive. Unlike floating vinyl floors, which are not permanently fixed to the surface below, glue-down flooring requires the application of glue before the planks are placed.

How It Works

  • Subfloor Preparation: Requires a clean, smooth, and even subfloor for proper adhesion and long-term durability.
  • Adhesive Application: The adhesive is applied to the subfloor before laying each plank, ensuring a firm and secure bond.
  • Fixed Structure: Each plank is glued down, minimizing movement and providing a solid, stable surface that is less affected by changes in temperature or humidity. This method is ideal for high-traffic areas and moisture-prone spaces, offering a durable, long-lasting finish.

Underlayment Requirements : Vinyl Plank Flooring Glue Down vs Floating

When installing vinyl plank flooring, the choice between glue-down and floating methods significantly impacts underlayment requirements.

Glue-Down: This approach secures the planks directly to the subfloor with adhesive. A thin underlayment is often recommended to provide moisture protection and enhance sound insulation, but it must be compatible with the adhesive to ensure a secure bond.

Floating: Floating vinyl plank flooring lies on the subfloor without being directly attached. In this case, a thicker underlayment is crucial for cushioning and sound absorption. It also smooths out minor irregularities in the subfloor, leading to a seamless installation.

Choosing the right underlayment for either method is essential to maximize durability, comfort, and overall performance of your vinyl plank flooring.

Key Differences Between Glue-Down and Floating Vinyl Plank Flooring

Vinyl Plank Flooring Glue Down vs Floating
[wptb id="1448" not found ]

This chart provides a quick reference for comparing the main attributes of glue-down and floating vinyl plank flooring to help with decision-making.

Installation Processes and DIY Suitability

Glue-Down Vinyl Plank Flooring

Glue-down vinyl plank flooring requires a clean, smooth subfloor. The installation involves spreading adhesive on the subfloor and pressing each plank into place, ensuring alignment. It may require tools like a roller to secure the planks properly. After installation, a curing time of 24 to 48 hours is needed before the floor can be used.

DIY Suitability

Moderate to Difficult: Requires precision in subfloor preparation and adhesive application, making it more suited for professionals or experienced DIY enthusiasts. Mistakes in the adhesive step can lead to flooring issues.

Floating Vinyl Plank Flooring

Floating Vinyl Plank Flooring uses a click-lock mechanism, where planks snap together over a clean subfloor, allowing them to “float” without being attached. The process is simpler, as it doesn’t require adhesives and can be laid directly over underlayment. It can be used immediately after installation, making it faster.

DIY Suitability

Easy to Moderate: The click-lock system is user-friendly, making it an ideal choice for DIY enthusiasts.It demands less precision and is more tolerant of errors compared to glue-down installations.

Best Use Cases for Residential and Commercial Applications

[wptb id="1447" not found ]

Factors Such as Subfloor Requirements, Moisture Resistance, and Durability

Subfloor Requirements

Glue-Down : Glue-Down Vinyl Plank Flooring needs a smooth, clean, and even subfloor for proper adhesion. Any imperfections must be fixed to ensure a strong bond, as uneven surfaces can affect the durability of the adhesive.

Floating: Floating Vinyl Plank Flooring is more forgiving with subfloor conditions. While a clean surface is preferred, minor imperfections can be accommodated, making it suitable for a broader range of subfloors.

Moisture Resistance

Glue-Down: Glue-Down is highly moisture-resistant, making it ideal for areas like bathrooms, kitchens, or basements. The adhesive helps prevent water from seeping beneath the planks, reducing the risk of mold and mildew.
Floating: Floating floors also offer good moisture resistance, but water can seep through the seams if not installed correctly, making them slightly less ideal for very wet environments.

Durability

Glue-Down: Glue-Down Flooring offers enhanced stability and durability, especially in high-traffic areas, as each plank is securely adhered to the subfloor, minimizing movement.
Floating: Floating Flooring is durable but can shift slightly over time, especially in high-traffic areas or under heavy furniture, making it more suitable for residential use rather than intense commercial settings.

Cost Efficiency: A Detailed Look at Glue-Down vs. Floating Vinyl Plank Flooring

[wptb id="1449" not found ]

Making the Best Choice for Your Home

Choosing between glue-down and floating vinyl plank flooring comes down to your specific needs, the space you’re working with, and your budget. Glue-down flooring offers long-term durability and stability, making it ideal for commercial spaces and high-traffic areas. Floating vinyl, on the other hand, provides flexibility and ease of installation, making it a great choice for DIY projects and spaces where you might want to change the flooring in the future.

Both options have their strengths, and the best choice depends on your personal preferences and the demands of your space. By understanding the differences, you can confidently select the vinyl plank flooring that will provide a beautiful, long-lasting upgrade to your home.

Key Takeaway: Glue-down vinyl plank flooring offers unmatched stability for high-traffic areas, while floating vinyl planks are easier to install and replace, making them perfect for DIY projects and temporary solutions. Choose based on your needs for durability, flexibility, and ease of installation.

Vinyl Plank Flooring Glue Down vs Floating: Pick glue-down for stability in high-traffic areas or floating planks for easy DIY installation and flexibility.

Filed Under: Product Comparisons

Engineered Hardwood vs Solid Wood Flooring: Key Differences

October 20, 2024 by bigfishtavernlagunaadmin Leave a Comment

Thinking about upgrading your home’s flooring but can’t decide between engineered hardwood and solid wood? You’re not alone! It’s a common dilemma for homeowners who want the classic, natural look of wood flooring but are unsure which type to go with. So, how do you decide which one is right for you? In this guide, I will try to explain everything you need to know about choosing between engineered hardwood and solid wood flooring.

Engineered Hardwood vs. Solid Wood Flooring

A detailed comparison of their durability, cost, appearance, installation, and maintenance.Insights on moisture resistance, eco-friendliness, and overall performance.We’ll lay out the pros and cons of each option to help you figure out which type of flooring best matches your lifestyle and budget. You’ll have all the information you need to make a smart, informed decision about which flooring option is perfect for your home. Let’s get started!

What is Solid Wood Flooring?

Solid wood flooring is crafted from individual planks of natural hardwood. It tends to have a higher initial cost than other types of flooring. Each plank is crafted from solid wood, often designed with a tongue-and-groove edge to ensure a snug fit during installation. Typically, solid wood flooring is about ¾ inch thick, which allows it to be sanded and refinished multiple times throughout its life. Common hardwoods used for solid flooring include oak, maple, cherry, and walnut.

Engineered Hardwood vs. Solid Wood Flooring

 Pros

  •  Exceptionally durable and long-lasting.
  • Can be sanded and refinished multiple times, which helps prolong its lifespan.
  • Provides a natural, authentic wood feel underfoot.
  • Enhances the value of a home and is often considered a premium feature.

Cons

  • Prone to moisture issues, making it less ideal for damp areas like basements or bathrooms.
  • It tends to have a higher initial cost than other types of flooring.
  • The installation process can be complex and often requires the skills of a professional.

What is Engineered Hardwood Flooring?

Engineered hardwood flooring is made by bonding multiple layers of wood veneers together using heat and pressure. The top layer, also referred to as the wear layer, is actually made from real hardwood-alike in look and feel to solid wood. Beneath this layer are core layers made from plywood or high-density fiberboard (HDF), which provide added stability and make engineered hardwood less susceptible to warping.

Engineered Hardwood vs. Solid Wood Flooring

Pros

  •  Better resistance to moisture and temperature fluctuations compared to solid wood.
  •  Easier and faster to install; hence, it’s suitable for DIY projects.
  •  It is offered in a wide range of styles, colors, and finishes.
  •  It is typically more cost-effective than solid wood.

 Cons

  • Refinishing is limited and depends on the thickness of the top layer.
  • Lower-cost options may have a thinner hardwood layer, affecting durability.
  • Might not increase home value as much as traditional solid wood flooring.

Key Differences Between Solid Wood and Engineered Hardwood

Refinishing

Solid wood: Solid wood flooring is made from a single piece of hardwood, typically around ¾ inch thick.This thickness allows for multiple refinishing sessions over the years, making it possible to sand and refinish the floor several times. This advantage extends the life of the flooring and allows homeowners to refresh the appearance as needed.

Engineered Hardwood: This flooring features a hardwood veneer on the surface, reinforced by layers of plywood or high-density fiberboard beneath. The thickness of the veneer limits the number of refinishing sessions to one or two, depending on how thick the top layer is. While it can be refreshed, it doesn’t have the same longevity for refinishing as solid wood.

Noise Production

Solid Wood: Because it is a denser, single-piece material, solid wood tends to produce more noise when walked on, particularly in high-traffic areas. The flooring’s rigidity can lead to more echoing or creaking sounds.

Engineered Hardwood: The layered structure of engineered hardwood helps absorb sound better than solid wood, making it quieter underfoot. The layers of plywood or fiberboard help absorb noise and minimize vibrations, creating a quieter environment. The layers of plywood or fiberboard help absorb noise and minimize vibrations, creating a quieter environment.

Installation Methods and Flexibility

Solid Wood: Installation typically requires nail-down or glue-down methods, which limit where solid wood can be used. It’s not ideal for below-grade installations, such as basements, or areas with concrete subfloors, due to its sensitivity to moisture.

Engineered Hardwood: The planks are directly bonded to the subfloor using a specialized adhesive, providing a solid feel and making it appropriate for both concrete and wooden subfloors.

Composition

Solid Wood: Comprising a single, solid piece of wood throughout its thickness, giving it a uniform appearance and natural texture. This consistency can be beneficial for those seeking a traditional, authentic wood look.

Engineered Hardwood: Composed of multiple layers, featuring a real hardwood veneer on top and plywood or high-density fiberboard layers beneath. This composition gives engineered hardwood greater stability, reducing the risk of warping or swelling with changes in humidity.

Moisture Resistance

solid hardwood: solid hardwood consists of a single wood piece, making it more susceptible to moisture issues. It can expand, contract, or warp under changing humidity levels, making it ideal for spaces with controlled environments like living rooms and bedrooms, but unsuitable for moisture-prone areas or below-grade installations.

Engineered Hardwood: Due to its multi-layer construction with plywood or HDF cores, engineered hardwood is more resistant to moisture than solid hardwood. This structure offers dimensional stability, minimizing expansion, contraction, and warping when exposed to humidity.Therefore, it’s suitable for areas with higher moisture, like kitchens, bathrooms, and basements.

Regression and Sorting System

Engineered Hardwood vs. Solid Wood Flooring

Solid Wood: The sorting and grading process for solid wood usually results in consistent quality, as it’s cut from a single piece of wood. Sorting systems categorize wood based on appearance, including knots, grain, and color variations.

Engineered Hardwood: The sorting process may involve more variations due to the combination of layers and the engineered nature of the product. However, engineered wood can be manufactured to achieve specific appearances and grading standards, allowing for greater control over consistency.

Surface Modification

Solid Wood: Offers more room for customization since it can be sanded and stained multiple times. Homeowners can modify the surface to change the look or refresh the wood as needed.

Engineered Hardwood: While surface treatments are possible, the limited thickness of the veneer means less room for sanding. However, many engineered hardwood products come pre-finished with advanced treatments like UV-cured or aluminum oxide coatings for enhanced durability.

Cost Comparison

Solid Wood: Usually more expensive because of the material costs and the labor-intensive nature of the installation. Its higher price is also influenced by the need for acclimatization before installation and the potential for future refinishing.

Engineered Hardwood: Typically more economical regarding both materials and installation. It can be installed more quickly and often requires less preparation. Additionally, its layered construction uses less expensive materials in the lower layers.

Charing Modification to Engineered Hardwood Flooring?

Charring modification, also known as thermal modification or wood charring, is a process used to enhance the durability, resistance, and aesthetic qualities of wood. This ancient technique, which dates back to traditional practices like the Japanese method of Shou Sugi Ban (焼杉板), involves carefully burning or heating the wood surface to alter its properties. The process results in improved durability, enhanced moisture resistance, and a unique appearance that can be both decorative and functional.

Additionally, charring can improve the wood’s resistance to moisture, insects, and decay, as the process seals the surface, reducing the chances of water absorption. Charring is often used as a finishing technique to give engineered hardwood flooring a unique, aged aesthetic, while still maintaining the benefits of engineered wood’s stability and versatility. Engineered hardwood floors are my top choice for these qualities.

Which is Better for You?

The choice between engineered hardwood and solid wood flooring depends on your priorities and the environment where it will be installed. Here are some recommendations:

Choose Solid Wood If: You want a floor that will last a lifetime, are prepared to invest in higher upfront and maintenance costs, and are installing it in areas with stable humidity and temperature.

Choose Engineered Hardwood If: You need a more budget-friendly option, want a quicker installation process, or plan to install the flooring in a room with higher moisture levels or on a concrete subfloor.

Ultimately, both engineered and solid wood flooring are excellent choices, and the right one will depend on your specific needs and budget.

Filed Under: Product Comparisons

Hardwood Floor Resurfacing vs. Refinishing: Key Differences

October 19, 2024 by bigfishtavernlagunaadmin Leave a Comment

Hardwood floors add warmth, elegance, and value to your home, but over time, they can start to look worn, scratched, or faded. If your hardwood floors are beginning to look a little tired and worn, you might be wondering how to bring back their natural beauty. You have two main options: hardwood floor resurfacing and hardwood floor refinishing.Though these two terms are often used as if they mean the same thing, they’re actually different processes with unique outcomes, costs, and requirements. 

Resurfacing vs. refinishing of we’ll explain the key differences, advantages, and when each option is appropriate, so you can make the best decision for your floors. We’ll also cover some new insights making this will help you restore your hardwood floors.

Hardwood Floor Resurfacing vs. Refinishing

What is Hardwood Floor Resurfacing?

Hardwood floor resurfacing involves replacing or repairing the top layers of wood that have been severely damaged. Resurfacing can include fixing issues like deep scratches, dents, or warped boards. This is more than a simple sanding; it may require removing and replacing parts of the flooring to address structural problems.

Resurfacing can be a more involved process than refinishing, but it’s ideal for floors that have been damaged over time or in high-traffic areas. It can help to restore the integrity of your floors by replacing damaged sections and giving them a new lease on life.

Key Steps Involved in Resurfacing

Inspect and Evaluate – The first step is to assess the condition of your floors to determine if resurfacing is the right option. If the damage is severe, resurfacing might be your only option.

Remove Damaged Sections – Boards that are warped, deeply scratched, or cracked are removed and replaced.

Sanding and Buffing – Once the damaged boards are replaced, the floor is sanded down to create a smooth surface.

Re-staining and Sealing – After the floor is sanded, it gets stained to match the existing boards, followed by a sealant to safeguard the wood.

Advantages of Resurfacing

  • Restores floors that have been significantly damaged
  • Can address structural issues like warping or deep dents
  • Extends the life of your flooring without replacing the entire floor
  • Adds value to your home

Disadvantages of Resurfacing

  • More labor-intensive and expensive than refinishing
  • Requires professional expertise, making it less ideal as a DIY project

What is Hardwood Floor Refinishing?

Refinishing, on the other hand, involves sanding off the top layer of the current finish on your hardwood floors. Unlike resurfacing, refinishing does not involve replacing any boards. Instead, it smooths out superficial scratches and imperfections, revealing a fresh, new surface that can be stained and sealed.Refinishing is a less invasive and less expensive option compared to resurfacing. It’s perfect for floors with a bit of wear and tear that are still structurally sound. This approach can bring your hardwood floors back to life without the need for extensive repairs.

Key Steps Involved in Refinishing

Sanding Down the Surface – The existing finish is sanded away, exposing the raw wood beneath.

Cleaning and Preparing – The floor is cleaned and any dust is removed to ensure a smooth finish.

Staining (Optional) – You can choose to change the color of your floors with a new stain or keep the natural look.

Sealing -A protective coating is added to shield the wood and give it a smooth finish, whether you prefer glossy, matte, or satin.

Advantages of Refinishing

  • It’s more affordable than resurfacing.
  • It can be done fairly quickly, depending on the size of the room.
  • Ideal for floors that are lightly scratched or faded
  • Can change the look of your floors with new stains or finishes

Disadvantages of Refinishing

  • Does not address structural problems or deep damage
  • May not be effective for floors with significant wear or warping
  • Requires a dust-free environment for best results

Resurfacing vs. Refinishing: Key Differences

Hardwood Floor Resurfacing vs. Refinishing
[wptb id="1433" not found ]

When Should You Resurface Your Hardwood Floors?

Resurfacing is your best option if

  • You have deep scratches, gouges, or dents that can’t be sanded out.
  • Your floors are warped or have large gaps between boards.
  • There are boards that are loose, cracked, or damaged beyond sanding.
  • You want to restore your floors without completely replacing them.

Resurfacing is a more extensive process, and it is ideal for situations where refinishing simply won’t be enough to address the damage. This method can add years of life to your floors and is more cost-effective than total floor replacement.

When Should You Refinish Your Hardwood Floors?

Refinishing is a great choice if

  • Your floors have surface-level scratches or scuffs.
  • The wood is starting to fade or lose its luster.
  • It can be done fairly quickly, depending on the size of the room.You’d like to refresh your floors with a new stain color.
  • The floors are still structurally sound with no major damage.

Refinishing is a straightforward process that you can tackle as a DIY project if you’re comfortable using sanding tools. It’s less expensive than resurfacing and can completely transform the look of your floors in just a couple of days.

Reducing Lead Exposure During Both Processes

Understanding Lead Risks for Safe Floor Restoration is important. Lead exposure risks differ between floor resurfacing and refinishing mainly due to the level of invasiveness of each process. Resurfacing has a higher risk of disturbing old materials that may contain lead, while refinishing generally focuses on the top layer, with a lower but still possible risk of exposure. For both projects, especially in older homes, it’s essential to test for lead and take the necessary safety precautions to protect yourself and your family.

Hardwood Floor Resurfacing vs. Refinishing

Test for Lead Before Starting: Use a lead test kit to check for lead in the existing finish. Knowing if there is lead in the top layer or underlying layers can help you plan the appropriate safety measures.

Use Lead-Safe Work Practices: Both DIY enthusiasts and professionals should follow EPA guidelines for lead-safe work practices, especially in homes built before 1978.

This includes containing the work area, wearing protective equipment, and using HEPA-filter vacuums to clean up dust.

Hire Certified Professionals: If you suspect lead may be present, it’s best to hire professionals who are certified in lead-safe renovations. They will have the right equipment and expertise to minimize exposure risks.

Proper Ventilation: Ensure that the workspace is well-ventilated, and consider using air purifiers with HEPA filters to help capture airborne particles.

Cleaning and Disposal: Dispose of all dust and debris safely by following local regulations for hazardous waste. Clean the area thoroughly after the work is done to ensure no residual lead dust remains.

Additional Considerations: Indoor Air Quality and Health VOCs and Indoor Air Pollution

Hardwood floor refinishing can emit volatile organic compounds (VOCs) that may negatively impact indoor air quality, although wood materials can also have positive effects such as moderating humidity and inhibiting bacteria.

Both processes can lead to indoor air pollution if VOC-containing products are used. These chemicals can affect the air quality and could potentially cause respiratory issues, headaches, and other health concerns.

Choosing low-VOC or VOC-free products can help lessen these effects and improve the air quality in your home.

Dust and Particulates: Sanding in both resurfacing and refinishing creates dust, which can contribute to indoor air pollution if not properly managed. Dust from older finishes could contain harmful substances, such as lead or other chemicals.

Using equipment with dust containment systems can greatly reduce the amount of airborne dust, making the environment safer and cleaner.

DIY or Hire a Professional?

When it comes to resurfacing, it’s recommended to hire a professional. The process involves more intricate work, including replacing boards and potentially working on subflooring. A professional will have the skills and tools to ensure the job is done correctly, minimizing the risk of further damage.

Hardwood Floor Resurfacing vs. Refinishing

You can tackle refinishing as a DIY project if you have the right tools and some patience. Many homeowners find it rewarding to refinish their floors themselves, and there are rental options for sanders and other tools. Just be prepared to invest time and effort into the project, especially if you are new to sanding and staining wood.

Pros of Hiring a Professional:

  • Experience and expertise
  • High-quality results
  • Efficient and safe process

Pros of DIY Refinishing:

  • Cost-effective
  • Customizable (you control the look)
  • Satisfaction of completing the project yourself

Which Option is Right for You?

Choosing between hardwood floor resurfacing and refinishing depends largely on the condition of your floors. If your floors have minor wear and tear, scratches, or just need a facelift, refinishing is the way to go.It’s cost-effective, quick, and can easily be done as a DIY project for those ready to put in some effort.

However, if your floors are severely damaged, warped, or structurally compromised, resurfacing will give them a new lease on life. While it may be pricier, it’s still more affordable than replacing the entire floor and guarantees that your hardwood will look stunning and last for years.

Filed Under: Product Comparisons

Marble vs Ceramic Tile Flooring: Comparison Guide

October 18, 2024 by bigfishtavernlagunaadmin Leave a Comment

When choosing flooring materials, one common debate is between marble tiles vs ceramic tiles. Both materials come with their own pros and cons, and the right choice depends on factors like aesthetics, durability, maintenance, and cost. In this article, we’ll clean up each aspect to help you make a well-informed decision.

Marble vs Ceramic Tile Flooring

Key Takeaways

  • Marble offers a luxurious, natural stone aesthetic with unique veining, while ceramic tiles are more affordable and versatile.
  • Both materials come in a variety of designs, but each is suited to specific environments and preferences.
  • Factors like maintenance, durability, and cost should be considered when choosing between marble and ceramic tiles.

Overview of Marble Tiles

Marble, with its classic elegance and distinctive veins, is a natural stone renowned for its enduring beauty. It has been used in architecture for centuries, giving homes and buildings a luxurious, high-end look. Each marble tile is unique, offering an exclusive design for every room where it is installed.

  • Pros: Aesthetically pleasing, luxurious, adds value to a property, highly durable with proper maintenance.
  • Cons: Expensive, prone to staining, requires regular sealing to maintain its appearance, sensitive to acidic cleaners.

Marble tiles are often used in upscale bathrooms, kitchens, and entryways to make a bold statement. The stone’s natural variations ensure that no two marble floors are the same.

Overview of Ceramic Tiles

Ceramic tiles are made from clay and fired in kilns, which makes them a widely available and affordable option for flooring. They can be glazed or unglazed, providing a broad range of colors, patterns, and textures to suit different aesthetic preferences.

  • Pros: Budget-friendly, highly customizable in terms of color and pattern, durable for light to moderate foot traffic, easy to clean.
  • Cons: Less durable than marble, can chip or crack over time, does not add as much value to a property.

Ceramic tiles are ideal for bathrooms, kitchens, and any space where water resistance is key. They also work well with a wide range of interior design styles, whether you’re going for a modern or rustic look.

Aesthetic Differences Between Marble and Ceramic Tiles

Marble vs Ceramic Tile Flooring

Marble tiles are known for their natural beauty and luxurious appeal. Each marble tile is unique, featuring natural veining and color variations, which adds an elegant and high-end feel to any space. Marble is usually polished to a glossy shine, which reflects light and gives rooms a brighter, more open feel. It’s ideal for those seeking a timeless, sophisticated look in their home.

On the other hand, ceramic tiles offer greater versatility in design. They come in a wide range of colors, patterns, and textures, allowing for more customization. Ceramic can mimic the look of marble, wood, or other materials, making it a flexible choice for both modern and traditional interiors. Unlike marble, ceramic tiles have consistent patterns and colors, offering a more uniform and controlled appearance.

While marble evokes luxury, ceramic provides more affordability and variety, suiting different aesthetic preferences.

Durability: How Do Marble and Ceramic Tiles Compare?

When it comes to durability, marble and ceramic tiles differ significantly. Marble, a natural stone, is known for its strength and longevity but requires careful maintenance. While it can last for decades or even centuries with proper care, marble is prone to scratching, staining, and etching when exposed to acidic substances like vinegar or lemon juice. In high-traffic areas, marble may also develop wear patterns over time, which can dull it’s finish.However, they’re more likely to crack if exposed to heavy impact or if not installed properly.

On the other hand, ceramic tiles are highly durable for moderate foot traffic areas and are more resistant to scratches than marble. However, they are more prone to cracking under heavy impact or if installed incorrectly. Glazed ceramic tiles are particularly durable against moisture, stains, and chemicals, making them a good option for kitchens and bathrooms.

Maintenance: Caring for Marble vs Ceramic Tile Floors

Marble tiles need consistent upkeep to keep their natural beauty intact. Because they’re porous, they must be sealed regularly to protect against stains and water damage. It’s important to use specific cleaners that won’t scratch or damage the surface, and you should avoid any acidic cleaners entirely.

 Marble requires more attention overall, including frequent cleaning and polishing, to preserve its luxurious finish. In contrast, ceramic tiles are far easier to maintain. Being non-porous, they can be cleaned with standard household products and don’t require sealing. Ceramic is naturally stain, water, and chemical-resistant. The only area that may need occasional care is the grout, which might require cleaning or replacement to prevent mold or discoloration over time.

 In summary, marble needs more hands-on care, while ceramic offers a low-maintenance alternative.

Cost Analysis: Marble vs Ceramic Tile Flooring

Marble vs Ceramic Tile Flooring

Marble tiles are significantly more expensive than ceramic tiles due to their natural origin and luxurious appeal. The price of marble tiles typically ranges from $10 to $30 per square foot, with premium varieties costing even more. Additionally, installation costs for marble are higher because it requires professional expertise to handle the heavy, delicate stone and ensure proper alignment of the veining.

In contrast, ceramic tiles are much more budget-friendly, with prices ranging from $1 to $15 per square foot, depending on the quality and design. Ceramic is also easier and cheaper to install, as it is lighter and less complex to work with, allowing for potential DIY installation and lower labor costs.

Overall, marble’s high cost is justified by its luxurious look and value, while ceramic tiles offer a more affordable solution without compromising on design variety or durability.

Environmental Impact: Which Tile is More Sustainable?

Marble tiles are made from natural stone, a finite resource, and their quarrying can cause environmental damage like habitat destruction and high energy use. However, marble’s durability means it can last for decades, reducing the need for frequent replacements and minimizing waste. Marble is also recyclable, adding to its sustainability.Ceramic tiles, made from abundant natural clay, have a more energy-intensive production process, as they require firing in kilns, contributing to greenhouse gas emissions.

Improvements in manufacturing have reduced the environmental impact of making ceramic tiles. Overall, marble’s longevity makes it a more sustainable option in the long run, while ceramic’s lower resource extraction and evolving eco-friendly production methods offer a sustainable alternative for those seeking affordability and environmental responsibility.

Which Tile Is Better for Resale Value: Marble or Ceramic?

When it comes to resale value, marble typically offers a higher return due to its luxurious and timeless appeal. Marble flooring is often associated with high-end properties, and its unique, natural beauty can significantly enhance a home’s market value. Buyers view marble as a premium material, making homes with marble floors more attractive in competitive markets.

Ceramic tiles, while more affordable, do not add as much resale value as marble. However, they still offer a clean, versatile look that appeals to many buyers, especially in kitchens and bathrooms. Ceramic’s durability and wide range of design options can improve a home’s overall appeal but won’t carry the same weight as marble in terms of value.

For maximizing resale value, marble is the better option, especially in luxury or upscale markets.

Best Areas for Marble and Ceramic Tile Installation

Marble tiles are best suited for luxury areas where aesthetics are a priority, such as living rooms, entryways, and bathrooms. Marble adds elegance and a high-end feel, making it ideal for spaces where you want to make a statement. It is also popular for countertops and backsplashes, though it requires more maintenance in these areas.

Ceramic tiles, due to their affordability and durability, are ideal for high-moisture areas like bathrooms, kitchens, and laundry rooms. Ceramic is also a great choice for hallways and entryways where water resistance and ease of cleaning are crucial. It’s versatile enough for both indoor and outdoor use, especially when frost-resistant versions are chosen.

In summary, use marble for luxury spaces and ceramic for high-traffic or wet areas that require low maintenance.

Final Verdict: Marble or Ceramic?

The choice between marble and ceramic tiles ultimately depends on your budget, style preferences, and long-term plans for your space. If you are looking for a luxurious, high-end material that will stand the test of time and add value to your property, marble is the superior choice. However, it requires a significant investment both in terms of cost and maintenance.

On the other hand, if you need a cost-effective, low-maintenance option that still offers plenty of design possibilities, ceramic tiles are a great alternative. They are practical, easy to install, and suitable for a wide variety of spaces.


By considering these factors, you can make an informed decision on whether marble or ceramic tiles are the best fit for your home. Whether you go for marble’s timeless elegance or the versatility of ceramic, both will add beauty and functionality to your space.

Filed Under: Product Comparisons

Laminate Flooring vs. Tile: The Ultimate Comparison Guide

October 18, 2024 by bigfishtavernlagunaadmin Leave a Comment

Selecting the right flooring for your home can be challenging, especially when faced with popular options like laminate flooring and tile.Both options offer unique advantages and disadvantages, and the best choice will depend on your specific needs, lifestyle, and budget. In this guide, we will provide a detailed comparison between laminate flooring and tile to help you make an informed decision.

Laminate Flooring vs. Tile

What We’ll Cover:

  • Key features of laminate and tile flooring.
  • A detailed comparison of cost, durability, and maintenance.
  • Pros and cons of each option.
  • Best use cases for both laminate and tile.

What is Laminate Flooring?

Laminate Flooring vs. Tile

Laminate flooring is a versatile and affordable option for homeowners looking for a stylish yet budget-friendly floor covering. Made from multiple layers of synthetic materials fused together, laminate is designed to mimic the look of natural wood, stone, or tile at a fraction of the cost.

Key Features of Laminate Flooring

  • Affordability: Laminate is often cheaper than real wood or ceramic tile flooring.
  • Installation: Simple click-and-lock installation process, often DIY-friendly.
  • Appearance: Wide variety of styles and textures, mimicking wood, stone, or tile.
  • Durability: Resistant to scratches and wear, making it ideal for areas with high traffic.

Ideal Uses
Laminate is best suited for areas like living rooms, bedrooms, hallways, and even some kitchens, depending on moisture levels. It’s a great choice for homeowners who want the appearance of natural wood, luxury vinyl plank, or tile without the high cost.

What is Tile Flooring?

Laminate Flooring vs. Tile

Tile flooring is made from materials like ceramic, porcelain, and natural stone, providing outstanding durability, long-lasting performance, and a diverse selection of styles and colors. Tile flooring is often used in areas where water and moisture are common concerns, such as bathrooms and kitchens.

Key Features of Tile Flooring

  • Waterproof: Tile is entirely water-resistant, making it perfect for wet areas.
  • Durability: Exceptionally durable and can last for decades with proper maintenance.
  • Design Options: Available in a wide array of colors, shapes, and sizes.
  • Temperature Regulation: Keeps spaces cooler, ideal for warmer climates.

Ideal Uses
Tile flooring is commonly installed in bathrooms, kitchens, entryways, and outdoor spaces. Its water-resistant characteristics make it ideal for areas with high moisture exposure, and it’s often compared to other waterproof flooring options like vinyl.

Appearance and Comfort

Laminate Flooring
Laminate flooring is crafted to replicate the appearance of hardwood, stone, or tile, using a high-resolution photographic layer. It’s available in a vast array of designs, colors, and textures, providing plenty of aesthetic versatility. However, some people find laminate less authentic in appearance compared to real materials it imitates, such as engineered hardwood or stone.

In terms of comfort, laminate is warmer and softer underfoot compared to tile. It typically features a foam underlayment that adds cushioning, making it more comfortable for prolonged standing or walking.

Tile Flooring
Tile flooring provides a high level of sophistication and elegance, available in a diverse range of materials, including ceramic, porcelain, and natural stone. Unlike laminate, tile does not have a photographic layer but is made from the actual material, offering a more genuine look and feel.

However, tile tends to be colder and harder underfoot, which may not be ideal for living spaces or bedrooms, especially in colder climates. Adding area rugs can alleviate this issue where comfort is a priority.

Winner for Appearance: Tile
Winner for Comfort: Laminate

Durability and Lifespan

Laminate Flooring
Laminate flooring features a durable wear layer that resists scratches, dents, and stains, making it ideal for households with pets or children. However, it is susceptible to moisture damage, which limits its use in areas like kitchens, bathrooms, or basements.

Laminate flooring generally has a lifespan of 10 to 25 years, depending on its quality and the level of care it receives. While it is durable, it does not last as long as tile or even engineered hardwood.

Tile Flooring
Tile flooring is recognized for its outstanding durability and long lifespan. Porcelain and ceramic tiles, when installed and maintained correctly, can last 50 to 100 years or more. Tile’s resistance to moisture, heat, and heavy foot traffic makes it an excellent option for kitchens, bathrooms, and entryways.

The primary downside of tile is its tendency to crack or chip when exposed to heavy impacts, but individual tiles can be replaced without redoing the entire floor.

Winner for Durability and Lifespan: Tile

Water and Heat Resistance

Laminate Flooring vs. Tile

Laminate Flooring
Laminate flooring is not naturally water-resistant, though some newer waterproof options are available. Traditional laminate can easily warp and swell when exposed to moisture, making it a poor option for wet areas. Additionally, it reacts to temperature fluctuations, causing the planks to expand or contract.

Tile Flooring
Tile flooring excels in water and heat resistance. Its built-in waterproof properties make it perfect for bathrooms, kitchens, and other moisture-prone areas. Tile does not warp or swell when exposed to moisture or heat, making it far more stable in these environments.

Winner for Water and Heat Resistance: Tile

Maintenance and Care

Laminate Flooring
Laminate flooring is easy to clean with regular sweeping or vacuuming, and it can be mopped lightly. However, it’s sensitive to excessive moisture, so wet mopping should be avoided. Its protective wear layer makes it resistant to scratches and stains, but deep scratches or water damage may require plank replacement.

Tile Flooring
Tile is also easy to clean with regular sweeping and mopping. Unlike laminate, tile can handle wet mopping without the risk of water damage. However, keeping the grout between tiles clean can be difficult, and it may need periodic resealing to prevent stains.

Winner for Maintenance: Tile

Cost Comparison

Laminate Flooring vs. Tile

Laminate Flooring
Laminate is a budget-friendly flooring option. It typically costs between $2 to $7 per square foot for materials, with installation costing between $2 to $6 per square foot. Overall, laminate is a more cost-effective option compared to tile or engineered hardwood, both in terms of materials and installation.

Tile Flooring
Tile flooring is more expensive, particularly when using materials like porcelain or natural stone. Ceramic tiles typically cost between $2 and $9 per square foot, whereas natural stone tiles can be pricier, often reaching $15 or more per square foot. Tile installation is also more labor-intensive and typically costs between $5 to $12 per square foot.

Winner for Cost: Laminate

 Environmental Impact

Laminate Flooring
Laminate flooring can release volatile organic compounds (VOCs) during and after installation, although many modern products are now certified as low-VOC. Since laminate contains synthetic materials, it is less environmentally friendly compared to tile or natural stone.

Tile Flooring
Tile is generally considered a more sustainable option, especially when using materials like natural stone, which have minimal environmental impact. Tiles are free of VOC emissions and are highly durable, often lasting for decades, so you won’t need to worry about replacing them frequently.

Winner for Environmental Impact: Tile

Resale Value

Laminate Flooring vs. Tile

Laminate Flooring
While laminate can add a modern touch to your home, it typically does not add as much resale value as tile. Its shorter lifespan and susceptibility to damage can be a drawback for potential buyers.

Tile Flooring
Tile is highly durable and long-lasting, making it a desirable feature for homebuyers. Homes with tile flooring, particularly in kitchens and bathrooms, tend to have higher resale values. Comparatively, buyers may prioritize the longevity and water resistance of tile over laminate.

Winner for Resale Value: Tile

Pros and Cons of Laminate Flooring

Pros

  • Affordable: A budget-friendly option that mimics the appearance of high-end materials like hardwood or stone.
  • Easy Installation: Ideal for DIY enthusiasts due to its user-friendly click-and-lock system.
  • Scratch-Resistant: Great for busy areas of the home, particularly if you have kids or pets.

Cons

  • Moisture Sensitivity: Not recommended for bathrooms or basements due to potential warping when exposed to water.
  • Not Authentic: While laminate can closely mimic wood or stone, it doesn’t provide the natural look and feel of real materials.

Pros and Cons of Tile Flooring

Pros

  • Highly Durable: Can last for decades with minimal maintenance.
  • Waterproof: Perfect for kitchens, bathrooms, and outdoor areas.
  • Temperature Regulation: Keeps rooms cool, making it ideal for warmer climates.

Cons

  • Expensive: Both the materials and installation can be costly.
  • Cold and Hard Underfoot: Tile can feel cold, especially in winter, and may not provide the same comfort as softer flooring options.

Which is Better for Your Home?

The choice between laminate flooring and tile ultimately depends on your needs and preferences.

  • Choose laminate flooring if you’re looking for an affordable, easy-to-install option that mimics the appearance of wood or stone, but without the high cost. It works well in living rooms and bedrooms where there isn’t much concern about moisture.
  • Choose tile flooring if you need something highly durable, waterproof, and low-maintenance, particularly for areas like bathrooms, kitchens, or even outdoors. Tile provides a premium, long-lasting solution, though it comes at a higher cost.

Both laminate and tile have their place in the modern home, and the right choice depends on factors like budget, room function, and personal style, especially when comparing the cost of tile vs laminate flooring.

Filed Under: Product Comparisons

  • « Go to Previous Page
  • Page 1
  • Page 2
  • Page 3
  • Page 4
  • Page 5
  • Go to Next Page »

Primary Sidebar

Recent Posts

  • Can You Deep Fry in a Nonstick Pan? My Surprising Results
  • Clay Pot vs Dutch Oven: Which One Right for You?
  • Are Dutch Ovens Non Toxic? All You Need to Know
  • Is Low Specific Heat Capacity Good for Frying Pans​
  • Smeg Kettle vs Mini Kettle: Which One Fits Your Style?

Copyright © 2024 bigfishtavernlaguna.com. All right reserved.