• Skip to primary navigation
  • Skip to main content
  • Skip to primary sidebar
  • About Us
  • Affiliate Disclosure
  • Contact us
  • Cookie Privacy Policy
  • Privacy Policy
  • Sample Page
  • Terms of Use

Kitchen Guide

  • Appliance Reviews
  • Bakeware
  • Buying Guides
  • Product Comparisons
  • Recipes
  • Essentials
  • Cleaning

Recipes

How to Cook Brown Rice in a Rice Cooker

March 15, 2025 by bigfishtavernlagunaadmin Leave a Comment

Cook Brown Rice in a Rice Cooker

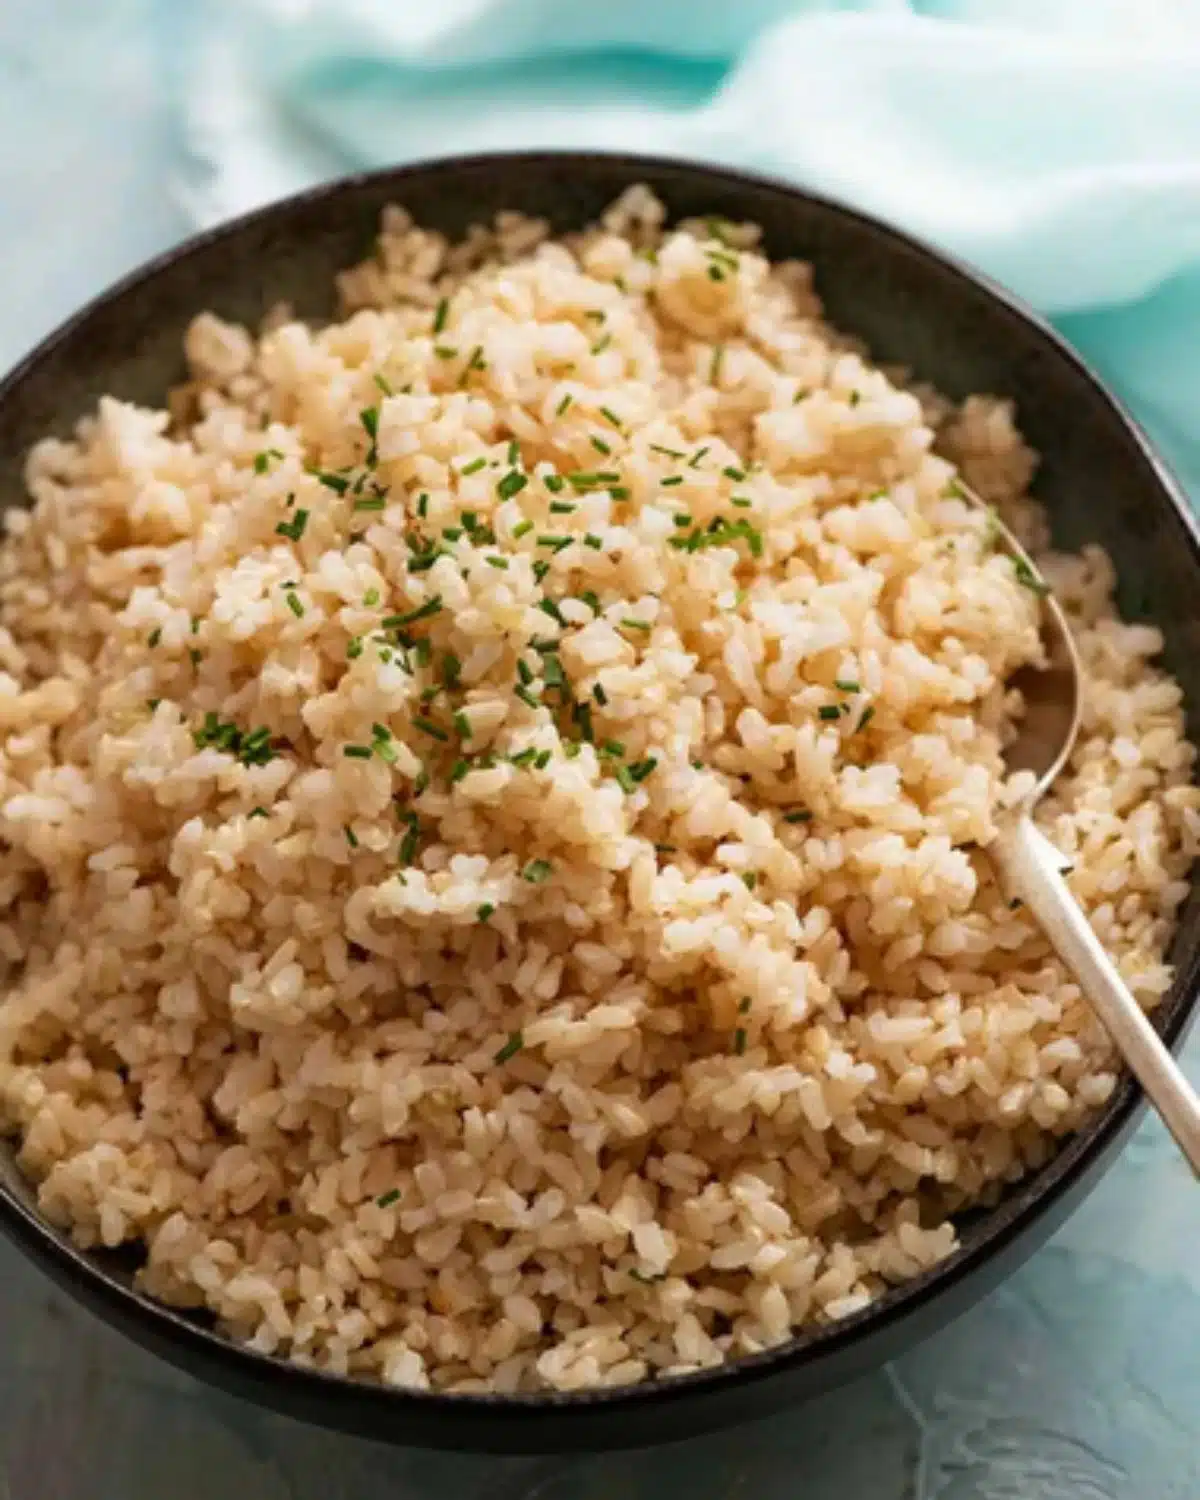
Cooking brown rice in a rice cooker is super easy once you know the right technique. When I first switched from white rice to brown rice, I didn’t realize it needed more water and a bit more time. Once I figured that out, my rice cooker made perfect, healthy rice every time. In fact, now I use it for most of my meals, especially when I’m in a rush. It’s been a game changer! If you’re new to brown rice or just trying to get it right, you’ll love how effortless it becomes.

Why Brown Rice is Healthy

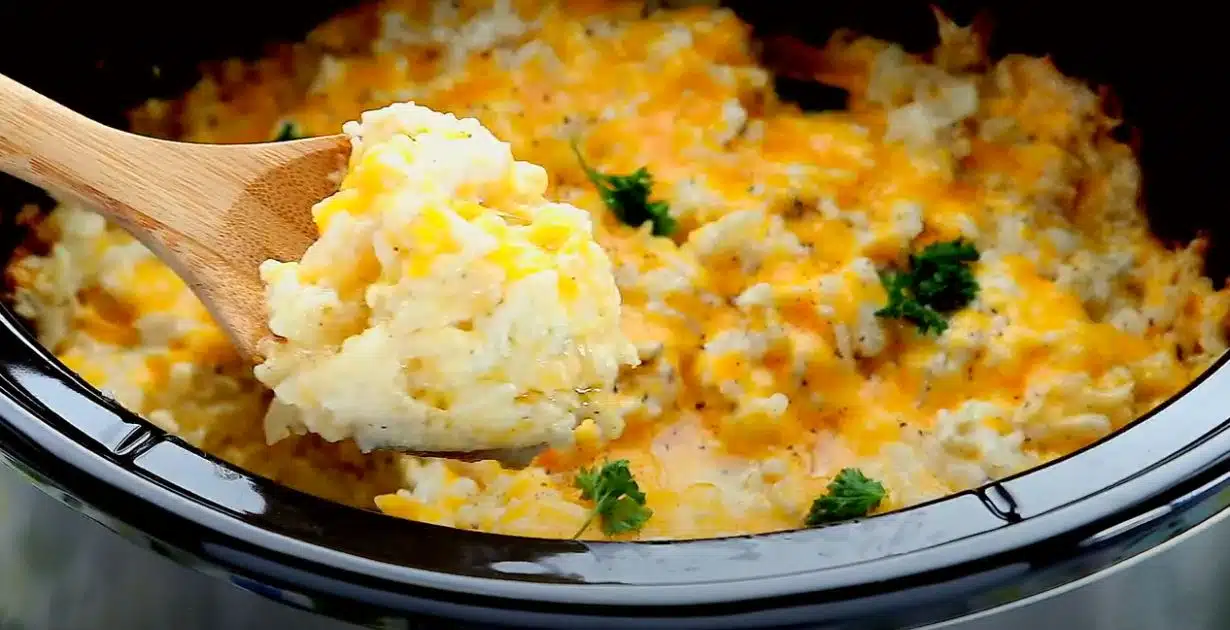
Brown rice is a whole grain, which means it retains all of its healthy parts, unlike white rice. It’s packed with fiber, vitamins, and minerals that support digestion, heart health, and blood sugar. I personally love its nutty taste and chewy texture—it adds such heartiness to dishes. I use it often in stir-fries and grain bowls. In fact, when I started incorporating more whole grains into my diet, brown rice was one of my top choices because of its many health benefits. It’s definitely a staple in my kitchen now.

How to Cook Brown Rice in a Rice Cooker

Ingredients 

Cook Brown Rice in a Rice Cooker

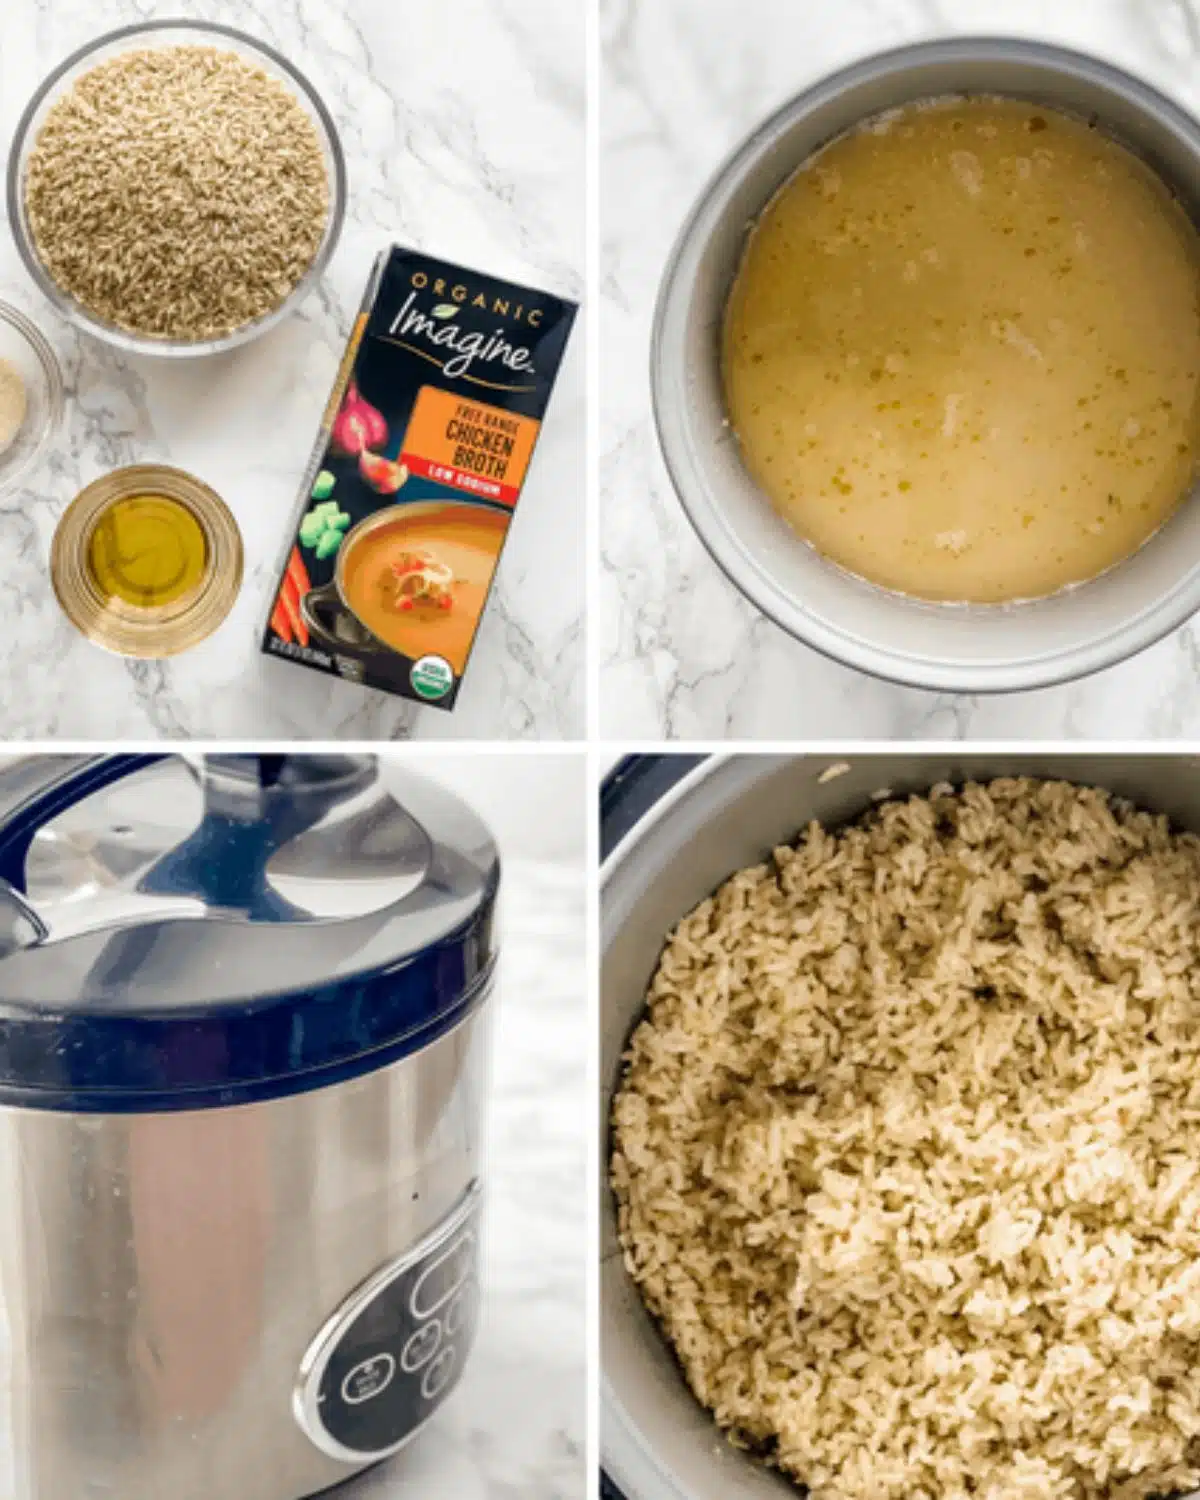
2 cups brown rice, use the electric rice cooker cup

1 teaspoon salt or per your taste

1~2 tablespoons of oil. I use olive oil or per your taste

Water up to level 2 1/4


Steps

cook brown rice in a rice cooker

Wash the rice well, drain, and put it in the machine.

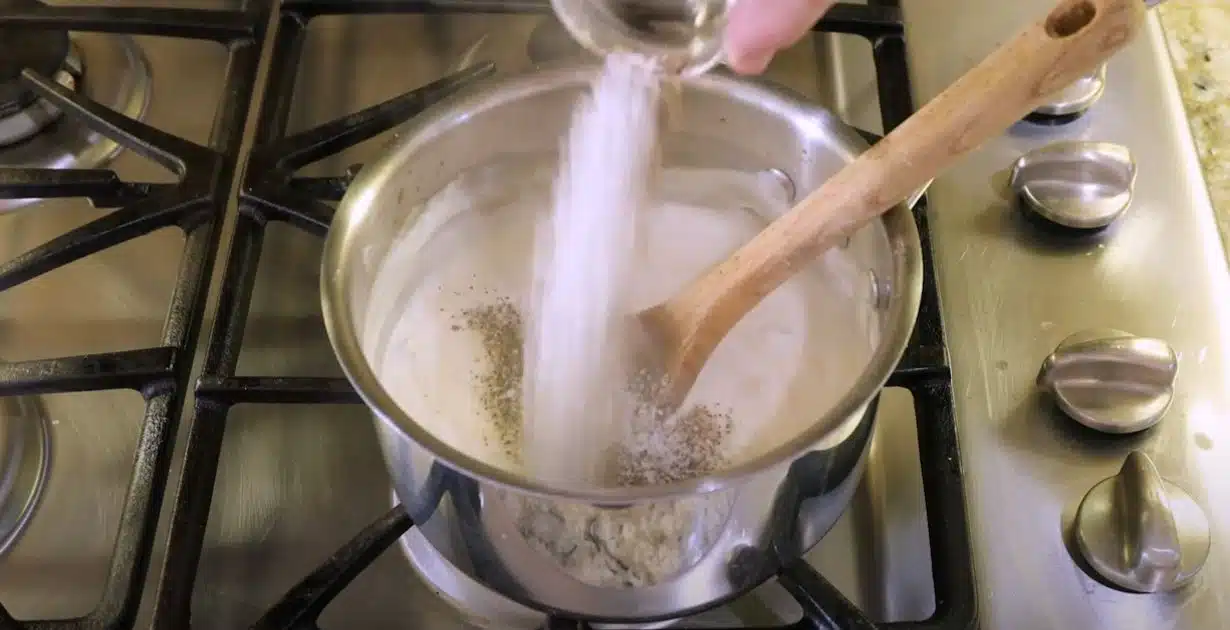
Add salt, oil and water and mix well.

Cover and plug the wire.

Presses on the cooking and walks away and leaves it alone to cook.

When the rice is ready, the device turns off by itself and turns on the keep warm feature.

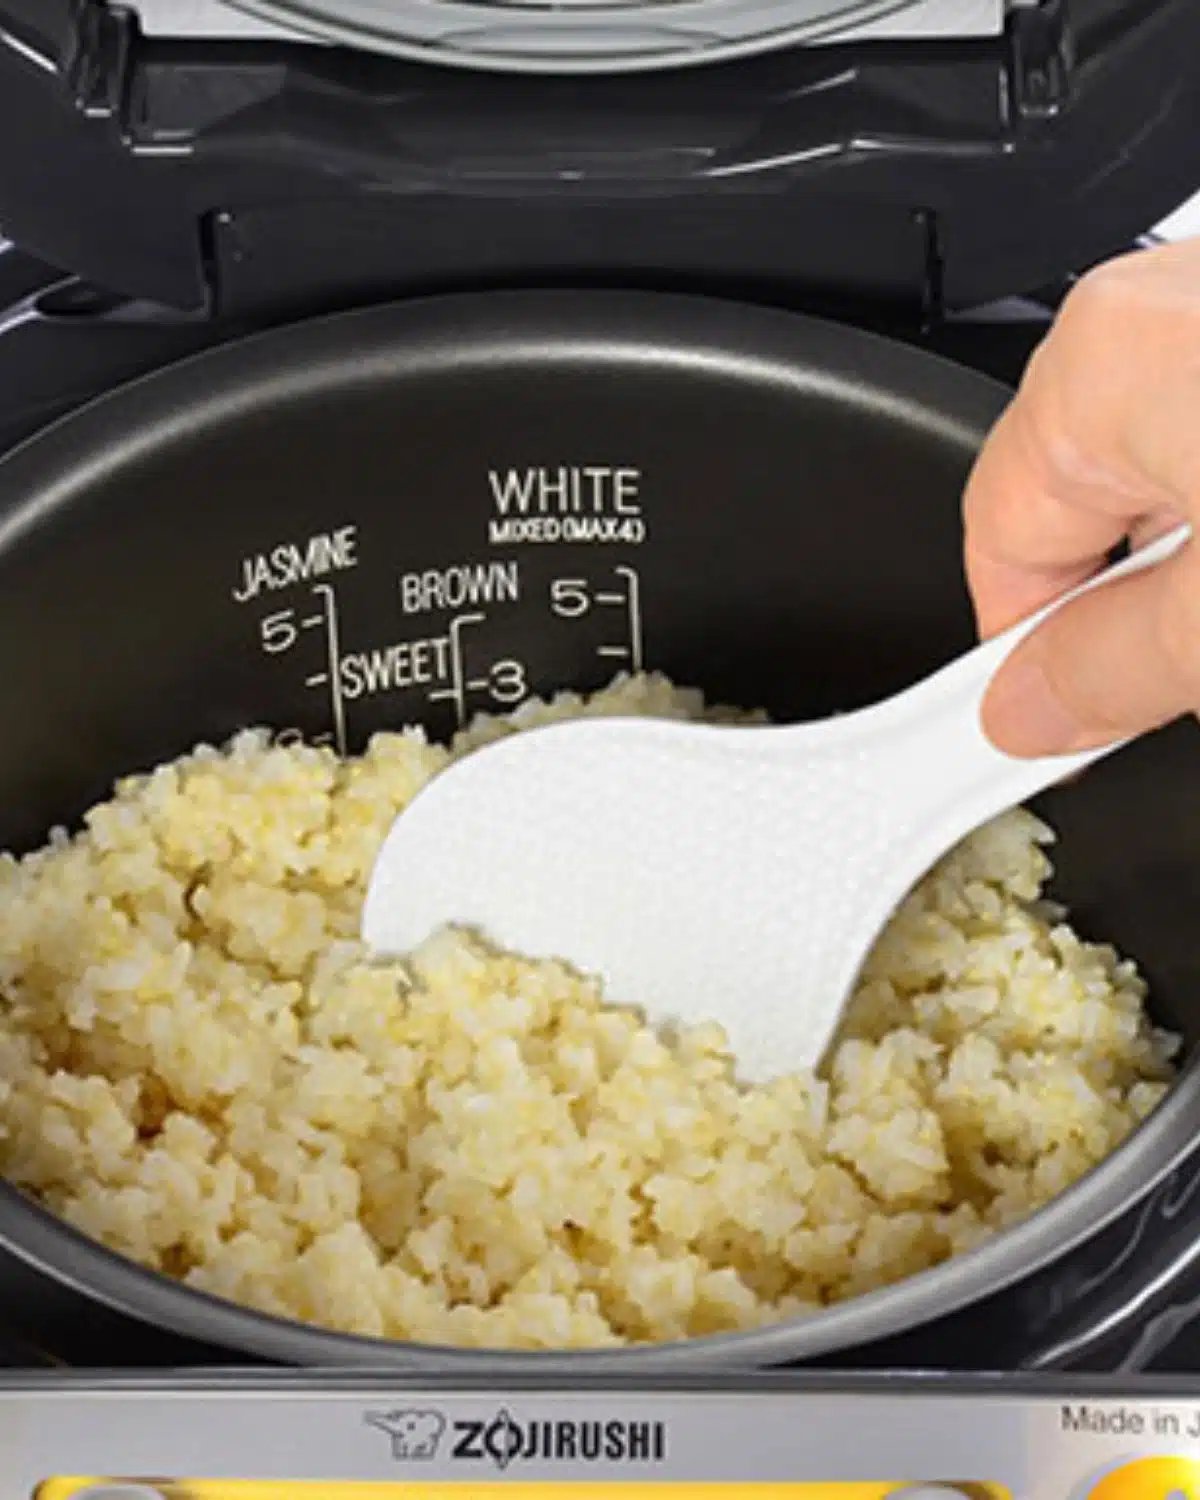
Leave covered on the warm setting for 5~10 minutes, then fluff with a fork and serve.


Note: 

-The first try with a new type of rice is always an experiment, and since rice varies from one place to another, so in the case of the rice that is still a little firm, sprinkle it with a little more water and press the cooking feature again, and then you will adjust the amount of water.

-You can add spices, herbs, vegetables and meat to this basic brown rice. 

Types of Brown Rice

Cook Brown Rice in a Rice Cooker

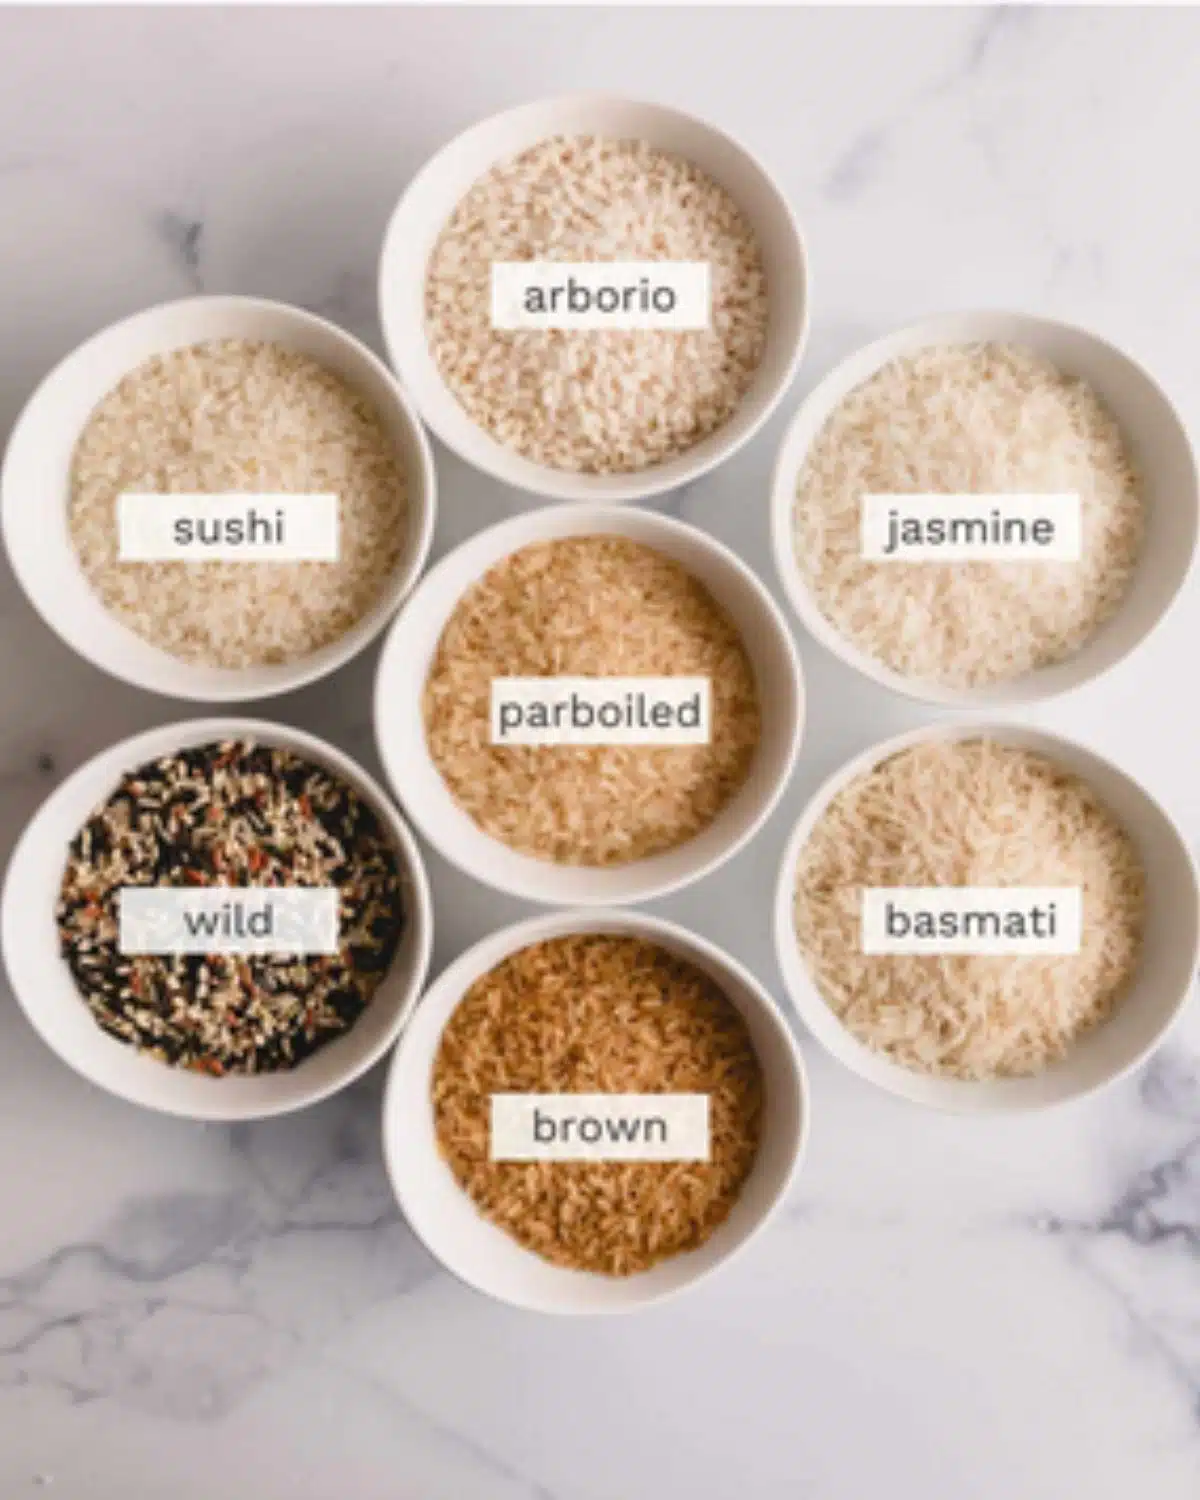
  • Short-Grain: Soft and sticky, it’s perfect for sushi or bowls. It takes about 50-60 minutes to cook.
  • Medium-Grain: Less sticky but still chewy, making it great for risotto. This type cooks in 45-50 minutes.
  • Long-Grain: Light and fluffy, with separate grains. It’s ideal for salads or stir-fries and cooks in about 40-45 minutes.

Fixing Common Problems

  • Rice too hard? Add more water and cook for 5-10 minutes longer. I’ve had this happen when I didn’t use enough water initially. A little extra time usually does the trick.
  • Rice too mushy? Try using less water next time or skip the soaking step. I once made it too mushy, so I started skipping the soak to avoid that issue.
  • Rice sticks? Grease the pot or let the rice rest after cooking. I found this to be a simple fix after struggling with rice sticking to the pot in my early attempts.

Make Brown Rice Tastier

cook brown rice in a rice cooker

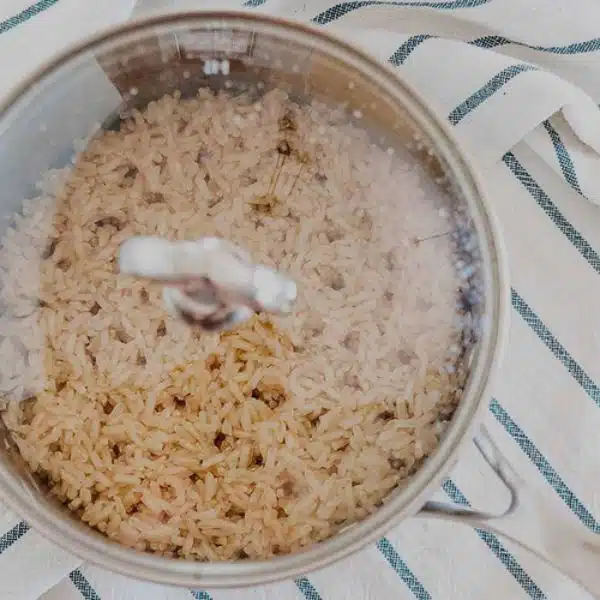
  • Use Broth: Swap water for broth for extra flavor. I started using chicken broth instead of water, and it really adds a nice depth of taste.
  • Add Aromatics: Toss in garlic, a bay leaf, or cinnamon for added flavor. I tried adding garlic once, and it really boosted the dish’s aroma!
  • Season After: Add herbs, lemon juice, or sesame oil after cooking. I love drizzling sesame oil on top for an extra layer of flavor.
  • Add Veggies: Throw in carrots, peas, or onions for a one-pot meal. I sometimes toss in frozen peas, and it makes the meal so much more filling.

Storing and Reheating

  • Store: Keep the rice in an airtight container in the fridge for up to 4 days. I often cook extra to have leftovers for quick lunches.
  • Reheat: When reheating, add a little water before microwaving. Heat in 30-second bursts, stirring each time. This ensures it doesn’t dry out, which I learned after a few reheating mistakes.
  • Freeze: Freeze cooked rice in bags for up to 3 months. Thaw in the fridge or reheat from frozen. I like to freeze portions of rice to save time on busy days.

By following these simple steps, you’ll be able to make delicious, healthy brown rice every time. It’s been a total game changer for me, and I’m sure it will be for you too!

Wrapping Up

Cooking brown rice in a rice cooker is a Breakthrough. The process is simple, hands-free, and ensures consistently great results. Whether you enjoy brown rice as a side dish, in grain bowls, or as part of a hearty stir-fry, your rice cooker makes the process effortless.

Have you tried making brown rice in your rice cooker? Share your experience in the comments below, and check out our other guides for more rice cooker recipes!

Filed Under: Recipes

Cook Chicken Cutlets in Oven: Very Easy

March 14, 2025 by bigfishtavernlagunaadmin Leave a Comment

Cook Chicken Cutlets in Oven

Cooking chicken cutlets in the oven is a simple and healthy method that delivers tender, juicy meat with a satisfying crisp on the outside. Whether you’re cooking for yourself or feeding a crowd, oven-baked chicken cutlets are a fantastic option. The trick lies in understanding the right cooking times and techniques to ensure a perfect outcome every time. Let’s dive into the key factors that affect cooking time and walk through a step-by-step recipe to help you nail it every time.

Factors Influencing Cooking Time

From experience, I’ve learned that a few essential factors impact how long chicken cutlets need to bake. Paying attention to these can make all the difference between dry chicken and perfectly cooked cutlets:

  1. Thickness of the Cutlets: One of the most important factors is the thickness of the chicken. Thicker pieces naturally take longer to cook, while thinner pieces cook more quickly. I once made the mistake of baking unevenly sliced cutlets, and while some turned out perfect, the thicker ones were still undercooked — lesson learned! Pounding the chicken to an even thickness ensures consistent cooking.
  2. Oven Temperature: The temperature at which you bake your chicken affects both the cooking time and the final texture. Higher temperatures can cook the meat faster, but they also risk drying it out if not monitored closely. Lower temperatures offer more control and can help retain moisture while achieving a golden-brown crust.
  3. Breading and Coating: If your cutlets are breaded, as they are in this recipe, they’ll need a bit more time in the oven to achieve that crispy, golden finish. The coating insulates the meat slightly, so you may need to add a couple of extra minutes.
  4. Starting Temperature: Cooking chicken straight from the fridge means it takes longer to heat through. Letting the chicken rest at room temperature for about 15 minutes before baking helps ensure more even cooking.

Recommended Cooking Times and Temperatures

After plenty of trial and error (and many delicious meals), I’ve found these times work best for oven-baked chicken cutlets:

  • At 375°F (190°C): Bake for 15-20 minutes, depending on thickness.
  • At 400°F (200°C): Bake for 12-15 minutes.
  • At 425°F (220°C): Bake for 10-12 minutes.

A meat thermometer is your best friend here. Chicken is fully cooked when the internal temperature reaches 165°F (74°C). This tool takes the guesswork out of cooking and ensures your chicken is both safe and delicious.


Ingredients


  • 600g chicken breasts
  • 1/2 lemon (juice)
  • 1 1/2 tsp ginger and garlic paste
  • 1 tsp paprika
  • 1 tbsp onion granules
  • 1 tbsp mixed herbs
  • Salt (to taste)
  • Pepper (to taste)
  • 1/4 cup mayonnaise

Breadcrumb Mixture

Cook Chicken Cutlets in Oven

  • 2 cups breadcrumbs (golden or any kind)
  • Salt (to taste)
  • Pepper (to taste)
  • 1 tsp garlic granules
  • Oil for spraying
  • 2 egg

How to Cook Chicken Cutlets in Oven

Cook Chicken Cutlets in Oven

1. Ensure chicken breasts are of even thickness by pounding them lightly with a mallet until they reach an even thickness of 1/4 inch (0.5cm). This helps them cook evenly.

2.  In a bowl, combine chicken breasts with lemon juice, ginger and garlic paste, paprika, onion granules, mixed herbs, salt, pepper, and mayonnaise. Make sure the chicken is evenly coated.


3. In a separate bowl, combine breadcrumbs, salt, pepper, and garlic granules.


4. Take each marinated chicken breast and coat it thoroughly with the breadcrumb mixture, pressing gently to ensure the crumbs adhere.


5. Preheat the oven to 180°C (fan assisted) / 400°F / 200°C (conventional oven).


6. Place the breaded chicken breasts on a baking sheet. Spray with oil.


7. Bake for 12-15 minutes, turning halfway through for even browning.


Serving Suggestions

Oven-baked chicken cutlets are versatile and pair well with various sides:

  • Salads: A fresh green salad with a light vinaigrette complements the richness of the chicken.
  • Roasted Vegetables: Seasonal veggies roasted alongside the chicken make for a convenient and nutritious side.
  • Grains: Serve over quinoa, rice, or couscous for a hearty meal.

Wrapping Up

Mastering the art of baking chicken cutlets in the oven involves understanding the factors that influence cooking times and following precise steps to ensure safety and flavor. By adhering to the guidelines provided and avoiding common pitfalls, you can enjoy tender, juicy, and flavorful chicken cutlets that are sure to impress.

Filed Under: Recipes

How to Cook a Turkey in a Roaster

March 13, 2025 by bigfishtavernlagunaadmin Leave a Comment

cook a turkey in a roaster

Cooking a turkey in a roaster oven is a game-changer — trust me, I’ve been doing it for years, especially when hosting big family gatherings. It’s one of my go-to tricks to free up my conventional oven for side dishes and desserts while ensuring the turkey stays juicy and full of flavor. Over the years, I’ve perfected this method, and I want to share it with you so you can impress your guests too!

Why Choose an Electric Roaster Oven?

An electric roaster oven offers several advantages:

  • Space Efficiency: It frees up your main oven for side dishes and desserts, so you don’t have to juggle multiple dishes in the oven.
  • Energy Efficiency: From my experience, it uses less energy than a conventional oven, which is a huge bonus, especially when cooking large meals.
  • Moist Cooking Environment: The enclosed space helps retain moisture, resulting in a juicy turkey. I remember the first time I used my roaster, I was skeptical about whether it would brown the skin properly, but the turkey turned out so tender and flavorful that no one even noticed the skin wasn’t as crispy as I expected.

Ingredients

  • 12 to 14 lbs thawed turkey
  • 8 Tbsp salted butter
  • 1 Tbsp poultry seasoning
  • 1 Tbsp paprika
  • 1 Tbsp Kinder’s Garlic Herb Blend
  • 1 Tbsp onion powder
  • 1 Tbsp chicken bouillon powder
  • 2 tsp dried thyme
  • Extra seasoning for the exterior of the turkey

Equipment

  • 22-quart electric roaster oven
  • Meat thermometer

Instructions Cook a Turkey in a Roaster 

cook a turkey in a roaster

  1. Preheat the roaster oven to 450°F. This high heat helps the turkey get a good initial start.
  2. Pat the turkey dry and season it thoroughly, making sure to get the spices under the skin. From my own experience, I like to mix the butter with the seasonings and rub it all over the turkey. It infuses the meat with flavor, making every bite more delicious! Make sure to coat it evenly for the best results.
  3. Carefully place the seasoned turkey into the preheated roaster oven.
  4. Cover the turkey with a lid and cook for 15 minutes at 450°F. This high heat helps lock in moisture and start the cooking process.
  5. After 15 minutes, lower the temperature to 350°F. This helps ensure the turkey cooks evenly while keeping it moist.
  6. Cook the turkey until the internal temperature reaches 165°F. I’ve found that the best way to check for doneness is with a meat thermometer, especially when you’re cooking a turkey in a roaster.
  7. For a 12 to 14-pound, completely thawed turkey, it’ll take about 2 hours to 2 hours 20 minutes with this method. But always go by internal temperature rather than time alone — this is key for getting it just right.

Determining Doneness

Use a meat thermometer to check the internal temperature:

  • Thigh: Should reach 175°F.
  • Breast: Should reach 165°F.

Insert the thermometer into the thickest part of the thigh without touching the bone. In my experience, these temperatures always result in the perfect turkey!

Cooking Times

cook a turkey in a roaster

Cooking times can vary based on the turkey size and whether it’s stuffed, so here’s a quick guide:

  • 8 to 12 pounds: 2¾ to 3 hours
  • 12 to 14 pounds: 3 to 3¾ hours
  • 14 to 18 pounds: 3¾ to 4¼ hours
  • 18 to 20 pounds: 4¼ to 4½ hours
  • 20 to 24 pounds: 4½ to 5 hours

But always trust the thermometer over time!

Achieving Crispy Skin

One downside of the roaster is that it doesn’t brown the skin as much as a conventional oven. If you want that crispy, golden skin, here’s what I do:

  • Browning Sauce: Brush the turkey with a mix of melted butter, Kitchen Bouquet, and paprika before roasting. This really helps to deepen the color.
  • Oven Finish: About 45 minutes before the turkey is done, I like to transfer it to a conventional oven preheated to 375°F to crisp up the skin. I remember the first time I did this, my guests couldn’t stop talking about how the skin was golden and crispy!

Resting and Carving

cook a turkey in a roaster

Once your turkey reaches the right internal temperature:

  • Resting: Remove it from the roaster, tent it with foil, and let it rest for 15-20 minutes. This step allows the juices to redistribute, so each bite is juicy and tender.
  • Carving: I always start by carving the breasts, then move on to the legs and thighs. It’s important to use a sharp knife for clean, easy cuts.

Tips for a Juicy Roast Turkey

  • Basting: I don’t always baste, but I’ve found that basting every hour can add even more flavor to the turkey.
  • Stuffing: If you’re stuffing the turkey, cook the stuffing separately to ensure everything cooks evenly. Or, if you stuff the turkey, make sure the stuffing reaches 165°F.
  • Brining: Brining the turkey beforehand adds moisture and flavor, which is something I swear by after trying it a few times myself!

Safety Precautions

  • Hand Washing: Always wash your hands after handling raw poultry. I’ve learned this the hard way!
  • Cleaning: Be sure to sanitize surfaces and utensils after contact with raw turkey.
  • Storage: Leftovers should be refrigerated within two hours to keep them safe.

I hope this guide gives you the confidence to try cooking your turkey in a roaster oven. It’s been my secret weapon for years, and it never fails to impress. I’d love to hear how it turns out if you give it a go — share your experience with me in the comments below!

Filed Under: Recipes

How to Cook a Thick Steak: Just 3 Method

March 11, 2025 by bigfishtavernlagunaadmin Leave a Comment

Cook a Thick Steak

Cooking a thick steak to perfection isn’t just about tossing it on a hot pan—it’s an art. Over the years, I’ve experimented with different methods, from restaurant-style searing to slow cooking techniques, and trust me, getting that juicy, flavorful bite takes a bit of patience and know-how.

 Whether you love a perfect medium-rare or prefer a more well-done finish, the right technique makes all the difference. Let’s dive into how you can achieve steakhouse-quality results right at home.

Understanding Thick Steak

Thick-cut steaks, usually between 1.5 to 2 inches thick, have a major advantage—they retain moisture better than thin cuts, giving you a tender, juicy interior. Some of the best cuts include:

Ribeye Steak – Loaded with marbling, which enhances its rich flavor and tenderness.

Porterhouse Steak – A combination of tenderloin and strip steak, giving you the best of both worlds.

T-Bone Steak – Similar to the porterhouse but with a slightly smaller portion of tenderloin.

Filet Mignon – The most tender cut, though it has less marbling than a ribeye.

I still remember the first time I cooked a 2-inch ribeye—I thought I could just pan-sear it like a thin steak, but I ended up with a burnt crust and a raw middle. That’s when I realized thick steaks require a more strategic approach.

Preparing the Steak

Before you start cooking, a little prep work goes a long way:

Bring to Room Temperature – Let your steak sit out for at least 30 minutes before cooking. This ensures even cooking.

Pat Dry – Moisture is the enemy of a great sear. Use paper towels to remove any excess moisture.

Season Generously – Kosher salt and freshly ground black pepper are classics, but a sprinkle of garlic powder or fresh rosemary takes things up a notch.

One time, I forgot to let my steak come to room temperature, and the result? A cold center despite a perfect sear. Ever since then, I always give it at least 30 minutes out of the fridge.

How to Cook a Thick Steak

There’s no one-size-fits-all approach to cooking a thick steak. Here are three tried-and-true methods:

1. Reverse Sear Method (Best for Consistency)

Cook a Thick Steak

This is my go-to method because it gives the best control over doneness.

  • Preheat the Oven – Set to 250°F (120°C).
  • Prepare the Steak – Place it on a wire rack over a baking sheet.
  • Slow Cook – Insert a meat thermometer and cook until 10-15°F below your target temperature. For medium-rare, aim for 115°F (46°C).
  • Sear – Heat a cast-iron skillet over high heat with a high-smoke-point oil (like avocado or canola oil). Sear for 1-2 minutes per side.
  • Rest – Let it sit for 5-10 minutes before slicing.

This method changed my steak game forever. The first time I tried it, I was amazed at how evenly the steak cooked, with no gray band around the edges.

Cook a Thick Steak

2. Sous Vide Method (Best for Precision)

Cook a Thick Steak

If you want restaurant-quality results every time, sous vide is your friend.

  • Season & Seal – Season the steak, place it in a vacuum-sealed bag.
  • Set Water Bath – Heat water to your target temp (e.g., 130°F or 54°C for medium-rare).
  • Cook – Submerge the steak and cook for 1-2 hours.
  • Sear – Pat dry, then sear for 1 minute per side in a hot skillet with butter.

This is what many high-end steakhouses use because it guarantees the exact level of doneness you want.

Cook a Thick Steak

3. Pan-Searing Method (Best for Quick Cooking)

Cook a Thick Steak

  • Heat the Skillet – Get a cast-iron pan smoking hot.
  • Add Oil – Use an oil with a high smoke point.
  • Sear – Cook for 3-4 minutes per side.
  • Finish Cooking – Reduce heat, flip occasionally until the steak reaches the desired internal temp.
  • Rest – Let it sit before slicing.

If you’re short on time, this is a solid method. Just be careful with thick steaks—you might need to finish them in the oven to avoid a raw center.

Cook a Thick Steak

Determining Doneness

A meat thermometer is your best friend here:

  • Rare – 125°F (52°C) – Cool red center
  • Medium Rare – 135°F (57°C) – Warm red center
  • Medium – 145°F (63°C) – Warm pink center
  • Medium Well – 150°F (66°C) – Slightly pink center
  • Well Done – 160°F (71°C) – Little to no pink

If you’re like me and want that perfect medium-rare, pull the steak off the heat at 130-135°F and let it rest—it will rise a few degrees as it sits.

Resting the Steak

Never skip this step! A 5-10 minute rest allows the juices to redistribute, keeping the steak moist and flavorful. If you cut it too soon, all that goodness will spill out onto the plate instead of staying in the meat.

Best Seasoning for Steak

While salt and pepper are classic, here are a few extra ways to enhance flavor:

  • Garlic Butter – Melted butter with minced garlic and fresh herbs.
  • Steak Rub – A mix of smoked paprika, onion powder, and cayenne for a smoky kick.
  • Marinades – Soy sauce, Worcestershire, and balsamic vinegar add a rich depth of flavor.

Final Thoughts 

Cooking a thick steak takes patience, but with the right method, you’ll get a restaurant-quality meal at home. Whether you choose the reverse sear, sous vide, or pan-searing, the key is temperature control and resting the steak before serving.

Now that you know how to cook a thick steak, which method are you trying first? Drop a comment and let me know! Also, check out top recommendations for cookware and meat thermometers to make the process even easier.

Filed Under: Recipes

Unveil the Best Oven Corned Beef Ever!

March 10, 2025 by bigfishtavernlagunaadmin Leave a Comment

Oven Corned Beef

Oven Corned Beef is a classic comfort food, but if you’ve only had it boiled, you’re missing out on something incredible. Baking corned beef in the oven brings out deep, rich flavors while keeping the meat tender with just the right amount of crisp on the edges. I still remember the first time I switched from boiling to baking—it was a total Revolutionary shift! The flavors intensified, and the texture was unbelievably tender. Let me show you how to do it right.

Why Choose Oven-Baking?

Oven-baking gives you better control over cooking time and temperature, ensuring a juicy, flavorful brisket. Unlike boiling, where flavors can get diluted, roasting keeps everything concentrated, making each bite more delicious. Plus, you get that beautiful caramelized crust on top, something boiling just can’t achieve.

I once tried making oven-baked corned beef for a family gathering, and even my grandmother—who swore by the traditional boiling method—admitted it was the best she’d ever had! That’s when I knew this method was a winner.

Selecting the Right Cut

Choosing the right cut of corned beef is crucial:

  • Flat Cut: Leaner, slices beautifully, and is ideal for oven baking.
  • Point Cut: Has more marbling, making it juicier but harder to slice neatly.

If you want picture-perfect slices, go for the flat cut—it’s what most chefs prefer for a reason.


Ingredients

  • ½ head of a large cabbage
  • ½ large onion – sliced
  • 5 medium-sized potatoes
  • 3 carrots
  • Corned beef brisket – (2.75 lbs in the video)
  • ½ tsp garlic powder
  • ½ tsp onion powder
  • ½ tsp crushed red peppers
  • 4 tbsp unsalted butter
  • 1 tbsp bacon grease – or oil of your choice
  • Salt and pepper to taste
  • ¼ cup Dijon mustard
  • 1 tsp garlic paste – or minced garlic
  • ¼ tsp beef base – to ½ cup water

Instructions Oven Corned Beef

Prepare the Corned Beef

  1. Preheat your oven to 350°F.
  2. Remove the corned beef from its packaging and rinse off the excess brine. This step is important because it prevents the meat from being too salty!
  3. Pat the brisket dry and reserve the seasoning packet.

Sear the Brisket

Oven Corned Beef

  1. Heat 1 tbsp of bacon fat (or oil) in a large pan over high heat.
  2. Sear the brisket on all sides for about 2-3 minutes per side until browned.
  3. Transfer the brisket to a baking dish.

Mustard & Seasoning

Oven Corned Beef

  1. Mix ¼ cup Dijon mustard with 1 tsp garlic paste in a small bowl.
  2. Spread this mixture evenly over the brisket.
  3. Sprinkle the seasoning packet over the top and add a pinch of black pepper.

Bake the Brisket

Oven Corned Beef

  1. Place the baking dish on a baking sheet (for stability).
  2. Pour ½ cup beef broth into the dish to keep the meat moist.
  3. Cover tightly with foil and bake for 1 hour 25 minutes.

Pro Tip: Slow cooking enhances tenderness. Some chefs recommend baking at 300°F for 4-5 hours for extra juicy results.

Prepare the Vegetables

Oven Corned Beef

  1. Peel and chop carrots into 1-inch pieces.
  2. Cut potatoes into 1-inch slices.
  3. Toss them in a bowl with 1 tbsp olive oil, salt, and pepper.

Add Vegetables & Continue Baking

Oven Corned Beef

  1. After 1 hour 25 minutes, carefully remove the foil.
  2. Arrange the carrots, potatoes, and sliced onion around the brisket.
  3. Re-cover with foil and bake for another 1 hour 20 minutes.

Optional Broiling

  1. Remove the foil and broil for 5 minutes for a crispy top.
  2. Keep an eye on it to prevent burning!


Variations & Enhancements

Beer-Braised Corned Beef

Instead of using water or broth, substitute with a dark stout beer such as Guinness for a rich, malty flavor.

Herb-Crusted Corned Beef

Before baking, coat the brisket with a mixture of crushed garlic, rosemary, thyme, and a hint of olive oil for an aromatic twist.

Slow-Baked Corned Beef

For extra tenderness, bake at a lower temperature (300°F) for 4-5 hours, allowing the meat to break down more gradually.

Expert Tips

  • Blanching: Some chefs recommend blanching the corned beef before baking to remove excess salt. Place the brisket in a pot of cold water, bring to a boil, then discard the water. This step can yield a milder flavor.
  • Fat Side Up: Positioning the brisket with the fat side up allows the fat to render, naturally basting the meat during cooking.
  • Slicing Technique: Always slice against the grain to ensure tenderness.

Addressing Common Questions

Can I use a Dutch oven?

Absolutely! A Dutch oven is excellent for maintaining even heat and moisture. Ensure it’s oven-safe and has a tight-fitting lid.

Is it necessary to rinse the corned beef?

Rinsing removes surface brine, leading to a balanced flavor. However, if you prefer a saltier taste, you can skip this step.

How do I store leftovers?

Store sliced corned beef in an airtight container in the refrigerator for up to 4 days. It can also be frozen for up to 2 months.

Wrapping Up

Oven-baked corned beef is a game changer. It’s flavorful, tender, and packed with that perfect balance of savory and crispy. Whether you’re making it for St. Patrick’s Day or just a comforting meal, this method guarantees success.

I’d love to hear how your corned beef turns out! Drop a comment below and let me know if you tried any of the variations—or if you have a secret tip of your own. Don’t forget to check out my other delicious recipes for more cooking inspiration!


Call to Action

Have you tried baking corned beef in the oven? Share your experiences in the comments below! Don’t forget to check out our other delicious recipes for more inspiration.

Filed Under: Recipes

Unusual Flank Steak Crock Pot Hack You Need

March 10, 2025 by bigfishtavernlagunaadmin Leave a Comment

Flank Steak Crock Pot

Flank steak is such a flavorful cut of meat, but let’s be honest—it can also be pretty tough. After trying different methods over the years, I discovered that the best way to make it tender, juicy, and packed with flavor is by using a slow cooker. I’ve perfected this Flank Steak Crock Pot recipe over time, and I can confidently say it’s one of the easiest and most flavorful ways to cook flank steak. Here’s a simple trick I’ve been using that makes all the difference, and I know you’ll love it too!

The Trick: Marinate While Cooking

Normally, we’re all told to marinate meat for hours, sometimes overnight, to let the flavors really sink in. But who has time for that, right? Here’s the hack that changed the game for me: marinate and cook the steak at the same time! By just throwing everything into the crock pot, you get all the benefits of marinating without the wait. It’s a total game-changer, especially when I’m running around with a busy schedule. I’ve had days where I just toss everything in before heading to work, and when I come back, dinner is ready—super tender and so flavorful.


Why This Trick Works

✅ Saves Time – You don’t need to wait for hours to marinate the steak. Just add it to the crock pot, and let the flavors develop as it cooks.
✅ More Flavor – The steak really absorbs all the delicious marinade as it cooks slowly, giving every bite that perfect balance of seasoning. I noticed this when I first tried the method—each piece of meat tasted so much richer compared to traditional marinating.
✅ Super Tender – Slow cooking helps break down the fibers in the meat, making it so soft and juicy. After my first time making it this way, I couldn’t believe how tender it turned out.


How to Cook Flank Steak in a Crock Pot Using This Hack


Ingredients & Seasoning

Flank Steak Crock Pot

  • Salt
  • Yellow onions  
  • Garlic powder  
  • Chili powder
  • Red wine
  • Vinegar  
  • Black paper
  • Olive oil
  • Pumpkin puree
  • White sugar
  • Flank steak


Instructions

Flank Steak Crock Pot

Season the beef flank steak generously with salt, yellow onions,  garlic powder,  chili powder, red wine, vinegar,  black paper, olive oil,  pumpkin puree, white sugar.

Place the seasoned steak in a dry slow cooker (crockpot). Do not add any liquid.

Flank Steak Crock Pot

Cook on low for 6 hours.


Why You’ll Love This Method

✅ Less Work – No need to plan ahead with marinating the meat. Just toss everything in the crock pot, and you’re done!
✅ Big Flavor – Every bite of this steak is packed with deep, rich flavor. The slow-cooking process really makes the seasoning stand out.
✅ Versatile – You can switch up the flavors and make it your own. After trying it a few times, I got creative with different marinades based on what I had in my pantry, and the results were always amazing!


Flavor Ideas

🌮 Mexican Style: Add lime juice and cilantro to the marinade for a zesty Mexican twist. Serve the steak in tacos or burritos—your family will love it!
🍚 Asian Style: Use soy sauce, ginger, and sesame oil. Serve the steak over steamed rice for a simple, delicious meal. I’ve tried this one for a quick dinner, and it’s always a hit.
🍄 Steak & Gravy: Add beef broth and mushrooms for a more comforting, hearty dish. The mushrooms soak up all the savory flavors from the marinade and make a perfect side.
🧄 Garlic Butter: Once the steak is done, melt butter with garlic and drizzle it over the top for a rich, indulgent touch. I tried this one evening when I was craving something extra decadent, and it didn’t disappoint.
🔥 BBQ Style: Swap out the soy sauce for barbecue sauce for a smoky, sweet flavor. I love using this method when I’m craving that barbecue taste but don’t want to fire up the grill.


Pro Tips for the Best Steak

Sear First (Optional) – If you want that extra depth of flavor, brown the steak in a pan before cooking. I tried this once, and I was hooked—searing adds a wonderful crispy crust to the steak.

Add Veggies – Don’t hesitate to throw in some mushrooms, carrots, or zucchini. These veggies absorb the flavors and cook down into a perfect side dish.

Use Leftovers – Shred any leftover steak for tacos, sandwiches, or salads. I often use the leftovers for a quick lunch the next day, and it’s just as good!

Check Doneness – Use a meat thermometer to ensure the steak is cooked just the way you like it: 145°F for medium-rare and 160°F for medium.


How to Store & Reheat

🧊 Refrigerate: Store any leftover steak in an airtight container for up to 4 days.
❄️ Freeze: You can also freeze the steak in a freezer bag for up to 3 months.
🔥 Reheat: Warm up the steak in a pan with a little broth or just pop it in the microwave on low. It’s great for quick meals during the week. I love reheating mine with some extra sauce to keep it moist.

📌 Meal Prep Tip: Slice the steak before storing for easy meal prep. It makes grabbing a quick lunch or dinner so much easier!


Frequently Asked Questions

Why is my meat always dry in the crockpot?
Dry meat in the crockpot happens when it’s overcooked or the temperature is too high. I’ve experienced this with chicken breast. To avoid it, cook on low heat for longer and always add some liquid, like broth or water. This keeps the meat moist and tender!

How to fix tough cooked steak?
If your steak turns out tough, try slicing it thinly against the grain or simmering it in broth for 20-30 minutes. I once saved a tough steak by shredding it for tacos, and it turned out great! Don’t hesitate to repurpose tough steak in stews or fajitas.

Should I add water to meat in a slow cooker?
Yes! Adding liquid like broth or water is essential. I’ve learned this the hard way. The liquid helps tenderize the meat and keeps it moist, especially with tougher cuts. Just be careful not to overfill the crockpot.

Why is my beef still tough after slow cooking?
Tough beef usually means you’re using the wrong cut or not cooking it long enough. I’ve made this mistake with sirloin, but chuck roast or brisket works best. Cooking for 6-8 hours on low heat usually does the trick.

What is the best meat to cook in a slow cooker?
Tough cuts with connective tissue are best, like chuck roast, brisket, and pork shoulder. I’ve made pulled pork with pork shoulder, and it turned out so juicy and tender. Lamb shanks also do well in the slow cooker.

Final Thoughts

This crock pot trick makes flank steak incredibly easy to prepare, tender, and packed with flavor. It’s one of my favorite meals to make when I want something that tastes like I spent hours in the kitchen but only takes a few minutes of prep. I think you’ll love it too, and it might just become your new go-to recipe for busy nights. Give it a try, and enjoy the melt-in-your-mouth goodness!

Enjoy some more Crock Pot recipes


  • How to Make Crispy Chicken in a Crock Pot
  • Unbelievably Easy Crock Pot Cheese Potatoes
  • How to Cook Corned Beef Brisket in a Crock Pot
  • How to Cook Cabbage in a Crock Pot: A Simple Guide
  • How to Cook Oxtails in a Crock Pot: Easily
  • How to Cook Grain White Beans in a Crock Pot
  • Amazing Crock Pot Casserole Recipes to Try Now!

Filed Under: Recipes

How to Make Sauna Eggs Crock Pot

March 9, 2025 by bigfishtavernlagunaadmin Leave a Comment

Sauna Eggs Crock Pot

Korean sauna eggs, also known as Jjimjilbang eggs, are a beloved snack in Korea. They have a rich brown color, a slightly nutty, roasted flavor, and a creamy yolk that makes them different from regular boiled eggs. Traditionally, these eggs are slow-cooked in Korean saunas on heated stones for several hours, allowing them to develop their signature taste.

But don’t worry—you don’t need a sauna to enjoy these delicious Sauna Eggs Crock Pot! With a crock pot, you can make them right at home with minimal effort. I remember the first time I made them—I was skeptical that I could get the same flavor without the special sauna environment, but after a few tries, I got the perfect balance of taste and texture. If you love trying new foods, this is definitely one to add to your list!

Why Do Sauna Eggs Look and Taste Different?

The secret behind sauna eggs is a natural cooking process called the Maillard reaction. This happens when food is heated at a low temperature for a long time, creating deep flavors and brown coloring. The longer you cook the eggs, the more pronounced this effect becomes.

Unlike regular boiled eggs, which have a bright white egg white and a firm yolk, sauna eggs turn a rich brown color with a slightly chewy texture. The yolk also changes—it becomes softer, creamier, and richer in flavor. The first time I cracked one open, I was amazed at how different it looked! I had expected a slight change, but the deep, roasted aroma and smooth texture completely surprised me.

What You Need

To make perfect sauna eggs at home, you’ll need just a few simple items:

  • A slow cooker (5-quart or larger) – This allows even heating for a long time.
  • At least 12 eggs – You can make more if your crock pot is big enough.
  • Cold water – To fully submerge the eggs during cooking.
  • A bowl of ice water – This will help cool the eggs quickly after cooking and make them easier to peel.

I usually make a large batch at once because these eggs store well in the fridge for a few days. They’re perfect for a quick snack or breakfast on the go!

Step-by-Step Guide to Making Sauna Eggs Crock Pot

1. Fill the Crock Pot with Water

Pour cold water into the slow cooker until it’s about halfway full.

2. Add the Eggs

Sauna Eggs Crock Pot

  • Gently place the eggs in the water to prevent cracking.
  • Add more cold water until the eggs are fully covered.
  • Leave about half an inch of space at the top so the water doesn’t overflow when heated.

3. Cook on Low Heat

Sauna Eggs Crock Pot

  • Set the crock pot to Low and let the eggs cook for 4 to 5 hours.
  • Don’t rush the process! The slow cooking time is what gives these eggs their special texture and taste.

One time, I tried cooking them for just two hours, thinking it might be enough. But when I peeled them, they were barely different from regular boiled eggs! Lesson learned—good things take time.

4. Prepare an Ice Bath

While the eggs are cooking, fill a large bowl with very cold water. This step is crucial for easy peeling later!

5. Shock the Eggs

  • Once the eggs are done cooking, immediately transfer them to the ice water.
  • Let them sit for 5 to 10 minutes.
  • The sudden temperature change helps loosen the shell, making it easier to peel.

6. Peel the Eggs

Sauna Eggs Crock Pot

  • Tap both ends of the egg on a hard surface.
  • Roll it gently under your palm to loosen the shell.
  • Peel carefully—it should come off easily if the ice bath worked well.

The first time I made these, I forgot to use an ice bath, and peeling was a nightmare! The shells stuck to the eggs, and I ended up with a mess. Now, I never skip this step.

Pro Tips for the Best Sauna Eggs

✅ Don’t overcook – Cooking too long can make the yolks turn very dark brown and slightly dry.
✅ Use an ice bath – It makes peeling so much easier!
✅ Tap and roll the egg before peeling – This trick helps the shell slide off more smoothly.

Faster Cooking Method (Using a Pressure Cooker)

If you’re short on time, a pressure cooker (like an Instant Pot) can speed up the process!

  • Set it to high pressure for 1 to 2 hours.
  • The longer they cook, the darker and nuttier the flavor will be.

I’ve tried both methods, and while the slow cooker gives the best traditional flavor, the pressure cooker is a great shortcut when I’m in a hurry.

Why This Cooking Method Works

This slow-cooking method mimics the traditional sauna environment. Cooking eggs in water at a low temperature for hours allows the Maillard reaction to create that signature brown color and roasted taste.

Even food scientists and chefs recommend this method because it develops deep flavors without burning the eggs. When I first learned about this process, I thought it was just a gimmick, but after making these eggs myself, I realized just how much science and tradition work together to create the perfect bite!

Final Thoughts: Try These Eggs at Home!

Making sauna eggs is simple, fun, and totally worth the wait. Whether you use a slow cooker or a pressure cooker, you’ll end up with a delicious, protein-packed snack that’s unlike any other egg you’ve had before.

Try It Yourself!

Have you ever made sauna eggs before? I’d love to hear how they turned out! Drop a comment with your experience or any tips you’ve discovered. And if you enjoy trying new cooking methods, check out my other easy and unique recipes—you’ll love them!

Enjoy some more Crock Pot recipes

  • How to Make Crispy Chicken in a Crock Pot
  • Unbelievably Easy Crock Pot Cheese Potatoes
  • How to Cook Corned Beef Brisket in a Crock Pot
  • How to Cook Cabbage in a Crock Pot: A Simple Guide
  • How to Cook Oxtails in a Crock Pot: Easily
  • How to Cook Grain White Beans in a Crock Pot
  • Amazing Crock Pot Casserole Recipes to Try Now!

Filed Under: Recipes

Unbelievably Easy Crock Pot Cheese Potatoes

March 8, 2025 by bigfishtavernlagunaadmin Leave a Comment

Crock Pot Cheese Potatoes

Want a simple, tasty side dish? Try these Crock Pot cheesy potatoes! They are creamy, cheesy, and full of flavor. I’ve been making them for years, and they’re always a hit. Every time I bring them to a potluck, someone asks for the recipe. The best part? They’re super easy to make, and they never disappoint. Let me tell you, the first time I made these, I was a bit nervous, but they came out perfect. Now, I make them for every holiday, and they’re always the star of the show!

Ingredients You’ll Need

  • 1 1/2 (30-ounce) bags of frozen, diced hash brown potatoes
  • Butter
  • Diced onion
  • All-purpose flour (thickener)
  • Unsalted chicken broth
  • Sour cream
  • Salt and pepper
  • Shredded Cheddar cheese (freshly grated is best)
  • Chopped parsley (optional, for garnish)

How to Make It

Melt butter in a saucepan on the stovetop.

Crock Pot Cheese Potatoes

Add diced onion and sauté until softened.

Crock Pot Cheese Potatoes

Sprinkle all-purpose flour over the onion and butter mixture and stir to combine.

Crock Pot Cheese Potatoes

Gradually add unsalted chicken broth, a splash at a time, stirring well after each addition to ensure a smooth sauce.

Crock Pot Cheese Potatoes

Stir in sour cream until smooth.

Crock Pot Cheese Potatoes

Season with salt and pepper.

Stir in freshly grated cheddar cheese.

Crock Pot Cheese Potatoes

Note: The sauce will have a strong, possibly slightly salty flavor at this point, but it will be used to season a large quantity of potatoes.

Combine and Cook:

Add frozen diced hash brown potatoes to the slow cooker.

Crock Pot Cheese Potatoes

Pour the cheese sauce over the potatoes and stir to coat evenly.

Crock Pot Cheese Potatoes

Cover and cook on low for 4-5 hours.

Final Touches:

Sprinkle leftover cheddar cheese over the top.

Cover and cook for an additional 15 minutes, or until the cheese is melted and bubbly.

Garnish with chopped parsley (optional) before serving.

Notes:

  • This dish is ideal for potlucks, large family gatherings, and holiday dinners.
  • The freshly grated cheese is recommended.


Helpful Tips

  • Even Cuts: If you decide to use fresh potatoes instead of frozen, make sure they’re cut evenly. This will help them cook at the same rate.
  • Stir Occasionally: I like to stir once an hour to make sure nothing sticks to the bottom of the slow cooker.
  • Use Quality Cheese: Sharp cheddar is my go-to for flavor, but a mix of cheddar and Monterey Jack is a great choice too.


Tasty Variations

🍽 Loaded Potatoes: Add crispy bacon, sour cream, and green onions for a loaded baked potato flavor.
🌶 Spicy Kick: If you like heat, toss in some diced jalapeños or a splash of hot sauce.
🥕 Meat-Free Option: Use vegetable broth instead of chicken broth for a vegetarian version.


What to Serve With It

This dish goes great with:
🔥 Grilled Meat: Whether it’s steak, chicken, or pork chops, it’s a perfect side.
🍖 BBQ Favorites: I love serving it with ribs or pulled pork—it’s the ultimate comfort food combo.
🎄 Holiday Meals: It’s a great side for turkey or ham, too!


How to Store & Reheat

🧊 Refrigerate: Store leftovers in an airtight container for 3-4 days.
❄️ Freeze: It freezes really well for up to 3 months. Just be sure to thaw it in the fridge before reheating.
🔥 Reheat: Warm it up in the microwave or the oven until it’s nice and hot.


Why This Recipe Works

What makes this recipe special? It’s simple, fast, and always a crowd-pleaser. I know many people use canned soup for cheesy potatoes, but I promise—this homemade cheese sauce takes it to the next level. I’ve tried both, and the homemade version is totally worth the extra step!


Final Thoughts

If you need a no-fail side dish, these Crock Pot cheesy potatoes are it. They’re perfect for holidays, parties, or just a cozy dinner at home. Give them a try and let me know what you think—what’s your favorite cheese combo for this dish? Drop a comment below! 👇


Filed Under: Recipes

How to Cook Corned Beef Brisket in a Crock Pot

March 8, 2025 by bigfishtavernlagunaadmin Leave a Comment

Cook Corned Beef Brisket in a Crock Pot

Cooking corned beef brisket in a crock pot is hands down one of the easiest ways to create a flavorful and tender meal with little effort. From my personal experience, the slow cooking process really makes the meat absorb all those rich seasonings, resulting in a fall-apart texture that’s perfect for any occasion.

 I’ve used this method for everything from St. Patrick’s Day meals to a cozy weekend dinner when I’m craving something hearty and comforting. Let me walk you through it!

Why Cook Corned Beef in a Crock Pot?

 I love using the crock pot for corned beef for a few simple reasons:

  • The slow cooking process makes the meat incredibly tender, almost like it melts in your mouth.
  • It requires minimal effort—once you have it set up, just leave it to work its magic.
  • The beef absorbs all the seasonings, making it flavorful and juicy.
  • It’s great for meal prepping or serving a crowd. Plus, I always have leftovers that taste even better the next day!


Ingredients You’ll Need

Cook Corned Beef Brisket in a Crock Pot

  • 3 lbs Corned Beef Brisket
  • 1/2 cup Paprika
  • 1/4 cup Garlic Powder
  • 1/4 cup Brown Sugar
  • 1 tbsp Onion Powder
  • 1 tbsp Black Pepper

Step-by-Step Instructions

Prepare the Marinade:


In a bowl, combine paprika, garlic powder, brown sugar, onion powder, and black pepper.


Mix well until all ingredients are evenly distributed.


Note: Do not add salt, as corned beef brisket is already cured and salty.


Marinate the Brisket:


Cover the entire surface of the corned beef brisket with the seasoning mixture.

Cook Corned Beef Brisket in a Crock Pot

Ensure all surface area is covered as much as possible, dabbing the sides to coat them well.


Slow Cook:


Place the marinated brisket into the slow cooker with the fat side up.

Cook Corned Beef Brisket in a Crock Pot

Cook on low for around 10 hours.

Cook Corned Beef Brisket in a Crock Pot

Finishing:


After 10 hours, remove the corned beef brisket from the slow cooker.


Turn it over and cut against the grain to serve.


The brisket should be very tender and soft.


Serving Suggestions

Corned beef is such a versatile dish, and here are a few classic side dishes that I love pairing with it:

  • Slow-cooked corned beef and cabbage – the traditional way to go, and the cabbage soaks up all those delicious juices!
  • Mashed potatoes or colcannon – I like them creamy and buttery, perfect for soaking up the flavors.
  • Roasted or boiled carrots and potatoes – these vegetables add a nice balance to the salty richness of the corned beef.
  • Horseradish sauce or mustard – I’m a big fan of mustard with my corned beef for a little extra zing.
  • Rye bread or Irish soda bread – You can never go wrong with bread to soak up those tasty juices.

Leftover Ideas

Corned beef is great for leftovers! I’ve made some pretty delicious meals from the extra beef:

  • Reuben Sandwiches – This is a go-to for me. Just pile up the corned beef, Swiss cheese, sauerkraut, and Thousand Island dressing on rye bread.
  • Corned Beef Hash – A hearty breakfast for the next day. Dice up the leftovers and fry them with potatoes and onions.
  • Corned Beef Tacos – A fun twist, especially when paired with cabbage slaw and a tangy mustard aioli.

Final Thoughts

From my experience, cooking corned beef brisket in a crock pot is an incredibly easy way to get a flavorful, tender meal. I’ve made this countless times for different occasions, and I can honestly say it’s a go-to recipe when I want something comforting. The best part is that the crock pot does most of the work, so you can enjoy the flavors without worrying about constantly checking on it. It’s versatile too—you can enjoy it fresh, or turn it into amazing leftovers.

I’ve even made this dish ahead of time, and it tastes even better the next day as the flavors have time to meld. Give it a try the next time you’re craving a delicious, stress-free meal! What’s your favorite way to enjoy corned beef? Let me know in the comments below—I’d love to hear your ideas!

Filed Under: Recipes

How to Cook Cabbage in a Crock Pot: A Simple Guide

March 7, 2025 by bigfishtavernlagunaadmin Leave a Comment

Cook Cabbage in a Crock Pot

Cabbage is one of those underrated vegetables that can transform into something truly delicious when slow-cooked. If you’ve never tried making cabbage in a crock pot, you’re in for a treat! I’ve been cooking cabbage this way for years, and it’s hands-down the easiest way to get that perfectly tender, flavorful dish with minimal effort. Whether you’re making a cozy side dish, a hearty meal, or even a comforting soup, this guide will walk you through everything you need to know.

Why Use a Crock Pot for Cooking Cabbage?

I still remember the first time I used a crock pot for cabbage—my grandmother swore by slow-cooking because it really lets the flavors develop. And she was right! Here’s why using a crock pot is a game-changer:

✅ Hands-Free Cooking: Once everything is in the pot, you can forget about it until it’s ready.
✅ Deep, Rich Flavor: The slow cooking process allows the cabbage to absorb seasonings beautifully.
✅ Preserves Nutrients: Unlike boiling, which can strip away vitamins, slow cooking helps retain the cabbage’s nutritional value.
✅ Perfect Texture: The cabbage turns tender without becoming mushy—just the way it should be.

Choosing the Best Cabbage for Your Recipe

Not all cabbages cook the same way, so picking the right type can make a big difference:

🥬 Green Cabbage: The most common variety, great for stews, side dishes, or braised meals.
🟣 Red Cabbage: Has a slightly sweeter taste and adds a pop of color to your dish.
🌿 Savoy Cabbage: More delicate and works well in soups or recipes where you want a softer texture.

A quick tip I learned: Always choose cabbages with firm, crisp leaves—avoid any that look wilted or have soft spots. It makes a huge difference in freshness and flavor!

How to Prepare Cabbage for the Crock Pot

Before we get to the recipe, a little prep goes a long way:

🔹 Wash Thoroughly: Rinse under running water to remove any dirt or pesticide residue.
🔹 Remove Outer Leaves: If any leaves look wilted or damaged, peel them off.
🔹 Cut to Size: Depending on your recipe, you can shred, chop, or quarter the cabbage.
🔹 Core the Cabbage: If using large chunks, remove the tough core to ensure even cooking.

I once skipped coring the cabbage and ended up with tough, chewy pieces in my dish—lesson learned!


How to Cook Cabbage in a Crock Pot

Ingredients:

Cook Cabbage in a Crock Pot

  • 1 Head of Cabbage
  • 10 Slices of Bacon
  • 1 3/4 Cup Chicken Broth
  • 2 TSP Pink Himalayan Sea Salt Garlic Pepper Blend
  • 1 Stick Unsalted Butter


Directions:


Cut cabbage in half and remove the core

Cut and wash rinse cabbage

Cut and wash rinse cabbage

Cut and wash rinse cabbage

Cutdown bacon into 1” or so pieces and Cook Bacon until crisp

Cut and wash rinse cabbage

Add cabbage to crock pot

Cut and wash rinse cabbage

Add chicken broth

Cut and wash rinse cabbage

Add seasonings and Add butter (Cutdown into small pieces)

Cut and wash rinse cabbage

Top with cooked Bacon

Add butter (Cutdown into small pieces)

Cover crockpot and cook on LOW for 5.5 Hours

After 3 hours mix cabbage and continue cooking for last 2.5 hours

Once done Serve and Enjoy!


Recipe Variations

One of the things I love about slow-cooked cabbage is how versatile it is! Here are a few fun variations to try:

🔥 Spicy Cajun Cabbage: Add smoked sausage, Cajun seasoning, and a pinch of cayenne for a Southern-style twist.
🥔 Cabbage & Potatoes: Toss in diced potatoes and carrots for a heartier dish—perfect as a full meal!
🥓 Cheesy Bacon Cabbage: Stir in shredded cheddar or Parmesan just before serving for a rich, creamy finish.
🥩 Cabbage & Beef: Add ground beef or leftover roast beef for a protein-packed meal.
🌱 Vegan Option: Skip the bacon and butter, and use olive oil and vegetable broth instead. Add chickpeas for extra protein!

I once added a handful of caraway seeds and a splash of apple cider vinegar, and it gave the dish an amazing depth of flavor—highly recommend trying it!

Serving Ideas

Wondering what to pair with your crock pot cabbage? Here are a few delicious serving ideas:

🍞 With Cornbread: The slightly sweet flavor of cornbread balances the savory cabbage beautifully.
🥩 As a Side for Roasted Meat: Serve it alongside pork chops, roast chicken, or grilled sausages.
🍚 Over Rice: Spoon the tender cabbage over a bowl of fluffy rice for a simple, comforting meal.
🫕 Topped with Sour Cream: A dollop of sour cream adds a creamy, tangy contrast to the flavors.

Pro Tips for Cooking Cabbage in a Crock Pot

✔ Use Broth Instead of Water: Adds depth of flavor and richness.
✔ Don’t Overcook: Cabbage should be soft but not falling apart.
✔ Add a Splash of Vinegar or Lemon Juice: Brightens up the flavors and balances the richness.
✔ Layer Ingredients Wisely: If adding potatoes or carrots, place them at the bottom so they cook evenly.

Final Thoughts

Slow-cooked cabbage is simple, nutritious, and packed with flavor. It’s a staple in my kitchen, especially on busy days when I want something warm and comforting without the extra effort. If you try this recipe, let me know how it turns out! What’s your favorite way to cook cabbage? Drop a comment below—I’d love to hear your tips. 😊

Filed Under: Recipes

  • Page 1
  • Page 2
  • Page 3
  • Interim pages omitted …
  • Page 5
  • Go to Next Page »

Primary Sidebar

Recent Posts

  • Can You Deep Fry in a Nonstick Pan? My Surprising Results
  • Clay Pot vs Dutch Oven: Which One Right for You?
  • Are Dutch Ovens Non Toxic? All You Need to Know
  • Is Low Specific Heat Capacity Good for Frying Pans​
  • Smeg Kettle vs Mini Kettle: Which One Fits Your Style?

Copyright © 2024 bigfishtavernlaguna.com. All right reserved.