• Skip to primary navigation
  • Skip to main content
  • Skip to primary sidebar
  • About Us
  • Affiliate Disclosure
  • Contact us
  • Cookie Privacy Policy
  • Privacy Policy
  • Sample Page
  • Terms of Use

Kitchen Guide

  • Appliance Reviews
  • Bakeware
  • Buying Guides
  • Product Comparisons
  • Recipes
  • Essentials
  • Cleaning

Recipes

How to Reheat Chicken Wings Air Fryer: Very Quickly

November 22, 2024 by bigfishtavernlagunaadmin Leave a Comment

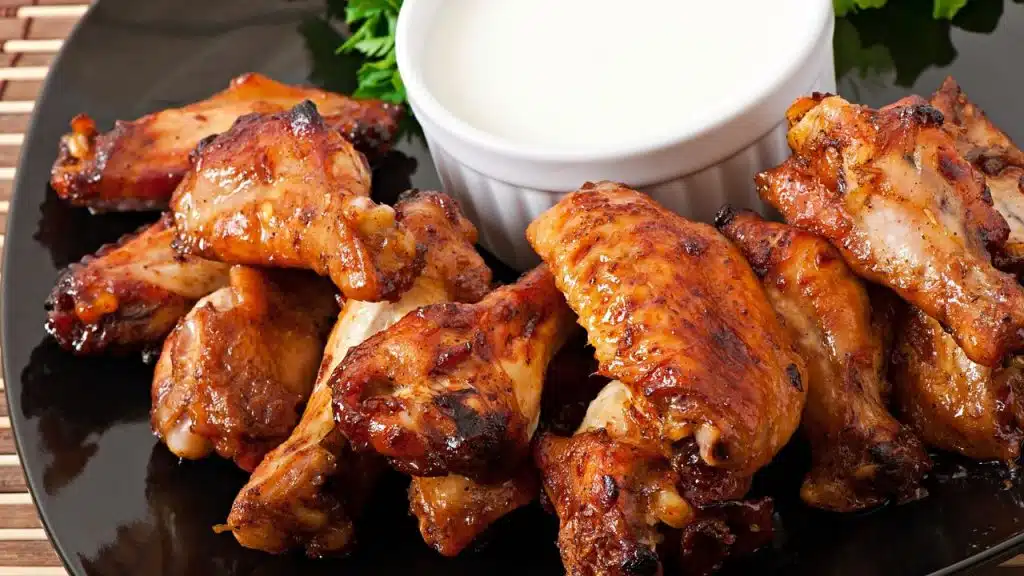
Want to enjoy crispy chicken wings again? How to reheat a chicken wings air fryer? Reheating them in an air fryer is quick and hassle-free! This method brings back their crunch and keeps them juicy, just like when they were first made. No need to deal with soggy wings from the microwave or wait too long with the oven.In this guide, we’ll show you simple steps to make your leftover wings taste fresh and delicious in no time.

How to Reheat Chicken Wings Air Fryer

Methods of Reheat Chicken Wings

Air Fryer Method

Pros

  • It keeps the skin crispy while preserving the meat’s juiciness.
  • Quick and energy-efficient.
  • Requires no additional oil.

Cons

  • Limited capacity; may not be suitable for reheating large batches.

Oven Method

The oven is another popular choice, especially when reheating large portions of chicken wings.

Pros

  • Ideal for reheating a large number of wings.
  • Produces consistent results when preheating and timing are properly managed.

Cons

  • Slower compared to an air fryer.
  • May require broiling to achieve desired crispiness.

Microwave Method

The microwave may be the quickest option, but it often affects the texture of the chicken wings.

Pros

  • Fastest method.
  • Convenient for a small quantity of wings.

Cons

  • Wings may turn soggy.
  • Uneven heating, especially if the wings are sauced.

Stovetop Skillet Method

Using a skillet on the stovetop can be a good alternative for reheating chicken wings, especially if you want to retain some crispiness.

Pros

  • Can crisp up the skin, especially with the addition of oil.
  • Gives more control when reheating.

Cons

  • Needs close watching to prevent overcooking.
  • May result in uneven heating if the wings are stacked.

Best Way to Reheat Chicken Wings

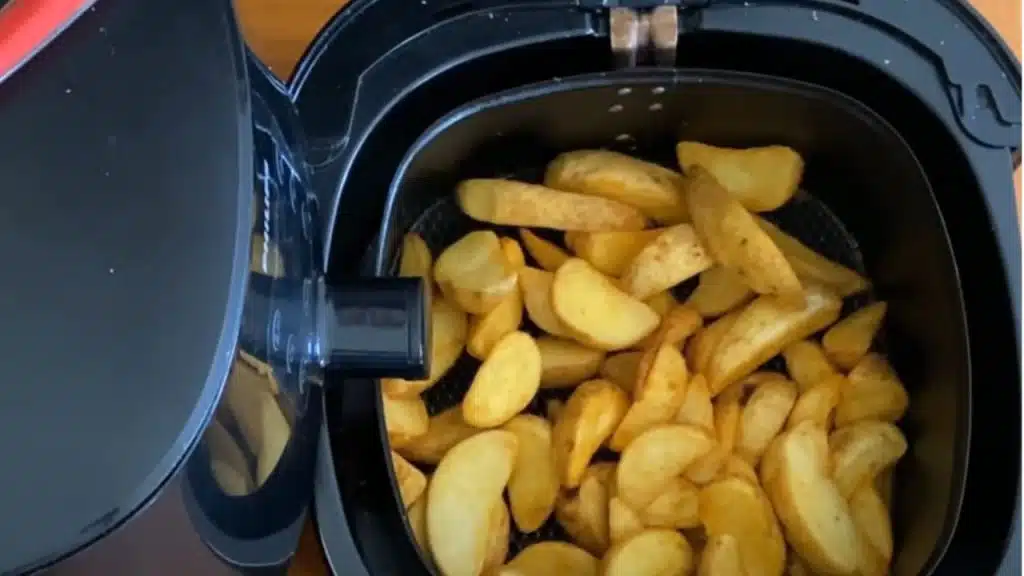
The air fryer is the best method to reheat chicken wings because it restores their crispy texture and keeps the meat tender and juicy. Unlike microwaving, which can make wings soggy, or oven reheating, which takes longer, the air fryer delivers fast, consistent results.

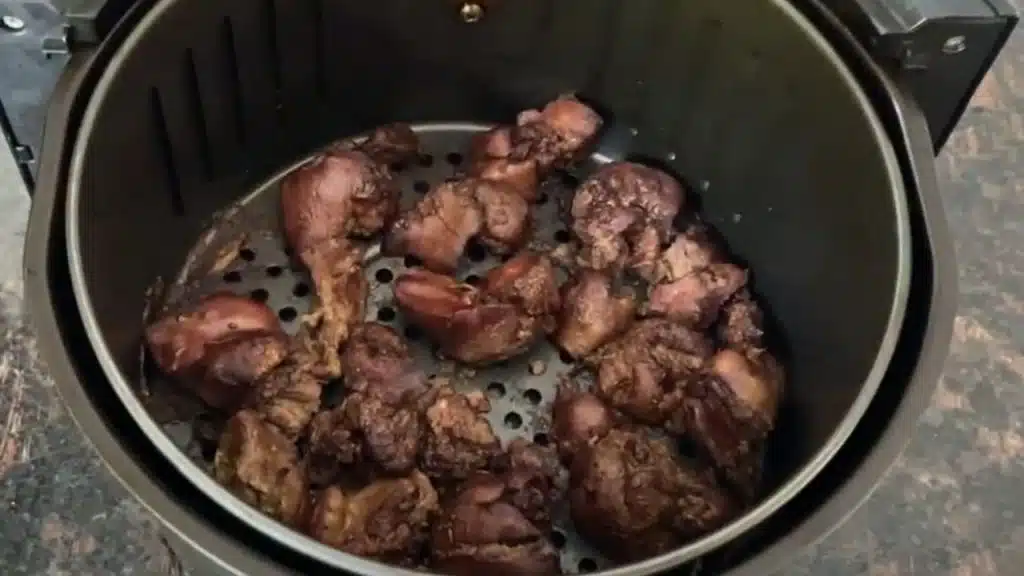
How To Reheat Chicken Wings In The Air Fryer

How to Reheat Chicken Wings Air Fryer
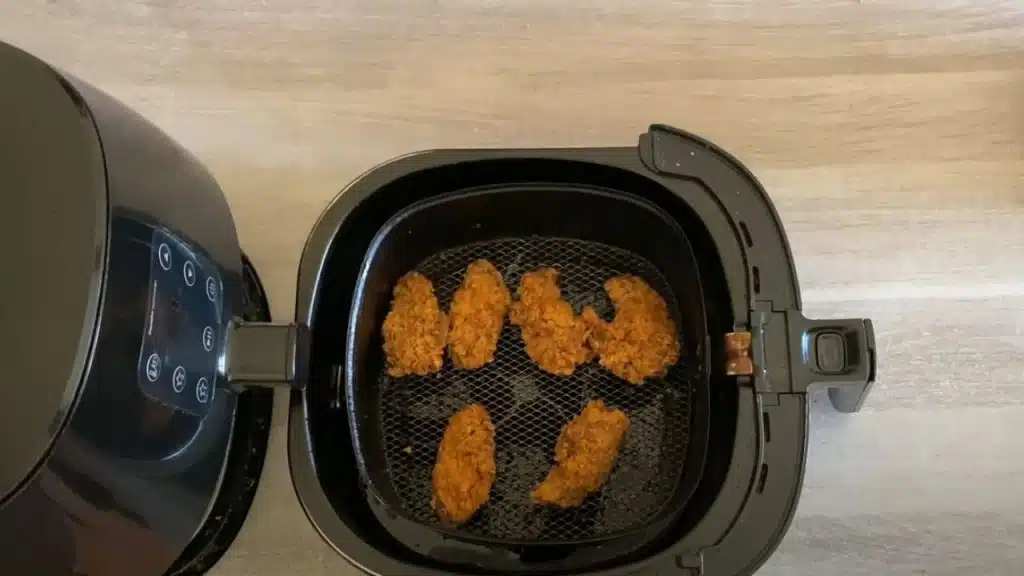
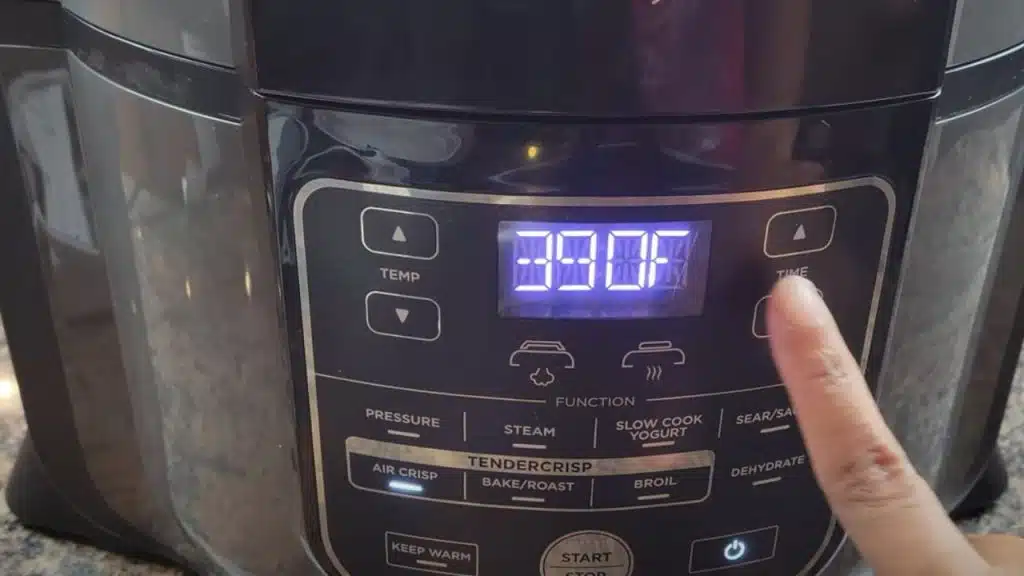
  1. Heat the air fryer to 360°F (182°C). 
  1. Reheat: Cook the wings for 5-6 minutes.
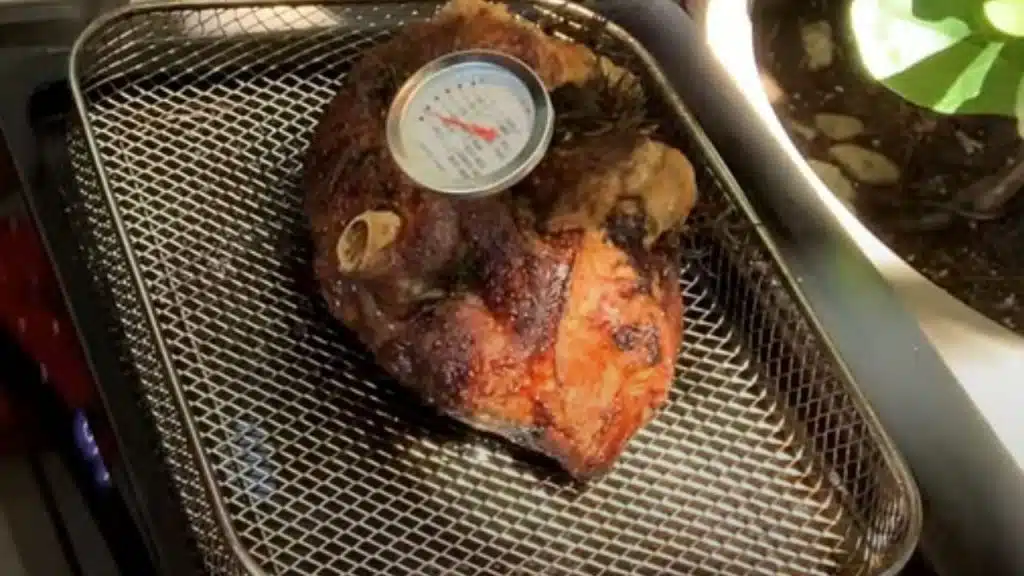
  1. Check Temperature: Make sure the inside of the wings reaches 165°F (74°C).

Benefit of Reheat Chicken Wings In The Air Fryer

Reheating chicken wings in an air fryer is a popular method that offers several benefits. Here’s a detailed outline of the advantages:

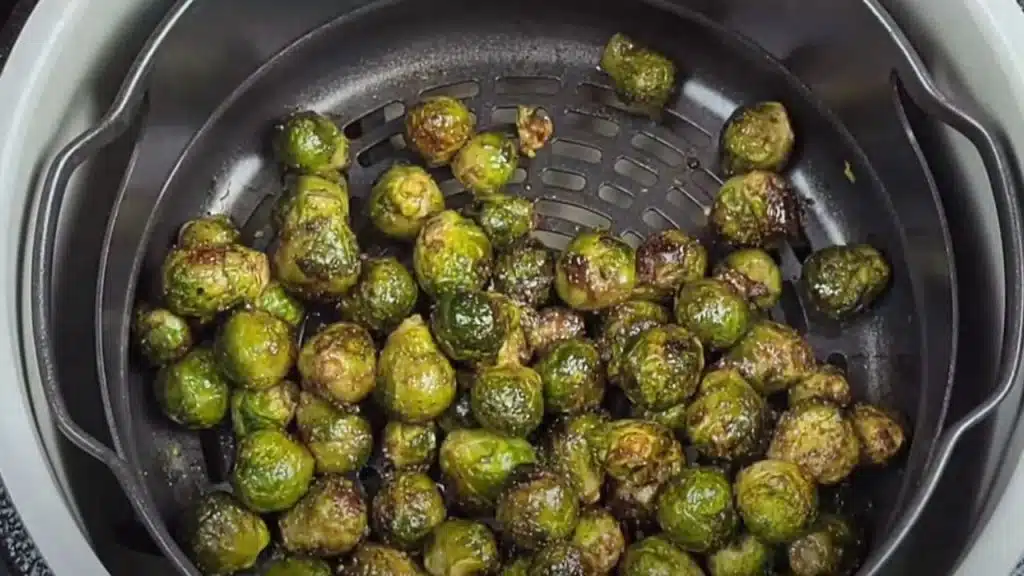
Maintains Crispiness: The air fryer uses hot air that circulates around the chicken wings, allowing them to maintain their crispy exterior without becoming soggy, which is a common issue with microwaving. Unlike oven reheating, the air fryer heats the wings uniformly on all sides, ensuring that every bite is perfectly crisp.

Speed and Efficiency: An air fryer heats up much faster than an oven and can reheat chicken wings in just a few minutes, making it a time-efficient option for quick meals. An air fryer uses less energy than a full-size oven, especially for small portions.

Healthier Option: Since the air fryer cooks by circulating hot air, there is no need for additional oil to achieve crispiness. This results in lower overall fat content compared to refrying. By avoiding extra oil, the calorie count remains lower, making it a healthier reheating option.

Healthier Option: Since the air fryer cooks by circulating hot air, there is no need for additional oil to achieve crispiness. This results in lower overall fat content compared to refrying. By avoiding extra oil, the calorie count remains lower, making it a healthier reheating option.

Healthier Option: Since the air fryer cooks by circulating hot air, there is no need for additional oil to achieve crispiness. This results in lower overall fat content compared to refrying. By avoiding extra oil, the calorie count remains lower, making it a healthier reheating option.

Convenience and Safety: Air fryers are generally user-friendly, with simple settings that avoid the fuss of preheating and watching over the oven.The enclosed design of air fryers minimizes the risk of burns from sputtering oil or open flames.

Can You Reheat Chicken Wings More Than Once?

Reheating chicken wings more than once in an air fryer—or any method—poses risks related to food safety and quality degradation. Each reheating cycle can promote bacterial growth as the wings pass through the danger temperature zone, increasing the likelihood of foodborne illnesses.

 Additionally, multiple reheatings can deteriorate the wings’ texture and flavor, making them rubbery, dry, and less enjoyable. It is generally recommended to reheat chicken wings only once after their initial cooking to maintain safety and quality. To avoid the need for multiple reheating, only warm the portion you plan to consume and store the rest properly to ensure they remain safe and delicious.

Tips to Keep Chicken Wings Moist When Reheating Them

  • Preheat the Air Fryer: Always start by preheating your air fryer to around 350°F (about 175°C). This helps the wings heat more evenly and quickly, reducing the time they spend drying out.
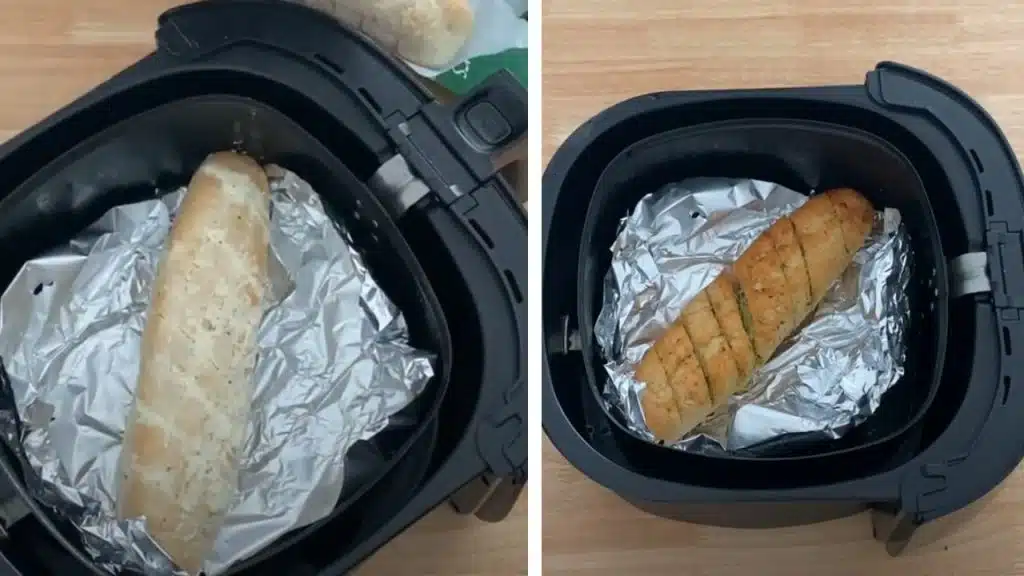
  • Use Foil or Parchment Paper: Line the air fryer basket with foil or parchment paper to prevent sticking and to help retain some of the moisture within the wings.
  • Avoid Overcrowding: Place the wings in one layer in the basket. Overcrowding can lead to uneven heating and steam buildup, which might make some parts soggy and others dry.
  • Spritz with Water or Oil: Lightly spritz the wings with water or a little oil before starting the reheating process. This adds moisture and prevents the skin from drying out too fast.
  • Short Reheating Cycle: Aim to reheat for a short duration—typically 5-6 minutes should be enough. Overcooking will dry out the wings.
  • Shake the Basket: Shake or flip the wings halfway to heat evenly.
  • Check Internal Temperature:Use a thermometer to ensure the wings reach 165°F (74°C) for safe eating without overcooking.
  • Serve Immediately: Chicken wings are best served immediately after reheating to enjoy their optimal texture and juiciness.

More Air Fryer Recipe

  • How to Cook Frozen Mini Pancakes in Air Fryer
  • How Long to Cook Stuffed Salmon in the Air Fryer
  • How Long to Cook Chicken Livers in Air Fryer
  • Mini Corn Dogs in Air Fryer
  • How Long to Cook Roast Lamb in Air Fryer
  • Crispy Air Fryer frozen  Brussels Sprouts
  • Cook Frozen Potato Wedges in an Air Fryer

Filed Under: Recipes

How to Cook Frozen Mini Pancakes in Air Fryer: Quickly

November 20, 2024 by bigfishtavernlagunaadmin Leave a Comment

In our busy life we always try to do everything fast. Especially cooking, the best medium for quick cooking is the Air fryer, and easy cooking is frozen pancakes. How to cook frozen mini pancakes in air fryer. Air fryer Pancakes cook are so quick and easy. Pancakes are a favorite food of children. It’s perfect for an easy breakfast or a yummy afternoon snack. To save time, refrigerate the pancakes and cook them when needed. You can also try this pancake recipe at home. It is great to eat.

How to Cook Frozen Mini Pancakes in Air Fryer

The Benefits of Cooking Frozen Pancakes in an Air Fryer

Cooking frozen pancakes in an air fryer isn’t just a time-saver—it’s great for your breakfast routine. Here are the main advantages of using an air fryer to cook frozen pancakes:

How to Cook Frozen Mini Pancakes in Air Fryer

Quick and Efficient: A major benefit of using an air fryer for frozen pancakes is how fast it cooks.Traditional methods, such as stovetop cooking or oven baking, can take anywhere from 10 to 20 minutes, depending on the size of your pancakes.With an air fryer, your pancakes are ready in just 4 to 5 minutes! This is ideal for busy mornings when you’re short on time but still crave a delicious meal.

No Need for Extra Oil: Unlike frying on a skillet, air frying doesn’t require extra oil or butter. The hot air circulates around the pancakes, giving them a crispy outer layer without the added calories or fat. This makes air-fried pancakes a healthier option compared to the traditional methods of cooking pancakes, which often involve butter or oil.

Faster Than Microwaving: While microwaving frozen pancakes might seem like a quick option, it often leads to robbery, unevenly heated results. Air frying, on the other hand, gives you perfectly reheated pancakes with a texture that’s closer to fresh pancakes, without the trouble.

Healthier Option for Pancake Lovers: Since air frying requires little to no oil, it’s a healthier cooking method compared to traditional frying. For those looking to enjoy pancakes without the extra grease, the air fryer is an excellent alternative.

No Preheating Required (for Some Models): Many air fryers don’t require preheating, which can save even more time. Simply load your frozen pancakes into the basket, set the temperature, and start cooking. This feature speeds up the process even further, so you can go from frozen to delicious in just minutes.

Ideal for Leftovers: If you have leftover frozen pancakes, the air fryer is perfect for warming them up. Not only does it restore their crispy exterior, but it also warms them up evenly, just like fresh pancakes. Unlike microwaving, which can make pancakes chewy or soggy, the air fryer gives them new life and a crispy, fresh taste.

Choosing The Right Mini Pancakes

Cooking frozen mini pancakes in an air fryer is quick and easy. But, choosing the right mini pancakes is important for a tasty result. Not all mini pancakes are the same. Let’s explore the types of pancakes and the best brands available.

Types Of Pancakes

Mini pancakes come in various types. Here are some popular ones:

  • Buttermilk Pancakes: Classic taste with a fluffy texture.
  • Blueberry Pancakes: Burst of blueberry flavor in every bite.
  • Chocolate Chip Pancakes: Sweet and delightful with chocolate chips.
  • Whole Wheat Pancakes: Healthier option, rich in fiber.
  • Gluten-Free Pancakes: Ideal for those with gluten sensitivity.

Choose the type of pancake based on your preference and dietary needs. Each type offers a unique taste and texture.

Best Brands

Here are some of the best brands for frozen mini pancakes:

[wptb id="1710" not found ]

How to Cook Frozen Mini Pancakes in Air Fryer

How to Cook Frozen Mini Pancakes in Air Fryer
  1. Spray cooking oil on the air fryer basket to prevent the pancakes from sticking.
  2. Place in the pancake basket and Set air fryer to 250°F (approximately 121°c) For 4 minutes

Serving Suggestions

How to Cook Frozen Mini Pancakes in Air Fryer

Frozen mini pancakes made in the air fryer are super versatile and easy to serve. You can stick to the classic with some maple syrup and a pat of butter. For something lighter, top with fresh berries and a dollop of whipped cream. If you’re in the mood for something more satisfying, spread peanut butter and top with sliced bananas. For a fun twist, make mini pancake “tacos” filled with yogurt, granola, and a drizzle of honey. These toppings turn a simple breakfast into a delicious treat!

What to Do with Leftover Pancakes

If you happen to have leftovers (though it’s unlikely with pancakes as delicious as these), store them in an airtight container in the fridge. To reheat, simply place them back in the air fryer for 2 to 3 minutes to restore their crispy texture.

FAQs About Cooking Frozen Pancakes in an Air Fryer

Can You Cook Frozen Mini Pancakes In An Air Fryer?

Yes, you can. Air fryers cook them quickly and evenly.

What Temperature To Cook Frozen Mini Pancakes?

Set the air fryer to 250°F (121°c) For 4 minutes
for best results.

How Long To Air Fry Frozen Mini Pancakes?

Cook for 4 minutes. Check for a golden-brown color.

Can I cook frozen pancakes in the air fryer without thawing them?

Yes! You can cook frozen pancakes directly in the air fryer without thawing. 

Should I Spray Oil On Frozen Mini Pancakes?

No need for oil. They cook well without it.

Some more air fryer recipes

Put Frozen Garlic Bread in the Air Fryer
How Long to Cook Roast Lamb in Air Fryer
Cook Frozen Potato Wedges in an Air Fryer
Crispy Air Fryer frozen Brussels Sprouts
Cook Canned Biscuits in Air Fryer
Mini Corn Dogs in Air Fryer

Filed Under: Recipes

How Long to Cook Stuffed Salmon in the Air Fryer: Few Mins

November 18, 2024 by bigfishtavernlagunaadmin Leave a Comment

This air fryer stuffed salmon recipe is simple to make and a healthy option for any meal.The most important thing you should know to make this recipe is, how long to cook stuffed salmon in the air fryer? You can make this recipe completely in just 10 minutes.

How Long to Cook Stuffed Salmon in the Air Fryer

After trying this stuffed salmon recipe, you’ll never go back to cooking salmon any other way.  Dinner will be served in no time and your family will love you. Salmon is packed with omega-3 fatty acids, making it a great choice for supporting heart health. I hope you try this stuffed salmon in your air fryer recipe soon.

What Makes Air Fryer Stuffed Salmon So Amazing?

Air fryer stuffed salmon stands out as a flavorful, fast, and convenient dish that combines the best of both worlds: delicious seafood and easy cooking. Here’s why it’s so amazing:

Quick and Convenient Cooking Time
The air fryer cooks stuffed salmon in record time, usually within 12-15 minutes, depending on the thickness of the fillets and the stuffing. Unlike traditional oven baking, which can take much longer, the air fryer allows you to enjoy a gourmet meal without the extended wait.

Healthier Cooking Method
Cooking stuffed salmon in the air fryer requires little to no oil, making it a much healthier option compared to frying or pan-searing. The air fryer uses hot air circulation to crisp up the salmon and give it a beautiful golden-brown finish without the need for excessive butter or oil, keeping the dish lower in fat and calories.

Deliciously Flaky and Moist Salmon
One of the best things about air fryer stuffed salmon is how evenly it cooks. The hot air surrounds the fish, forming a crispy crust while keeping the inside tender and moist. The result is tender, flaky salmon that’s cooked to perfection with every bite.

Versatile Stuffing Options
Stuffed salmon is highly adaptable, allowing you to get creative with the fillings. Whether you prefer a classic crab stuffing, a creamy spinach mixture, or even a vegetable-packed option, the air fryer accommodates a wide variety of stuffing choices, giving you endless opportunities for customization.

Minimal Cleanup
Cooking with an air fryer means less mess, with fewer pans and utensils to clean afterward. You can cook the salmon directly in the air fryer basket, and if you line it with parchment paper, cleanup is even easier. Plus, the lack of messy grease splatters makes it a hassle-free cooking experience.

How Long to Cook Stuffed Salmon in the Air Fryer

The cooking time for stuffed salmon in the air fryer depends on factors such as the thickness of the fillets and the stuffing you choose. However, the general guideline for cooking stuffed salmon in the air fryer is:

Cook at 375°F (190°C) for 10-15 minutes.

Thin fillets (around 1 inch thick) typically cook in about 10 minutes.

Thicker fillets (1.5 to 2 inches) might require as much as 15 minutes to cook.

If your stuffing contains moisture-rich ingredients (like crab, spinach, or cheese), it may need a few extra minutes to cook thoroughly.

Some air fryers cook faster or slower, so you may want to check the salmon at the 12-minute mark and adjust accordingly.

The salmon should reach an internal temperature of 145°F (63°C)

Ingredients Needed to Cook Stuffed Salmon

  • 4 large skinless salmon fillets
  • 1/2 pound cooked and chopped shrimp
  • 3 tablespoons cream cheese
  • 1.5 tablespoons lemon juice
  • 170g crabmeat
  • 1/2 cup chopped bell pepper (or spinach/other vegetables)
  • 1 tablespoon unsalted butter
  • A quarter cup of freshly grated Parmigiano cheese (or your preferred cheese)
  • Season with salt and pepper to taste

Cooking Instructions

How Long to Cook Stuffed Salmon in the Air Fryer

In a bowl, mix the chopped shrimp, crabmeat, cream cheese, lemon juice, and chopped bell pepper until well combined. Season with salt and pepper to taste.

Cut a pocket into each salmon fillet without slicing all the way through. This will hold the filling.

Fill each salmon pocket with the prepared mixture, ensuring it is packed in well.

Preheat the air fryer to 375°F (190°C) for approximately 5 minutes.

Brush the outside of each stuffed fillet with melted unsalted butter for added flavor.

Place the stuffed salmon in the air fryer basket in a single layer.

After 10 minutes of cooking, flakes easily with a fork.

Carefully remove the salmon from the air fryer and serve hot

Stuffing Variations to Elevate Your Air Fryer Salmon

How Long to Cook Stuffed Salmon in the Air Fryer

I have used seafood cream cheese stuffing in this recipe. Feel free to use any stuffing you prefer. Stuffing salmon is a fantastic way to enhance its rich, tender flavor, turning a simple dish into something special. Here are the top three stuffing options that will elevate your air fryer salmon to a whole new level:

Classic Crab Stuffing: Crab and salmon pair together perfectly in the kitchen. This stuffing highlights the delicate sweetness of fresh crab meat, perfectly paired with the salmon’s flaky texture. The creamy base of cream cheese or mascarpone binds the stuffing together, while fresh dill and parsley add a refreshing note. A touch of lemon zest brightens the dish, and panko breadcrumbs, if used, provide a satisfying crunch. This stuffing is ideal for seafood lovers who enjoy a delicate, yet rich flavor.

Mediterranean Stuffing: For a fresh, vibrant twist, a Mediterranean stuffing made with spinach, feta, and Kalamata olives brings bold flavors that complement the salmon. The tangy feta and salty olives are balanced by earthy spinach and sweet sun-dried tomatoes. Garlic adds savory depth, while a squeeze of lemon juice and a sprinkle of oregano finish the stuffing with a Greek-inspired flair. This stuffing offers a hearty and satisfying flavor profile, perfect for those who love Mediterranean cuisine.

Pesto Stuffing: Basil pesto brings a fresh, herbaceous twist to your salmon. Made with basil, garlic, Parmesan, and pine nuts, this stuffing infuses the fish with a vibrant, aromatic flavor. The creamy pesto combined with the crunch of pine nuts creates a satisfying texture contrast. This option is ideal for fans of Italian cuisine, delivering a burst of herby freshness that elevates the natural sweetness of the salmon.

What to Serve with Stuffed Salmon

To elevate your stuffed salmon, pairing it with the right sides can create a perfectly balanced meal. Here are some top choices:

How Long to Cook Stuffed Salmon in the Air Fryer

Roasted Vegetables
Roasted vegetables like asparagus, carrots, or brussels sprouts bring a sweet, caramelized flavor that compliments the richness of the salmon. Season with olive oil, garlic, salt, pepper, and fresh herbs like rosemary for added flavor.

Garlic Mashed Potatoes
Mashed potatoes are a comforting side for stuffed salmon.The creamy texture complements the fish’s richness, while garlic enhances the overall flavor. Sour cream or cream cheese makes them extra creamy, while chives add a fresh finish.

Fresh Salad with Citrus Dressing
A light, crisp salad provides the perfect balance to the rich flavor of the salmon. Mix greens like spinach or arugula, with avocado, cucumber, and tomatoes for crunch. A citrus vinaigrette with lemon or orange juice brightens the dish and adds a zesty contrast.

Rice Pilaf
Rice pilaf complements the salmon with its nutty flavor. Add garlic, onions, and fresh herbs like dill for extra flavor. Toasted almonds or pine nuts can add a nice crunch.

Steamed Broccoli or Green Beans
Simple yet flavorful, steamed broccoli or green beans offer a fresh contrast to the salmon. Toss with olive oil, lemon juice, or Parmesan cheese for added flavor.

Tips for Perfectly Cooked Stuffed Salmon in the Air Fryer

Use Fresh Salmon: Fresh salmon fillets are always the best choice, offering superior texture and flavor.

Don’t Overstuff: While it’s tempting to load up the salmon with as much stuffing as possible, be sure not to overstuff it, or it may spill out during cooking.

Season Well: Season both the outside of the salmon and the stuffing with salt, pepper, and your favorite herbs to bring out the best flavor.

Moisture is Key: Make sure the stuffing has enough moisture (cream cheese, mayonnaise, etc.) to prevent it from drying out during cooking.

Don’t Forget the Lemon: A squeeze of fresh lemon juice over the cooked salmon enhances the flavor and adds a refreshing touch.

Frequently Asked Questions

Can I use frozen salmon for this recipe?

Frozen salmon is fine to use, but be sure to thaw it completely before stuffing and cooking. Frozen salmon may require a few extra minutes of cooking time.

 How do I prevent the stuffing from falling out?

To prevent the stuffing from spilling, ensure that you don’t overstuff the salmon. Use toothpicks to secure the slit if necessary, and be sure the stuffing is tightly packed.

 What can I substitute for crab in the stuffing?

If you don’t like crab or don’t have access to fresh crab meat, you can substitute it with shrimp, salmon, or even a vegetarian filling like spinach and cheese.

 How long will stuffed salmon last in the fridge?

Stuffed salmon will last up to 2 days in the fridge. Keep it in an airtight container to preserve freshness, and reheat in the air fryer for the best results.

Some more air fryer recipes

  • Cook Frozen Meatballs in the Air Fryer
  • Cook Hamburger Meat in an Air Fryer
  • Cook Mini Tacos in Air Fryer
  • Cook Brie in an Air Fryer
  • Crispy Rice in an Air Fryer

Filed Under: Recipes

Put Frozen Garlic Bread in the Air Fryer: See the Magic

November 17, 2024 by bigfishtavernlagunaadmin Leave a Comment

Pop frozen garlic bread into the air fryer and enjoy a perfectly crispy crust in just 5 minutes! Using this method, you can make mouth-wateringly crispy garlic bread without the need for any extra oil or seasoning.

Can you Put Frozen Garlic Bread in the Air Fryer

Why Put Frozen Garlic Bread in the Air Fryer?

The air fryer has quickly become one of the most beloved kitchen appliances for a reason: it cooks food faster than an oven, requires less oil, and results in a crispy finish that’s hard to beat. When it comes to frozen garlic bread, using the air fryer is a great choice for several reasons.

The air fryer heats up quickly, so you can start cooking right away, unlike the oven which requires preheating. Its circulating hot air crisps the exterior of the garlic bread while keeping the inside soft and buttery.

This results in a perfect contrast of crunch and melt-in-your-mouth texture. The air fryer cooks faster and uses less oil than traditional frying, making it a healthier, energy-efficient option that saves both time and energy.

How to Cook Frozen Garlic Bread in the Air Fryer

Ingredients

Can you Put Frozen Garlic Bread in the Air Fryer

The main ingredient is frozen garlic bread, with a preference for French-style baguettes. Other types, like Texas Toast, can also be used.

Method

Can you Put Frozen Garlic Bread in the Air Fryer
  1. Cut the frozen bread to fit perfectly in the air fryer basket, ensuring enough space for even cooking.
  2. Lay the bread in the air fryer basket, Place the buttered side facing up.
  3. Set the air fryer temperature to 360°F (180°C).
  4. Cook for 5 minutes, pausing to check halfway through. Can be time adjusted based on your personal preference.
  5. After 5 minutes, the garlic bread should be crispy and golden.

Tips for Air Frying Frozen Garlic Bread

Avoid Overcrowding: For the best results, don’t overcrowd the air fryer basket. Air fryers work by circulating hot air, so giving the garlic bread enough space allows the air to cook it evenly.

Check for Crispiness: Monitor the garlic bread closely, as cooking times can vary depending on the bread’s thickness and the brand. Some garlic bread may need less time to cook, while others may need a little longer.

Enhance Flavor: If you like your garlic bread extra crispy or flavorful, feel free to add a sprinkle of grated parmesan or additional garlic butter on top before air frying.

How Does Air Fried Garlic Bread Compared to Oven-Cooked Garlic Bread?

Both methods have their pros and cons, but when it comes to convenience and speed, the air fryer wins hands down. Here’s a comparison:

[wptb id="1696" not found ]

While the oven gives you a more traditional, slow-baked garlic bread, the air fryer offers a quicker, crispier alternative. It’s ideal for those in a rush or looking for a lighter option without compromising on taste.

What Type of Garlic Bread Works Best in the Air Fryer?

Not all frozen garlic bread is made equal. These are some of the most popular types of garlic bread that cook perfectly in the air fryer:

Garlic Bread Loaves: This is the classic garlic bread you usually find in the frozen section. These loaves work great in the air fryer. You can cut them into pieces before cooking if you want.

Garlic Bread Slices: Pre-sliced garlic bread is already ready to go. This is the most convenient option for air frying because it cooks quickly and evenly.

Garlic Bread Sticks: Perfect for snacking or dipping, these are another great option for the air fryer. Just remember to check the cooking time, as they might need slightly less time than a full loaf.

Can You Add Cheese or Other Toppings to Frozen Garlic Bread in the Air Fryer?

Absolutely! The air fryer is perfect for experimenting with different toppings. Here’s how you can add cheese or extra flavor:

Cheese: For cheesy garlic bread, sprinkle shredded mozzarella or parmesan on top of the garlic bread halfway through cooking. Cook in the air fryer for another 1-2 minutes to melt the cheese.

Herbs: Fresh herbs like parsley, basil, or thyme can be sprinkled on top after cooking for added freshness and flavor.

Extra Garlic Butter: For those who like their garlic bread extra rich, you can brush on more garlic butter halfway through cooking or right after the bread is done.

How to Reheat Leftover  Garlic Bread in the Air Fryer

  • Heat the air fryer to 350°F.
  • Heat the garlic bread for 2-3 minutes.
  • After 2 minutes, check if the bread has reached your preferred temperature and texture.

Frequently Asked Questions

How long does it take to cook frozen garlic bread in the air fryer?

Cooking time typically ranges from 5 minutes at 360°F, depending on the thickness and type of garlic bread. Start checking around 3 minutes to prevent overcooking.

Can I add extra garlic butter or cheese while cooking frozen garlic bread in the air fryer?

Yes! If you want to add extra garlic butter or cheese, do so about halfway through the cooking time. This ensures the butter melts into the bread without scorching the toppings.

Will the garlic bread be as crispy in the air fryer as it is in the oven?

Yes, the air fryer can achieve a crispy exterior, even better than some traditional oven methods. The circulating hot air guarantees a crispy exterior while preserving a soft and moist interior.

Can I use the air fryer to reheat leftover garlic bread?

Yes, leftover garlic bread can be reheated in the air fryer. Set the temperature to 350°F (175°C) and heat for about 2-3 minutes for a crispy, refreshed taste.

Enjoy some more air fire recipes

How Long to Cook Roast Lamb in Air Fryer
Cook Frozen Potato Wedges in an Air Fryer
Crispy Air Fryer frozen Brussels Sprouts
How Long to Cook Chicken Livers in Air Fryer
Cook Canned Biscuits in Air Fryer
Mini Corn Dogs in Air Fryer

Filed Under: Recipes

How Long to Cook Roast Lamb in Air Fryer: Less Time

November 16, 2024 by bigfishtavernlagunaadmin Leave a Comment

How long to cook roast lamb in an air fryer, juicy To cook roast lamb in an air fryer and achieve juicy meat with a perfectly crisp crust, you can significantly reduce cooking time compared to a traditional oven.

How Long to Cook Roast Lamb in Air Fryer

 Whether you’re cooking a boneless leg of lamb, lamb chops, or a shoulder cut, the air fryer uses rapid air circulation to cook the meat evenly and lock in its natural flavors. A key benefit is the significantly reduced cooking time, making it perfect for busy weeknights or quick family meals.

How Long to Cook Roast Lamb in Air Fryer

With the right temperature settings and a meat thermometer on hand, you can achieve restaurant-quality results—whether you prefer your lamb medium-rare, medium, or well-done—all without the hassle of preheating or extensive cleanup.

Why Use an Air Fryer for Roast Lamb?

Healthier Cooking: Air fryers use much less oil compared to traditional roasting methods, helping to reduce the overall fat content in your meals. This makes air-fried lamb a healthier option without sacrificing the rich flavor of the meat.

Consistent Cooking: Air fryers use circulating hot air to cook lamb evenly on all sides. This helps to eliminate cold spots or unevenly cooked sections that can occur in traditional ovens.

Faster Cooking Time: Air fryers preheat rapidly and reduce cooking time compared to traditional ovens. This means you can enjoy your roast lamb much sooner, making it ideal for a quick dinner solution without long oven preheating times.

Crispier Exterior: The fast air circulation in an air fryer creates a crispy outer layer on the lamb while maintaining a tender and juicy interior. This results in a roast lamb with a perfect texture that’s difficult to achieve using other cooking methods.

Convenience: Air fryers are simple to use and easy to clean, making cooking hassle-free. This makes them ideal for everyday cooking as well as special occasions.

Flavor Enhancement: Because air fryers lock in moisture and cook quickly, the natural flavors of the lamb are enhanced, allowing for the seasonings and marinades to penetrate more deeply.

Space Efficiency: For those with limited kitchen space, an air fryer is a compact appliance that can bake, grill, and roast, eliminating the need for multiple cooking devices.

How Long to Cook Roast Lamb in Air Fryer

How Long to Cook Roast Lamb in Air Fryer

Cooking time varies based on the size and type of cut, as well as your preferred level of doneness. A meat thermometer is essential for accurate results.

General Cooking Times for Lamb in an Air Fryer

[wptb id="1684" not found ]

 Cooking Roast Lamb in an Air Fryer

How Long to Cook Roast Lamb in Air Fryer

Ingredients

1.5kg/3.2lb half leg of lamb

Salt

4x garlic cloves and a few sprigs of Rosemary (optional)

Method

How Long to Cook Roast Lamb in Air Fryer

Unwrap the lamb and let it sit on the counter for about an hour so it’s at room temp

Preheat the air fryer to 200C/390F

Make along incision on the thickest section down to the bone

Make several incisions all over the leg

Insert the peeled garlic cloves and rosemary into the incisions

Cook in the air fryer for 1hr15m

Check the internal temp.  Medium but still juicy is 62C/143F

Enjoy!

Cooking Tips forYour Air Fryer Lamb Roast

  • Always preheat your air fryer to 360°F (180°C) for about 5 minutes. This guarantees even cooking from the very beginning.
  • Allow the meat to sit at room temperature for 15-30 minutes before cooking. This helps it cook evenly and retain moisture.
  • This ensures consistent cooking from the start.This ensures uniform cooking from the beginning. Rub it with olive oil, salt, pepper, and herbs like rosemary and thyme to boost the flavor.
  • Use a meat thermometer to check the internal temperature, aiming for 130-135°F (54-57°C) for medium-rare or 145°F (63°C) for medium. Place the lamb in the air fryer with the fat side facing up.
  • This allows the fat to baste the meat as it cooks, enhancing flavor and juiciness. Once cooked, remove the lamb and cover it loosely with foil.

Side Dish for Serving

Garlic Mashed Potatoes: Creamy mashed potatoes seasoned with garlic butter make a classic pairing.

Roasted Vegetables: Toss carrots, zucchini, and bell peppers in olive oil, salt, and pepper, then roast in the air fryer.

Mint Sauce or Chimichurri: These fresh, tangy sauces complement the rich flavors of the lamb.

Green Beans with Almonds: Sauté green beans in butter and top with toasted almonds for a nutty, crunchy side dish.

Greek Salad: A vibrant blend of cucumber, tomato, olives, and feta cheese, finished with a drizzle of olive oil and lemon juice.

Couscous or Quinoa Salad: Light and fluffy, with dried fruits, nuts, and herbs like parsley or mint.

Yorkshire Pudding: Perfect for soaking up the lamb’s juices or any gravy.

Enjoy some more air fire recipes

Cook Frozen Potato Wedges in an Air Fryer

Crispy Air Fryer frozen  Brussels Sprouts

How Long to Cook Chicken Livers in Air Fryer

Cook Canned Biscuits in Air Fryer

Mini Corn Dogs in Air Fryer

Filed Under: Recipes

Cook Frozen Potato Wedges in an Air Fryer: So Easy

November 15, 2024 by bigfishtavernlagunaadmin Leave a Comment

Cooking frozen potato wedges in an air fryer is quick and easy. One of the most important things to know about Cooking frozen potato wedges is, How Long to Cook Frozen Potato Wedges in an Air Fryer. To crispy potatoes, the temperature cannot be too low or too high, the right temperature must be maintained.

Cook Frozen Potato Wedges in an Air Fryer

You can enjoy them either as a snack or as a side dish. Potato wedges turn golden brown on the outside and stay soft inside. I use McCain brand, If you want any frozen wedges can be used. Follow these easy steps to make delicious air-fried potato wedges.

Cook Frozen Potato Wedges in an Air Fryer

You only need a few ingredients and a small amount of oil. The air fryer cooks them evenly and saves time. Perfect for busy days or casual meals. Everyone will love these tasty treats!   Let’s get started on how to cook them perfectly.

Why Use an Air Fryer for Frozen Potato Wedges?

Healthier Snack: Air-frying requires minimal or no oil, making potato wedges lower in fat and calories than traditional deep-fried ones.This makes them a healthier choice for growing kids, providing a snack that’s both delicious and better for their health.

Crispy and Fun to Eat: Kids love crispy foods, and air-fried potato wedges offer a perfect crunchy texture.Air fryer Potato Wedges makes the inside soft and fluffy and the outside crisp and golden. This makes them fun and enjoyable for children, especially when served as a snack or side dish.

Quick and Easy to Prepare: Air fryers cook potato wedges in as little as 12-15 minutes, making them a quick and easy meal for busy families. You don’t have to wait long, and your kids won’t be hungry for too long. Plus, there’s no need for constant supervision during cooking, so parents can focus on other tasks.

Customizable Flavors: With an air fryer, you can adjust the seasoning to fit your child’s taste preferences. Whether they like mild flavors or enjoy a little spice, you can make the wedges to suit their liking, encouraging them to eat healthier, homemade snacks.

Kid-Friendly Cooking: Kids can help in the kitchen by tossing the potato wedges with oil and seasonings or even placing them in the air fryer basket. It’s a great way to involve children in meal preparation while keeping things simple and safe.

Cooking Time for Frozen Potato Wedges

 Here’s a chart of the cooking times and temperatures for popular air fryer models.

[wptb id="1676" not found ]

Note: When using a new or unfamiliar air fryer model, it’s recommended to start with the lower end of the time range. Check the wedges for doneness, and add extra time if needed for optimal crispness.

Ingredients

Frozen potato wedges (pre-seasoned or plain)

Olive oil (optional for extra crispiness)

Salt (to taste)

Pepper (to taste)

Garlic powder or onion powder (for extra flavor)

Paprika (for a smoky taste)

Parmesan cheese (optional, for a cheesy twist)

How to Make Frozen Potato Wedges in an Air Fryer

Cook Frozen Potato Wedges in an Air Fryer
  • Preheat the air fryer to 180°C (356°F).
  • Keep the potato wedges in the air fryer, being careful not to get them too close, as this may cause them to stick.
  • Cook for 20 minutes, shaking or flipping the wedges halfway through for even cooking.
  • Optionally, add some cooking oil, salt, or seasonings to enhance flavor, but this is not necessary as most air fryers come pre-greased.
  • And, these are done!! You can cook them one or two minutes longer if you prefer them crispier, but I find these seem crispy enough.

Serving Suggestions

The wedges can be served with a variety of dishes such as steak, chicken nuggets, fish, and vegetables, along with dipping sauces like mayonnaise or ketchup.

You can place them directly into a bowl while they’re hot. Add 1/2 a cup of parmesan cheese, and 1 tablespoon of parsley.

Best Dips for Potato Wedges

Cook Frozen Potato Wedges in an Air Fryer

Potato wedges are perfect for dipping. Here are a few ideas for delicious dips to pair with your wedges:

Classic Ketchup:Combine tomato paste, vinegar, sugar, and a pinch of salt. Stir until smooth. Sweet and tangy ketchup pairs well with crispy wedges.

Ranch Dressing: Many people love creamy ranch. Its smooth texture and tangy taste complement the crispy wedges.Mix together mayonnaise, sour cream, and buttermilk, then add garlic powder, onion powder, dried dill, and parsley. Stir until everything is well combined.

Garlic Aioli: Mix mayonnaise, minced garlic, lemon juice, and a little olive oil. Whisk until smooth and creamy. This adds a rich flavor.

Barbecue Sauce: Combine ketchup, apple cider vinegar, brown sugar, Worcestershire sauce, garlic powder, and smoked paprika. Simmer on low heat until thickened. Smoky and sweet barbecue sauce is a perfect pairing with potato wedges.

Sour Cream: Cool and creamy, sour cream balances out the crispy texture of the wedges.Serve sour cream plain or mix with seasonings like garlic powder, onion powder, and fresh herbs such as chives for extra flavor.

Cheese Dip: Melt cheddar cheese with milk, butter, and a pinch of flour for a smooth, creamy texture. Add seasoning like mustard or garlic powder if desired. Great for cheese lovers.

Spicy Mayo: If you like a little heat, try mixing mayonnaise with a dash of hot sauce. This spicy, creamy dip adds a nice kick.

Storing and Reheating Leftovers

Cook Frozen Potato Wedges in an Air Fryer

Air-fried potato wedges are best enjoyed fresh. Storing and reheating leftovers properly will help keep them crispy.

Storing Leftovers: Place any leftover potato wedges in an airtight container. Refrigerate them for up to two days. The Potato Wedges must be cooled completely before storing, Moreover it will become soft.

Reheating: Reheat the wedges by placing them back in the air fryer at 350°F (175°C) for 3-5 minutes. This will help restore their crispness without drying them out. You can also reheat them in an oven, but the air fryer is quicker and helps maintain the crispiness.

Frequently Asked Questions

Should you boil potatoes before roasting?

Boiling potatoes before roasting can help make them crispier on the outside while keeping them soft and fluffy on the inside. This is especially useful for dishes like roasted potatoes or fries.

Why are potatoes soggy in the air fryer?

Potatoes may become soggy in the air fryer if they are too wet, if they are not coated with a small amount of oil, or if they are overcrowded. Make sure to pat the potatoes dry, use minimal oil, and leave enough space for air circulation.

Can I put raw potatoes in the air fryer?

Raw potatoes can definitely be placed in the air fryer. Just make sure to cut them into evenly sized pieces, season them, and lightly coat them with oil for the best results.

Do you put oil on fries in an air fryer?

Yes, it’s recommended to lightly coat fries with oil in the air fryer to help them crisp up. You don’t need a lot of oil—just a light spray or toss to ensure even cooking.

Enjoy some more air fire recipes

  • Crispy Air Fryer frozen  Brussels Sprouts
  • How Long to Cook Chicken Livers in Air Fryer
  • Cook Canned Biscuits in Air Fryer
  • Mini Corn Dogs in Air Fryer
  • Cook Frozen Meatballs in the Air Fryer?
  • Can You Cook Hamburger Meat in an Air Fryer?
  • Cook Mini Tacos in Air Fryer

Filed Under: Recipes

Crispy Air Fryer frozen  Brussels Sprouts: Just 10 Minutes!

November 14, 2024 by bigfishtavernlagunaadmin Leave a Comment

Making frozen Brussels sprouts in an air fryer is easy, quick, and delicious.Many individuals aren’t big fans of vegetables.  Also, most children are less fond of vegetables.

Air Fryer frozen Brussels Sprouts

My kids don’t like to eat vegetables at all. So I cook and feed them frozen Brussels Sprouts like this. Babies eat Brussels Sprouts with gusto. Whether you are an experienced cook or not, everyone can easily make this frozen Brussels Sprouts recipe of mine.

Air Fryer frozen  Brussels Sprouts

With this method, you’ll get crispy, golden sprouts that are perfect as a side dish or snack. Also why to choose Air Fire for Brussels Sprouts, Air Fire Brussels Sprouts benefits, solutions to common mistakes in Air Fire Brussels Sprouts cooking you can also easily learn.

Why Choose an Air Fryer for Brussels Sprouts?

An air fryer is an excellent method for cooking frozen Brussels sprouts. This cooking method gives you crispy results without the need for heavy oil or extra cooking time. The air fryer circulates hot air around the Brussels sprouts, which helps them cook evenly and develop a deliciously crispy exterior.

An air fryer is convenient, too. You can go from freezer to table in 8 to 10 minutes. There’s no need to thaw the sprouts, and cleanup is simple. By using an air fryer, you avoid a greasy kitchen and save on cooking oil. For anyone looking to eat healthier, air-fried Brussels sprouts are a smart choice.

Ingredients

Air Fryer frozen  Brussels Sprouts

Brussel Sprouts-1 lb (frozen, Small size)

Olive oil- 1 Tbsp

Balsamic vinegar- 1 Tbsp

Salt- 1/2 tsp

Black Pepper- 1/4 tsp

Garlic Powder- 1/2 tsp

How to Cook Frozen Brussels Sprouts in the Air Fryer

1. Preheat air fryer at 390F for 5 minutes

Air Fryer frozen  Brussels Sprouts

2. Make a sauce by combining the ingredients in a bowl.

Air Fryer frozen  Brussels Sprouts

3. Put the frozen Brussels sprouts into an air fryer.

Air Fryer frozen  Brussels Sprouts

4. Air fry at 390F for 8 minutes. If not fully thawed/soft, add additional time

5. When fully thawed/soft, add sprouts to the balsamic sauce.

Air Fryer frozen  Brussels Sprouts

6. Place the sprouts with sauce in the air frier basket.

 7. Air fry at 390F for 4-6 minutes on nutil preterned doneness.

8. Stir every 2 minutes

Air Fryer frozen  Brussels Sprouts

Troubleshooting Common Air Fryer Brussels Sprouts Mistakes

Cooking Brussels sprouts in an air fryer is easy, but small mistakes can happen. Here’s how to avoid the most common issues

Too Soggy: Use only a small amount of oil. Too much oil can make them soggy.

Undercooked: Increase cooking time by a few minutes if they’re still hard.

Burned: Check the Brussels sprouts after 4 minutes and shake halfway through.

Uneven Crisping: Avoid overcrowding the basket and shake it during cooking.

If your sprouts come out too soft or too dry, adjust the oil and cooking time. Each air fryer is a little different, so don’t be afraid to make small changes to get your desired results.

Benefits of Air Fryer frozen Brussels Sprouts

Cooking Brussels sprouts in an air fryer has several benefits. Here are some reasons why you should try this method:

Healthier Option: Air frying uses less oil, which means fewer calories and fats. You’ll still get delicious, crispy Brussels sprouts without the extra calories from frying.

Time-Saving: Air frying cuts down on cooking time. You can go from frozen to fully cooked sprouts in about 8 to 10 minutes. Ideal for busy nights when you need a fast and healthy side dish.

Versatility: Brussels sprouts from the air fryer pair well with almost any meal. They work as a side dish, salad topping, or even a healthy snack.

Cooking Brussels sprouts in the air fryer is a simple, nutritious way to add more vegetables to your diet.

Tips for Extra Flavor

  • Add Parmesan Cheese: Sprinkle cheese in the last few minutes of cooking.
  • Use Balsamic Vinegar: Drizzle balsamic glaze on top for a sweet finish.
  • Try Spicy Seasoning: Add a dash of chili powder or hot sauce before serving.
  • Fresh Herbs: Add chopped fresh parsley or basil for a bright flavor.

These options enhance the taste and make the dish more exciting.

Frequently Asked Questions

Should I boil my Brussels sprouts before roasting?

No, you don’t need to boil Brussels sprouts before roasting, especially if you’re air frying. Boiling can add extra moisture, making it harder for them to crisp up.

Why did my Brussels sprouts burn in the air fryer?

Brussels sprouts can burn in the air fryer if the temperature is too high or they cook too long. Make sure to set the air fryer to 400°F or lower and check on them midway through cooking.

Why are my roasted Brussels sprouts not crispy?

Roasted Brussels sprouts may turn out soft instead of crispy if there’s too much moisture or oil. Apply a light coat of oil and place the sprouts in a single layer, leaving space between each. Shaking the air fryer basket halfway through also helps create even crisping.

How long does it take to air fry Brussels sprouts?

Air frying Brussels sprouts at 390°F usually takes around 8-10 minutes. Smaller sprouts may cook faster, while larger ones might require a few extra minutes.

Enjoy some more air fire recipes

  • Cook Chicken Livers in Air Fryer
  • Cook Canned Biscuits in Air Fryer
  • Mini Corn Dogs in Air Fryer
  • Cook Frozen Meatballs in the Air Fryer?
  • Cook Hamburger Meat in an Air Fryer?
  • Cook Mini Tacos in Air Fryer

Filed Under: Recipes

How Long to Cook Chicken Livers in Air Fryer: Few Minutes

November 13, 2024 by bigfishtavernlagunaadmin Leave a Comment

The most important thing when cooking chicken liver in air fire is how long to cook chicken liver in air fire? Because the taste of cooking changes when the temperature is low or high. For those who are cooking in Airfire for the first time, it becomes a bit of a problem.Here’s a complete guide to my cooking process. What ingredients are needed, how to cook, how long to cook, and what is the nutritional quality. You won’t need to see anything else.

how long to cook chicken livers in air fryer

Why Air Fry Chicken Livers?

Air frying has gained popularity as a method for preparing a variety of foods, including chicken livers. The primary reason? It achieves a crispy texture without requiring deep frying in oil. Traditional fried chicken livers can be greasy and high in calories.

Air frying uses hot air to produce a similar crispy texture while using much less oil.This method reduces calories and fat, making it a healthier choice.

Cooking chicken liver is less hassle and can be cooked in an air fryer in less time. You can serve it anytime for lunch or an afternoon snack. Airfire cooking keeps the livers juicy inside while providing a crispy exterior.

Optimal Cooking Time for Chicken Livers in an Air Fryer

The best time to cook air-fried chicken livers is 12 minutes at 400 F. If you are a beginner, cook for 10 minutes first. Check after five minutes and cook for an additional five minutes.Cook for two more minutes if needed. Then you will have no fear as a first time user of Air Fare.

Ingredients

Chicken Livers: I took 400 grams of chicken liver. You can take more as you need. Definitely prefer fresh fresh liver.

Seasonings: I used all purpose seasoning, garlic powder, onion powder, salt, chili flakes, parsley, black pepper powder, and olive oil. If you’re not keen on chili, simply omit the chili flakes.

How to Make Air Fryer Chicken Livers

Follow these straightforward steps to achieve perfectly crispy air fryer chicken livers every time.

1. Clean the chicken livers and gently dry them using paper towels.

how long to cook chicken livers in air fryer

2. Make a dry rub by mixing all the spices in equal amounts in a bowl.

how long to cook chicken livers in air fryer

3. dry rub and olive oil rub on the chicken liver and fry for 10 minutes.

how long to cook chicken livers in air fryer

4. Place the marinated chicken in the air fryer, leaving a little space between them so that they don’t stick to each other.

5. Set the air fryer to 400F for 12 minutes.

how long to cook chicken livers in air fryer

6. After 6 minutes turn the livers over, and cook for another 6 minutes.

7. Now take it down and prepare to serve.

how long to cook chicken livers in air fryer

ProTips : Soak liver in milk this helps tenderize the livers and remove any bitterness. Soak it for at least an hour prior to cooking.

Homemade Gochujang Sauces

how long to cook chicken livers in air fryer

I serve fried chicken livers with homemade Gochujang sauce. This sauce enhances the flavor of air-fried chicken livers.

Ingredients

1/4 cup Gochujang (Korean chili paste)

2 tablespoons honey

1 tablespoon soy sauce

1 tablespoon rice vinegar (or apple cider vinegar)

1 tablespoon sesame oil

How to make

  1. Combine all the ingredients in a bowl and mix well.
  2. Then check the taste of the sauce with a little mouthful to see if everything is fine. If needed you can add more honey or gochujang.
  3. Then serve this sauce with air fried chicken liver.

Nutritional Benefits of Chicken Livers

Chicken livers are both delicious and nutrient-rich. They are a rich source of essential nutrients, including:

Iron: Key for red blood cell production and anemia prevention.

Vitamin A: Supports eye health and strengthens immunity.

Protein: Provides necessary building blocks for muscles and tissue repair.

Vitamin B12: Essential for maintaining nerve health and producing red blood cells.

A 100-gram serving of chicken livers contains:

Calories: 165

Protein: 25 grams

Iron: 8 milligrams (about 44% of the daily value)

Vitamin A: 13,000 IU (more than double the daily recommended intake)

Adding chicken livers to your diet can enhance your nutrient intake and contribute to better overall health.

Frequently Asked Questions

How do I know when the chicken livers cook?

The livers should be firm and no longer pink in the center. You can cut one open to check for doneness. An internal temperature of 165°F is recommended for safety.

Are chicken livers healthy?

Yes, chicken livers are highly nutritious, providing a good source of protein, iron, vitamin A, and other essential nutrients. However, they are high in cholesterol, so moderate consumption is advised.

Can I reheat chicken livers in the air fryer?

Reheating chicken livers in an air fryer is possible, and it can help restore some crispiness. Preheat the air fryer to 350°F (175°C), then cook the livers for 3–5 minutes until warmed through.

Some more air fryer recipes

  • Cook Canned Biscuits in Air Fryer
  • Mini Corn Dogs in Air Fryer
  • Can You Cook Hamburger Meat in an Air Fryer?
  • Cook Mini Tacos in Air Fryer
  • Make Crispy Rice in an Air Fryer

Filed Under: Recipes

Cook Salmon in a Convection Oven: 10 Minitue

November 12, 2024 by bigfishtavernlagunaadmin Leave a Comment

How to cook salmon in a convection oven, this process is very easy and done in very little time. Before preparing any food, we should think about its nutritional value. No cooking method should be used which destroys the nutritional value of the food. Cooking in a convection oven is a method in which the nutritional value of the food you cook remains intact. 

This method allows for a crispy exterior without the need for excessive oil or butter. Whether you prefer your salmon seasoned simply with salt and pepper or dressed up with flavorful marinades, using a convection oven can elevate your dish to restaurant-quality standards.

cook salmon in a convection oven

Cook Salmon in a Convection: Step  by Step Guide

Ingredients

Salmon filets: 4 filets, 6–8 ounces each

Olive oil or melted butter: 1–2 tablespoons

Salt: ½ teaspoon, adjust to taste.

Black pepper: ¼ teaspoon, adjust to taste.

Lemon slices (optional): 4–6 thin slices

Fresh herbs (such as dill or parsley, optional): 1–2 tablespoons, chopped

Minced garlic (optional): 1 clove

Instructions

1. Dry the water from the fish body with a tissue.

2. Then Season it with salt, pepper, garlic powder, and lemon juice.

cook salmon in a convection oven

3. Lightly fry the fish pieces on both sides with olive oil and a knob of butter in a non-stick pan on medium high heat.

cook salmon in a convection oven

4. Place the piece of fish on a sheet tray and pour the remaining frying oil over the fish.

cook salmon in a convection oven

5. Now cook in a conventional oven at 350 degrees for 10 minutes.

6. Let the salmon rest for 2-3 minutes after baking. This allows the juices to settle, making it more flavorful.

cook salmon in a convection oven

New Tips for Enhanced Flavor

Glaze Options: Before baking, glaze salmon with honey mustard or maple syrup.

Smoky Flavor: Add a pinch of smoked paprika to the seasoning.

Crispy Skin: Broil for the last 2 minutes for extra crispiness.

Sensory Aspects

Salmon steaks baked in a convection oven generally receive high ratings for appearance and color. Compared to infrared broiling, convection-baked salmon maintains better visual appeal, though both methods preserve vitamins similarly

Oven-cooked salmon, including Atlantic salmon, tends to have a firmer texture with higher hardness, chewiness, and gumminess compared to steaming or other methods. These texture changes are typically preferred, with baked salmon being rated better for firmness and chewiness.

Thermal treatments, including oven baking, enhance flavor intensity and overall acceptability. Sensory evaluations often favor baked salmon for flavor and aroma compared to poaching or microwaving, which can reduce perceived flavor quality.

While convection ovens provide even heating and a pleasing texture, superheated steam cooking methods have been noted to reduce oxidative deterioration compared to dry air ovens. This suggests potential benefits in sensory quality when using steam-assisted convection, which maintains a fresher taste and softer texture.

Benefits of Using a Convection Oven

Cooking salmon in a convection oven offers several benefits in terms of taste, texture, nutritional retention, and overall quality. Here are the key reasons:

  • Even Heat Distribution: The oven’s fan circulates air to cook food evenly, preventing uneven textures.
  • Omega-3 Retention: Gentle, even heat preserves omega-3 fatty acids, crucial for health.
  • Enhanced Flavor and Texture: Circulating air crisps the salmon’s exterior while keeping the inside moist.
  • Efficient Cooking Time: Faster than traditional ovens, convection saves time without sacrificing quality.
  • Healthier Cooking: Requires less fat, highlighting the salmon’s natural flavors and reducing calories.
  • Improved Nutrient Retention: A steam-convection oven retains more proteins and vitamins than other cooking methods.

Filed Under: Recipes

Cook Canned Biscuits in Air Fryer: Saves a Lot of Time

November 10, 2024 by bigfishtavernlagunaadmin Leave a Comment

Cook Air frying canned biscuits is a fast and simple way to enjoy warm, flaky biscuits with little effort. In a very short time it creates a golden, crispy outside while keeping the inside soft and fluffy. With just a few simple steps, you can have perfectly cooked biscuits that make a tasty snack or addition to any meal.

Cook Canned Biscuits in Air Fryer

Why Choose the Air Fryer for Canned Biscuits?

An air fryer is a fantastic option for cooking canned biscuits for a variety of reasons.First, the air fryer cooks biscuits quickly, often in about half the time it would take in a regular oven. 

Cook Canned Biscuits in Air Fryer

This is perfect for busy mornings or when you’re short on time. Another reason is the texture. The air fryer’s hot, circulating air creates a nice, crispy outside on the biscuits while keeping the inside fluffy and soft. This makes the biscuits taste homemade and fresh without much effort. 

Finally, cooking in an air fryer is simple and uses less energy than preheating a full oven. You can also avoid using extra oil, so the biscuits come out lighter. The air fryer gives you fast, delicious, and perfectly cooked biscuits every time, making it a great choice for this simple kitchen task.

Ingredients Needed to Cook Canned Biscuits

Canned Biscuits

Choose your favorite brand of canned biscuits. These are typically found in the refrigerated section of the grocery store. One can usually have enough biscuits to serve a few people.

Cook Canned Biscuits in Air Fryer

Cooking Spray or Oil

Have some cooking spray or a small amount of oil on hand to lightly grease the air fryer basket. This helps prevent the biscuits from sticking and ensures they come out golden and crispy.

Optional Toppings

Butter: For brushing on top after cooking to add a rich flavor.

Herbs or Garlic Powder: If you like, sprinkle some herbs or garlic powder on the biscuits before cooking for extra taste.

That’s it! These are the simple ingredients you need to make delicious biscuits in your air fryer.

How to Cook Canned Biscuits in Air Fryer

Preheat Your Air Fryer

Air fry the biscuits at 330°F/165°C for about 6-7 minutes. Let it heat up for about 2-3 minutes. This ensures your biscuits cook evenly.

Prepare the Biscuits: Open the can and separate the biscuits. If you want extra flavor, you can brush them with a little melted butter or sprinkle with cinnamon sugar..

Cook Canned Biscuits in Air Fryer

Place in the Air Fryer: Place the biscuits in a single layer inside the air fryer basket. Make sure they have some space around them so the hot air can circulate.If you have a small air fryer, cook the biscuits in batches.

Cook the Biscuits: Set the timer for 6-7 minutes. Check halfway through and flip the biscuits if you want them evenly browned on both sides.

Cook Canned Biscuits in Air Fryer

After 3/4 minutes, flip the biscuits and cook again for the remaining time.

Cook Canned Biscuits in Air Fryer

Serve: After cooking, take the biscuits out of the air fryer. Serve warm.Brush with melted butter and add a sprinkle of herbs or garlic powder, if desired. Serve warm.

After 3/4 minutes, flip the biscuits and cook again for the remaining time.

Benefits of Baking with an Air Fryer

Baking with an air fryer offers many advantages, boosting both convenience and health.

Reduced Cooking Time: Air fryers bake quickly due to their compact size and rapid air circulation, making them ideal for busy schedules.

Energy Efficiency: These appliances are smaller and heat up faster than traditional ovens, leading to lower energy usage and reduced bills.

Healthier Meals: Air fryers require less oil for baking, resulting in healthier, lower-fat meals without compromising taste.

Crispier Texture: They deliver a consistently crispy texture to baked goods, which is challenging to achieve in regular ovens.

Versatility: Not limited to frying, air fryers can bake a variety of items, from muffins to quiches, making them a versatile kitchen tool.

Convenience: Easy to use and clean, air fryers feature non-stick surfaces that simplify kitchen chores.

Reduced Kitchen Heat: They emit less heat than ovens, keeping kitchens cooler.

Safety: Equipped with automatic shut-offs and cool exteriors, air fryers are a safer option, especially in homes with children.

Pairing Drinks with Air-Fried Biscuits

Pairing drinks with air-fried biscuits elevates their flavors, turning each bite and sip into a delightful experience. Choosing the right drink for each biscuit style adds just the right balance, whether it’s a sweet morning biscuit or a savory snack.

Pairing Drinks with Air-Fried Biscuits

Cooking canned biscuits in an air fryer is quick and easy, and pairing them with the right drink can make your snack even more delightful. If you’re starting your day with these warm, crispy biscuits, a hot cup of coffee is a perfect match.

The robust flavor of coffee complements the buttery biscuits, making for a satisfying breakfast. For a midday snack, cold milk is a great choice as its creamy texture goes well with the crunchy exterior of the biscuits.

 If you’re in the mood for something cool and refreshing, iced tea enhances the experience with its mild bitterness, balancing the richness of the biscuits.

Best Practices for Storage and Reheating

When storing air-fried biscuits, let them cool completely and then place them in an airtight container. They can stay fresh at room temperature for up to two days or in the refrigerator for up to a week.

 For reheating, pop the biscuits back in the air fryer at 350 degrees for about 2 to 3 minutes until they’re warm and crispy again. This method helps maintain their delicious texture.

Fun Variations Kids Will Love

Cooking canned biscuits in an air fryer is a fun and easy way to treat kids to delicious snacks. A simple way to add flavor is by sprinkling cheese on top of the biscuits before baking. As the biscuits bake, the cheese melts and creates a cheesy, gooey top that kids absolutely love. 

Another great idea is to mix a little cinnamon and sugar and sprinkle it over the biscuits before they go into the air fryer. This adds a sweet and spicy flavor that makes the biscuits taste like a special dessert. You can also make mini pizza biscuits by spreading a bit of pizza sauce on each biscuit and topping them with shredded mozzarella and mini pepperonis before air frying.

Pairing Drinks with Air-Fried Biscuits

 The biscuits come out crispy with a pizza-flavored topping that is sure to be a hit. For a savory touch, brush the biscuits with garlic butter and sprinkle dried herbs on top before baking. This variation gives a burst of flavor that makes the simple biscuits taste like garlic bread.

Each of these variations is quick to prepare and cook, making them perfect for busy parents who want to give their kids a tasty treat.

Frequently Asked Questions

Can I cook canned biscuits in my air fryer?

Canned biscuits are easy to cook in an air fryer. It’s a fast and convenient way to get warm, fluffy biscuits with a crispy, golden crust.

Can I make gluten-free canned biscuits in the air fryer?

Yes, gluten-free canned biscuits can be cooked in the air fryer just like regular biscuits. The cooking time and temperature will generally be the same, but check them halfway through, as gluten-free biscuits may cook a bit differently and need slight adjustments.

What is the best way to cook canned biscuits?

The best way to cook canned biscuits in an air fryer is by setting the temperature to 330°F/165°C for about 6-7 minutes. A few minutes of preheating the air fryer ensures a crispy, even finish.

Are biscuits in the air fryer good?

Yes, biscuits in the air fryer are delicious! The air fryer gives the biscuits a golden, crispy outside while keeping the inside tender and fluffy.

Which brand of Canned Biscuits is the best?

Pillsbury is often considered the best brand for canned biscuits, known for its soft, flaky texture and variety of options.

Some more air fryer recipes

Mini Corn Dogs in Air Fryer

Cook Frozen Meatballs in the Air Fryer

Cook Hamburger Meat in an Air Fryer

Cook Mini Tacos in Air Fryer

How Long to Cook Brie in an Air Fryer

Make Crispy Rice in an Air Fryer

Filed Under: Recipes

  • « Go to Previous Page
  • Page 1
  • Page 2
  • Page 3
  • Page 4
  • Page 5
  • Go to Next Page »

Primary Sidebar

Recent Posts

  • Can You Deep Fry in a Nonstick Pan? My Surprising Results
  • Clay Pot vs Dutch Oven: Which One Right for You?
  • Are Dutch Ovens Non Toxic? All You Need to Know
  • Is Low Specific Heat Capacity Good for Frying Pans​
  • Smeg Kettle vs Mini Kettle: Which One Fits Your Style?

Copyright © 2024 bigfishtavernlaguna.com. All right reserved.