• Skip to primary navigation
  • Skip to main content
  • Skip to primary sidebar
  • About Us
  • Affiliate Disclosure
  • Contact us
  • Cookie Privacy Policy
  • Privacy Policy
  • Sample Page
  • Terms of Use

Kitchen Guide

  • Appliance Reviews
  • Bakeware
  • Buying Guides
  • Product Comparisons
  • Recipes
  • Essentials
  • Cleaning

Recipes

Mini Corn Dogs in Air Fryer – Crispy and Kid-Friendly

November 9, 2024 by bigfishtavernlagunaadmin Leave a Comment

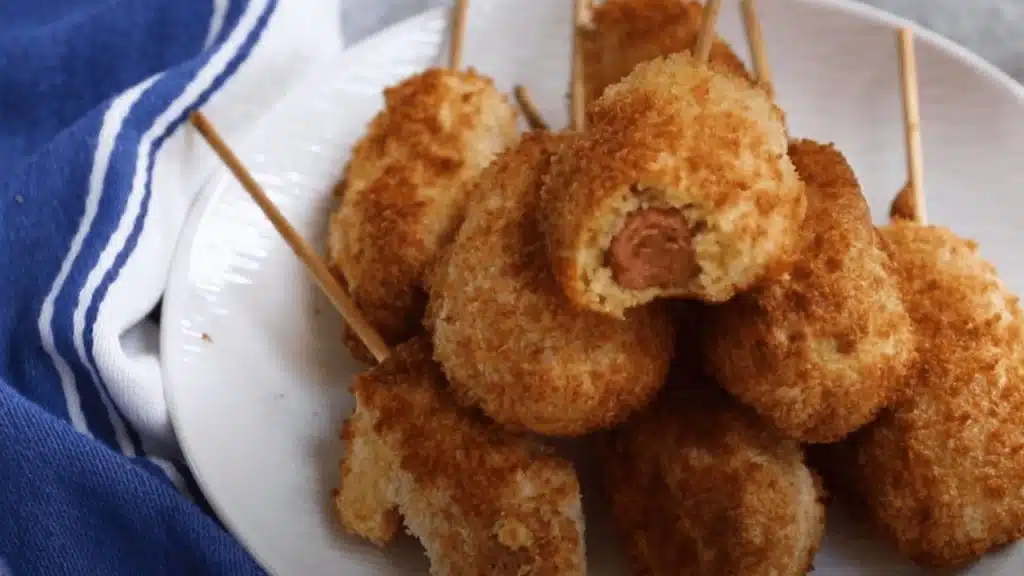
If you’re craving a fun and tasty snack that’s easy to make and can be enjoyed by all ages, mini corn dogs are a perfect choice! Air frying mini corn dogs gives you a delicious outcome that’s also healthier than the traditional deep-fried version. Here’s how to whip up some mini corn dogs in your air fryer, what you’ll need, and some fantastic ideas for dipping sauces and sides.

Mini Corn Dogs in Air Fryer

It’s enjoyed by both kids and adults alike .You can present Mini Corn Dogs on a festive platter or in a casual setting, depending on the occasion.There is no fear of spoiling the leftovers after eating. Put Mini Corn Dog leftovers in an airtight container and keep them in the fridge for up to three days. To maintain crispiness, reheat them in the air fryer at 375°F for 8 minutes.

Mini Corn Dogs in Air Fryer

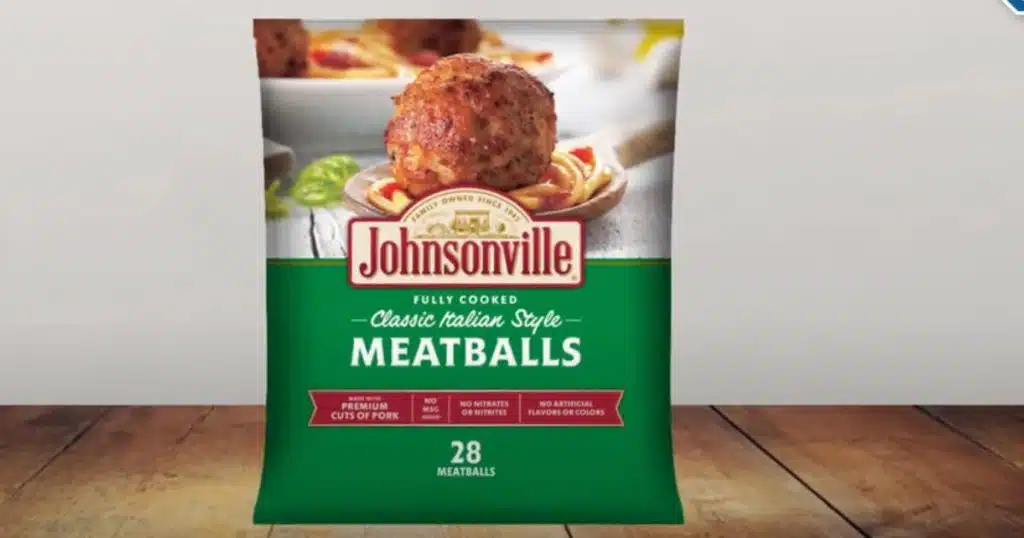
Air frying frozen mini corn dogs gives them a golden, crunchy texture on the outside while keeping the inside juicy, without needing any added oil.

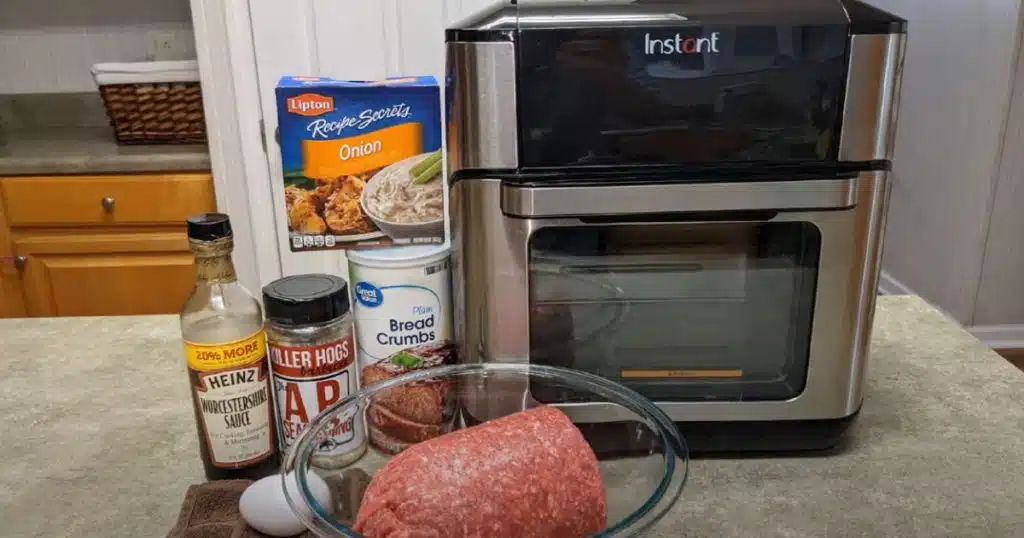
Ingredients Needed to Make Mini Corn Dogs

  • 1 cup of cornmeal
  • 1 cup of all-purpose flour
  • 1 tablespoon of sugar
  • 1 tablespoon of baking powder
  • 1/2 teaspoon of salt
  • 1 cup of buttermilk (or regular milk with a splash of vinegar)
  • 1 large egg
  • 1 teaspoon of mustard (optional)
  • 10-12 hot dogs (mini or regular size)
  • Wooden skewers or popsicle sticks

For the Coating

  • Cooking spray or olive oil

How to Make  Homemade Crispy Air Fryer Mini Corn Dogs

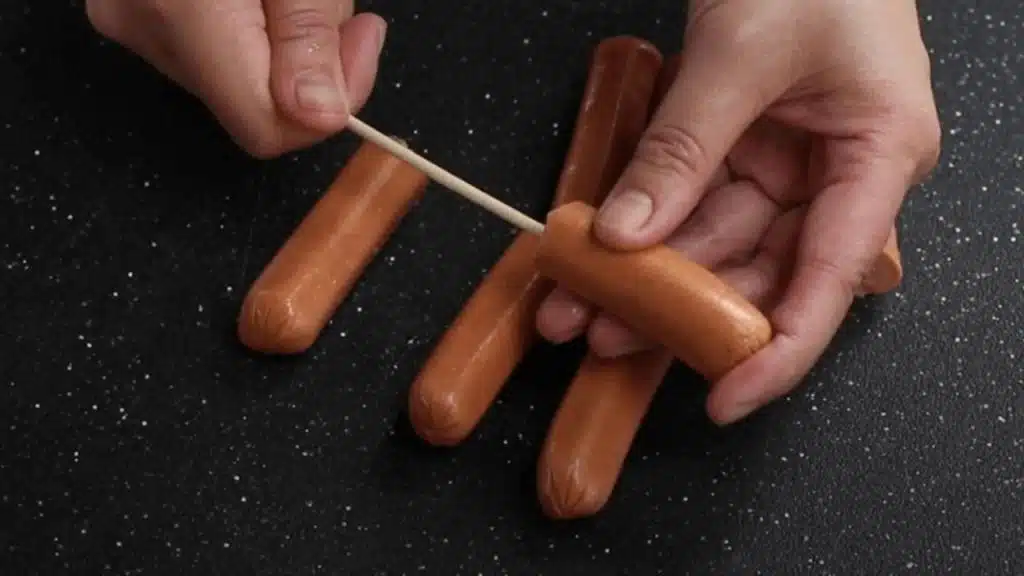
1. cut the hot dogs into halves.

Mini Corn Dogs in Air Fryer

2. Skewer the mini hot dogs on wooden sticks.

Mini Corn Dogs in Air Fryer

3. Break two eggs in a bowl and beat them well. Then add buttermilk to the egg batter, and mix well again.

4. In a separate bowl, mix cornmeal, all purpose flour, baking powder, baking soda, sugar, and salt well.

5. Add the buttermilk mixture into the dry ingredients, Then mix well again.

Mini Corn Dogs in Air Fryer

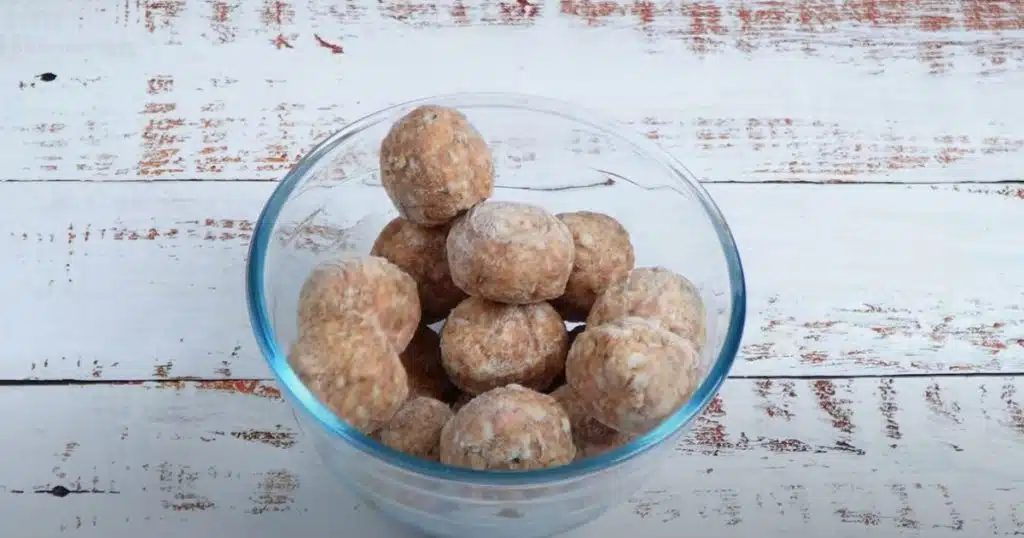
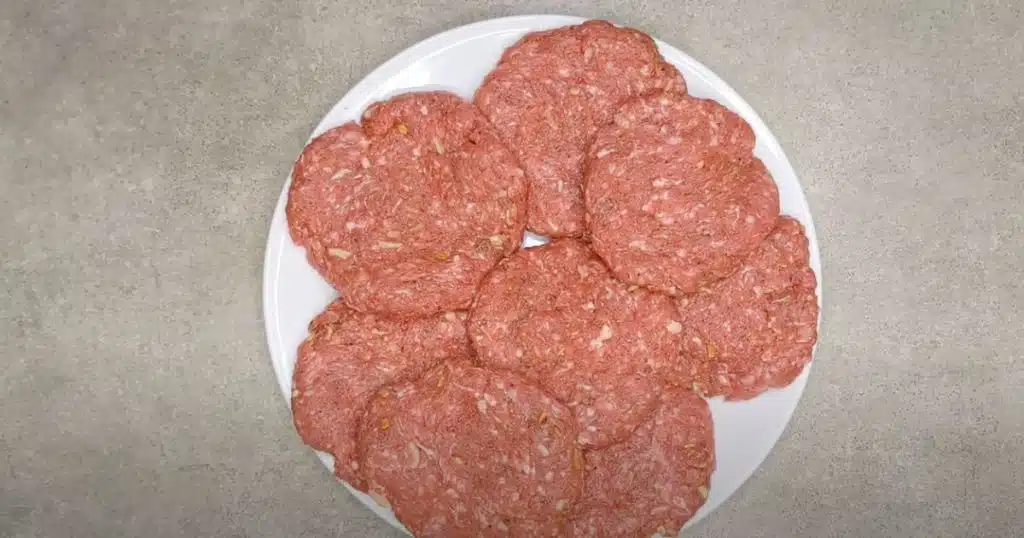
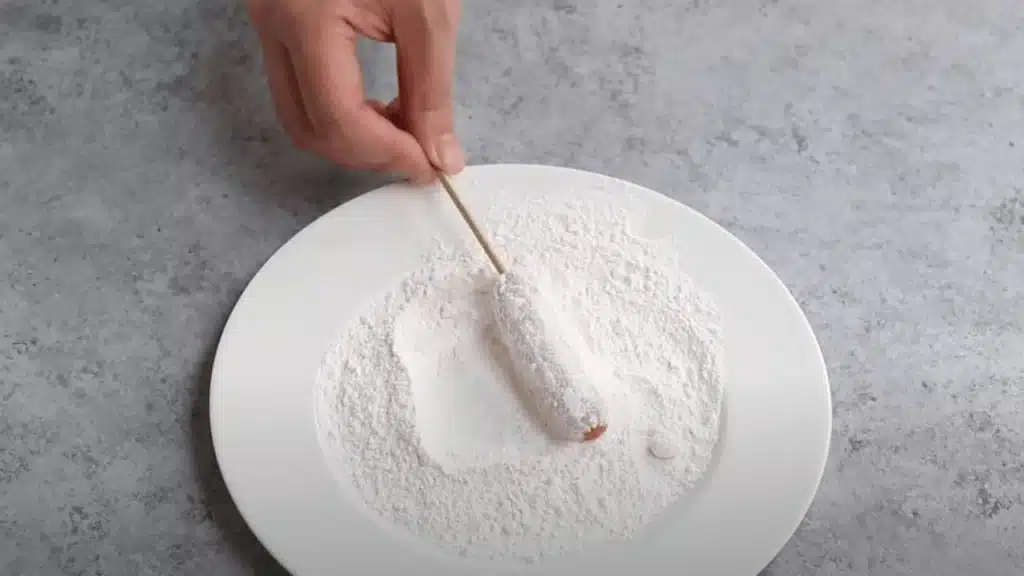
6. Take some flour on a separate plate and roll the hot dogs in flour.

Mini Corn Dogs in Air Fryer

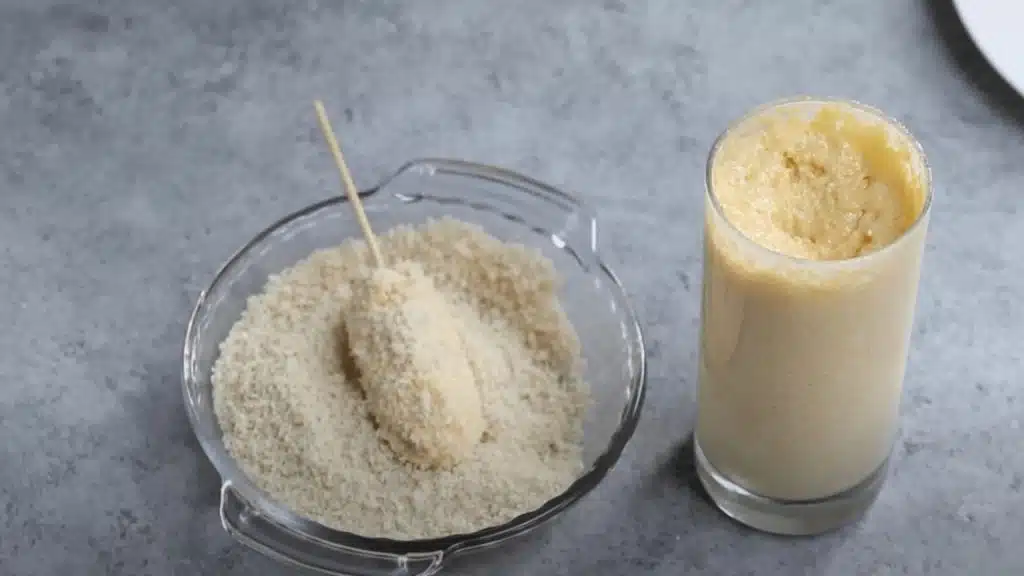
7. one hot dog stick each, dip into the butter. Cover with breadcrumbs.

Mini Corn Dogs in Air Fryer

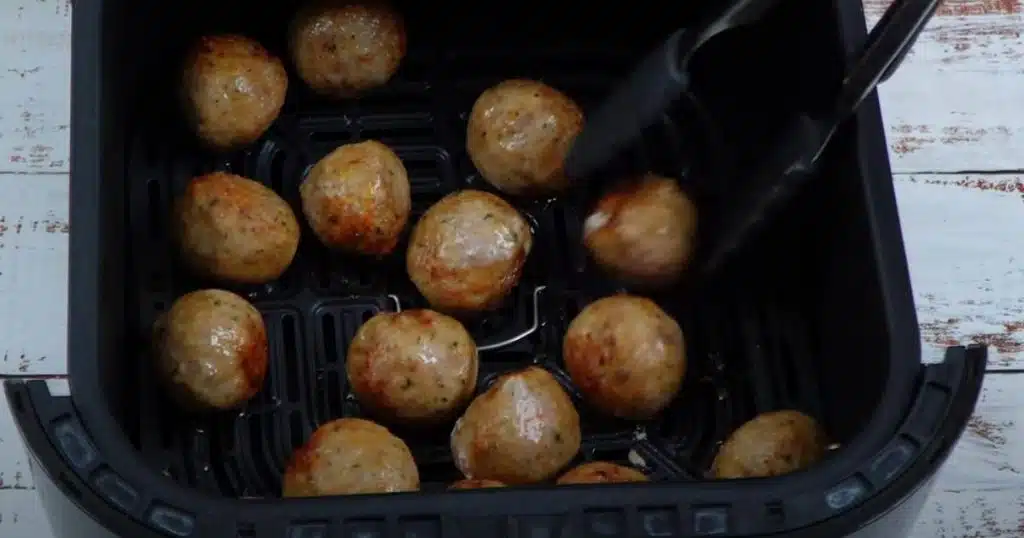
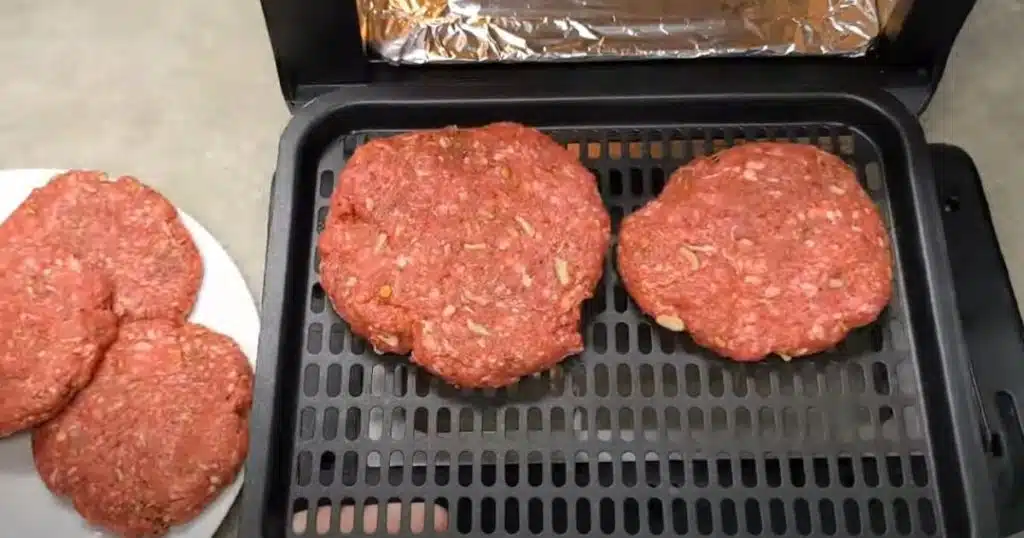
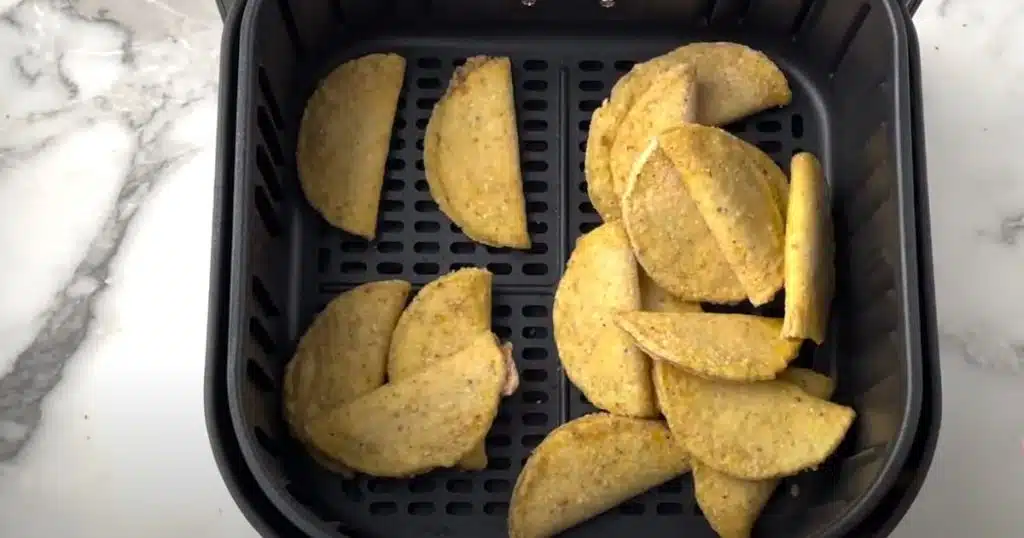
8. Spray oil cooking on an Air fryer tray. Then arrange the mini corn dogs by leaving some space. Then spray again.

Mini Corn Dogs in Air Fryer

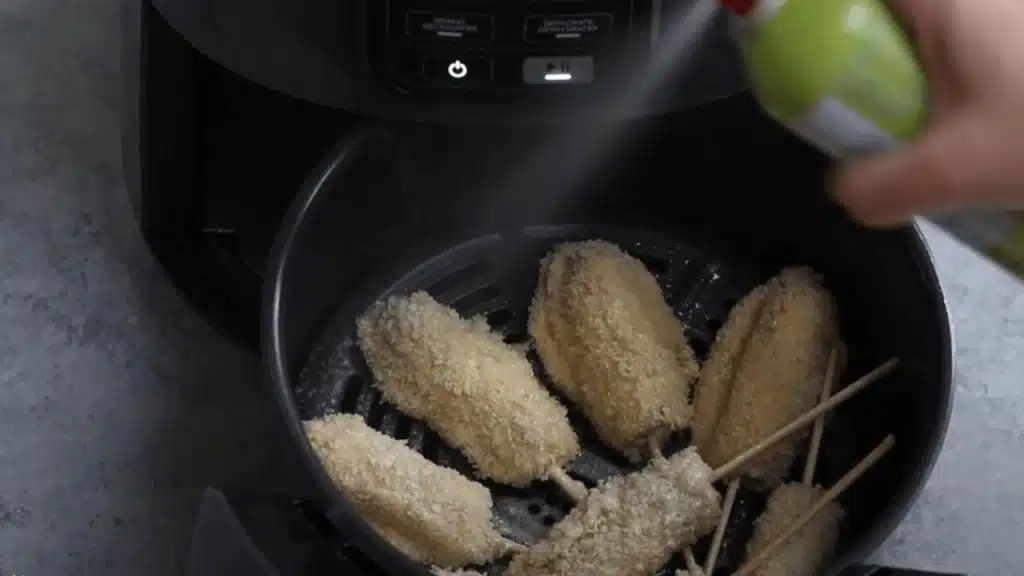
9. Cook At 375 F- Degree.Cook for 8 Minutes, and flip after 4 minutes.

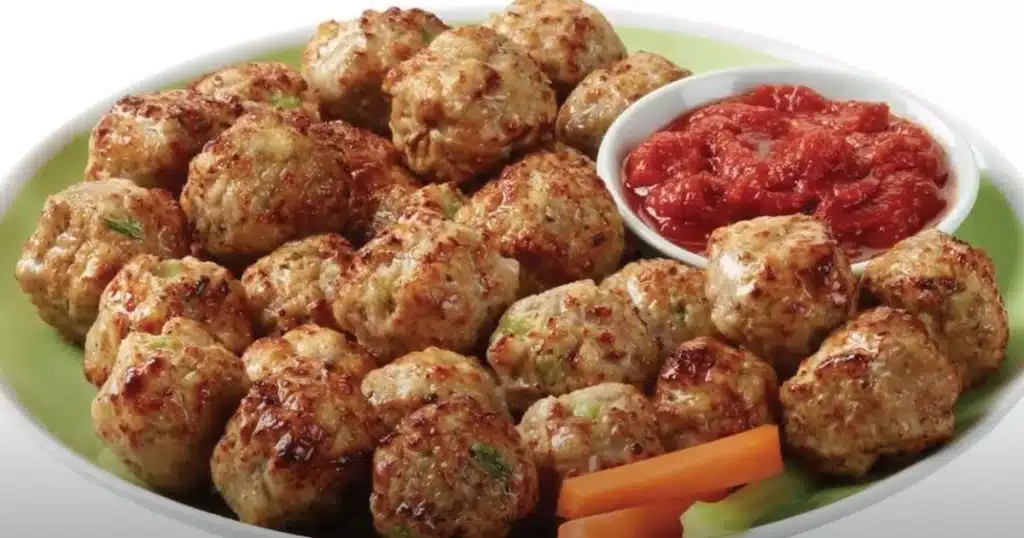
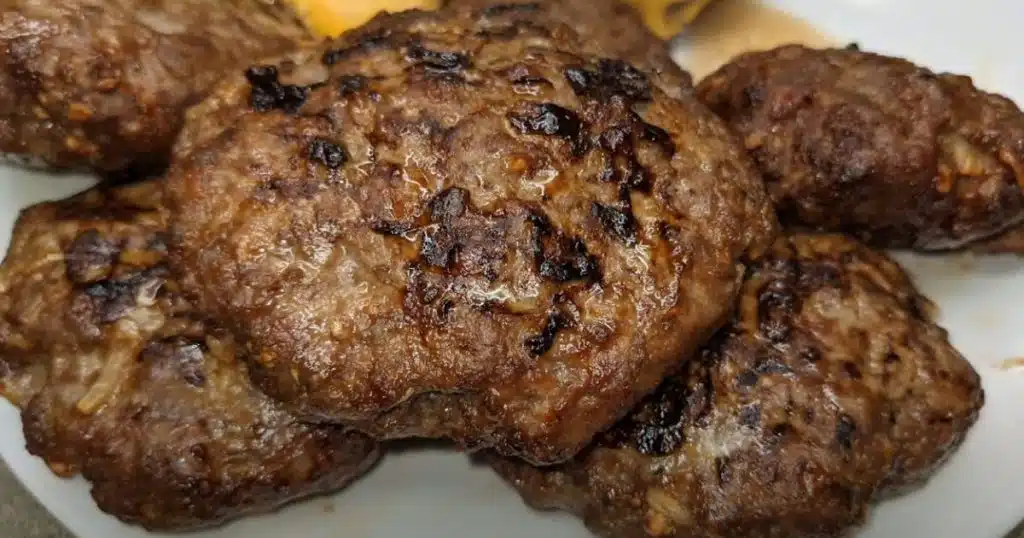
10.Then Ready to serve.

Dipping Sauces for Mini Corn Dogs

Mini corn dogs are a fun and tasty snack that pair well with a variety of dipping sauces. Here are some great options to enhance their flavor:

Mini Corn Dogs in Air Fryer

Classic Ketchup and Mustard: You can’t go wrong with these traditional condiments. Ketchup offers a sweet tomato flavor, while mustard adds a tangy kick.

Honey Mustard: This is a sweeter alternative to plain mustard and adds a nice depth of flavor to the corn dogs.

BBQ Sauce: For a smoky touch, barbecue sauce is a fantastic choice. You can go with a classic sweet BBQ or something with a bit more heat if you like spice.

Ranch Dressing: Creamy and tangy, ranch dressing is a favorite for its cool and refreshing taste that contrasts nicely with the hot corn dogs.

Cheese Sauce: Warm cheese sauce, especially a sharp cheddar or a spicy nacho cheese, makes a decadent and satisfying dip.

Buffalo Sauce: If you like a bit of heat, buffalo sauce offers a spicy, buttery flavor that’s bold and mouth-watering.

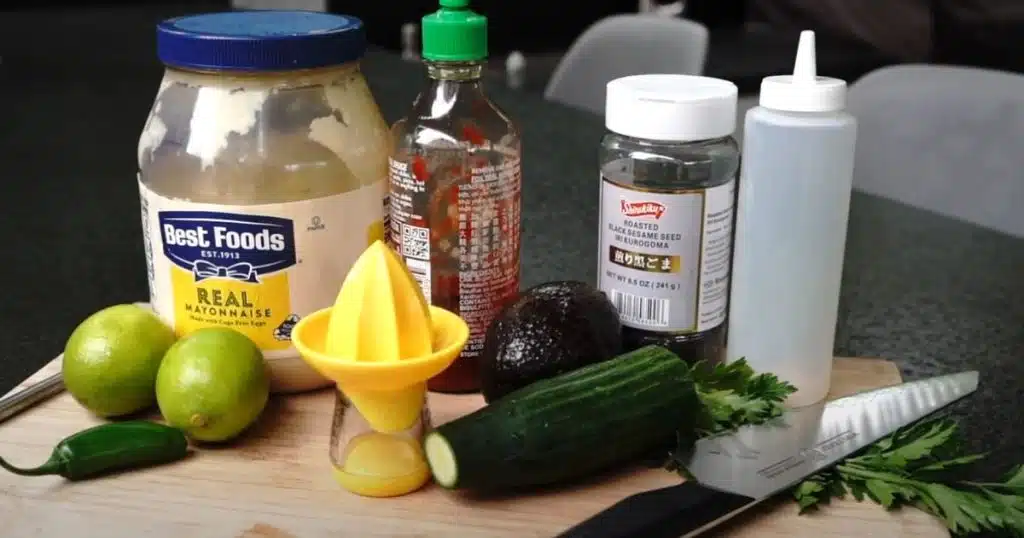
Sriracha Mayo: Mixing Sriracha with mayonnaise creates a creamy dip with just the right amount of heat and a hint of garlic.

Chipotle Mayo: For a smoky, spicy kick, chipotle mayo is a great choice. It pairs well with the sweet cornbread coating.

Health and Nutrition Benefits of Air Frying

Air frying is a popular cooking method that offers several health and nutrition benefits:

Mini Corn Dogs in Air Fryer

Reduced Fat Content: Air frying is a healthier cooking method that uses a lot less oil than traditional frying. Instead of soaking foods in lots of oil, air frying uses just a little—about a tablespoon or less. This slashes the fat content of foods by up to 80%, cuts down on calories, and can be better for your heart.

Lower Risk of Acrylamide Formation: This method also lowers the risk of creating acrylamide, a harmful chemical that can form when foods are cooked at high temperatures. Air frying keeps acrylamide levels lower than regular frying, which can help lower your risk of cancer and other health issues.

Retention of Nutrients: Another benefit of air frying is that it helps keep the good stuff in your food. Unlike deep frying, which can zap nutrients because of the high heat and lots of oil, air frying helps preserve vitamins and minerals in things like vegetables.

Weight Management: Air frying can also aid in weight management. Foods cooked this way have fewer calories, making it easier to fit them into a weight loss or healthy eating plan.

Improved Safety: Safety is another big plus. Traditional deep frying involves handling lots of hot oil, which can be dangerous. Air frying is much safer, with less risk of oil splatters and burns.

Better Texture and Flavor: Finally, lots of people love the way air-fried foods taste. They have a crispy outside and a moist, tender inside, without any hint of greasiness. This can make healthy eating both more enjoyable and rewarding.

Frequently Asked Questions

How long do I cook mini corn dogs in an air fryer?

Cook mini corn dogs in an air fryer at 375°F (190°C) for about 8-10 minutes, or until they’re golden brown and heated through. Shake the basket midway through cooking to achieve even results.

Do I need to preheat the air fryer before cooking mini corn dogs?

While not always necessary, preheating the air fryer for 3-5 minutes at 375°F (190°C) can help the mini corn dogs cook more evenly and become crispier.

Do I need to shake the air fryer basket while cooking mini corn dogs?

Yes, shaking the basket halfway through the cooking time helps ensure that the mini corn dogs cook evenly and prevents any sticking or uneven browning.

Are air-fried mini corn dogs healthier than deep-fried ones?

Air-fried mini corn dogs use little to no oil, making them a healthier alternative to deep-fried corn dogs, which are typically cooked in a lot of oil.

Some More Air Fryer Recipes

  • Cook Frozen Meatballs in the Air Fryer
  • Cook Hamburger Meat in an Air Fryer
  • Cook Mini Tacos in Air Fryer
  • Cook Brie in an Air Fryer
  • Crispy Rice in an Air Fryer

Filed Under: Recipes

How Long to Cook Frozen Meatballs in the Air Fryer?

November 6, 2024 by bigfishtavernlagunaadmin Leave a Comment

If you’ve ever wondered, “How long to cook frozen meatballs in the air fryer?”, you’re in the right place! Air fryers are a quick and easy way to cook delicious, crispy meatballs right from frozen without needing extra oil. This guide covers everything you need to know to achieve perfectly cooked frozen meatballs every time.

how long to cook frozen meatballs in the air fryer

Why Cook Frozen Meatballs in an Air Fryer?

The air fryer rapidly circulates hot air to cook foods quickly and evenly.This method is particularly suitable for frozen foods, like meatballs, as it can achieve a crispy outer layer while cooking the inside thoroughly in just minutes. Compared to traditional baking or frying, using an air fryer for frozen meatballs:

  • Cuts cooking time in half
  • Creates less mess, with minimal oil needed
  • Preserves flavor and moisture, preventing dryness

How Long to Cook Frozen Meatballs in the Air Fryer?

how long to cook frozen meatballs in the air fryer

For best results, cook frozen meatballs in an air fryer at 380°F (193°C) for 10-12 minutes. Here’s a step-by-step guide to getting perfectly cooked meatballs every time.

Steps to Cook Frozen Meatballs

Preheat the Air Fryer: Set to 350°F (175°C).

Arrange Meatballs: Arrange frozen meatballs in a single layer in the basket, leaving space between each for even cooking.

how long to cook frozen meatballs in the air fryer

Set Timer: Cook for 10-12 minutes.

  • Small meatballs: 8-10 minutes
  • Medium meatballs: 10-12 minutes
  • Large meatballs: 12-15 minutes

Flip Halfway: Flip the meatballs around the 5-6 minute mark for even browning.


Check for Doneness: Ensure the meatballs are hot and cooked through; the internal temperature should be at least 165°F (74°C).

Tips for best results

  • Don’t overcrowd the air fryer for best results.
  • For extra crispiness, spray the meatballs lightly with cooking spray before cooking.
  • Toss in sauce after cooking to keep them crispy.

Consumer Reports Best Frozen Meatballs

Consumer Reports has evaluated various frozen meals, including meatballs, to identify options that are both nutritious and flavorful.  

how long to cook frozen meatballs in the air fryer

Best meatballs brand name

  • Mulay’s
  • Mom made Fj
  • compleats
  • Devault
  • Mom made gv
  • Johnsonville

here are some general recommendations for selecting high-quality frozen meatballs:

  • Check Nutrition Labels: Opt for meatballs with lower sodium and saturated fat content.
  • Look for Quality Ingredients: Choose products made from whole foods with minimal additives.
  • Consider Taste and Texture: Select meatballs that have been rated favorably for flavor and consistency.

For detailed reviews and specific product recommendations, you can refer to Consumer Reports’ frozen food ratings and reviews.

Filed Under: Recipes

Can You Cook Hamburger Meat in an Air Fryer? Very Easy

November 6, 2024 by bigfishtavernlagunaadmin Leave a Comment

Absolutely, you can cook hamburger meat in an air fryer, and it’s a fast, efficient way to make juicy, flavorful burgers with minimal fuss. Air fryers use hot air circulation to cook food evenly, creating a perfectly crispy exterior and tender interior in minutes. This method requires little to no oil, making it a healthier option than traditional frying while still delivering delicious results. Whether you’re starting with fresh or frozen patties, cooking hamburger meat in an air fryer is ideal for busy days or when you’re craving a quick, satisfying meal.

Can you cook hamburger meat in an air fryer

The Easiest Way to Make Cooking Hamburger Meat in an Air Fryer

ways to make delicious, juicy burgers at home. All it takes is a few simple steps: start by preheating your air fryer to 375°F, then season the hamburger patties with salt, pepper, or your favorite spices. 

Lay the patties in a single layer in the air fryer basket, ensuring they do not overlap. Cook for 8-10 minutes, flipping halfway through for even cooking. The air fryer’s rapid hot air circulation ensures a perfectly browned, crispy exterior while locking in the juices.) With minimal oil needed and quick cleanup, this method is perfect for a fast, healthy burger fix anytime!

How To Cooking Hamburger Meat in an Air Fryer

Cooking hamburger meat in an air fryer is a quick and easy way to get a juicy, flavorful burger without the mess of stovetop cooking. Here’s a step-by-step guide to making perfect air fryer hamburgers. 

Can you cook hamburger meat in an air fryer

Ingredients

  • Ground beef (80/20 lean-to-fat ratio works best)
  • Salt and pepper (or other preferred seasonings)
  • Optional: Garlic powder, onion powder, or other favorite seasonings
  • Buns and toppings of your choice, such as lettuce, tomato, cheese, and more.

Instructions

Preheat the Air Fryer: Preheat the air fryer to 375°F (190°C) for 3-5 minutes.

Prepare the Meat

Place the ground beef in a mixing bowl.
Season with salt and pepper, and if you like, add a sprinkle of garlic powder, onion powder, or a dash of Worcestershire sauce for extra flavor.

Can you cook hamburger meat in an air fryer

Form the Patties
Divide the meat into equal portions, with each portion weighing approximately 4 ounces for a quarter-pound burger.
Gently shape each portion into a round patty around ¾ inch thick. Press your thumb gently into the center of each patty to create a small indent, ensuring even cooking.

Can you cook hamburger meat in an air fryer

Preheat the Grill or Skillet Set a grill or large skillet over medium-high heat to preheat. Lightly oil the grates or skillet to keep the patties from sticking.

Set the patties onto the hot grill or skillet to start cooking. Cook for 4-5 minutes on one side without moving them.Turn the patties over and cook for an additional 4-5 minutes for medium doneness, or adjust the time to suit your preferred level of doneness.

For cheeseburgers, you can optionally place a slice of cheese on each patty during the final minute of cooking.Cover for a short moment to let the cheese melt.

Can you cook hamburger meat in an air fryer

Assemble the Burgers Toast the buns lightly on the grill or in the skillet if you prefer. Set each patty on a bun and add your preferred toppings, such as lettuce, tomato, onions, and pickles.

Serve

Enjoy your homemade hamburgers hot off the grill or skillet!
Can you cook hamburger meat in an air fryer

Air Fryer Burger Secrets That Will Make Your Mouth Water

Cooking burgers in an air fryer is already a fantastic way to get juicy, flavorful results with less mess and less oil. But there are a few secrets to truly mastering the art of an air fryer burger. These tips will elevate your homemade burgers and keep them irresistibly juicy and packed with flavor. Here’s how to make air fryer burgers that will leave your mouth watering every time.

  • Choose the Right Meat for Maximum Juiciness
  • Season Generously (And Don’t Forget the Inside)
  • Make a Thumb Indentation in the Center
  • Preheat the Air Fryer for Optimal Texture
  • Avoid Overcrowding for Even Cooking
  • Flip Halfway Through for Uniform Browning
  • Use a Meat Thermometer for Perfect Doneness
  • Add Cheese at the End for Melt Perfection
  • Let the Burgers Rest
  • Toast the Buns for Added Flavor and Texture
  • Customize with Unique Toppings and Sauces

Tips for Perfect Air Fryer Hamburgers

  • Avoid pressing down on the patties during cooking, as this can squeeze out the juices and dry out the burger.
  • Experimens seasonings,  For added flavor, mix Worcestershire sauce, garlic powder, or smoked paprika into the ground beef before forming the patties.
  • Cook in batches if necessary to avoid overcrowding, as this allows the air to circulate evenly around each patty.

Enjoy Your Air Fryer Burger!

Cooking hamburger meat in an air fryer is a foolproof way to enjoy a tasty, healthier burger at home with minimal effort and cleanup.

Filed Under: Recipes

How to Cook Mini Tacos in Air Fryer: Unleash Flavorful Fun!

November 5, 2024 by bigfishtavernlagunaadmin Leave a Comment

Making mini tacos in an air fryer is a quick, healthier way to enjoy this popular snack. This guide covers everything you need to know to cook perfect mini tacos in your air fryer, whether they’re frozen or homemade, as well as tips on making them healthier, ideas for creative toppings, and detailed storage and reheating instructions. By the end, you’ll be able to serve up delicious, crispy mini tacos that are full of flavor and way lighter than traditional fried tacos.

How to Cook Mini Tacos in Air Fryer

Why Choose an Air Fryer for Mini Tacos?

Choosing an air fryer for mini tacos offers a quick, healthier way to enjoy this delicious snack. Instead of frying in oil, the air fryer uses hot air to create that crispy shell we all love, without the extra fat.It’s very simple to use and saves cooking time, making it perfect for hectic days.

 You can also customize your tacos with different fillings and cook them all at once. Additionally, cleanup is effortless because there’s no greasy mess.With an air fryer, you’ll get tasty, crispy mini tacos without the guilt of traditional frying methods.

Homemade Mini Tacos Recipe: How to Make Them from Scratch

Making homemade mini tacos in the air fryer gives you complete control over ingredients and flavors, plus they taste incredibly fresh.

Ingredients

  • Small corn or flour tortillas
  • Your choice of protein: ground beef, chicken, turkey, or a plant-based protein
  • Taco seasoning
  • Shredded cheese (cheddar, Mexican blend, or your favorite)
  • Optional fillings: diced onions, peppers, black beans, or corn

Instructions

  1. Prepare the Filling: In a skillet, cook your protein over medium heat until fully cooked. Stir in taco seasoning to taste.
  2. Assemble the Tacos: Spoon a small amount of the filling and cheese into each tortilla, fold in half, and press down slightly to keep them closed.
  3. Preheat the Air Fryer: Set it to 400°F (200°C).
  4. Arrange in the Basket: Place the mini tacos in a single layer in the air fryer basket, being careful not to overcrowd.
  5. Cook: Air fry for 5-8 minutes, flipping halfway, until golden and crispy.
  6. Serve: Add your favorite toppings and enjoy!

Detailed Nutritional Information & Health Benefits

How to Cook Mini Tacos in Air Fryer

Air-fried mini tacos are a lighter alternative to deep-fried tacos. Here’s how air frying makes a difference nutritionally:

  • Reduced Calories: By cutting out the need for excess oil, air frying lowers the calorie count. For example, air-fried mini tacos can contain up to 30-40% fewer calories than fried versions.
  • Lower Fat Content: Traditional frying soaks food in oil, increasing fat content, whereas air frying uses minimal or no added oil, which helps to reduce fat by up to 70-80%.
  • Controlled Ingredients: Making mini tacos at home allows you to choose whole, high-quality ingredients and avoid additives or preservatives often found in frozen options.

Basic Nutritional Info per Air-Fried Mini Taco
(Approximate values for one taco with beef and cheese filling, without toppings)

  • Calories: 90-120
  • Protein: 4-6g
  • Carbohydrates: 8-10g
  • Fat: 3-5g

Tips to Make Mini Tacos Healthier

  • Use Whole-Wheat or Low-Carb Tortillas: They increase fiber content and lower simple carbs.
  • Lean Protein: Opt for lean ground turkey, chicken, or plant-based protein to cut down on saturated fat.
  • Low-Fat Cheese: Use reduced-fat cheese or skip the cheese entirely to save on fat and calories.
  • Add Vegetables: Diced bell peppers, onions, or zucchini are great add-ins for extra vitamins and fiber.

The Best Way to Cook Frozen Mini Tacos in an Air Fryer

How to Cook Mini Tacos in Air Fryer

Ingredients You’ll Need

  • Frozen mini tacos (any brand or flavor)
  • Cooking spray or a light mist of oil (optional, for added crispiness)
  • Optional toppings and dips

Step-by-Step Cooking Instructions

  • Preheat: Preheat the air fryer to 400°F (200°C) for 2-3 minutes before cooking.
  • Arrange Tacos: Place the frozen mini tacos in a single layer inside the air fryer basket.
  • Optional Oil: Lightly spray with oil for extra crispiness.
  • Cook: Air fry for 5-7 minutes, shaking or flipping after 3 minutes.
  • Check Doneness: Tacos should be golden and crispy. Add 1-2 minutes if needed.
  • Serve: Let them cool briefly, then enjoy with dips and toppings!

Special Storage & Reheating Tips for Maintaining Crispness

Leftover mini tacos can be just as tasty as freshly cooked ones if stored and reheated properly. Here’s how to maintain that ideal crispy texture:

Storing Leftovers: Place cooled mini tacos in a sealed container and refrigerate for up to 3 days.

Reheating: Reheat the tacos in the air fryer at 350°F for 2-3 minutes to maintain their crispiness. Steer clear of using the microwave, as it may cause the tacos to become soggy.

Freezing Homemade Mini Tacos: Arrange the assembled mini tacos in a single layer on a baking sheet to freeze. After freezing, move them to a freezer-safe bag. Air fry directly from frozen at 400°F for 6-8 minutes.

Air Fryer Settings for Different Types of Mini Tacos

Different types of fillings may require slight adjustments in cooking time or temperature to get the perfect texture. Here’s a quick guide:

How to Cook Mini Tacos in Air Fryer
  • Chicken Mini Tacos: 400°F for 6-7 minutes. Check that the filling reaches 165°F for safe eating.
  • Beef Mini Tacos: 400°F for 5-6 minutes. Pre-cooked beef will warm up and crisp quickly.
  • Veggie or Plant-Based Tacos: 380°F for 5-7 minutes. Vegetables and plant-based proteins cook fast, so keep a close watch.
  • Homemade Mini Tacos: 400°F for 5-8 minutes, depending on the thickness of the tortilla and filling.

Air Fryer Model Tips

  • Basket Style: Cook in a single layer and shake halfway for even crisping.
  • Toaster Oven Style: These may cook faster due to the closer heating element. Reduce time by 1-2 minutes and keep a close eye on them.

Topping Ideas to Elevate Your Mini Tacos

Take your mini tacos to the next level with these creative topping ideas:

Mexican Street Corn Topping: Add grilled corn, cotija cheese, and a sprinkle of chili powder.

Loaded Nacho Style: Melted cheese, diced tomatoes, jalapeños, and green onions.

Breakfast Tacos: For a breakfast twist, add scrambled eggs, a sprinkle of cheese, and some salsa.

Classic Toppings: Guacamole, sour cream, pico de gallo, and cilantro.

Frequently Asked Questions

Do I need to preheat the air fryer before cooking? 

Yes, preheating the air fryer is recommended before cooking. It helps the mini tacos cook more evenly and ensures they develop a crispy texture. Preheating for about 2-3 minutes at the desired temperature, typically 400°F (200°C), is ideal for most air fryer recipes.

Do I need extra oil to cook frozen mini tacos?

No, you don’t need extra oil to cook frozen mini tacos. They will crisp up on their own in the air fryer. However, if you prefer extra crunch, you can lightly spray them with cooking oil, but this step is completely optional.

Do you grease the air fryer basket for mini tacos?

No, greasing the air fryer basket isn’t necessary for cooking mini tacos. However, if you’re concerned about sticking, you can lightly spray the basket with a bit of cooking oil. Most frozen mini tacos have enough oil to prevent sticking on their own.

How long does it take to cook frozen mini tacos in the air fryer?

 It takes about 5-7 minutes to cook frozen mini tacos in the air fryer at 400°F (200°C). For even cooking, flip them or shake the basket halfway through.

How do you crisp tacos in the air fryer?

To crisp tacos in the air fryer, set the temperature to 400°F (200°C) and cook them for 5-7 minutes. To ensure even cooking and crispiness on all sides, flip the tacos or shake the basket halfway through.

Can I add seasoning to frozen tacos?

You can definitely add seasoning to frozen tacos. Sprinkle spices like cumin, chili powder, or taco seasoning before reheating to enhance flavor.

Do I need to flip mini tacos when air frying? 

Flipping mini tacos when air frying isn’t necessary, but it can help ensure even crisping. Gently flip them halfway through the cooking time to achieve a uniform texture.

Filed Under: Recipes

How Long to Cook Brie in an Air Fryer: Find the Ideal Time

November 5, 2024 by bigfishtavernlagunaadmin Leave a Comment

Have you ever experienced the rich, creamy delight of perfectly cooked brie, right from the comfort of your own kitchen? Whether you’re a seasoned brie enthusiast or just exploring quick appetizer options, an air fryer can transform this classic cheese into a gooey, delicious treat in minutes. Today, let’s answer a popular culinary question: How long should you cook brie in an air fryer? Perfect for those who love a sophisticated snack without the fuss, this guide will show you the quickest way to achieve that irresistibly smooth melt every cheese lover dreams about. So, grab your air fryer and let’s focus on the simple steps .

How Long to Cook Brie in an Air Fryer: Find the Ideal Time

What You Need to Know Before Cooking Brie in an Air Fryer

Cooking brie in an air fryer is incredibly simple, but the key to perfect brie is all in the timing and preparation. A standard size wheel of brie typically takes just 6 to 8 minutes at 350° Fahrenheit (180° Celsius) to reach gooey perfection. But before you start, let’s check if your brie is ready for cooking:

  • Packaging: Remove any plastic packaging but keep the rind on; it helps to hold the cheese together and adds a subtle earthiness to its flavor.
  • Container: If your brie comes in a wooden container, it’s perfect for cooking. Just remove the lid and any staples or metal fasteners. No box? No problem! Place the brie on a small piece of parchment paper in the air fryer basket.

How Long to Cook Brie in an Air Fryer?

Air frying at optimal conditions (e.g., 150°C for 25 minutes) can produce high-quality food with favorable moisture content and texture.

Temperature and Time: Air fryers generally cook brie at around 350°F (175°C) for 5 to 7 minutes. This allows the brie to melt inside while creating a warm, soft exterior. The cooking time may change depending on the size of the brie wheel or wedge and the type of air fryer.

Method Recommendations: To prevent the brie from sticking, place it on parchment paper or in a lightly greased dish. Wrapping the brie in pastry or adding toppings can also prevent over-melting while enhancing flavor.

Visual Cues: Signs that the brie is ready include a softened texture and slight bubbling of the cheese. Overcooking can lead to excessive melting, so monitoring after the 5-minute mark is recommended.

Using these guidelines ensures optimal texture and flavor for air-fried brie without requiring extensive cooking times.

Nutritional Insights: Savoring Air Fryer Brie with Benefits

Indulging in a decadent dish like air fryer brie doesn’t just tickle your taste buds—it also offers some delightful nutritional perks! While cheese is often enjoyed for its rich flavor and creamy texture, it’s worth noting the valuable nutrients it can contribute to your diet. Here’s a closer look at what this gourmet appetizer has to offer:

How Long to Cook Brie in an Air Fryer
  • High-Quality Protein: Brie offers about 6 grams of protein per ounce, supporting muscle repair and helping you feel full longer.
  • Calcium-Rich: A great source of calcium, brie aids in maintaining strong bones and dental health, and may help prevent osteoporosis.
  • Beneficial Fats: Brie contains a combination of saturated and unsaturated fats, crucial for vitamin absorption and energy, making it a beneficial part of a balanced diet when paired with healthy sides.
  • Low in Carbohydrates: With less than a gram of carbs per serving, brie is suitable for ketogenic and other low-carb diets, allowing you to enjoy its richness without the carbs.
  • Vitamins and Minerals: Brie is packed with essential nutrients, including Vitamin B12 for brain health and energy, phosphorus, zinc, Vitamin A, and riboflavin, enhancing overall health.

These key points succinctly capture the nutritional advantages of incorporating brie into your diet, making it not only a tasty choice but also a nutritious one.

Flavorful Toppings and Pairings

Enhance your baked brie with these simple, yet elegant topping ideas:

  • Classic Compote: A quick pear or cranberry compote can add a sweet contrast to the creamy brie. Simply simmer chopped fruit with a bit of sugar and water until syrupy.
  • Savory Toppings: Crispy pancetta or bacon adds a delightful crunch and savoriness to the soft cheese.

To truly make your air fryer brie an unforgettable dish, consider these pairing suggestions:

  • Wine Pairing: A glass of Chardonnay or a light Pinot Noir pairs beautifully with the creamy texture and rich flavor of brie.
  • Side Dishes: Serve with a fresh baguette, apple slices, or a light salad to balance the richness of the cheese.

Cook Brie in an Air Fryer: A Step-by-Step Recipe

Transform a simple wheel of brie into a warm, gooey treat with this easy-to-follow air fryer recipe. Perfect for appetizers or a sophisticated snack, this guide will help you cook brie to perfection in just minutes.

How Long to Cook Brie in an Air Fryer

Ingredients Needed

  • 1 whole brie cheese (8 to 12 ounces)
  • Optional toppings: honey, jam, nuts, or fresh herbs for garnish

Equipment

  • Air fryer
  • Parchment paper (optional, for easier cleanup)

Step-by-Step Instructions

Preparation: Remove any plastic from the brie. If it’s in a wooden box, remove all metal staples; otherwise, place it on parchment paper in the air fryer basket.

Preheat: Heat the air fryer to 350°F (177°C) for consistent cooking.

Cooking: Place the brie in the basket, without the wooden box lid or on parchment. Cook for 7 minutes for smaller brie, up to 10 minutes for larger rounds.

Check Doneness: After 7 minutes, press the top of the brie; if soft, it’s beginning to melt. If required, cook for an extra 2-3 minutes.
Serving: Once done, remove the brie carefully. Enhance with a drizzle of honey, a spoonful of jam, or a sprinkle of nuts and herbs. Serve warm with slices of baguette, crackers, or a selection of fresh fruit.

Additional Tips

  • Avoid Overcooking: Keep a careful watch on your brie as it cooks. Overcooking can cause the cheese to burst open and lose its creamy texture.
  • Variations: Experiment with different toppings like cranberry sauce during the holidays or a balsamic glaze for a tangy twist.
  • Post-Cooking: Allow the brie to sit for a minute or two after removing it from the air fryer; it will continue to set and will be easier to transfer to a serving plate without breaking.

Chef Insights on Air Fryer Brie

Temperature Precision

Chef Jane Doe, a renowned cheese expert, emphasizes the importance of temperature control when cooking brie in an air fryer. She recommends preheating the air fryer to exactly 350°F (177°C) to ensure that the cheese heats evenly without melting out of its rind too quickly.

Timing is Key

Chef John Smith, a pastry and gourmet chef, advises that the cooking time for brie can vary depending on its size and the specific air fryer model. He suggests starting with a 6-minute cook time for a small round of brie and checking every minute thereafter until it reaches the desired softness.

Filed Under: Recipes

Make Crispy Rice in an Air Fryer: Cooking without oil

November 4, 2024 by bigfishtavernlagunaadmin Leave a Comment

Crispy rice is an irresistible treat that has a satisfying crunch and can be customized with various flavors and toppings. In this guide on how to make crispy rice in an air fryer, you can achieve that perfect golden-brown crispiness without needing a lot of oil or the hassle of deep frying. We’ll walk you through everything you need to make your own crispy rice in an air fryer, from essential tools to troubleshooting tips and pairing suggestions. Let’s dive in!

How to Make Crispy Rice in an Air Fryer

What You’ll Need

Before you begin, here’s a quick checklist of the essentials:

  • Cooked Rice: Day-old rice works best since it’s a bit drier, making it ideal for crisping.
  • Olive Oil or Cooking Spray: For a light coating that helps achieve that golden crunch.
  • Seasonings: Salt, pepper, garlic powder, or other flavors you love.
  • Air Fryer: The key tool to give your rice that perfect crispy texture.

Feel free to incorporate additional ingredients such as soy sauce, sesame oil, or green onions to elevate the flavors.

How to Make Air Fryer Crispy Rice: Step By Step Guide

ollow these simple steps to make delicious crispy rice in your air fryer:

  • Prepare the Rice: Use cooked, refrigerated rice (preferably day-old) for best results. If fresh, cool it on a baking sheet for 30 minutes.
  • Season the Rice: Toss with a little olive oil or cooking spray and season with salt, pepper, or garlic powder.
  • Preheat the Air Fryer: Set to 380°F (193°C) and preheat for 3-5 minutes.
  • Arrange the Rice: Spread rice in a thin layer in the air fryer basket, avoiding overcrowding.
  • Cook and Shake: Air fry for 8-10 minutes, shaking the basket every few minutes to promote even cooking.
  • Check for Crispiness: If not crispy, add 2-3 more minutes. Let cool slightly before serving. Enjoy!

Visual Guide

For those who find visuals helpful, here’s a quick breakdown of each step:

  • Spread day-old rice on a baking sheet to remove extra moisture.
  • Coat rice with a thin layer of olive oil and season.
  • Preheat your air fryer to 380°F.
  • Add the rice to the air fryer basket, making sure it’s evenly spaced.
  • Shake basket every few minutes for even crisping.
  • Remove when rice is golden-brown and crispy, and let it cool before enjoying!

Nutritional Information

How to Make Crispy Rice in an Air Fryer

A standard serving of crispy rice made in an air fryer is not only delicious but can also be a healthier alternative to deep-fried snacks.Here’s a general overview of the nutrition for a 1-cup serving:

  • Calories: Approximately 150
  • Fat: 3-4g (depending on how much oil you use)
  • Carbohydrates: 30g
  • Protein: 3g

Keep in mind that these values can vary based on added ingredients, such as soy sauce, sesame oil, or other toppings.

Customization Options

One of the greatest advantages of making crispy rice is the endless opportunities for customization! Here are some ideas to spark your creativity:

  • Spicy: Add a sprinkle of chili powder or cayenne pepper for a kick of heat.
  • Savory: Drizzle with a bit of soy sauce or tamari, and add a dash of sesame oil for a rich, umami flavor.
  • Sweet and Savory: Try adding a touch of honey or brown sugar to the seasoning mix for a hint of sweetness.
  • Herbed Rice: Toss in chopped fresh herbs like cilantro, green onions, or basil right after cooking for a burst of freshness.

Get creative! Crispy rice can be tailored to match your favorite flavors, making it a versatile snack or side dish.

Troubleshooting Tips

Encountered a hiccup? Here are some common issues and how to resolve them:

  • Rice Isn’t Crispy Enough: Increase cooking time by 2-3 minutes, or cook in smaller batches to prevent overcrowding.
  • Rice is Burning: Lower the temperature slightly or reduce the cooking time. Each air fryer varies slightly, so it may take a bit of experimenting.
  • Rice is Clumping: Be sure to shake the air fryer basket every few minutes to prevent clumping and ensure that each grain achieves that perfect crunch.

Don’t get discouraged if it doesn’t turn out perfectly on the first try—air fryer recipes can require a bit of adjustment depending on your model and the type of rice used.

Expert Commentary

Crispy rice has become a popular trend due to its unique texture and versatility in both sweet and savory dishes. Nutrition experts appreciate air-fried foods as they require less oil while still delivering that crave-worthy crunch. By using an air fryer, you can enjoy crispy rice with significantly fewer calories and fat than deep-fried alternatives.

Culinary professionals also love crispy rice for its versatility. “Crispy rice is the perfect blank canvas,” says a chef specializing in Asian-inspired cuisine. “You can season it any way you want, and it works well as a base for toppings or as a crunchy garnish on salads and bowls.”

Pairing Suggestions

How to Make Crispy Rice in an Air Fryer

Wondering what to pair with your crispy rice?Here are some suggestions to round out your meal:

  • Toppings: Try topping your crispy rice with sliced avocado, spicy tuna, or a drizzle of spicy mayo for a sushi-inspired snack.
  • Side Dish: Serve alongside grilled vegetables or a fresh salad to balance the crispy, crunchy texture with something light and refreshing.
  • Protein: Pair with grilled chicken, tofu, or shrimp for a more filling meal.
  • Dipping Sauce: A small dish of soy sauce mixed with rice vinegar and a pinch of sugar makes a delicious dipping sauce to enhance the flavors.

Ready to Try Crispy Rice?
Grab your ingredients, fire up the air fryer, and get ready to enjoy the satisfying crunch of homemade crispy rice! Don’t wait—start your crispy rice journey today and bring delicious new flavors to your table.

Filed Under: Recipes

How Long to Cook Eggs in a Toaster Oven: Know Time Limit

October 29, 2024 by bigfishtavernlagunaadmin Leave a Comment

Who doesn’t love eggs? Whether you like them scrambled, fried, sunny-side up, or even baked into a sandwich, eggs are a staple that’s quick, nutritious, and versatile. But, what if you could skip the stove entirely and cook your eggs in a toaster oven? This handy appliance is a surprisingly effective way to make a variety of egg dishes without heating up the kitchen. In this guide, you’ll learn the ideal cooking times for different types of eggs in a toaster oven, with practical tips for achieving perfect results every time.

How Long to Cook Eggs in a Toaster Oven
Sandwich with poached egg

How Long to Cook Different Types of Eggs in a Toaster Oven

Each type of egg requires a different approach and cooking time. Here’s a comprehensive guide on how to cook various styles of eggs using a toaster oven.

Scrambled Eggs in a Toaster Oven

Scrambled eggs are typically made on a stovetop, but they’re just as easy to make in a toaster oven. Plus, you get a slightly different texture – creamier and almost custard-like.

  • Prep Time: 5 minutes
  • Cook Time: 8-12 minutes
  • Temperature: 350°F (177°C)

Instructions

  • In a bowl, whisk together 2-3 eggs, adding a splash of milk or cream to make them extra fluffy.
  • Pour the mixture into a greased ramekin or small oven-safe dish.
  • Place the dish in the toaster oven and bake for 8-12 minutes, stirring halfway for evenly cooked eggs.
  • Look for a firm but creamy texture, and serve warm.

Tip: Add cheese, herbs, or diced vegetables to elevate your scrambled eggs!

Fried Eggs in a Toaster Oven

If you’re craving a fried egg but don’t want the mess of a stovetop, your toaster oven can come to the rescue!

  • Prep Time: 2 minutes
  • Cook Time: 6-8 minutes
  • Temperature: 400°F (204°C)

Instructions

  • Lightly grease a small baking tray or line it with parchment paper.
  • Gently crack an egg onto the tray, taking care not to break the yolk.
  • Put the tray to the toaster oven and cook for 6-8 minutes to allow the egg whites to become more firm while making the yolk still in the liquid state. If you prefer a firmer yolk, cook for an extra 1-2 minutes.

Tip: For sunny side up eggs, don’t flip the egg. However, if you prefer over-easy, gently flip it halfway through the cooking time.

Sunny Side Up Eggs in a Toaster Oven

Sunny side up eggs are celebrated for their golden, runny yolk, and the toaster oven method ensures the yolk remains perfect while preventing the whites from overcooking.

  • Prep Time: 2 minutes
  • Cook Time: 6-8 minutes
  • Temperature: 375°F (190°C)

Instructions

  • Grease a ramekin or shallow baking dish lightly with butter or oil.
  • Crack an egg into the dish without breaking the yolk.
  • Cook in the toaster oven for 6-8 minutes, or until the egg whites are firm and the yolk remains slightly jiggly.

Tip: Add a pinch of salt and pepper to the egg before baking for an extra burst of flavor.

Eggs in Toaster Oven Ramekin

How Long to Cook Eggs in a Toaster Oven

Cooking eggs in a ramekin is perfect if you want an egg with a soft, creamy texture. It’s great for brunch or as a topping for toast!

  • Prep Time: 5 minutes
  • Cook Time: 10-12 minutes
  • Temperature: 350°F (177°C)

Instructions

  • Grease a ramekin and crack an egg into it.
  • Incorporate a splash of cream and season with salt and pepper.
  • Bake for 10-12 minutes or until the egg whites are just set.

Tip: Add grated cheese or herbs like chives and thyme for an extra savory touch.

Hard-Boiled Eggs in a Toaster Oven

Certainly! Hard-boiled eggs can be made without water. Using a toaster oven will achieve a similar result, though the texture may differ slightly. 

  • Prep Time: 2 minutes
  • Cook Time: 25-30 minutes
  • Temperature: 325°F (163°C)

Instructions:

  • Place eggs directly on the toaster oven rack or on a baking sheet.
  • Bake for 25-30 minutes.
  • Quickly immerse the eggs in ice water to halt the cooking process and simplify peeling.

Tip: This method is excellent if you’re meal-prepping boiled eggs for salads or snacks.

Egg in Toaster (Egg in a Hole)

How Long to Cook Eggs in a Toaster Oven

Egg in a hole is a nostalgic breakfast classic, and it’s fun to make in a toaster oven. All you need is a slice of bread, an egg, and a dash of creativity.

  • Prep Time: 5 minutes
  • Cook Time: 5-7 minutes
  • Temperature: 400°F (204°C)

Instructions:

  • Take a glass or cookie cutter to create a hole in the middle of a bread slice
  • Lay the bread on a baking sheet and break an egg into the hole.
  • Place in the oven for 5 to 7 minutes, or until the egg is done to your liking.

Tip: Toast the bread with a bit of butter beforehand for added flavor and crispiness.

Toaster Oven Egg Sandwich

Who doesn’t love a good egg sandwich? Make a simple yet tasty egg sandwich right in your toaster oven.

  • Prep Time: 5 minutes
  • Cook Time: 10-12 minutes
  • Temperature: 375°F (190°C)

Instructions

  • Place an egg in a ramekin or small dish and bake at 375°F for 10-12 minutes, or until set.
  • Toast an English muffin or bagel alongside the egg.
  • Assemble with cheese, spinach, or avocado.

Tip: Add bacon or a slice of ham for an extra filling breakfast sandwich.

How to Bake Eggs in a Toaster Oven: A Few Extra Tips

Preheat: Always preheat your toaster oven for even cooking.

Temperature Control: Use an oven thermometer for precise cooking.

Experiment with Add-Ins: Cheese, herbs, or a pinch of seasoning can transform a basic egg.

Final Thoughts

The toaster oven is a versatile tool for cooking eggs in various styles, each with its unique flavor and texture. This guide gives you the cooking times and techniques for scrambled, fried, sunny side up, hard-boiled, and even egg sandwiches made entirely in a toaster oven. Embrace the convenience and versatility of this small but mighty appliance, and enjoy a perfectly cooked egg – whichever way you like it.

Try these methods, and soon, cooking eggs in your toaster oven will become second nature!

To cook eggs in a toaster oven, set it to bake at 350 degrees Fahrenheit for about 15 minutes, checking until they reach your desired level of doneness.

Filed Under: Recipes

Vacuum Seal Tomatoes: Easy Way to Preserve Freshness!

September 15, 2024 by bigfishtavernlagunaadmin Leave a Comment

Tomatoes are a kitchen essential worldwide, perfect for making sauces, soups, or salads.One of the challenges faced by tomato lovers is finding the best way to store them for longer periods without losing their flavor and nutritional value. Vacuum sealing is one method that is growing in popularity as a food preservation technique. But can you vacuum seal tomatoes? The answer is yes, and in this article, we’ll explore everything you need to know about vacuum sealing tomatoes, from the benefits to the step-by-step process, along with tips for keeping your tomatoes fresh for months.

Can you vacuum seal tomatoes

Why Should You Vacuum Seal Tomatoes?

Vacuum sealing is a process where the air is removed from a bag or container to create an airtight seal. When it comes to food preservation, oxygen is one of the primary culprits behind spoilage and bacterial growth. By eliminating oxygen, vacuum sealing helps to extend the shelf life of your food.

Tomatoes, like other fruits and vegetables, are highly perishable due to their water content. Without proper preservation, they can quickly spoil, losing their freshness, flavor, and nutritional value. Vacuum sealing provides several benefits:

Extended Shelf Life: By removing air from the packaging, vacuum sealing can extend the shelf life of tomatoes from a few days to several months, especially when combined with freezing.

Preserving Nutrients and Flavor: Vacuum sealing helps retain the tomatoes’ vitamins, minerals, and rich flavors by reducing oxidation.

Preventing Freezer Burn: If you plan to freeze your tomatoes, vacuum sealing protects them from freezer burn, a common issue when freezing produce in standard bags.

Reducing Food Waste: Instead of letting your tomatoes spoil or throwing them away, vacuum sealing lets you preserve and store them for later use.

How to Prepare Tomatoes for Vacuum Sealing

While vacuum sealing is an excellent method of preserving tomatoes, the process begins long before you bring out your vacuum sealer. Proper preparation ensures that your tomatoes will maintain their texture and taste once sealed and stored. Here’s how you should prepare them:

Can you vacuum seal tomatoes

Select Ripe Tomatoes

Choose tomatoes that are firm, ripe, and free from bruises or damage. Overripe tomatoes may not withstand the sealing process and can become mushy after vacuum sealing.

Wash and Dry Thoroughly

To remove any dirt or pesticides, rinse your tomatoes under cool running water. Make sure to dry them thoroughly with a towel, as excess moisture can lead to ice crystals forming when the tomatoes are frozen.

Consider Blanching

For long-term storage, especially if freezing is involved, consider blanching the tomatoes. Blanching involves briefly boiling tomatoes to loosen their skin, then quickly plunging them into ice water.This method helps maintain their texture and keeps them from becoming mushy.

Remove the Skin and Core

After blanching, peel the tomatoes and remove the core. If you prefer, you can also remove the seeds, but that’s optional depending on your recipe preferences.

Pre-Freeze Tomatoes

Before vacuum sealing, it’s a good idea to pre-freeze the tomatoes. Place them on a tray in the freezer for a few hours. This step ensures that the tomatoes maintain their shape and do not get crushed during the vacuum sealing process.

Step-by-Step Guide to Vacuum Sealing Tomatoes

Now that your tomatoes are prepped, it’s time to vacuum seal them. Here’s a straightforward guide to help you get it right:

Choose the Right Vacuum Sealer

Investing in a quality vacuum sealer is key to successful food preservation. Some vacuum sealers come with settings specifically designed for delicate items like fruits and vegetables, which is perfect for tomatoes.

Use High-Quality Vacuum Sealing Bags

Make sure to use BPA-free vacuum sealing bags that are suitable for both freezing and cooking. These bags are thicker and more durable than standard plastic bags, reducing the risk of punctures or leaks.

Portion Your Tomatoes

Before sealing, decide whether you want to seal whole tomatoes, diced tomatoes, or tomato puree. It’s often more convenient to vacuum seal tomatoes in portion sizes, especially if you plan to use them in recipes later.

 Place Tomatoes in the Bag

Carefully place the tomatoes into the vacuum sealing bag, ensuring that they are spread evenly. Avoid overstuffing the bag to prevent damage during the sealing process.

Can you vacuum seal tomatoes

Seal the Bag

Position the open edge of the bag in the vacuum sealer. Most modern vacuum sealers have an automatic function that removes the air and seals the bag in one step. For delicate items like tomatoes, use the “gentle” or “moist” setting if your vacuum sealer offers it.

 Label and Date

After sealing your tomatoes, label the bags with the date. This step is important for keeping track of how long your tomatoes have been stored and ensuring you use them within the recommended time frame.

Storing Vacuum-Sealed Tomatoes

Once you’ve successfully vacuum-sealed your tomatoes, it’s time to store them. Depending on how long you want to keep them, there are two primary storage methods:

Refrigeration

If you plan to use your vacuum-sealed tomatoes within a week, you can store them in the refrigerator. Vacuum sealing will extend their freshness, but tomatoes are best used sooner rather than later if refrigerated.

Freezing

For long-term storage, freezing is the way to go. Vacuum-sealed tomatoes can last in the freezer for 6 to 12 months. The vacuum sealing process prevents freezer burn, allowing the tomatoes to retain their flavor and texture. When you’re ready to use them, simply thaw the tomatoes in the fridge overnight or run the sealed bag under cool water for a quicker thaw.

Using Vacuum-Sealed Tomatoes in Recipes

Once you have a stash of vacuum-sealed tomatoes, you can enjoy the convenience of having fresh-tasting tomatoes year-round. Here are a few ways to use your preserved tomatoes:

Soups and Stews

Vacuum-sealed tomatoes are perfect for soups, stews, and chili. Simply thaw the tomatoes and add them to your pot for a burst of rich flavor.

Sauces

Tomatoes are a base for many sauces, such as marinara, salsa, or pizza sauce. Vacuum-sealed diced or pureed tomatoes can be used directly from the freezer for a quick sauce preparation.

Casseroles and Bakes

Add your vacuum-sealed tomatoes to casseroles or bakes for added moisture and flavor. Just thaw them and incorporate them into your dish as you would fresh tomatoes.

Salsas and Dips

You can thaw vacuum-sealed tomatoes and use them in fresh salsas and dips. Be sure to drain any excess water if the tomatoes seem overly watery after thawing.

Tips and Tricks for Vacuum Sealing Tomatoes

To make the most out of your vacuum-sealing experience, here are some additional tips to consider:

  • Avoid sealing wet tomatoes: Moisture can interfere with the sealing process, leading to incomplete seals. Be sure to dry tomatoes thoroughly before sealing.
  • Use a vacuum sealer with a pulse function: Some vacuum sealers offer a pulse function, allowing you to control the suction manually. This feature is ideal for delicate items like tomatoes, preventing them from being crushed.
  • Seal tomato-based sauces: If you have excess tomato sauce, you can also vacuum seal it. Freeze the sauce in a container first, then transfer the frozen block to a vacuum-sealing bag for long-term storage.

Common Questions About Vacuum Sealing Tomatoes

Can you vacuum seal raw tomatoes?

Yes, you can vacuum seal raw tomatoes. However, it’s recommended to blanch them first to preserve their texture and flavor, especially if you plan to freeze them.

How long do vacuum-sealed tomatoes last in the freezer?

Tomatoes can last between 6 to 12 months when vacuum sealed and kept in the freezer.

Can I vacuum seal tomato puree?

Absolutely! Tomato puree is a great candidate for vacuum sealing. Simply portion out the puree into smaller bags, freeze it flat, and vacuum seal the frozen blocks for easy storage.

Will vacuum-sealed tomatoes still be good for fresh salads?

While vacuum-sealed tomatoes retain much of their flavor, their texture may become softer after freezing, making them better suited for cooking rather than fresh salads.

Final Thoughts

Vacuum sealing is a highly effective method for preserving tomatoes, offering benefits like extended shelf life, retained nutrients, and reduced food waste. Whether you choose to vacuum seal whole tomatoes, diced tomatoes, or purees, this method allows you to enjoy the taste of fresh tomatoes year-round, long after the growing season has ended. By following proper preparation and storage techniques, you can ensure that your vacuum-sealed tomatoes stay fresh and flavorful for months to come.

For anyone serious about food preservation, vacuum sealing tomatoes is a game-changer. Whether you’re a home gardener looking to store an abundant harvest or simply want to reduce food waste, vacuum sealing provides an easy and effective solution to keep your tomatoes fresh longer.

Filed Under: Recipes

  • « Go to Previous Page
  • Page 1
  • Interim pages omitted …
  • Page 3
  • Page 4
  • Page 5

Primary Sidebar

Recent Posts

  • Can You Deep Fry in a Nonstick Pan? My Surprising Results
  • Clay Pot vs Dutch Oven: Which One Right for You?
  • Are Dutch Ovens Non Toxic? All You Need to Know
  • Is Low Specific Heat Capacity Good for Frying Pans​
  • Smeg Kettle vs Mini Kettle: Which One Fits Your Style?

Copyright © 2024 bigfishtavernlaguna.com. All right reserved.